Wall finishing option acrylic paint
Acrylic wall paint has been very popular for many years. It is most often used for painting residential and office premises, despite the emergence of new, cheaper and advertised materials. The reason for such widespread use is the excellent external and operational characteristics, as well as the environmental friendliness of the paint. Since paints for wall decoration must have a wide range of colors, acrylic materials are chosen by many artists and designers to create exclusive compositions on the walls in cases where the design of the room must be unique and inimitable.
Features of acrylic paints for walls
Despite the many technologies for applying images to vertical surfaces in residential areas, acrylic wall paint is the most popular, even compared to photo wallpaper, mosaic or tile.
IN in this case many are guided by features of this material. It consists of:
- coloring pigment;
- water;
- acrylic resin, which acts as a binding element;
- stabilizing and modifying additives that significantly improve performance characteristics paints.
 Wide color palette
 In addition, the material has the following positive characteristics:
- ease of application;
- acceptable price;
- wide range of colors;
- the ability to mix colors to create new shades, which allows you to paint walls at a professional artistic level;
- acrylic paints for finishing allow you to create both complex compositions made by professional artists and the most simple drawings, created by novice performers;
- quick drying after application and minimal time between painting and the start of use of the surface;
- acrylic paints for wall painting are resistant to moisture and ultraviolet rays, its surface after drying is quite durable and resistant to various types of mechanical stress; After the paint dries, the wall will resemble plastic in structure, this is facilitated by the special composition of the material;
- frost resistance;
- painting walls with acrylic paint is completely safe, since the material has low toxicity;
- durability of the coating: products from well-known brands can be used for 15 years.
Acrylic paint for walls is perfect in cases where high-quality and original paint is required. decorative design surfaces.

For maximum effect from the use of the material it is required proper preparation walls before painting and following application technology.
Acrylic paints are tinted using special mixtures, thanks to which it is possible to achieve different concentrations of a particular color, as well as create new shades.
Acrylic paints for wall painting: varieties
One of the advantages of painting walls with acrylic is the ability to create original interior And unusual design surfaces thanks to a wide selection of materials on modern market. In addition to ordinary acrylic paint in a wide range color scheme The buyer can purchase the following options:
- fluorescent paint that can glow under ultraviolet light;
- invisible coating, unnoticeable under normal lighting conditions; when illuminated with a UV lamp, the pattern applied with such paint appears;
- pearlescent acrylic paints;
- paints with glitter or metallic effect;
- luminescent materials that accumulate light during the day and emit it during dark time days;
- waterproof coatings for use in rooms with high levels of humidity, for example, in swimming pools or bathrooms; This paint option is often used in kitchens near work surfaces.
Such a variety of choice of materials allows you to paint walls with acrylic paints in almost any room, not only inside, but also outside of buildings. In addition, using acrylic on walls you can create incredible effects that have no analogues when using other materials.
Preparing walls for painting
It is very important to prepare the walls for painting before applying the finishing material, that is, the paint itself.
This will depend on:
- durability of the coating;
- external characteristics;
- ease of application of the material during the process of painting walls with acrylic paint.
So, before painting the walls you will need to do the following work:
- Cleaning the rough surface from the old layer of paint and plaster. The plaster must be removed if it has significant damage or was applied long ago.
- Before preparing the wall for applying new layers of materials, it will need to be degreased. For this, a special primer or White Spirit is used. These materials will ensure adhesion to the leveling mixture and prevent the spread of mold or mildew on the surface.
- After priming the wall, two layers of plaster are applied. The first, thicker layer is made using the starting mixture. It is sold in finished form, or - diluted with water. The quality of the material will determine how durable the acrylic paint coating will be. After the starting layer has dried, the finishing putty is applied. It brings the surface quality to perfection and allows you to perform various decorative works.
- If necessary, the finishing surface, after drying, is sanded and treated again with a primer to eliminate removed fine particles of putty and provide better adhesion to the painting material.
- Artistic painting of walls is carried out only after applying a layer of special acrylic primer. It functions as a canvas, but which will subsequently be applied with acrylic paint.
- After treating the walls with putty and adhesion materials, painting is done with acrylic.
- A layer of colorless transparent acrylic varnish is applied over the painted walls.

After the varnish has dried, the walls are completely ready for use. The service life of a properly prepared and painted surface using quality materials can be 15 years or more.
Before you prepare the wall, you should buy quality materials for professional surface finishing. In this case, you should not save, since the durability of the image on the wall and its quality will directly depend on the price of putties and primers.
How to apply acrylic paints
Acrylic paints are quite easy to apply. If necessary, to create the optimal consistency, they can be diluted with special thinners for a matte or glossy effect or with plain water.
Depending on the strength of the material, it is applied in 1 or 2 layers. The second layer can be painted on the wall only after the first has completely dried. If you need to paint a large surface area, it is better to use a roller. Although the paint fits perfectly on the wall even when applied with brushes of different widths.
Walls are usually painted only after applying a base coat of paint. But there are a lot of ways to make simple and very effective drawings on the walls immediately when applying the first layer.
Technique for painting walls with acrylic paints
After preparing the walls for painting, you should think about whether to entrust the painting to a professional or do it yourself. If you have no experience in repair and artistic work, you should think about the first option. But there are also quite simple painting techniques with which you can create original design interior design independently, even for those who are working with acrylic for the first time.

Application techniques:
- The simplest technique is waves on the walls. To do this, on top finishing plaster With a pencil, smooth lines are carefully drawn along the entire surface of the walls. Usually they are laid horizontally, smoothly flowing into each other. The spaces between the lines are simply sketched different shades or colors depending on the chosen range that prevails in the interior. Some distance around the dividing lines should be drawn with a brush, the rest of the space with a roller.
- You can also simply wrap a piece of fabric around a roller and paint the walls that way. Special fabric rollers are also available for sale.
- Combination of tones in longitudinal and end walls. For example, the main color would be ivory, and the end walls would be painted in light or olive terracotta. There can be many options in the interior.
- If the inhabitants of the house dream of painted walls, it is worth choosing ready-made paints with coloring pigments. As a suitable option for the drawing, you can choose delicate tree branches with leaves and flowers in pastel colors, or - use a win-win option - a stencil.
Here is one of the options for a simple and beautiful design:
The main thing is always to apply the drawing over a surface that has been well prepared and painted with acrylic paints.
Today, to express your “I” with the help of color and light, there are many people (professionals and amateurs from painting) who are ready to teach you drawing lessons. The lessons are laid out step by step both on YouTube and in various articles on the Internet, where they will tell you in detail and easily how to learn to draw, show you accessible techniques for painting with different paints on different canvases, and at the same time tell you what painting styles are accepted by artists.
By the way, an artist will never say about his work: “I drew!” Artists paint pictures like a musician writes music, where every note is like a stroke of a master’s brush.
Try and become a master of your feelings and emotions, pick up your brushes, open your paints, stand in front of the canvas and start painting!

The most common are gouache and watercolor; a person becomes familiar with them in early childhood. Oil paints require a more respectful attitude; they are applied tightly to the canvas, in several opaque layers, and take a very long time to dry.

And there are paints that combine the ease of use of gouache and the oily density of “serious” paints. These paints are diluted with water, dry quickly, which allows you to apply them layer by layer without the risk of spoiling the drawing, and after drying they do not fade or change color. Moreover, they are also waterproof (after drying, of course) and absolutely hypoallergenic! These are liquid acrylic paints.
You will object that you have already become acquainted with acrylic paints when you were making repairs. construction works V own home, and you know for sure that acrylic is a liquid plastic, a polymer. Right. This means that you already know the properties of acrylic and are aware that this polymer easily adheres to wood and glass, fabric and plaster, let alone canvas and cardboard! You also know that in addition to weather resistance, you can create volumes with acrylic paint, so many artists use acrylic paints to paint three-dimensional paintings to give them sculptural relief on a flat canvas.
Check out Justin Gaffey's acrylic paintings.

Impressive? But he is self-taught! And I also once faced a choice: “What colors are best for a beginning artist to paint?” — and settled on colored polymers.
It must be said that working with acrylic allows you to use both traditional painting techniques and various modernist “tricks”; it allows you to mix styles and techniques, which will make your paintings more interesting and emotional. But acrylic paints also have their own characteristics; you need to know how to handle acrylic paints.
Basic techniques when working with acrylic
- Wet. The diluted paint is applied to a canvas moistened with water. It is somewhat reminiscent of working with watercolors.

- Dry. You will need several brushes to edit the strokes on the canvas “dry”.

- Glaze. This technique involves the formation of a pattern from thin translucent layers. By adding layers step by step, we get beautiful iridescent colors that give our painting a richness and sophisticated mood.

- Impasto. Very similar to working with oil paints in pastose technique. Dense, non-transparent paste layers applied flat brush or a palette knife (something like a small spatula) can create a relief. Impasto is a special painting technique, completely opposite to the glazing technique!

What might you need for drawing?
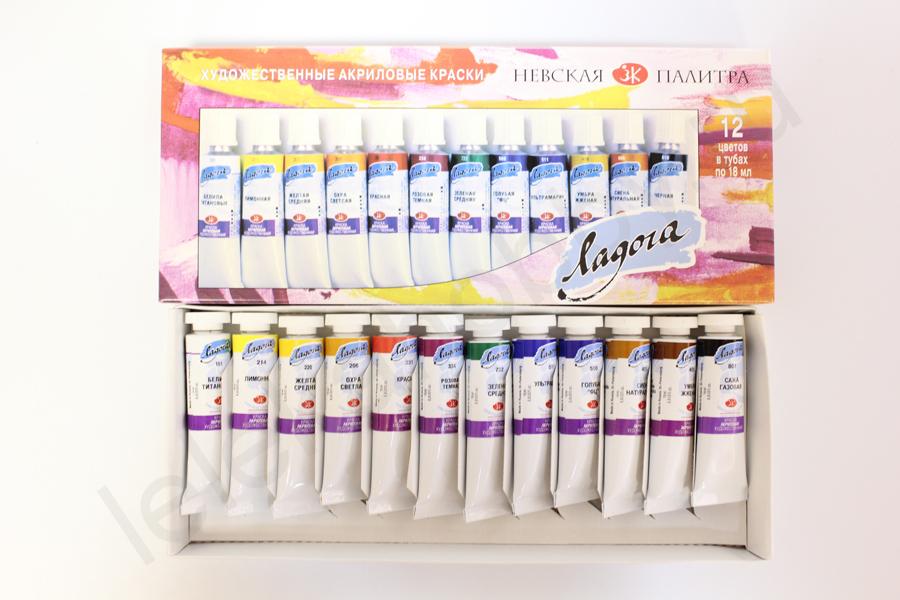
First of all, the artistic acrylic paints themselves. If you doubt your ability to mix different paints or are afraid of not getting “in color” when applying color, then it is better to use ready-made paint palettes, since acrylic paints are now available in about 130 colors both in tubes (tubes) and in small plastic jars -containers.
If you are just starting to paint with acrylic paints, so to speak, taking courses for beginners, try your hand as an artist with basic undiluted colors: white - black, red - blue, yellow - green, brown.
And don't take it right away complex work, buy a regular children's coloring book, and try to color any picture using your favorite acrylic painting technique.

This good practice for beginners - having learned to work in small areas, you will understand at first hand how to use acrylic paints when painting large canvases. It is important to remember when using acrylic paints that they dry very quickly and cannot be left open!
What else you will need:
- Long brushes made of natural and synthetic hair - flat and round in different numbers. Plastic pile will be needed when working with undiluted acrylic; natural “column” or “squirrel” - for watercolor techniques.
- A set of palette knives of different sizes. A palette knife is a device that artists use to clean the palette and apply thick paints to the canvas. A kind of trowel knife made of flexible steel strip or thick plastic.
- bottle with clean water(preferably warm). You also need a spray bottle for wetting. work surface so that the acrylic paint adheres better to the canvas.
- Palette. You will place some paint on it for convenience or mix paints with each other, using some as dyes or colors for others. It is very convenient and economical to use ordinary disposable plastic trays or plates. You can purchase or make a palette that will retain moisture in the paint. The whole secret is two types of paper. The first, bottom layer is one that absorbs water and is therefore always wet, the second is parchment that covers the paint on top.
- Retarder (thinner) for acrylic paints. It will not allow a polymer film to quickly form, and will make it possible to more carefully work out the drawing on paper or canvas for drawing. This “addition” will also increase the ability to spread and shade the paint and make it a little brighter. You can apply it directly into the paint, or simply on a brush. How to use them correctly is written in the instructions for use.
How to paint with acrylic paints using a palette knife? Just like with oil, applying thick paint in even layers or in a relief stroke.

Having understood the peculiarity of this application and having learned how to use a palette knife, you will appreciate its wide capabilities and will be able to work polymer paints on wood or canvas, and even give a master class to beginners on how to use it correctly in their work so that a painting with acrylic paints turns out not just bright, but also bas-relief and voluminous.
Among other things, you need to prepare:
- a large volume of water in a deep container for washing brushes;
- paper or cloth napkins and towels;
- sandpaper with grit P120;
- felt-tip pens, markers, gel pens or chanting (a glass or copper tube with a thin spout for drawing thin contour lines) to complete the drawing;
- decoupage glue;
- An airbrush can also be used if you are sure that you are using it correctly and the acrylic paint is diluted in the proper proportion;
- and, of course, the basis for painting with acrylic paints.
On video: painting space with acrylic.
Preparing the base
The basis can be anything that requires your attention in artistic transformation: a piece of cardboard, a plywood board, a canvas on a board or an easel stretched on a stretcher.

Is it possible to make your own canvas to paint on? Yes. And even necessary! The law is simple: when we learn to draw, we learn to make a canvas for drawing on our own. For example, the basis for a future masterpiece will be wooden plank. How to make sure that the polymer of acrylic paints can easily “catch” and not crumble later? For best effect For adhesion (adhesion), we take texture paper or origami paper and glue it with decoupage glue over the area of the board on which we will paint with acrylic.
So that the background for the drawing is smooth, and the drawings themselves turn out bright and beautiful, without distortion (the kind we need!), use a needle to remove all the bubbles that appear on the future canvas - we make a puncture in each and remove the air. But even now something is missing to start drawing correctly. Our canvas looks clearly unpresentable. Painting on a fresh canvas is postponed: you need to use canvas primer.
We will use 10-15 layers of decoupage glue as a primer, each of which is applied only after the previous one has completely dried.

The time has come to polish our base, for which we have prepared sandpaper. They do this: lightly moisten the surface of the canvas with water and rub it to the desired gloss. The smoother the first layer of soil, the easier it is to paint on the canvas. Now we need to get a uniformly white background. To do this, we have used whitewash all our lives, we will do the same. Apply, wait for it to dry, and if necessary sand again.

The “canvas” we make contains all the characteristics for creating a painting with your own hands, on which artistic acrylic paints will easily and firmly lie.
Before you start painting with acrylic paints, check out our recommendations:
- The degree of transparency of acrylic paints is adjusted by adding water to them, but if there is more than 20% water, the paint will easily peel off when dry.
- When processing a drawing with paint, you need to start with large details with brushes with high numbers, and only then move on to smaller details, subject to brushes with lower numbers.
- After rinsing the brush after using the color, blot it on a clean cloth or paper napkin; this will protect the painted flowers from unnecessary color stains. When mixing paints, use acrylic thinner.
- When painting, use only the tip of the brush, this will give you a better chance of distributing the paint evenly.
- When mixing, move the colors towards each other, rather than “slipping” one into the middle of the other.
If you need to use a straight line that clearly separates one color spot from another, stick it on dried out area electrical tape or masking tape. Afterwards you can easily remove it, and the straight line will remain.

To know how to mix acrylic art paints correctly, the video tutorials below may be useful, where they will explain to you that the best acrylic paints are those that can be used to paint something beautiful. Oh yes! We don’t draw, we write the music of our mood!
How to paint with acrylic (2 videos)
Very often, when choosing paint for construction, buyers choose acrylic. And this is not without reason - it has a number of advantages that are valued by consumers, for example, durability and bright color. Painting with acrylic paint, which paint to choose and how to apply it correctly, you will learn from this article.
Acrylic dyes are common not only in construction, but also in painting. They are often chosen to create designs on cars and are used in nail salons for painting on nails.
Before applying such a dye, the surface must be prepared.
There are some steps you need to take, namely:
- clean the surface of all kinds of contaminants;
- treat with a primer if the surface absorbs moisture too much;
- bring the paint to the desired consistency;
- use a brush or roller to apply paint;
- provide the required temperature, not lower than +10°C;
- Prepare water for cleaning brushes.
If paint remains after work, it must be tightly closed with a lid, otherwise all beneficial features will be lost, and it will be impossible to use this dye in the future.
Non-toxic and environmentally friendly
In the production of acrylic paints, not a single substance is used that can harm the human body.
No smell
 Acrylic paints have absolutely no odor, so working with them is convenient and pleasant.
Does not burn
There are no flammable substances in this paint coating, so there is no fear of fire.
Dries quickly
The thickness of the layer affects the drying speed, but, as a rule, this happens within a couple of hours.
Huge selection of colors
The color range of acrylic paints is truly diverse. Probably for this reason it is chosen not only in construction, but also in painting.
Not afraid of dirt and does not let in moisture, while allowing air to pass through
Durable
Elastic
Increased durability
It does not require special care
Durable
Manufacturers often claim that acrylic paint may not lose its external properties for 10 years.
Wide Application
Acrylic paints resist ultraviolet rays well and are not afraid mechanical influences and tolerate moisture. They are suitable for both wet rooms and outdoor use.
Universal
Acrylic-based paint is unpretentious and can be combined with all kinds of materials. It is compatible with most surfaces. This dye is not compatible only with plastic, or rather, with some of its varieties.
 According to the area of use, acrylic paints are divided into 4 types:
- external;
- internal;
- paints for painting;
- automobile.
Facade acrylic paint consists of a number of additives that protect it from direct sun rays, moisture and abrasion. This type of paint is suitable for any outdoor use. It can be used to cover a façade, a gate or a fence.
Acrylic indoor paints are not as resistant to external factors. But they also have a number of advantages, such as easy application to the surface and long term services. There is a special type of paint for painting ceilings and walls. In addition, there are universal dyes that are equally suitable for exterior and interior use.
Acrylic dyes are also in demand for painting cars. They are applied to the body, which changes the appearance of the car beyond recognition. There are also compositions specially created for painting, used in painting. Even painting nails or painting on fabric can use acrylic dye.
Acrylic compositions are excellent for many surfaces, most notably metal and wood. With their help, you can paint walls and ceiling surfaces, and universal paints, true to their name, can be used in almost any conditions.
Most acrylic paints have special advantages that set them apart from others. These include:
- moisture-resistant paints;
- lightfast;
- washable;
- resistant to mechanical stress.
There is also a division according to the degree of gloss. In addition to matte and glossy acrylic paints, semi-gloss and silky matte are also available.
Table. Technical characteristics of facade paints.
| Type | Characteristics | Peculiarities |
|---|---|---|
| Latex, acrylic | Easily removes excess, durable, quick drying, can be used even on wet surfaces, incompatible with previous finishes on oil based, elastic. Almost no smell. Water-soluble, used for wood processing, brickwork, plaster and properly primed metal surfaces. | They are not diluted, and with careful work you can get a uniform thin layer. They do not crack over time. These are breathable paints that are resistant to fading in the sun. |
| Oil, alkyd | They dry very slowly (from 12 to 48 hours), have a strong smell, are difficult to clean, but are durable and have good adhesion, especially on whitewashed surfaces. Paint in one layer, clean with solvent. Based on synthetic resin, fit well on old multi-layer alkyd coatings and chalk, and have excellent hiding power. Galvanized iron and fresh masonry should not be painted. | The thick consistency makes it more difficult to apply, but this paint adheres better than latex paint. The coating must be protected from rain until completely dry. In direct sunlight, the paint will fade and may crack over time due to oxidation. |
 Acrylic-based paint is easiest to dilute with water. This is not only simple, but also effective, because water is part of acrylic paint. But it should be remembered that this type of dye dries quickly, and after that it creates a protective waterproof film, so after work the tool must be cleaned as soon as possible before the paint dries.
Also suitable for dissolution is a thinner, which paint manufacturers themselves readily recommend. It significantly affects the characteristics of the paint, thereby adding shine and richness to the surface to be coated.
- mix water and paint in equal proportions. Thanks to this, it will be possible to achieve ideal mass and convenient application;
- by diluting paint with water in a ratio of 1:2, you can create a thin layer that will evenly cover the surface;
- When diluting, it is important to take into account the proportions that are dictated by the type and thickness of the required layer. The thinner the layer you want to achieve, the more water you need to add.
It is more difficult to dilute dried paint. To do this, you need to grind it to a powder, pour boiling water over it. When the water has cooled, you need to drain it and repeat the procedure again. After this, you will need to get rid of excess water and mix the paint. Although the dye can be made suitable for use, it should not be applied to critical areas. Once the paint dries, it partially loses its properties, so it will not look the same. It is no longer very suitable for exterior work, except when painting an outbuilding.
 Using acrylic paint is quite easy, especially if you know its features and the subtleties of working with it.
The following instructions may help you with this correct painting ceiling:
- First of all, you need to prepare the surface for painting. Ceiling surface cleaned of existing contaminants. In addition, it should be as even as possible. If the ceiling has not been painted before, it is first primed before applying the composition. The primer will save paint and protect the coating from fungus or mold.
- Any paint remaining on the ceiling must be removed using a spatula. This is important, since the presence of even small particles of paint on the surface makes painting impossible.
- Existing chips or cracks are repaired using putty. When it dries, you need to rub it, then apply a primer and only then start applying paint.
- Prepare everything in advance necessary tool: brush, roller, separate container for dye, stepladder or ladder, paint itself.
- Start painting from the corners using a brush, since a roller is not suitable for this purpose. Once you've finished painting the corners, brush around the perimeter of the ceiling. And only after this you can continue painting with a roller.
- The first coat of paint can be applied in any direction. But the last painting should be carried out strictly towards the window. With this simple technique you can achieve a smooth effect.
Acrylic-based paint dries quickly enough, so painting the ceiling can be completed in one day. In addition, acrylic paints do not smell at all, which is why they are often chosen for finishing work.
You can apply them in two ways:
- after diluting with water or special mixtures;
- in the form of a paste, if you choose this method you will need a thickener.
To dilute the composition, you will need a separate container; if you do this in a jar with dye, then when the moisture evaporates, it cannot be used.
To paint a facade with this composition you need to perform a number of simple steps:
Pre-prepare the surface
The facade of the building must be absolutely clean. Any dirt is unacceptable. Also make sure there is no fungus on the walls. Seal cracks if you find them.
Apply primer
When the surface is completely ready, a primer needs to be applied to it. This improves the adhesion of the composition to the surface; in addition, paint can be saved.
Paint the facade
Painting is done manually using a brush and roller. If you have a spray gun, you can use it. You need to apply at least two layers of acrylic paint. The second one can be applied only when the first one is completely dry.
materials on the topic
New premium acrylic interior and exterior paint WeatherOne® CoverCoat from Cloverdale
WeatherOne ® CoverCoat, a premium interior and exterior latex paint and coating from Cloverdale, is formulated with a 100% acrylic base and can be used over stucco, masonry, masonry, treated wood, metal, and galvanized surfaces that must be properly treated. and for which preliminary application of a primer is necessary.
Currently, a large number of industry products are produced that produce varnishes and paints, which are needed to give surfaces a beautiful appearance. Thermochromic paint is one such product. It is used to create souvenirs and interesting household items. It is also very necessary for making dishes for children, as it gives information about whether the food is hot.
The research project of scientists from the UK and Greece involves the development of new advanced polymer-based raw materials and composite materials, as well as technologies for processing and manufacturing new powder paints.
Acrylic paint or auto enamel is a widely used material for painting a car. The paint base is polyacrylates, which give the paint a shine similar to the varnish coating. Moreover, this type of painting is considered inexpensive and practical. Acrylic coating has high hardness and fairly high wear resistance.
But not everything is as simple as it may seem at first time. Acrylic paint involves bringing the viscosity to the desired level using a hardener, and the technology of applying such paint to the surface of a car requires not only iron patience, but also careful preparation.
ATTENTION! A completely simple way to reduce fuel consumption has been found! Don't believe me? An auto mechanic with 15 years of experience also didn’t believe it until he tried it. And now he saves 35,000 rubles a year on gasoline!
So, let's look at each stage of painting a car with acrylic paints with your own hands.

Preparation stage
This stage includes not only the preparation of the surface to be painted, but also the purchase necessary materials and tools. What we need:
- spray gun or spray gun;
- auto spatulas;
- abrasive material of varying hardness (sandpaper and grinding wheels);
- Sander;
- containers;
- putty;
- primer (if there are plastic parts - primer on plastic);
- acrylic paint;
- hardener and solvent;
- degreaser;
- masking tape;
- rags and napkins;
- protective mask (respirator) and gloves.

Choose materials from the same series to avoid unpredictable reactions when interacting with each other.
Now we begin to prepare the surface of the car. It is necessary to remove parts that will not be painted, glass and mirrors are covered with film, small parts should be covered with masking tape.
Car surface polishing
Using sandpaper (P 80 -220) or grinder with the abrasive wheel installed, you need to remove the old one paintwork. It is worth starting with rough sanding, gradually moving to finer and more careful removal of the coating. As a result, we should get a surface with micro-scratches (for adhesion with putty). The surface is thoroughly washed, dried and degreased.
Puttying the surface
The putty is applied evenly, without gaps. It will give a further result in which the paint will lie in an even layer without defects. A hardener must be added to the putty (or a type with a hardener already added is purchased). The putty layer should dry, 15-20 minutes is enough. Then, after drying, the applied layer is sanded. Sandpaper from 180 to 240 is used. Final sanding should be done using P800 sandpaper. Clean the surface and degrease it.
Priming a car before painting
A mandatory layer is a primer, which will hide all existing unevenness, create a background for the paint (light primer is used for light paint and vice versa), and also create conditions for better adhesion of the paint to the surface.
The primer is applied according to the putty principle, and is also sanded and degreased.

Painting a car with acrylic paint
Acrylic paint is applied in several layers: the first is a base thin layer by spraying (applied at a distance of 15-20 cm), the second is a main thick layer (applied at a distance of 20-25 cm more liquid paint), the third is the outer protective layer (applied at a distance of 30-35 cm). Each layer should dry for 10-15 minutes.
Varnish coating
Acrylic paint has properties that make applying varnish unnecessary. But let's look at the complete process of painting with acrylic paints. The varnish is applied in a neat layer and, if necessary, polished after drying.
Having thoroughly studied the entire painting process and following all the rules for applying each layer, painting a car with acrylic paints will not be difficult, even with your own hands.
To find out what varnish to coat acrylic paint with, we will consider the types of varnish compositions available for repair, select the optimal ones and describe the procedure for applying it.
Different varnishes are needed, different varnishes are important
In the very general view varnish is a liquid solution of various resins, which thin layer applied to various surfaces and after drying it gives them shine and protection from external influences. With the help of varnishing, a significant aesthetic effect is achieved, the service life of many products and the durability of repairs are increased. Varnish compositions are very diverse in terms of area of use:
- Furniture - used indoors to cover any wooden products (not just furniture), they often appear finishing layer after . They may contain coloring pigments immediately or be supplemented with tinting before use, thereby immediately giving the wood desired shade already in the process of varnishing. They are economical in cost, but have low wear resistance;
- Parquet. Used on floors made of natural wood, including factory-treated floors. Parquet varnishes are compatible with parquet itself, solid boards and ordinary floorboards. Their cost is quite noticeable, as is their high abrasion resistance. The common property of furniture and parquet varnishes is low moisture resistance - this is why it is recommended to wipe parquet, furniture and varnished floors with mastic or special compounds, and not wash them with buckets of water;
- Yachting. They are the antipodes of their predecessors in terms of moisture resistance, because they can resist prolonged exposure to sea spray, salty winds and ocean waves for a long time. They are used not only in shipbuilding, but also in land-based economic and repair work, for example, in varnishing garden furniture, gazebos, stands for canopies made of wood or carved frames outside the windows. The cost of yacht varnish is several times higher than the price of parquet varnish, so it must be used wisely and carefully;
- Universal or decorative. They occupy an intermediate position between the above-mentioned compositions, allow application indoors and outdoors, and have moderate durability and cost.
Varnish for water-based paint, most often, it is universal. Region decorative use very wide, they are perfect for interior renovation, and for external design, therefore, the protection of these paints should have universal properties.
Main types of varnishes by composition
By studying the label (or other accompanying inscription) on the packaging of a container of varnish, you can glean a lot of useful information about its components and compatibility with paint. The formulas of varnishes and the technologies for their production are very diverse:
- Oil based, based on organic (natural or synthetic) oils and resins. They are best compatible with wood surfaces; this material absorbs oily substances well and has high hardness after hardening. Unfortunately, the freezing itself oil varnishes may last several days;
- Alkyd - produced from alkyd resins and synthetic solvents. In terms of moisture resistance and wear resistance, they are better than oil ones, and dry a little faster. They have universal qualities - they can be used to varnish interior items and products located outside. Applied by everyone by known methods– from miniature brushes to rollers and sprayers;
- Acrylic - environmentally friendly and absolutely safe in terms of fire (produced in water based). Completely transparent acrylic varnishes well protect any wooden surface and acrylic painting on plaster or plaster, however, their durability depends on the stability of the microclimate in the room;
- Nitrovarnishes are advantageous because they harden quickly and stick quite “tenaciously” to the surface being treated.. The disadvantage of nitro varnishes is toxicity and the ability to corrode the painted base, so before varnishing you need to stock up on a respirator and test the nitro varnish in an inconspicuous place, what if instead of a glossy layer, rags of new paint form?
- Polyurethane is a universal and convenient composition with high resistance to mechanical, natural and chemical influences. Well compatible with various materials and paints. Among the “disadvantages” of polyurethane varnishing, one can note its technical complexity and high cost;
- Epoxy. In terms of aesthetic qualities they are inferior to polyurethane ones, comparable in strength, and dry faster. Typically used for varnishing wooden products in rooms with high humidity (baths, saunas, steam baths, swimming pools).
Whether it is possible to varnish acrylic paint is determined by the identity of its composition with the painted surface, that is acrylic lacquer, obviously, will be compatible with acrylic paint; it is also acceptable to use polyurethane and some types of alkyd varnishes.
How to coat acrylic paint with varnish - application instructions
Acrylic paints have one interesting feature: the longer they are left unvarnished, the more firmly they “bond” with the wooden base. Before choosing a varnish, the paint must be allowed to dry thoroughly, from several days to several weeks.. While drying, the painted product can be protected with film or glass.
How to varnish acrylic paint - step by step diagram
Step 1: Choose a varnish
Be sure to check whether the varnish you like (acrylic, polyurethane or universal) is compatible with the type of base - wood, plaster or putty. It is highly desirable that the varnish composition with acrylic components be fresh, that is, no more than 90 days have passed since its manufacture. Other than that equal conditions It’s better to purchase a matte composition instead of a glossy one, because acrylic paint rarely needs additional shine.
Step 2: Getting ready for varnishing
Protective film, cellophane, glass, etc. must be removed carefully without damage acrylic base. If dust is found on the surface, remove it with a vacuum cleaner (without contact with the base!) In extreme cases, you can use a feather whisk. Moreover, movements should be as careful and measured as possible. Mechanical sweeping with rags is strictly prohibited - acrylic paints are quite delicate and can fly around with petals of multi-colored hopes even before varnishing.
The varnish itself should be heated to a temperature of 40-50 ˚C before applying it to a dust-free surface. It is best to perform this operation in a water bath. If you don’t have a thermometer at hand, then you can stick to the empirical ratio: a three-liter jar of varnish in a boiling liter of water heats up to a temperature of 40-50 ˚C in about five minutes. During heating, the varnish composition must be stirred several times with a smooth lath.
Step 3: Varnish!
It is important to set the lighting correctly in the dark best master paint and varnish works will not cope with the task. The optimal light source is at the top and to the right, even if the room is sufficiently illuminated. It is best to work with a wide flute brush - from 50 to 150 mm wide, depending on the volume of varnish. Take a small amount of varnish onto the brush (so that it does not drip onto the floor or flow over the product) and apply it to the surface with wide, smooth strokes, moving from top to bottom. The trajectory of the brush movements should be parallel to the upper border of the varnish. After processing 0.5-0.7 m2, the varnish layer must be polished.
Polishing is done with a dry flute brush using top-down movements. When the dry brush begins to stick to the surface being treated, you should move on to varnishing new areas. The finished product should be protected from dust accumulation until the varnish layer hardens. This is done by installing visors, film frames, etc. It is better to try out self-varnishing with acrylic paints on small products; once you acquire skills, you can move on to decorative elements with a significant surface.