Using drywall, you can bring a variety of design ideas to life. Using built-in LED lights on the ceiling, performing several levels and complementing everything with side lighting - these are all the advantages of this type of design. Suspended ceiling It is possible to make it from plasterboard yourself, although this process is not entirely simple.
But, having carefully studied all the recommendations of specialists and applied them in practice, the work will progress much easier and simpler. For curved figures on a plasterboard ceiling, special patterns are needed to cut out the parts. In this case, you have to bend the sheets and create unusual profiles. All these processes are feasible.
By following the instructions, it is possible to make a plasterboard ceiling with your own hands
Restrictions on the use of material
In order for the ceiling to be of high quality, it is necessary to purchase suitable plasterboard sheets. In a room where high humidity is not present all the time (bathrooms, kitchens, etc.), in principle, such material can be used. But, in other cases, plasterboard sheets must be moisture-resistant, with a vapor-proof coating. That's why paint material, used to cover sheets, must create a waterproof film.
The use of plasterboard sheets for ceilings is not recommended in rooms where there is no heating. In this case, condensation may form on the surface, and this leads to deformation of the material. It is also risky to install drywall in city apartments, as there is a risk of flooding, after which the ceiling may simply collapse.
If your upstairs neighbors have automatic system to shut off the water supply, then it is advisable to use this installation method.
In general, we can say that plasterboard ceilings are common in apartments. The main thing is that the height of the room allows this, since suspended structures significantly reduce this value. If the room has a height of less than 2 m 40 cm, then you should not make such a ceiling. This value may also decrease due to built-in lamps or other utilities. But, it is possible to use special lighting devices: you can use flat overhead ones, saving about 5 cm or only one chandelier.
Calculation of material and components of the ceiling

To do frame structure You must first complete a drawing for the ceiling. Mark all the dimensions of the room on it, which will help significantly reduce the cost of purchased Construction Materials. Calculate the number of profiles for the manufacture of the frame, fasteners, and drywall.
Also, a drawn diagram of the ceiling will help you decide on configurations and the correct calculation of everything needed for installation.
Necessary materials for construction
Before you start installing drywall on the ceiling, you need to calculate how much material is needed, taking into account its different sizes. This will allow you to make fewer pieces and trims and optimally place the material on the surface. Standard sizes sheets are as follows: thickness from 9.5 mm to 14 mm, and length from 120 to 250 mm.
When placing sheets of plasterboard on the ceiling, it is important to adhere to the following recommendation: do not match the seams and do not place them on the same line; they must be offset by at least 50 cm. This rule applies to both longitudinal and transverse connections. Docking should only be done on a metal profile, and the seam should be in the middle.
The sheet is secured to the CD profile with screws; they should be placed at a distance of 1.5 cm from the edge of the drywall sheet.
The transverse seams must coincide with additional elements main profiles that serve as additional reinforcement of the frame. Follow the steps at intervals of 20 cm. Having found out the exact length of the structure and installed profiles(together with the transverse ones) you can calculate the number of screws by multiplying it by 5.

Tools for work
Having everything necessary to complete the process speeds up the work and also ensures high-quality installation and further finishing of the ceiling. What you need to have:
- assembly scissors for metal;
- grinder for working with metal profiles during the construction of the frame;
- blade for a hacksaw for metal with fine teeth or special tool to cut sheets of drywall;
- screwdriver;
- perforator;
- sandpaper or grater to smooth the end of the cut parts;
- special needle roller for perforation;
- yardstick;
- construction square;
- laser level, and in its absence, painted painting thread to mark the line;
- water level at least 2 m 50 cm long;
- long rule;
- serpyanka for processing seams;
- masking tape.
Ceiling markings

This process is very responsible, since it depends on appearance the surface to be installed and the strength of the structure itself. Without following all the rules, a plasterboard ceiling may not be of high quality and will not last long. The rules for a quality installation are to inspect the surface before starting the work process for height differences.
A level that needs to be used to set the lowest point on the wall will help you do this.
Proceed with ceiling marking, which includes the following processes:
- Set a line where the initial profile will be located. In this case, it is worth considering the height if there is an intention to hide it under the structure electric wires or lighting fixtures. This can be a distance from 7 to 15 cm.
- Make a mark on a nearby wall with a marker or pencil.
- Next, similar lines are marked on other walls using a water level.
- After this, all lines should be connected into one continuous line. If all the markings are made correctly, the straight line will coincide.
Then you need to make markings where the supporting guides for the suspended ceiling will be located:
- Draw a line along the ceiling parallel to each other at a distance of 1250 mm (this is half a plasterboard sheet).
- These lines are a guide for placing hangers on special metal anchors (wedges or dowels).
- The installed profiles should run both along the edges of the sheet and in the middle. When marking is carried out, this fact must be taken into account.
The first stage of installation of the ceiling frame

Buy narrow metallic profile UD-27 and attach it around the entire perimeter of the room. It will serve as guide profiles and hold the CD strips that will be inserted into it.
Also needed for strong fastening of the dowel profile are 5 cm long if the surface is made of heavy material, and also 9 cm if there is a porous surface. The interval for placing fasteners is 35 – 40 cm.
You need to hide everything behind a suspended ceiling engineering Communication. Then check its performance and reliability under load.
A suspended sheathing is created from CD-6/27 metal profiles 3 m or 4 m long. When installing, an interval of 60 cm is maintained between them, and the length should be a couple of centimeters less than the room to ensure thermal expansion. First, the first profile is mounted on the ceiling close to the wall, and it is inserted along the length into the UD. They are located at a distance of 60 cm from each other. Transverse inserts are made from the same material to make the structure more rigid. The distance between these profiles is also maintained at 60 cm; they are fastened using self-tapping screws. This way the drywall sheets will hold more firmly.
Second stage of installation

To avoid problems with the suspensions, it is important to check how much overlap is inside. If it is hollow, then you should use dowels of a larger diameter (12 mm) and fasten them with thick screws. In the presence of wooden surface Fasteners with a length of at least 60 mm must be used.
CD profiles are suspended on perforated hangers. They have different sizes and you need to choose the one that suits you best best option for each individual case. The remaining excess length should be folded. They are placed at intervals of 1 m, mounted on dowels in the ceiling. Fasteners must be 6 mm in diameter and 50 mm long, 2 pcs per hanger.
The connecting parts between the longitudinal profiles and cross members are elements called “crabs”. They perfectly fix intersecting profiles at the same level. Self-tapping screws for fastening CD profiles together with hangers have a length of 10 mm. Their number must be calculated in this way: for each suspension you need 2 pieces, and add 4 more pieces. for each cross member.
In order for the plasterboard ceiling to be even between the profiles, it is best to stretch a cord or fishing line in an amount of 3 to 5 pieces, depending on the size of the room. It is for them that you need to set the CD profile. Secure the cords with screws, attaching them to the end of the UD strip. Place small washers 1 or 2 mm high under them. This is necessary to create a gap between the fishing line and the profile.
Once secured, the CD profile should not touch the cord.
Material cutting and installation

To properly cut a sheet for a plasterboard ceiling you must have:
- long rail;
- marker or pencil;
- sharp knife;
- roulette
It’s not difficult to complete this process; the main thing is to do everything step by step:
- Draw a line on the sheet and cut the cardboard layer with a knife strictly along it.
- Crack the material along the line and then cut the cardboard from the back of the sheet.
- Sand the unevenness at the end with sandpaper.
- It turns out two sheets of plasterboard with smooth edges.
When joining sheets, remove a 1 cm wide chamfer at an angle of 45 degrees.
If you need to make a cut from the edge, you must first put a mark on the cardboard and, using a jigsaw or hacksaw, make a cut in several places in the direction from the edge. Break a piece of drywall and outside cut the paper. When making a hole inside a sheet, you need to make a cut on three sides, and then break off the remaining part or saw through all four sides.
Place prepared pieces of a certain size onto the finished ceiling frame, so that one edge is pressed tightly against the wall. They are fixed to the profiles with self-tapping screws. They need to be screwed in so that the cap goes in a little and does not stick out. The interval between fasteners should be 20-25 cm. Continue this process until the entire ceiling is sewn up.

Puttying the drywall surface
Completing the installation of drywall on the profiles is not the last step in this work. After this, the sheets installed on the ceiling must be primed, puttied and painted. First, you need to fill the joints between the pieces of drywall with a special putty so that the ceiling becomes monolithic and smooth. Painting mesh or serpyanka is used at the joints so that cracks do not appear in this place later. First, the seam is filled 60% with putty, then the serpyanka is laid and covered again with the finished mixture. The mesh should be inside; this is the only way it will hold the solution tightly and prevent cracks.
The areas where the screws are located are also closed in order to veil the resulting holes. To do this, use a small spatula with putty to move it in different directions to hide the indentations. After all, if you don’t do this after applying the first layer of the mixture, it will retract as it dries and you’ll end up with a hole.
After drying, the putty areas must be sanded using a trowel mesh or fine-grained sandpaper.
Apply a layer of primer to a flat, dry surface and allow time to dry. Then cover the entire ceiling in several layers with putty mixture. Allow time for complete drying each time to ensure the surface is smooth and beautiful. Carefully inspect the entire ceiling for any sagging or unevenness. If any defects are found, the ceiling must be cleaned so that it is perfectly smooth and without flaws. Now you can paint.

When installing the ceiling, you should pay attention to the following important points:
- the room temperature during operation should not be lower than +15 degrees;
- the purchased sheets must be brought indoors and let them lie in a horizontal position for some time to acclimatize;
- fasten the screws strictly at 90 degrees and deepen them a few millimeters so that they do not protrude on the surface of the ceiling.
Suspended design – universal and practical option ceiling finishing. It can be installed in any room, regardless of the humidity level. A creative approach to the construction of a suspended ceiling and construction experience makes it possible to create a multi-level structure original form. But even an ordinary single-level frame covered with plasterboard hides defects in the main ceiling, allows you to hide communications, wiring and ventilation elements, and place lamps. Reducing the ceiling height reduces heating costs, and a layer of insulation keeps the room warm.
If you have the skills construction work, then you’ll quickly figure out how to make a suspended ceiling from plasterboard with your own hands. Beginners will have a more difficult time in this matter, but desire and a good assistant will allow them to cope with the task.
What is needed to install a suspended ceiling? This:
- powerful drill or hammer drill;
- laser or water level;
- screwdriver;
- metal scissors;
- roulette;
- chop cord;
- assembly knife.
Materials for installation of the structure

The basis of suspended ceilings is a metal, less often wooden, frame. To assemble it you need to purchase:
- Guide galvanized steel profile UD, having a length of 3 and 4 m, metal thickness up to 0.6 mm.
- Ceiling-rack supporting profile CD, produced in lengths of 3 and 4 m, its width is 6 cm, the thickness of the steel base is 0.4 – 0.6 mm.
- Connectors for CD profiles: corner, longitudinal, single-level (crab), direct suspension, self-tapping screws and dowels.
- Drywall sheets. The type of material – regular or moisture-resistant, is selected depending on the purpose of the room and the level of humidity in it.
Note! Professional installers recommend purchasing all materials for the frame from one manufacturer, then they will fit optimally in size.
Marking

Installation of the structure begins with marking the walls and ceiling. In one of the corners, mark the first point, lowering it by the size of the future ceiling. Using a water level, marks are made on the opposite wall. This instrument consists of two vessels filled with water and connected by a tube. It accurately shows the horizontal plane; just lift its parts and set the same water level according to the drawn scale. The marks are transferred along it to the wall and connected with a tapping cord. An accurately drawn horizontal line will allow you to correctly screw the profile and avoid difficulties with the installation of the structure.
Note! On the ceiling, it is necessary to determine the attachment points of the suspensions and the ceiling profile. Lines are marked at a distance of 60 cm; for the first profile, 25 cm is set aside from the wall.

The guide profile is attached along the drawn strip with dowels. Holes for them are punched with a hammer drill in the walls and in the metal profile. The fastening pitch is 30 cm, decreasing to 10 cm in the corners. A galvanized guide profile is installed on all walls. The ceiling profile will be inserted into it.
Direct hangers are attached at the intersection of lines marking the location of the CD profile. They are screwed with two or three dowels, it depends on the expected load.
The perforated sides bend at an angle of 90 degrees. The CD profile is inserted into opposite guide profiles UD. If the smallest side of the room exceeds 4 m, then the supporting profile is spliced with longitudinal connectors; a suspension can be installed in this place to enhance reliability. IN small rooms the profile must be cut into pieces. It is easy to cut with special metal scissors. To align all the CDs on the same plane, a strong thread is pulled underneath them as a guide. The profile is screwed to the hangers on both sides with self-tapping screws. The remaining parts of the plates are bent to the sides.

After fixing all the hangers, the transverse parts of the frame are installed. To do this, you will need “crab” connectors, which snap onto the CD profile at a distance of 50 cm from one another. The connector antennae are bent on the longitudinal profile and transverse parts, the connection occurs with self-tapping screws. The jumpers must be attached to the main profile at right angles. After tightening all connections with self-tapping screws, we obtain a finished frame with a cellular structure, to which sheets of drywall can be screwed.
Cladding of the ceiling structure

The plasterboard ceiling structure is not designed to support additional weight. It cannot be attached to heavy lamps or air conditioners. Before sewing up the ceiling, it is necessary to make a chandelier mount, which is installed on ceiling. At this stage, insulation is laid and electrical wiring for spotlights is laid.
Plasterboard sheets are laid so that their edge is located in the center of the CD supporting profile. The fastening of the canvas to the frame should occur along the entire perimeter and in the middle, where the metal profile passes. Adjacent sheets divide the shelf of the supporting profile in half. The work is carried out using a screwdriver, screwing in the screws at a distance of 20–25 cm from each other. To ensure that the self-tapping screw enters to the same depth, not exceeding 1 mm, you need to install a limiter attachment on the tool. In pieces the right size The drywall is cut with a mounting knife.
After fixing all the drywall sheets, cut out holes for the lamps. Perfect round shape obtained when working with a special attachment on a drill. The next step in ceiling cladding is priming the surface. Then the putty begins. Finishing begins at the joints and places where screws are screwed in; a mesh is applied to the layer of putty to secure the seams more firmly. After allowing the applied layer to dry, putty the entire ceiling. The finished surface is cleaned with sandpaper. The suspended ceiling is ready for finishing decoration.
Note! For a room with normal humidity use regular drywall, the use of moisture resistant will not provide any advantages; on the contrary, it will make the structure heavier.
Installation suspended structure requires accuracy, strict measurements and adherence to technology. By acting according to the plan and being responsible about the reliability of fastening and maintaining the required level, you will assemble an excellent suspended ceiling.
We would also like to invite you to read the articles that describe the manufacturing technology plasterboard ceilings.
We continue our traditional series of articles from Yuri Voedilo (professional builder and repairman). Yuri writes: 
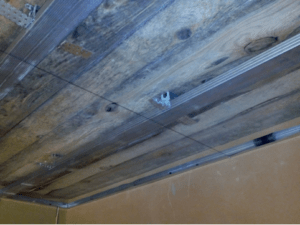
In old houses, little attention was paid to beauty during construction, since the main task was built quickly and reliably. Therefore, ceilings, as a rule, have different irregularities: protruding beams in wooden floors and differences in seams between slabs in reinforced concrete floors, as well as various distortions and notches. It’s good if the defects on the ceiling are not large and can be eliminated with putty, but what if it’s simply impossible to putty them? What if this is a new building and you need to cover the rough ceiling? Here sheets of drywall, which we have known for a long time, will help us out. From these we will make a suspended ceiling from gypsum plasterboard sheets, which will cover all defects and it will also be possible to hide electrical wiring and other communications behind it. In this article, let's take a closer look at what we need to install such a plasterboard ceiling with our own hands and the sequence of its installation from marking the ceiling to puttying. We will also look at the technology and device for installing a gypsum board ceiling in step-by-step instructions with photos.
And in the process of work we cannot do without such a tool as:
- Impact electric drill or hammer drill
- Tape measure, pencil and building level
- Water construction level (transparent hose 5-10 meters long)
- Cordless or electric screwdriver
- Ladder
- Thread or fishing line (preferably yellow)
- Tin scissors and construction knife
Material for work:
- Ceiling profile for plasterboard CD-60
- Guide profile for plasterboard UD-30
- Suspension plates
- Wood screws 32 mm
- Dowels 60 by 40 mm
- Metal screws 10 mm (fleas)
- Ceiling plasterboard sheets (GKL) 9 mm thick
- Metal screws 25 mm
- Fiberglass reinforced tape (serpyanka)
Stage 1. Marking for installation of profiles
How to properly make a plasterboard ceiling with your own hands? First, we need to make sure that the ceiling comes out without distortions and is strictly horizontal. To make this happen, you need to knock out the zeros of the room. To do this, we will use a water level. It is difficult for one person to make such markings, so ask someone for help. In any corner of the room we put a mark with a pencil at a height of one meter. We apply a water level to this mark so that the water level coincides with our mark. And at this time your assistant should move from corner to corner of the room with the opposite end of the hose. In each corner he will have to leave a mark at the water level. At the same time, you need to make sure that your mark doesn’t get lost! All these marks (zeros) in the corners of the room will be the horizontal level of the new ceiling. From the zeros, use a tape measure to measure upward the same distance to the height at which we want to make our plasterboard ceiling. In this case, it will be necessary to take into account the thickness of the plasterboard of 9 millimeters and the thickness of the guide profile ud 30 millimeters. Also, do not forget that the minimum that will have to be 10 cm away from the rough ceiling, because a standard built-in lamp will take up 10 centimeters in height.

Stage 2. Installation of the ceiling frame
Let's start with the fact that along the perimeter of the entire room, at the height at which we decided to make a plasterboard ceiling with our own hands, we need to nail the ud guide profile to the wall using a hammer drill and dowel-nails measuring 60 by 40 millimeters and with a pitch of 450-500 millimeters from each other .

Having secured the guide profile ud, let's take the ceiling profile cd. First you need to cut it to the length or width of the room, then choose for yourself which is more convenient for you. The main thing is that it fits easily into the ud guide profile; if it is too long, it will begin to bend. If it's too short, it won't stay on. Ideally it should be 5 millimeters shorter than the dimension from one ud guide profile to the opposite one.

Having cut the ceiling profile cd to the required length, it must be inserted perpendicularly into the guide profile ud. They are twisted together with special metal screws, popularly called fleas. CD profiles are placed every 60 or 40 centimeters, this is necessary so that the distance is a multiple of 120 centimeters. Since this is the width of a sheet of drywall. And with this arrangement, the joints will fall strictly on the profile.


To ensure that our ceiling does not sag, but is level, we need to screw the cd ceiling profiles to the rough or old ceiling using mounting hanger plates. Strictly above the profile to the ceiling we screw the hangers with self-tapping screws 30 millimeters long, or if you have reinforced concrete floors, then with dowels 60 by 6 mm. Suspensions are placed on each CD profile at intervals of 50-60 centimeters.

After that, through the middle of the room across the cd profiles, you need to stretch a thread (preferably black, it is better visible) attaching it to the outermost opposite ud profiles, which are screwed to the wall. Having bent the suspension plate to the bottom, with one hand we hold the cd profile so that it barely touches the stretched thread and fix it to the suspension with the flea already familiar to us on one side and the other. Please note that you need to fasten it with a dowel or self-tapping screw closer to the edge of the profile bend in order to prevent sagging under the weight of the plasterboard sheets.
Using this method, you can make the hangers longer or shorter, and the gypsum board ceiling can be raised or lowered to the desired distance.
Note: While working, make sure that the other profiles do not touch the thread, as they may distort it.
Very often CD profiles are installed not only along the drywall sheets, but also across them. Practice has shown that transverse profiles should be installed only during installation multi-level ceilings. In this case, such a profile must be installed only at the joints of plasterboard sheets. In this way, you can significantly save on material, and in this case you will also have to refuse to buy crabs (special fasteners designed to connect the longitudinal to the transverse profile).

Stage 3. Screwing plasterboard sheets to the ceiling frame
If the suspension plates are too long, then this is not a problem. They need to be turned up again so that they do not interfere with screwing the sheets. Before you start attaching sheets of drywall to the ceiling frame, you need to think about the future lighting of the room! Consider where the lamps will be located and in what quantity, since the wiring for them must be done before screwing on the gypsum board.
Here are instructions describing the installation of a plasterboard ceiling. It is quite detailed and understandable even to those who have not encountered gypsum boards. All stages are considered - from design to rough finishing. In addition to standard techniques, you will learn some tricks to save time or money. At the beginning of the article there are lists of necessary tools and materials, as well as recommended conditions for such work. Then a brief procedure is given. And from the next section, which is called “Plan and Calculations”, it begins directly detailed description each stage.
Where does the installation of plasterboard on the ceiling begin?
From wall decoration. The fact is that correct installation plasterboard on the ceiling is ideal. So before we start ceiling works walls must be prepared for finishing(plastered and puttied). Or at least covered with plasterboard.
The future ceiling also needs to be prepared. Remove old finishing if she gets in the way. Secure all communications to the ceiling - wires, air ducts, pipes.
The rules for installing a plasterboard ceiling are almost the same as for. There are some difficulties. But overall, the idea is worth it, even if this is your first time encountering gypsum boards. Of course, to install plasterboard ceilings, it is advisable that you have at least some skill in handling power tools and have some physical strength.
What is needed to install a plasterboard ceiling?
You will have to work with long and relatively heavy materials. You will definitely need an assistant.
The tools you will need are:
- water or laser level;
- pencil;
- marker;
- metal scissors (a grinder will do);
- perforator;
- hammer;
- a screwdriver and several PH2 Phillips bits.
The list should be supplemented with tools and devices that will make your work much easier:
Chalk shnu  Special bit for drywall with limiter
An ordinary building level would also be useful. If you don't have a hydraulic level or a laser level and have nowhere to get them, you can get by with a regular one.
Trick: how to do without a laser level
- Secure a regular level with electrical tape to a long, perfectly straight bar;
- place the bar on a known horizontal surface;
- If the bubble is not exactly in the middle, slide a thin wedge under the appropriate end of the level. Try to perfectly align the bubble;
- rotate the bar 180°. Make sure that in this position the bubble is exactly in the middle.
So instead of a short and inaccurate level, you got a long and accurate one.
You will also need finishing tools. The list will depend on the type of finish, but in any case the following are necessary:
- spatulas - narrow and wide;
- bucket (or other convenient container).
It is advisable to have a drill attachment () for mixing construction mixtures.
A simple bench will help a lot. Forget about stepladders - working on them is inconvenient. Make a simple bench out of boards or roll up a simple bench out of chipboard. Calculate its height so that there is 10-15 cm above your head to the future ceiling surface.
List of materials:
- guide profile;
- ceiling profile;
- single-level connectors (“crabs”);
- longitudinal connectors (if longitudinal profiles longer than 3 meters are required);
- straight hangers (for heights up to 20 cm);
- anchor suspensions + rods (for heights over 20 cm);
- dowel-nails with a diameter of 6 mm
- or wood screws for wooden walls and floors (black, with a rare step thread);
- self-tapping screws with a press washer 4.2 x 13 mm (silver, without drill head);
- (black, with frequent thread pitch)
- and the drywall itself;
- and ;
- and serpyanka.
How many materials will you need? In order to have enough, but not have any surplus, you need an accurate calculation. How to do it, read in the section “Scheme and calculations”.
Work plan
Let’s conditionally divide the installation of gypsum boards on the ceiling into five big stages. Next, each section of the article will describe these stages in full detail.
- Scheme and calculations;
- marking;
- installation of profiles and hangers;
- installation of drywall;
- finishing/
By measuring the room and drawing up a diagram, you will get a clear idea of how much materials will be needed.
The technology of installing drywall on the ceiling requires care. To ensure that the structure does not warp, it is necessary to accurately mark the perimeter of the room.

Now let's count the number of profiles. The technology for plasterboard ceilings is as follows: first, a metal guide profile is fixed around the perimeter. Ceiling profiles are inserted into it and attached to it. Additionally, the profiles are attached with hangers to the ceiling.
 Technology for installing plasterboard ceilings
 Important: guide profile installation rules
There should be no gaps between the guide profile sections. In the corner, one profile is inserted into the other until it stops. On one plane, profile sections are joined into a joint. If there outside corner, then one of the profile sections should stick out 27mm. In this way, a continuous belt is obtained from the guide profile.
To count the number of dowel nails, focus on the fastening approximately every 40-50 cm.
Long sections of the ceiling profile are installed exactly every 50 cm. Plasterboard slabs are placed across them. Thus, the edges of each sheet will lie clearly in the middle of the profile. No edge should hang in the air! The edges adjacent to the walls will be attached directly to the guide profile.

Jumpers are inserted across the longitudinal profiles. These are sections of the same ceiling profile, installed in increments of 60 cm. The principle is the same: all edges of each gypsum board sheet should fall in the middle of the profile. The middle of the sheet should also be secured. The length of the lintels = 50 cm minus the width of the ceiling profile (60 mm), that is, 44 cm.
Suspensions are installed along the entire length of the longitudinal profiles in increments of 60 cm.
For clarity, draw all the profiles on your diagram so as not to make mistakes in the calculation. Each intersection of the ceiling profiles is one crab and three metal screws (with a press washer).
Self-tapping screws for drywall are screwed in increments of 15 cm. Just take the total length of all profiles in centimeters and divide it by 15.
Buy putty in quantities of 1 kg ready mixture per 1 m2 approximately 3 kg per sheet. A kilogram of the finished mixture, not the powder.
Materials should be purchased with a small margin - about 20%. Quickly calculate what you need using a calculator.
Marking
So, we begin the actual installation of the ceiling plasterboard.
Typically, plasterboard on the ceiling is mounted strictly horizontally. Arm yourself with a level and get ready to draw a horizontal line around the entire perimeter of the room. You can limit yourself to short strokes every half meter. The main thing is that the ends of the markings meet exactly at the same level.
 The correct placement of plasterboard sheets on the ceiling is important
 To avoid buying tools
There is no point in buying rather expensive equipment for a one-time job. Tools such as a laser level, hammer drill and screwdriver can be rented.
You can draw a line with a pencil along a long straight bar. A piece of ceiling profile is suitable for this purpose. You can put marks only in the corners, then drive nails into them and pull the lace. But it’s even easier to stretch a chalk cord between these marks and slam it on the wall - you will be left with a perfect, straight and clearly visible line.
Using this marking you will need to install a guide profile. Remember that the finishing surface of the ceiling will be about a centimeter lower.
Next, you need to mark the installation locations of the ceiling profiles. Place marks directly on the wall, just below the guide profile attachment line. They should be visible even after installing gypsum board sheets. Apply strokes in 50 cm increments for installing long ceiling profiles, in 60 cm increments for lintels.
It remains to mark the junction of the longitudinal profile with the jumpers. Draw on metal with a marker. Place strokes every 60 centimeters on the longitudinal profiles. You can do this even before you install them in the guide profiles. Mark the ends where you started: they should all end up on one side of the room.
Installation of profiles and hangers
Drill the guide profile with a 6 mm drill bit in increments of about 40 cm. In principle, you can punch it with a hammer drill directly at the installation site. When drilling into a wall, hold the profile tightly. Make sure that it does not move relative to the markings.
 Through drilling of the guide profile is allowed
 If you have plasterboard walls, then you need to imagine at what distance from the wall the drywall is located. The working part of the dowel (with a notch) must sit completely in the concrete.
On walls longer than 3 m, be sure to “splice” the guide profiles by inserting one into the other. They also need to be joined in the corners. Then install the longitudinal ceiling profiles, inserting their ends into the guide profile.
Trick: how to insert a ceiling profile into the guide more easily
Use scissors to cut off the corners at the ends of the ceiling profile. This will make it much easier to insert it into the guide, especially if you are working alone.
It is best to install the hangers before you secure the longitudinal profiles and install the lintels. You just need to make sure that the profiles are exactly in place: they will guide you where to place the hangers.
For fastening into concrete, a dowel-nail is usually used. You can also take it - it holds much more tightly, but it is also much more difficult to dismantle.
Concrete floors in old apartments are treacherous. It often happens that a drill, having traveled a little less than a centimeter, falls into the void. You can deal with such surprises in different ways:
- take a very long dowel-nail;
- attach the suspension in another place;
- Instead of a dowel-nail, drive in a wooden plug and secure the suspension with a self-tapping screw.

It is better to attach the direct suspension not to the outer holes (which are in the petals), but to the adjacent ones, located closer to the middle. Attaching it by the petals is, of course, more convenient: it’s easier to get to them when the frame is already assembled. But this method will allow the ceiling to sag a little.
You can use direct hangers even when the ceiling height from the ceiling is more than 20 cm. You just need to use two instead of one hanger.
But it is much more convenient to use an anchor suspension. The rod of the anchor suspension is attached to the ceiling in the same way as a direct suspension, through an eyelet previously bent 90° with pliers. Please note that you only need to bend the eyelet itself. The rest of the bar should remain perfectly straight.
Where to install hangers? Above each of the long ceiling profiles, in increments of about 50-60 cm. They should not fall on the junction of the longitudinal and transverse profiles! Refer to the previously applied markings.
 Direct suspension
 After nailing straight hangers, bend the legs 90° down. Do this carefully - after bending, the legs should remain perfectly straight.

When all the hangers are nailed, install the longitudinal profiles according to the markings (every 50 cm). Secure them with self-tapping screws through the guide profile, one at each end.

Screwing screws without a drill is not that difficult. The main thing is to use a suitable bat (marked “PH2”). Press firmly on the screw (but without fanaticism) and turn at medium speed. After a second or two, the sharp tip will pierce the metal, and then the self-tapping screw can be screwed in without difficulty.

Cut the jumpers. Please note that the length of the outer jumpers will not be 44, but 47 cm. Attach the jumpers with crabs.
 Ceiling crab for connecting cross profiles
 The crabs are snapped on top. They have special petals with holes for fastening with self-tapping screws to the profile. Bend the petals and attach the crab with one screw to the long profile. Before doing this, make sure that it has not moved relative to the mark. Screw two more screws through the same petals into each jumper.
How to save money on crabs
Make the jumpers 6 centimeters longer. Cut off side shelves 3 cm from each end. Screw the remaining middle part with a self-tapping screw directly to the long ceiling profile from below. Don’t be confused by the fact that the head of the screw sticks out a little: this will not be a serious obstacle to the tight fit of the drywall.
Options for connecting profiles without using a crab in the photo:


With such savings, the rigidity of the frame will suffer somewhat. Of course, the ceiling won't collapse; It will just be a little less smooth and durable.
Do not rush to screw straight hangers to the profile. The problem is that profiles 2 m or more in length will inevitably sag. Especially if you used an extension cord (longitudinal connector).

We eliminate the sagging using a cord stretched tightly across all longitudinal profiles:
- screw one screw into the guide profile at each end of the room, in the middle of the wall;
- tie a string to them and pull it tightly;
- you can see that the long profiles "lie" on the lace. Before securing with hangers, lift them so that they hang 1-2 millimeters above the lace.
When all the hangers and all the jumpers are screwed to the longitudinal profiles, the frame is ready. We proceed to installing drywall on the ceiling.
Installation of drywall sheets
But first you need to do insulation (if in your case it is necessary). Eat different ways insulate the ceiling. Perhaps the most convenient is mineral wool insulation. Roll insulation simply placed on top of the frame. Wear gloves, goggles and a respirator - dust from mineral wool irritates even the skin, not to mention the mucous membranes.
And now you can screw the gypsum board sheets. Start from the edge where the whole sheet fits. Place the sheet across the long profiles, close to the walls. If you did everything correctly and accurately, then the edges of the sheet along the entire length will be exactly in the middle of the ceiling profiles.
Screw the sheet to all profiles, both at the edges and in the middle. Along the edge, the screws should go approximately every 15 cm, in other places you can increase the pitch to 20-25 cm.
How to attach sheets
GCR has a front side and a back side. On the front side there is a rounded chamfer along the longitudinal edges of the sheet and there is a slight unevenness. The reverse side is always flat– for a tight fit to the surface.
Screw in the screws ten millimeters from the edge. You need to retreat at least 15 mm from the cut edge. Retreat at least five centimeters from the corners!
The screw head should be slightly recessed into the surface of the slab. Do this carefully: the self-tapping screw is quite easy to tighten, especially if you lack experience. In such work, a special bit for drywall with a limiter is very helpful. 
You can see where the profiles go by the marks on the wall. However, you can draw out a sheet of drywall in advance, even before you lift it and start attaching it. Continue the longitudinal row of sheets, end to end, without gaps. It is difficult to do this work without an assistant.
Devices for not holding a sheet of drywall
Make a support. Take a board slightly longer than the height of the ceiling, screw a piece of board about a meter long across it to form the letter “T”. Reinforce with two planks diagonally. This mop-like device is used by craftsmen all over the world when they make installation of plasterboard on the ceiling.
Methods for installing a gypsum board ceiling without an assistant:
 Using the lift
 Homemade option holding the sheet on the ceiling
 The next row starts with half a sheet. The technology requires that the seams between the sheets do not intersect crosswise. Correct location slabs resemble brickwork.
How to cut drywall sheets
With a knife. It can be clerical. Mark exactly the middle and make a cut along the ruler. You probably still have a piece of the ceiling profile left - use it as a ruler. The cut can be shallow; it is enough to cut through the paper. Place the same profile under the cut or place the sheet on the edge of the table and break it. All that remains is to cut the paper from the back side.

If you need to cut a very narrow strip, it is easier to use a hacksaw.
The cut edges need to be chamfered additionally. This is necessary for high-quality putty. Using the same knife, cut off a few millimeters from the front side at an angle of about 45°. Precision is not required at this stage. Do not touch the factory longitudinal edges - their chamfer is already rounded.
Final finishing
Prime the ceiling with a roller or large brush. Using a small brush, carefully go over the seams.
After the primer has dried, apply tape. It is glued only to the junction of two factory seams, as well as to the corners. Immediately after this you can.
Mix a small amount of putty. At this stage, you only need to cover the seams and recesses from the screws. Apply the putty with a narrow spatula, then level it with a wide one.
According to the technology, the seams need to be puttied twice. So you will have to wait for the putty to dry, then apply a second, thin layer. But before that, be sure to scrape off all the burrs with a spatula (just don’t use much force).
Conclusion
Actually, that’s the whole article about how to mount a plasterboard ceiling. Save this page or print it and let it be your cheat sheet on how to install drywall on a ceiling.
Good luck with your renovation! In addition, watch a video selection on the installation of gypsum board structures.
Are you planning to make a plasterboard ceiling with your own hands? You can understand: this is a reliable and economical material, allowing you to bring into reality the most non-trivial design idea. In order for it not to work out, as in the immortal statement of Viktor Chernomyrdin - “We wanted the best, but it turned out as always” - it would be useful to familiarize yourself with the step-by-step instructions, which cover in detail all the stages of work for finishing the ceiling surface.
For convenience and clarity, we have provided it with 47 photos, so you will not have any difficulties understanding the material.
Preparing the premises

- remove all large objects and furniture that could potentially interfere with work and movement during the installation process;
- if it is impossible to carry out the first step, cover the furniture with film to protect it from construction debris, adhesive composition and dust;
- clean the ceiling of everything unnecessary: dust, small knots and everything that you are unlikely to get to in the foreseeable future after installation.
Tool preparation

How to make a plasterboard ceiling with your own hands correctly, so that later you don’t have to regret the crooked fit of the sheets and poorly organized lighting? That’s right, the key to successful installation is proper marking and necessary tools at hand.
First, we list everything you need to properly mark out the room:
- roulette;
- level;
- pencil;
- painting cord.
Now let’s touch on the mandatory set of directly necessary construction tools:

- hacksaw;
- perforator;
- screwdriver;
- scissors.

As you can see, you don’t need anything out of the ordinary to make a plasterboard ceiling with your own hands. A standard set of tools that can be purchased at any construction supermarket.
The only thing that can be added to this list, modest in every sense, is protective glasses. Still, some steps in our step-by-step instructions include operations that could potentially harm your eyes.
Compliance with safety regulations- this is the basis for performing any type of repair work, so take this recommendation seriously.
Preparation of material

In accordance with how you see your future gypsum board ceiling, prepare plasterboard sheets of the required size. Calculating the total area of the room is quite easy: the length is multiplied by the width, and the exact size of the pieces of material directly depends on the format plasterboard construction, which you want to see in your room.
You will also need:
- ceiling guide profiles UD;
- ceiling main profiles CD;
- direct universal hangers or any others in accordance with the layout;
- self-tapping screws;
- dowels
It should be remembered that UD profiles are attached to the wall along the perimeter, and CDs are inserted into them longitudinally with the required step according to the size of the plasterboard fragments.
Cost table
In order for you to have a rough idea of future expenses and be able to prudently adjust your budget, we offer you a small table that shows the average current prices for the materials used for finishing the ceiling with plasterboard.
| Name | Vacation unit | Price |
| self-tapping screws | packaging (200 pcs.) | from 120 rubles |
| gypsum board sheets | sheet(3 m2) | from 250 rubles |
| UD profile | PC. | from 40 rubles |
| CD profile | PC. | from 45 rubles |
| ceiling hangers | PC. | from 4 rubles |
| dowels | packaging (200 pcs.) | from 125 rubles |
Marking

Very simple but enough important stage, the correct execution of which determines the final result:
- find the bottom corner point on a concrete ceiling base;
- we make the necessary indentation, guided by practical considerations: how the lamps will be mounted, how many levels there will be in the final structure. Remember that there must be a certain margin of a few centimeters, otherwise making a plasterboard ceiling with your own hands will turn out to be very rough and unattractive;
- We put a mark using a level; if you have a hydraulic level at hand, then the problem of evenly transferring this line to the entire plane can be considered solved. If not, then you will have to use the painting cord we mentioned;
- We connect all the marks using this cord, achieving a perfectly straight line.

The final marking touch is to apply the so-called mesh, which will serve as a guide for the installation of prepared hangers. Observe the step between the lines, it is approximately equal to 50 cm.
This is what you should end up with.

If you see approximately the same thing on your ceiling, then congratulations: you have successfully completed the first stage of our step-by-step instructions.
Frame


If the markings are done correctly, then constructing the frame should not cause you any particular difficulties:
- start from the perimeter, securing the prepared UD wall profile at a given step (up to 60 centimeters);
- proceed to fixing the hangers - use dowels for this, and again the prepared hangers should be placed at the intersection of the longitudinal and transverse lines marked on concrete base mesh ceiling (see previous paragraph);
- prepare mortgages from bars for the chandelier, if one will be used indoors, and also run wires to the places where you plan to install spots and other types of lighting fixtures;
- insert the longitudinal CD profile into the grooves of the wall one and secure it with self-tapping screws. You should have them on hand, right?


If you didn’t know how to make a plasterboard ceiling with your own hands correctly, but followed the suggested step-by-step instructions, then half the way has already been safely completed. The creation of the frame is crowned by the installation of what is called battens , on which the plasterboard sheets will be attached.


Sheathing with plasterboard

Probably the most basic and uncomplicated step when installing drywall, which, however, will require help in the form of a couple of extra hands.


In order to speed up or even simplify finishing the ceiling with plasterboard with your own hands, use the help of your friends to fix the sheets on the ceiling. The fact is that you are unlikely to be able to secure sheets of drywall with self-tapping screws alone.

- start from one wall, systematically moving towards the opposite;
- installation of the last fragment is carried out by cutting the sheet in accordance with your measurements;
- lay the fragments in a joint, eliminating the appearance of any gaps or irregularities. If we are talking about the last sheet, then experienced experts still recommend leaving a small gap in this case.


Finishing


Step-by-step instructions on how to make a plasterboard ceiling with your own hands logically approached the post-processing of an already assembled surface. However, in terms of the number of micro-operations, this stage confidently pushes back all the previous ones:
- puttying joints and gaps;
- surface primer;
- decorative finishing.


The choice of implementation of the latter is solely on your conscience. Usually, to make a plasterboard ceiling more expressive, they use beautiful wallpaper, application decorative plaster, painting the ceiling base water-based paint. When choosing one solution or another, make allowances for the functional purpose of the room.


It goes without saying that for a kitchen or bathroom, where high humidity prevails and temperature changes are frequent, it is best to choose the most practical look finishing - painting with a reliable water-based emulsion.


Conclusion