Insulation of the loggia with mineral wool is carried out if it is connected to a room.
One of the most common materials for insulation is mineral wool. It is used for thermal insulation of attics, walls and other elements residential buildings. Mineral wool is an absolutely harmless material that is not afraid of fire and does not emit any toxic substances. When choosing this material for covering a balcony, you can reduce heat loss. Therefore, insulating the loggia with mineral wool will create a fairly comfortable atmosphere.
Scheme of actions for covering the loggia with mineral wool:
- cleaning the loggia from all sorts of things and debris;
- glazing;
- floor finishing work;
- headliner;
- wall insulation;
- electric installation work;
- installation of flooring;
- interior decoration.
Preparatory stage for insulating the loggia with your own hands
At the first stage, you need to clear the balcony room of all things. It is also necessary to remove the old wooden frames(if they were installed long ago), having single glazing, and replace them with more modern ones. To have warm loggia, it is advisable to install new double-glazed windows with two or three glasses.
The loggia can be insulated with inside and from the outside. To avoid condensation and moisture accumulation, it is recommended to insulate the balcony only from the outside, but there are cases when this is not possible (for example, so as not to spoil the architectural appearance of the building). Then insulation from the inside is assumed.
To do the work yourself, in addition to mineral wool, you will need roofing felt, special glue, a building level, and a stapler.
Insulating the loggia floor with mineral wool

To insulate the floor with mineral wool, wooden logs are first installed.
After clearing the floor surface of various debris, roofing felt is placed in one layer. The connection of the sheets can be sealed with sealant tape. Logs are installed on top of the roofing material in increments of 50 cm. The thickness of the beam is calculated as the height from the floor to balcony door minus the thickness of the floor covering, rough material and roofing felt. The joists are installed using building level, and are connected by bars.
Important! Before installation, the joists must be impregnated with a rot-resistant compound.
Do-it-yourself mineral wool is placed between the logs, which must first be cut into pieces equal to the size of the parts between the logs. When cutting cotton wool, it is advisable to wear a bandage so that its small particles do not enter the respiratory system.
Having laid out the mineral wool, a subfloor is placed on the joists, which is secured with self-tapping screws. At this point, the insulation of the floor temporarily stops, and work begins on the walls and ceiling of the loggia.
Ceiling and wall covering
The surface is carefully inspected to eliminate the possibility of cracks or crumbling plaster. All cracks are processed polyurethane foam, and sealed on top with sealant tape.
If the balcony ceiling forms a joint slab from the upper floor, then it is advisable to inquire whether the floor of the neighbor above is insulated. In the case of an insulated loggia floor, there is no need to insulate the ceiling. But, in order to be completely sure that the heat will not escape, you can still do the cladding work on your part.
The walls of the loggia are mostly double-glazed windows, which, of course, do not need to be insulated. But the lower part can be made of concrete or sheet iron. In this case, insulation is required.
A wooden beam 50x40 mm is attached to the walls and ceiling with your own hands. Installation should begin at the border of the ceiling and walls, after which, in increments of 50 cm, the beam is attached over the entire surface.
In case of installation of electrical equipment in the premises, it must be carried out at this stage.
Important! Switches and sockets installed on the loggia must be exclusively external.

Mineral wool is attached to the wall and ceiling using special glue.
Mineral wool, just like in the floor version, is cut into pieces equal to the size of the areas between the beams. Insulation with material begins from the ceiling. Mineral wool sheets are glued with special glue. The glue is applied very carefully, after which the sheets are pressed to the surface.
When preparing glue, it is important to make it of a certain uniformity and thickness. After all, very thick glue is not able to provide good adhesion to the surface. Liquid adhesive composition, on the contrary, can make work difficult because it has a low density. Therefore, the glue must be of such a consistency that when applied to a spatula, it does not drip.
Advice! Since mineral wool is a fairly fragile material, when gluing it is important not to push it through.
In the same way, mineral wool is attached to the walls. For the best adhesion, using a knitting wire, the mineral wool is secured with the staples of a construction stapler.
And you don’t have to make a room, since it’s already warm, so you can install all the sockets and switches on it.

After insulation, the walls can be covered with eurolining or plasterboard.
Having installed the insulation, you do the vapor barrier of the room yourself. It is necessary so that the mineral wool does not deteriorate under the influence of moisture, and the timber does not begin to rot. To do this, you can take polyethylene and apply it first to the ceiling, then to the walls. At the junction of the ceiling and the wall, polyethylene is overlapped. In places where sockets and switches are installed, the vapor barrier film must be cut slightly in order to insert electrical products into it.
After installing the vapor barrier, you can begin the final work.
At this stage, the ceiling is covered with clapboard or plasterboard with your own hands. Next, you can move on to the flooring. The walls are finished in the very last place, and in finishing material It is necessary to make holes for sockets and switches. At the end of the finishing, baseboards are installed.
The best insulation can be achieved by installing a convector in the room. Thus, not only will the heat not escape, but the optimal temperature will also be maintained.
Advantages of an insulated mineral wool loggia
In the new warm room you can make both a place to relax and a study. But in this case, it is necessary to plan the arrangement of furniture in advance in order to take care of correct installation sockets and switches.
Also, depending on the size of the loggia, you can arrange a dining room with beautiful view surroundings, or turn it into flower garden. That's why proper insulation with your own hands will allow the owner to fulfill all his desires.
Reading time: 8 minutes.
All residents of apartments with a balcony or loggia sooner or later think that it would be nice to insulate the room. In summer, you can relax or even sleep on the balcony without fear of freezing. But with the arrival of winter, use an uninsulated balcony as additional room It won't work anymore. In addition, if old windows in poor condition are added to the lack of insulation, the cold from the street makes its way into the room itself.
In order to rationally use the entire living area and save on heating, it is worth insulating the balcony. There are various Construction Materials for work of this kind. However, the most popular among them are mineral wool, which will be discussed in this article.
Advantages and disadvantages of mineral wool as a material for insulation
The name “mineral wool” combines several materials that are almost identical to each other both in structure and production technology. The properties of these materials are also similar, so they can be described as one whole.
Positive aspects of using mineral wool:
- excellent sound insulation, which will especially appeal to people living near noisy roads or in houses with large yards;
- insulation with this material can be done at any time of the year;
- The installation method is quite simple, so even a non-professional can handle it;
- good thermal insulation qualities;
- this material not subject to fire;
- light weight, which is convenient both for transporting material and for carrying out work.
In addition to a number of advantages, this material also has its disadvantages, which you should definitely familiarize yourself with before proceeding. repair work on the balcony.
Here are the main disadvantages of mineral wool:
- instability to moisture. When liquid gets in, the material simply deforms and crumples;
- Cotton wool tends to crumble when working with it, so you need to be careful. In addition, after completion of the work, a lot of small debris will remain, and additional time will be required for cleaning;
- You can work with this material only with special clothing, as well as goggles, gloves and a respiratory mask. And after installation is completed, you must immediately thoroughly clean the balcony using a vacuum cleaner.
Preparatory work before installing mineral wool
Before starting work, it is necessary to carefully prepare the balcony itself and assess its current condition. Otherwise, the installation may turn out to be of poor quality, and the insulation will not bring the expected effect.
The main stages of preparation for insulating a balcony:

Installation of insulation in the surface of the balcony
The process of insulating a balcony mineral wool occurs in several stages. It is very important to strictly adhere to each of them, since compliance with all rules is the key to quality and long service work done.
Such an insulated and heated balcony will help expand the area of the apartment: it can be turned into a full-fledged small room. Depending on the size, it can accommodate a couple of chairs and a table. It will work out cozy place for relax. True, in this case you will also have to take care of lighting.

Also, an insulated balcony is an excellent place for, and with the proper level of heating and sufficient area, you can make additional sleeping area. This solution will be especially relevant for small-sized and one-room apartments.
Insulation with rolled mineral wool is more difficult - but still possible, see how this is done in our video:
The development of the window industry has led to the emergence profile structures balcony frames that can effectively retain heat indoors, with a high degree of noise absorption from the street and protection from precipitation and dust.
In this regard, homeowners have a great opportunity not only use the balcony room for a comfortable exit from the apartment at any time of the year, but also use it as a living space. Many, having insulated the balcony with mineral wool or polystyrene foam, remove the balcony door leaf, thereby increasing the volume of usable living space. The resulting space is used for their own purposes - they take out a refrigerator, stove and cabinets onto the balcony or loggia, and make a workshop or office out of them.
To achieve the maximum effect of maintaining heat in the room, along with the right choice balcony frame, it is equally important to decide how to insulate the balcony from the inside, that is, choose insulation.
In the construction industry, two types of insulating materials are equally widely used - expanded polystyrene (foam) and mineral wool, each has its own technological advantages and disadvantages.
Fig. 1 Do-it-yourself insulation of a balcony with mineral wool
An internally insulated loggia or balcony belongs to the category of residential premises, so increased demands are placed on the insulation material. The main criteria for comparing polystyrene foam and mineral wool can be: following parameters materials:
Thermal conductivity
Insulation materials must be high degree live up to its name. Low thermal conductivity will not only save material, reducing the cost of its acquisition, but also thermal and electrical energy for heating, for which you have to pay. A less thermally conductive material will take up less volume with the same characteristics as its counterpart - this is important when used on a small balcony.
Environmental friendliness
The main requirement for all materials used in the decoration of residential premises, because health is most valuable.
Fire safety
For balcony insulation, it is important to be protected from matches or cigarettes falling from above, but their contact with an unprotected surface is unlikely - the insulation of loggias with mineral wool and polystyrene foam is subjected to surface finishing after installation. In case of fire, resistance to ignition and the absence of harmful and toxic release products when the material is exposed to direct fire or high temperature are equally important.
Soundproofing properties
Insulation mounted on the walls of a balcony or loggia affects sound absorption to a much lesser extent than a balcony frame, so the parameter is not so important.

Fig 2 Basalt mineral wool
Hygroscopicity and vapor conductivity. Insulation installed on concrete walls of balconies and loggias should not absorb or accumulate moisture from the slabs. Its vapor conductivity, which contributes to the ventilation of rooms, is not so important - the material is subjected to surface finishing.
Life time. The insulation should not decompose and lose its physical (shrinkage) and chemical (decomposition) properties over a long period of time and from exposure to climatic factors.
Ease of installation. The insulation material should be easy to process and install; it is desirable that its surface is even and smooth to simplify further finishing.
Biological stability. The material should not contribute to the formation of mold and mildew.
Price. The price of insulation for finishing a balcony is not so significant due to the low consumption of material due to the small area of the room.
Basic parameters of mineral wool

Rice. 3 Insulation of the loggia with mineral wool in rolls
The industry produces several types of mineral wool for insulating building facades and interior walls:
Glass wool
Made from thin glass threads 5 - 15 microns. 15 – 50 mm long, has a thermal conductivity of 0.038-0.052 W/m*K, resistant to high temperatures up to 450 C, does not burn. Currently, it is obsolete and is not used for household insulation due to its harmful properties– volatile, corrosive glass (work requires a respirator and protective clothing.)
Slag
It is obtained by processing blast furnace slag into thin fibers 16 mm long. and with a diameter of 4 – 12 microns. The material absorbs moisture well and is caustic, non-flammable, emits harmful substances, therefore it is not used for external insulation and in residential premises. It has a thermal conductivity of 0.46 - 0.48 W./(m.*K.) and can withstand temperatures up to 250 C, forms acid when exposed to moisture, corroding metal structures.
Basalt (stone) wool
Insulation made from mountain basalt from thin BTV (thickness 5 - 15 microns) or super-thin BSTV (thickness 1 - 3 microns) fiber is designed for use inside residential premises (insulation of floors, walls and ceilings), available in the form of rolls, mats or slabs

Rice. 4 Thermal insulation of the balcony floor stone wool in sheets
To insulate balconies, it is more practical to use 50 mm thick slabs, which are easily mounted on umbrellas or glue and are easier to exterior decoration Unlike roll types requiring a frame to be installed.
Basic specifications fine-fiber basalt slabs:
Thermal conductivity. The thermal conductivity coefficient of the stone slab is 0.46 – 0.48 W/(m*K).
Soundproofing. Fine fiber stone slabs have a maximum sound absorption coefficient of 0.80 - 0.95%.
Hydrophobicity. The structure of the board allows it to absorb moisture, which fills the air voids between the fibers without being absorbed into the material.
Flammability. The material is not flammable; the melting point of basalt fiber is about 1000 C.
Vapor permeability. Basalt mineral wool allows air to pass through well.
Biological and chemical stability. Basalt does not contain organic matter, which contributes to the formation of fungus and mold. The material is not affected by acids.
Treatment. The slabs are easy to cut with a hacksaw and adhere well to the walls; their surface, when applied with a mesh, perfectly holds plaster solutions.
Physical characteristics. Stone wool slabs have a density of up to 400 kg/cm. cubic, due to which they retain their geometry and are not subject to stalling and shrinkage.
Environmental friendliness. Like all natural materials basalt is harmless to human health.
Properties of foam plastic (expanded polystyrene)

Figure 5. Polystyrene foam structure
The material is pressed polystyrene foam granules with a diameter of 5 – 15 mm. Polystyrene foam consists of 98% air contained in granules; pressed slabs 30 or 50 mm thick are used to insulate balconies. with a density of 25 – 35 kg/m3. (this parameter is indicated in the foam plastic marking - PSB 15,25,35). The most dense grade of polystyrene foam PSB-35 according to GOST-15588-86 has the following physical characteristics:
Thermal conductivity. For foam plastic it is considered lower compared to mineral wool, its maximum value is 0.037 W/m*K.
Hydrophobicity. The material practically does not absorb water, water absorption is 2% of its mass.
Noise insulation. The material does not have a very high noise absorption rate, reducing its level by an average of 4 dB.
Temperature stability. Polystyrene foam is classified as a flammable material of class 3 - 4, its melting point is 270 C. It ignites at a temperature of +491 C. and does not support combustion, having a self-extinguishing time of about 4 seconds (for fire resistance, antiprene is added to its composition, indicated in the marking with the letter C) .
Resistant to chemicals and bacteria. The material is resistant to most household chemicals and does not support the formation of mold and colonies of microorganisms.
Environmental friendliness. According to the manufacturer, the material is inert and does not emit substances harmful to health. There is another opinion, according to which polystyrene foam releases styrene and a lot of harmful substances during oxidation.
Installation. Foam plastic is perfectly processed, its flat and smooth surface is good for applying finishing materials.
Price. Polystyrene foam is 2 - 2.5 times cheaper than mineral wool.

Rice. 6 Insulating the balcony floor with foam plastic from the inside
When deciding what is better to insulate a balcony - with polystyrene foam or mineral wool, in the case of concrete walls you can give preference to dense foam plastic (PSB-35) - the material is cheaper, can be easily processed and finished, and has lower thermal conductivity. In addition, basalt wool when installed on concrete plates without a vapor barrier, it can absorb moisture from them - this significantly reduces its heat-protective parameters.
If you are insulating a balcony with a metal fencing grid, it is preferable to use stone wool, which has high sound-absorbing properties.
Winter is approaching and it's time to think about insulating your home. Owners of loggias glaze them en masse, and this allows not only to get comfortable additional space, but also to protect the apartment from the cold. The next stage after glazing the loggia will be the installation of a heated floor. Insulating the floor on a loggia or balcony with mineral wool can be easily done with your own hands.

Let's consider the construction of such a floor. How to insulate? Mineral wool will be used as insulation. This is a very practical insulating material that has the following qualities:
- high thermal insulation properties;
- environmental friendliness;
- ease of work;
- affordability.

A warm floor for a loggia with mineral wool insulation has the following design: the first row is transverse beams, on which longitudinal beams are laid, and the subfloor is attached to them. For the subfloor, chipboard is used, which in this case is optimal material for the loggia, because it is not subject to deformation and does not swell with changes in temperature and humidity.
It should be noted that this option for installing an insulated floor is well suited for glazed but not heated permanent loggias, i.e. having enclosing walls.
Floor installation, determining the amount of materials
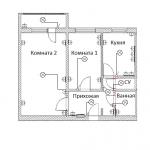
In order to quickly and successfully cope with a task, you need to have clear plan. In this case, this is the plan of the loggia. We measure the length and width of the loggia, as well as niches and projections, if any.
Scheme of beams layout
On the plan of the loggia we determine the layout of the transverse and longitudinal beams. In doing so, we adhere to the following rules:
- the bottom row consists of transverse beams, which are laid out along the loggia, the step between the beams is 40-60 cm;
- the top row consists of longitudinal beams located along the loggia; the distance between the longitudinal logs should be no more than 45 cm.
In standard loggias, it is enough to lay three longitudinal beams. If the loggia has a width of 1.2 m, then you can lay the outer beams at a short distance from the walls: 10 cm from interior wall and 20 cm from the loggia fence. The length of the longitudinal beam can be 10-15 cm shorter than the length of the loggia (5-7 cm on each side).
Floor structure height
It is important to correctly determine the height of the floor. For good insulation It is enough to make the floor 10-20 cm thick. You need to check how the floor will fit the threshold of the balcony door and match it in height. In this case, it is necessary to take into account all the elements that make up the structure: the height of the transverse and longitudinal beams, the thickness of the subfloor (chipboard) and the thickness of the finishing coating.
In order to achieve the desired floor height, you can choose the appropriate timber height and chipboard thickness. It must be remembered that the thinner the chipboard thickness, the smaller the distance between the longitudinal beams should be. The recommended chipboard thickness is 18 mm, the recommended height of the upper (longitudinal) row of beams is 70 mm. The height of the bars of the first row is 50-70 mm. For accurate counting required amount of floor materials, you can
After drawing up the layout of the beams, it is determined required amount material for the floor frame. The amount of chipboard is determined based on the floor area and the width of the loggia. Having decided on the size of the chipboard sheets, you can immediately order them to be cut in the store.
To install the floor you will need:
- timber 50x70 (or 60x40, 50x50) mm depending on the height of the structure;
- sheet chipboard with a thickness of 18-20mm;
- mineral wool;
- frame anchor 112 mm long;
- self-tapping screws 70 mm and 40 mm long;
- mounting wedges;
- drill;
- screwdriver;
- level;
- construction knife;
- polyurethane foam;
- protective glasses;
- gloves.
Step-by-step instructions for insulating the floor on a loggia with your own hands
Step 1. Preparation. Before you begin installing the floor, the loggia must be thoroughly cleared of debris and dust. If there are large holes in the floor, they need to be repaired with repair mortar. The floor of the loggia should be relatively flat and horizontal.

Step2. Laying cross beams (logs). We cut the bars to the required length. The length of the log is equal to the width of the loggia minus 2-3 centimeters.


First, holes with a depth of ¾ of its height are drilled in the beam at the fastening points.

Then, using a drill or hammer drill, a hole is drilled in the concrete corresponding to the length of the anchor.

Then the anchor is inserted into the hole and tightened. In this case, it is necessary to press the beam tightly to the floor with your hand and knee and use a screwdriver to tighten the anchor.

The distance between fasteners should be 60-80 cm; in a standard loggia, two fasteners for each beam are sufficient. As a result, the crossbars must be tightly attached to the base ( balcony slab). There is no need to level the logs of the first row.
Step 3. Laying longitudinal beams. The longitudinal beams are laid on the crossbars so that the distance between them does not exceed 45 centimeters. For standard loggias, three longitudinal beams are sufficient.

If the width of the loggia is 120 cm, then the beams are laid at a distance from the walls: 10 cm from the inside and 20 cm from the outside. Thus, to install a floor in loggias up to 1 m 20 cm wide, it is enough to also lay three longitudinal beams.

Step 4. Fastening the longitudinal beams and leveling the horizontal level of the subfloor. Let's start laying the second row. At the same time, when laying the second row, the top of the longitudinal joists will be leveled “under level” in order to obtain the correct horizontal plane of the subfloor.
To do this, it is enough to align the horizontal level of the two outer logs. The central joist will be exposed later.
First of all, you need to determine the highest point. The horizontal level of the entire subfloor will be set at this point.

Using a level, we find the highest point on the two outermost joists. At this highest point we secure the longitudinal beam to the transverse beam using a self-tapping screw.
Now the level of the top of the longitudinal joists will be “adjusted” to this point. Consistently, moving from crossbar to crossbar, the timber is leveled and secured to each crossbar with self-tapping screws.

To fix the required lifting height, mounting wedges are used.

Mounting wedges
For clear fixation, mounting wedges must be placed on both sides of the beam so that it does not wobble.

After the first beam is leveled, we proceed to leveling the second outermost beam.

The timber is leveled using fixing mounting wedges
Using the level it is determined required height timber placement.

Then the beam is fixed with mounting wedges and attached to each crossbar with self-tapping screws.
As a result, we get a perfectly leveled horizontal plane for the subfloor. All that remains is to install the middle beam. Any crossbar is installed on the two outer beams. The middle beam is brought under it, its position is fixed with mounting wedges and the beam is attached to the cross member with self-tapping screws.

The subfloor frame is ready.
Step 5. Laying mineral wool insulation. The surface between the joists is cleared of possible debris. Mineral wool insulation is carefully placed between the joists.

To get the pieces the right size, the cotton wool is cut with a construction knife. The cotton wool should be laid so that it is tightly adjacent to wooden frame. In order for the insulation to be more effective, it is recommended to lay the wool in two layers, so that the total thickness of the insulation layer is 10-15 cm.

Step 6. Laying chipboard. Chipboard sheets are attached to the timber with self-tapping screws. The sheets should be laid so that there is a gap of 2-3 mm between their ends.

This gap allows the sheets to move freely relative to each other when walking and not make creaking sounds. There should be a gap of up to 1 cm between the wall and the chipboard.
When attaching chipboard to the joists, you need to pay attention to not deform the sheet when working with your own weight. To do this, you need to stand on the logs so that the attached sheet does not sag.

Step 7. Sealing the joint around the perimeter of the subfloor. For normal operation of an insulated floor, it is necessary to ensure the possibility of ventilation of its structure. For this chipboard sheets are not brought to the walls at a distance of 1 cm. But in this way a gap is formed through which debris can fall down or particles of mineral wool can fall from under the floor into the loggia. To protect yourself from possible mineral wool getting into the loggia, the joint between the wall and the chipboard can be foamed with polyurethane foam.

But it is not necessary to seal the joint. It will be possible to simply close this gap with a plinth after laying the finishing coating.
Step 8. Finish floor. According to the finished subfloor Now you can lay the finishing coating. It could be linoleum or parquet. But it’s better to lay the finishing floor after all finishing works on the loggia.

Video is the basis of the article:
This video served as the basis for this article.
We also recommend:
Almost every modern city apartment has the opportunity to expand the living space by using additional area balcony or loggia. To do this, you will need to carry out work to insulate cold glazing, floors and ceilings. It will be useful for anyone who is faced with the need to solve this problem to learn about the technologies, methods, stages, and materials that will be required for this.
Insulating the balcony expands the living space in a city apartment
Polystyrene foam and mineral wool
Two technologies are used for preparing cold and glazed rooms in the apartment:
- Balcony insulation with mineral wool.
- Using polystyrene foam () for the same purpose.
Both approaches pursue one goal - creating a thermally insulating and hermetically sealed shell on the loggia or balcony, which, like the walls of a thermos, prevents heat loss. To achieve this, several related problems are solved:
- Installation of vapor barrier.
- Protection from atmospheric moisture.
- Ensuring the durability of the protective layer.
- Maximum saving of usable area.
- Finishing.
Similar goals and objectives determine the similarity of their technical solutions.
The problem of choice: what is better to insulate a balcony or loggia, with polystyrene foam or mineral wool?
 Mineral wool - universal insulation
 In terms of costs and labor costs, both methods have insignificant differences that can be neglected. The difference will be noticeable only after achieving the result. Thermal insulation made on the basis of foam plastic will completely block the access of air. If the balcony is on the sunny side, then closed windows and doors, in clear weather it will turn into a hot greenhouse and stale air and condensation will accumulate there all the time. The stuffy room will have to be ventilated periodically. provides minimal “breathing” internal space, therefore, with proper installation of insulation based on it, the microclimate in the room will be more favorable.
Advantages and disadvantages
With all the advantages modern insulation based on foam plastic, professionals still advise using mineral wool to insulate balconies. This is due to the following advantages of this material:
- Better isolates the room from street noise.
- Does not require a perfectly smooth surface of the walls that need to be insulated.
- Combines with breathable materials such as wood. That's why open balcony Before installing it, you can cover it with clapboard.
- Resistant to impact high temperatures and does not burn when in contact with an open flame.
- When installed correctly, it reduces the likelihood of random cold bridges to a minimum.
- Provides weak convection and prevents long-term accumulation of stale air.
Mineral wool also has disadvantages compared to penoplex and similar foam-based materials:
- Thermal insulation properties are 10-15% less. Therefore, for similar indicators it will be necessary to install a slightly thicker layer of material, which negatively affects the reduction of usable space.
- The total mass of the thermal insulation coating is 2 times greater.
- The installation process is more demanding in terms of experience and skills.
- Installation technology requires additional operation installation of vapor barrier film.
- The material is a source of dust harmful to breathing, so to work with it it becomes necessary to use a respirator.
- More stringent technological requirements, since their violation can lead to irreversible losses thermal insulation properties and the entry of harmful dust into the living space.
Features of work when insulating balconies
 Insulation of a balcony or loggia with mineral wool - step by step process
 All work on mineral wool insulation can be divided into several stages:
- Insulation of side walls, floor and ceiling.
- Installation of flooring.
- Replacement of cold glazing (if any) with warm one.
- Final decorative finishing.
Before carrying out work, it is necessary to immediately resolve the issue with warm glazing. The fact is that now balconies and loggias in new buildings in most cases have cold glazing. On upper floors most often there is a complete finishing of the facade with an aluminum profile. On the lower floors such structures are installed at half the height of the balcony.
How to insulate aluminum windows with partial or full glazing on a balcony?
 Insulation of aluminum windows on the balcony
 The most in a budget way Insulation of an aluminum balcony in a new building is the installation of multi-layer plastic double-glazed windows on the existing profile. If the aluminum structure is installed from floor to ceiling, then in order to save money, instead of the bottom row of double-glazed windows, façade panels, which are insulated from the inside in the same way as the side walls and ceiling - with mineral wool or polystyrene foam. Pasting a cold single-layer structure will only be insufficient for both heat retention and good insulation from street noise. The junctions of new multi-layer double-glazed windows with the aluminum profile are filled silicone sealant and vilatherm.
Features of insulation of aluminum windows
 Insulation of aluminum profile
 After installing the warm frames, all junctions and cracks are treated with polyurethane foam:
- The sealing process is carried out especially carefully in the junction area aluminum construction to the wall, floor and ceiling.
- For additional protection In these areas, plastic or metal strips are installed.
- Before foaming, the gaps between the profile and the wall can be filled with vilatherm.
- On the outside, a vapor barrier is glued to the treated joints reinforced tape, one of the layers of which is aluminum foil.
- If the lower part of the aluminum structure is covered with sheets of glass magnesite, then it can be covered with a stenophon or similar means. It is well held with double-sided tape and provides high level heat and sound insulation.
- The inner surface of the aluminum profile is covered with wide strips of vilaform, on which the ceiling profile is installed as clamps.
- When installing clamps, flashings and Vilaform tapes, it is necessary to take into account the distance that the insulation of the walls, floor and ceiling will occupy.
Insulation with mineral wool yourself
 Calculation of material before carrying out work on balcony insulation
 Read on topic -. How to fasten, lay and glue.
- Wooden beam 60 cm. Its quantity depends on how many layers the protective layer is planned to be made.
- To lay a layer 10 cm thick, it is recommended to use 5 cm thick cotton slabs and form a second layer from them, where the blocks are located perpendicular to the direction of laying the first layer.
- Glue for gluing protective blocks and vapor barrier film are purchased based on the total area of the insulated surface.
Preparation for installation of mineral wool slabs
 Installation of sheathing for laying mineral wool
 The floor, side walls, ceiling and parapet (if any) are covered with mineral wool slabs. Blocks insulating material are placed inside a wooden sheathing. Its installation has the following features:
- Thickness wooden beam– 50-60 mm.
- The vertical or horizontal arrangement of the beam is determined by the design and shape of the decorative panels finishing and how to install them.
- Wooden elements are attached using self-tapping screws and dowels to concrete or a brick wall.
- The gaps between frame elements for mineral wool blocks should be smaller sizes these blocks by 1-2 cm for a tighter fit.
- With a two-layer method of laying thermal insulation, the frame beams of the second layer are laid perpendicular to the sheathing of the first layer.
Mineral wool adhesive
Using special glue on cement based allows you to completely block the movement of air between the insulated surface and the insulation. Full gluing of the two-layer protection, when the blocks are laid perpendicular to each other, allows you to create a dense monolithic barrier without random cold bridges. Additional fasteners for blocks can be fungi - dowel nails with wide washers.
Vapor barrier
 Installing a vapor barrier when insulating a balcony with mineral wool
 Roll vapor barrier material unroll along the insulated surface on top of the layer of stone wool. The material is attached using a furniture stapler to wooden elements frame. The butt overlap must be at least 10 cm. The joints are additionally sealed with double-sided tape. The junctions of the vapor barrier film to the ceiling, walls, floor and window profile are covered with sealing, moisture-proof tape.
Installation of counter beam
The counter beam is used to fix the panels decorative finishing. Before installation, it is applied to its surface, which should be adjacent to the vapor barrier coating. Double-sided tape. Fixation is carried out using self-tapping screws to the sheathing elements located behind the vapor barrier layer.
Insulation on the floor
 Insulating the floor with mineral wool on the loggia
 To install the frame under the floor insulation, a wider beam of 50X100 mm is used. It is recommended to make the step between the lags the same as that used when installing wall and ceiling cladding. For slabs with a width of 60 cm, it is necessary to take a step of 58-59 cm for a tighter fit. Flooring can also be done in 2 layers. For installing 100 mm thick mineral wool insulation. It is allowed to place 2 layers of 50 mm each with mutually perpendicular arrangement of blocks. Before installing plywood or fiberboard, a vapor barrier film is applied to the thermal insulation layer and attached using staplers. All joints of the vapor barrier material are overlapped and glued using double-sided tape.
Finishing the floor
On frame joists, closed vapor barrier film, plywood sheets or boards are laid and fastened with self-tapping screws. It is recommended to make the flooring two-layer, when the elements of the second layer are laid across the elements of the first. Only after this will the linoleum, laminate or parquet laid on top last a long time.
Internal cladding of walls, ceilings and parapets
The choice of decorative panels for finishing an insulated balcony is very wide:
- Drywall.
- Siding.
- Lining.
- Decorative plastic panels.
If the insulation and vapor barrier layer were installed correctly, then no facing coating will suffer from temperature changes, moisture penetration, or ice. Interior an insulated balcony becomes completely habitable and can be used as such all year round, which increases the total living space of the apartment.
Interior finishing of insulated glazing
Metal clamps on aluminum profile covering the layer of vilaform or other insulation is lined with plastic decorative panels With the right shades, or for painting. Multilayer double-glazed windows become full-fledged apartment windows, so the balcony doors do not need to be closed.
Types of mineral wool and their features
Completely insulating a balcony with mineral wool does not always help make a new room warm and cozy. Stone or basalt wool is better suited for this purpose. interior decoration premises. Its fibers are created from molten rocks and are held together with a special synthetic composition that does not emit harmful substances in dangerous quantities. The thermal insulation properties of such material are the highest, compared to more cheap options- glassy and slag-like.
Is it possible to use glass wool to insulate a balcony? Despite the low cost of this product, insulation based on it will not be able to make a new room completely residential. Even a thick layer will still let cold air in, and glass dust will definitely get into the atmosphere.
Available technology
 Finishing the loggia with clapboard after insulation with mineral wool
 Transforming a balcony or loggia into a full-fledged one living room using mineral wool insulation does not require special skills and is done with ordinary household tools:
- Hammer drill.
- Screwdriver.
- Bulgarian.
- Hacksaw for wood and metal.
- Pliers and side cutters.
- A set of screwdrivers, a furniture stapler and a stationery knife.
For accurate work you will need a tape measure and a level. To protect against harmful dust, you can use not only a professional respirator, but also an ordinary cotton-gauze bandage. It is best to work with mineralized wool while wearing construction gloves. After its blocks touch open areas skin, it is enough to wash off all traces of it with soap in time to avoid allergies and skin itching.