Drywall has been a fairly popular material in construction and renovation for many years. Walls, niches, arches, ceilings and, of course, ceilings are erected from it. Sheets of plasterboard in the hands of a master can easily turn into a reliable, durable and at the same time stylish, beautiful and original ceiling structure. In addition, there are quite a lot of options for designing a single-level or multi-level ceiling, it all depends on individual preferences and proper installation.
Finishing with plasterboard allows you to decorate ceiling surfaces in almost any style. The shape of the lines, the presence of individual blocks, figured elements - all these elements are determined by the design sketch. However, there is a fundamental base part, which consists of three types of ceiling structures, namely: 
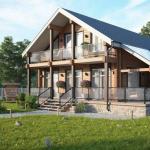
Single-level plasterboard ceiling
A ceiling surface of this type can simultaneously be either a ready-made structure or serve as a basis for the construction of a more complex ceiling. The construction principle is quite simple. Initially, the metal frame is attached, then, if necessary, electrical installation work is carried out, then the gypsum board frame is covered, and the final stage will be finishing (painting, plastering, wallpapering, etc.) 
Single-level ceilings have a number of advantages, including:
- the ceiling surface, lined with plasterboard in one level, does not lose original appearance even with general movement foundation;
- when making a single-level ceiling, the space between the rough and front surfaces is significantly saved;
- high degree of surface leveling, good way hide all irregularities and defects of the original ceiling;
- excellent heat and sound insulation;
- ease of installation and subsequent maintenance.
Two- or three-level ceilings
They are built on the basis of a single-level ceiling surface. The basic principle is that the lower the level of plasterboard sheets, the smaller their total area, while the installation of each next level occurs on the basis of the previous one. All levels must be combined with each other not only from a technical point of view, but also from an aesthetic point of view, without causing visual discomfort.
Main types multi-level ceilings distinguish: frame, diagonal and zonal. 
Complex ceiling structures
Outwardly, they are quite similar to multi-level structures, but their structure is more complex, as it can include figured and patterned elements. In particular figured ceilings predominantly have individual or group convex elements. The abstract appearance of a complex plasterboard ceiling implies the presence of spiral structures, and very often with finishing different colors are used. A “floating ceiling” involves installation using fittings and metal pins, as well as specially planned lighting to create an airy volume. 
Plasterboard structures on the ceiling
Decorating the ceiling surface using plasterboard is a fairly variable method, but does not require any special technological difficulties. Even a novice craftsman can independently build both single-level and complex plasterboard ceiling structures; all you need to do is purchase required material, the corresponding “toolkit” and remember the basic technological provisions.
Required Tools
In order for the installation of plasterboard to proceed without any problems, the master must take care of such tools as:

Necessary materials
In addition to the main component element - plasterboard sheets, you will need ceiling, guides and load-bearing metal profiles, direct suspension, sealing tape, connectors, profile crabs, dowels and screws.
Marking and surface preparation
In order for the future drywall new ceiling turned out to be smooth, without distortions or deviations from the planned sketch, before the immediate start of installation, it is necessary to make preliminary markings of the ceiling surface.
The main purpose of such marking is to draw a common horizontal line along the perimeter of the walls under the ceiling to further obtain a flat ceiling surface. A secondary task will be the additional application of parallels to the concrete or wooden base. It is along these lines that the supporting profile will be attached. 
As a rule, the general horizontal is located below the ceiling surface at a level of 8 to 15 cm. given value depends on the evenness of the rough ceiling, as well as on the complexity of the degree of concentration of communications that will be located in the space between the concrete (wooden) surface and the plasterboard sheets.
When drawing parallel lines on a rough ceiling, a certain step between them should be observed. Its recommended size is 50-60 cm. It is also worth carefully observing the parallelism of the drawn lines not only among themselves, but also relative to the line of the walls.
If the area of the room being repaired is small, then to control the correct application of the appropriate markings, you can use either a water jet or an ordinary one. building level. However, if the ceiling surface area is quite large, then it is more advisable to use a non-leveler or laser level. 
Features of frame construction
Construction frame structure must be made taking into account many technological requirements so that the future ceiling is not only smooth and beautiful, but also durable and safe. To do this, you should only follow a certain list of professional recommendations. 

Drywall installation
The installation technology is simple, does not require special knowledge and skills, you just need to remember the basic provisions.

When constructing ceiling structures from plasterboard, the latter very often has to be cut due to the specific area of the room or the design nuances of the sketch itself. In order to cut gypsum boards correctly and without unnecessary damage, several general rules should be followed:

Simple installation, a minimal “tool” and “material” set, simple maintenance and a relatively low cost have made ceiling structures quite popular for finishing for many years. ceiling surfaces premises for any purpose.
There are no similar posts, but there are more interesting ones.
A plasterboard ceiling is known as a decorative and technically convenient element of a living space. Technical convenience plasterboard ceiling in closing engineering communications, hiding the insulation system and the ability to quickly level the main ceiling. A variety of plasterboard ceiling designs allow you to significantly change the design of the room by making illuminated ceilings, two-level ceilings, and figured ceiling structures.
Of course, it is worth noting that plasterboard ceilings require finishing. Unlike other ceiling structures, it needs to be puttied and painted, which can be inconvenient due to timing or other reasons. It is much easier to choose a ceiling from ceiling panels PVC. PVC panels do not require finishing. They are completely ready for installation and come in a variety of colors and designs. In addition, PVC panels are not afraid of moisture and can be installed on the balcony, in the bathroom and other wet rooms of the house and apartment. On this site you can find out everything about PVC panels.
However, despite all this, a ceiling made of plasterboard and a ceiling made of PVC panels have different tasks and no one forbade them to be combined. One to hide communications, the other to do a quick finish.
Choosing the type of plasterboard ceiling

When making a hard ceiling with your own hands, you would need a guide profile (PNP 20/27) around the perimeter of the room. Its length can be calculated by the length of the perimeter of the room plus 10% margin. This profile is not needed in this floating ceiling design.
The main structure of the floating ceiling frame is a kind of grid of ceiling profiles (PP 60/27). Some of these profiles will be attached to hangers (they are called main). The second part of the profiles will be attached to these profiles (they are called load-bearing). The name is load-bearing due to the fact that sheets of drywall will be attached to these profiles.
In technologies for working with plasterboard, intersecting ceiling profiles can be connected in one level (end-to-end) or in two levels, overlapping one on top of the other.
- The first connection is called a single-level connection of ceiling profiles and it is made with special “crab” type fasteners.
- The second connection is called two-level and it is made with a special two-level profile connector.

In the design of a floating ceiling, only a two-level connection of profiles is used!
I repeat and this is important. In the design of the plasterboard ceiling frame, two types of profiles are clearly separated. Some profiles are called main, the second are called load-bearing (load). The main profiles are attached to the sub-ceiling, and the load profiles bear the load from the weight of the drywall attached to them.
Important! In a two-level frame, the main profiles are located at the top of the structure, and load-bearing profiles are attached to them.
Plasterboard ceiling fastening material
For any type of plasterboard ceiling, you will need fastening material:
- Screws type: TB
- Screws type: LB (bugs)


Be sure to purchase soundproofing tape like Dichtungsband. She sticks to external parties rigid profile shelves suspended ceiling, for sound insulation and deformation compensation.
Purchase of drywall
Purchased for the ceiling next type plasterboard sheet:
- For dry rooms: GKL.
- For wet rooms: GKVL.
Tool preparation
For work, prepare the following tool:
- Laser level;
- Hammer;
- Hammer;
- Knife for cutting hyposcraton;
- Screwdriver Set;
- Metal scissors or cutting machine;
- Painting tool.
DIY plasterboard ceiling - marking
- When making a plasterboard ceiling with your own hands, it is important to make the markings correctly. You need to start work by cleaning the old ceiling and top of the walls from old building material. If necessary, the walls are strengthened with building mixtures.
- We begin work by marking the ceiling. Marking is best done using laser level.
- We apply the lower level of the ceiling along the perimeter of the room.

On the ceiling we mark the places for attaching the suspensions, taking into account the distances from the outer profiles to the walls (at least 100 mm) and the distances between the main profiles (at least 600 mm).

For accurate marking, we mark the location (fastening) of the suspensions on the marking lines. To mark, we use a construction marking cord and, with the help of an assistant, we put the markings on the ceiling.

Installation of hangers
- According to the markings made, we install the suspension rods using dowels with screws or other fasteners.
- On the installed rods, at the same level, we attach clamps with hangers for the profiles.


Ceiling frame installation
We begin installing the ceiling frame with our own hands by installing the main profiles. They are secured with a suspension as follows.

- We attach load profiles to the main profiles. We connect them to the main profiles with a two-level suspension.
- We maintain technological distances between profiles.


Important! When making a plasterboard ceiling with our own hands, we constantly measure the horizontality of the profile levels. If necessary, adjust the level using clamps on the rods. In the photo, this adjustment is shown with arrows.

Upon completion of installation of the frame, we once again check the horizontality of the entire structure in different directions.

Covering the frame with plasterboard
Gypsum craton sheets are attached to the load profiles with TN self-tapping screws with a pitch of 150 mm. You will need an assistant or device to support the sheets. You can make a device for supporting sheets with your own hands, for example, a T-shaped support made of wooden slats.
Most builders note that when renovating an apartment or house, one of the most difficult processes is how to make a ceiling from plaster or any other material.
The unevenness of various tiled floors, the fact that the angles almost never correspond to each other, and many other details hinder the quick completion of work. It is quite difficult to hide all these shortcomings today. And it’s not so much difficult as it is expensive.

This article will discuss step-by-step instruction for installing a plasterboard ceiling, which has a huge number of advantages, ranging from ease of installation to reasonable prices.

What tools will you need?
If you are thinking about how to make a plasterboard ceiling with your own hands, then first of all you should do various preparatory work for the main process, namely: it is important to purchase the necessary quick installation ceiling building materials, and prepare all the tools.

To install yourself two-level ceiling from plasterboard you will need:
- A water-type level in order to accurately mark the place where the guide level will be installed.
- For quick drilling of various holes, use any hammer drill.
- Scissors that can be used to cut metal.
- "Bulgarian".
- Screwdriver for fastening gypsum boards, as well as profiles.
- Roll
Frame installation
The first thing to do is to choose a place for future marking of the place where the guide profile will be installed. Marks should be applied after the water in all containers is at the same level.

Exactly how many centimeters to retreat from the construction ceiling is up to you, but most builders suggest looking at a photo of a plasterboard ceiling to understand that the distance should not be less than ten centimeters.
After completing the first stage of work, that is, after markings have been made on each wall, you can proceed to drilling several holes for dowels. A hammer drill is used for this.

After completing the installation of the guide profile, using the prepared tape measure, you need to make marks right along the perimeter with an average interval of approximately 60 cm.

If you want to do enough simple design, consisting of only one level, then there is no need to install popular C-shaped profiles in two directions at once. It is enough to mark only on two opposite sides.
After this, you can proceed to attaching the suspension. After completing the installation of all direct hangers, you can proceed to installing the ceiling profile and then covering the ceiling with sheets.

Ceiling decoration
Today we offer a huge number of the most in various ways ceiling decoration. Thanks to the active development of the construction industry, you can find many different decorative materials which will allow you to decorate the ceiling.

Everything will depend solely on taste preferences and financial capabilities. Some people prefer plaster casting, and someone is delighted with foam baguettes.

You should not pay attention to various fashion trends, since they quickly pass, but you will definitely have to live with a new renovation for more than one or two years.

It is important that the ceiling gives you exceptional joy from looking at it and creates a feeling of comfort in the room.
Once you have decided what your ideal ceiling looks like after renovation, it is important to evaluate whether you can afford it. financially, and if the answer is yes, then you can safely go to the store building materials and choose something that will quickly make your dreams of an ideal ceiling come true.

There is nothing difficult in the technology of creating suspended ceilings using plasterboard.
You just need to remember that before doing anything, you need to think several times, since such a ceiling is not set for a year or even for five years.
Note!


Photo of a plasterboard ceiling


Note!


Plasterboard is the best modern material for finishing walls and ceilings, erecting partitions, creating arches, niches in absolutely any room, both in the bathroom and in your living room. It's hard to imagine modern design without drywall, because in two or three days you can cover a spacious room yourself, easily coping with unevenness, ledges and cracks in the walls. In this article we will tell you about the design of a plasterboard ceiling.
Suspended ceiling on a metal frame
A suspended plasterboard ceiling is one of the most affordable options for improving the sound insulation of ceilings and walls, emphasizing the design of the living room, or making the ceiling perfectly flat.
A single or multi-level plasterboard suspended ceiling can be mounted on a metal frame. This option is one of the most common and popular all over the world. Metal profiles allow you to assemble any composition or figure, and the simplicity and simplicity of installing suspended ceilings gives even novice craftsmen a chance to do this. This ceiling will add a unique design to any room. No special instructions are required for this.
Return to contents
Materials used for assembling suspended ceiling structures
To construct a suspended ceiling in the living room, you can purchase ready-made ceiling modules or special 8 mm thick plasterboard ceiling sheets, as well as a guide profile with a cross-section of 27×28 mm and a rack profile with a cross-section of 60×27 mm.
Return to contents
Tools required for installing a metal frame and attaching drywall:

- screws or nails;
- dowels;
- metal mounting brackets;
- construction knife for cutting;
- hammer;
- putty knife;
- electric drill;
- a set of screwdrivers with straight and Phillips notches;
- metal scissors;
- screwdriver;
- laser level;
- tape measure and pencil.
Return to contents
Ceiling marking instructions
Work on arranging a suspended ceiling should begin with determining the exact dimensions of the ceiling to calculate the required material.
You need to choose the design of the ceilings, decide how far the new ceiling will go down from the base floor of the living room. Having decided on the distance from the base floor and having found the lowest angle, you need to mark a mark on the wall; all other marks will be made from it.

Using a laser level at a height, mark the walls of the room with an even horizontal line along its entire perimeter - these are the boundaries of the ceiling, or the depth to which it will fall below the base ceiling. Usually the value is 10-20 cm, but not less than 3-4 cm. You should not make a mark closer to the base ceiling, as there will be a problem with installing the hangers. This gap will make it easier to make new electrical wiring. This is the first mark equal to the future ceiling height. Mark a horizontal line on the wall with a pencil.
A guide profile will then be attached along this line, so its marking should be treated with due attention; the evenness of future suspended ceilings depends on it. When using a regular level, keep in mind that it gives a small error. An indicator of the correctness of the marking will be the perfect coincidence of the horizontal line at the starting and ending points.
Next, you need to mark the ceiling for the main guides, first mark the center of the room - this will be the axis, in all directions from which you will then need to draw parallel lines at a distance of half a sheet of drywall.
Return to contents
Calculation and planning of work
Before proceeding with the installation of ceiling profiles, it is advisable to draw up a design future design on paper in the form of a sketch with all the necessary dimensions. When drawing up a design project, applying dimensions and cutting, you must constantly take into account the thickness of the sheet.
The simplest is design and installation single-level ceiling when all profiles should be mounted on the same level. The calculation is easy to perform and does not require special skills. The ceiling design can be either single-level or multi-level. Having understood the technology of installing a simple single-level suspended ceiling, it will not be difficult to learn information on how to assemble a multi-level ceiling.

The metal frame for attaching plasterboard to the ceiling is usually made of a metal profile with a cross-section of 60×27 and 27×28 mm.
Installation of the frame should begin with fastening the wall plinth corner. It has the form of a 3 m long strip; for these purposes you can use metallic profile cross section 28×27 mm. It must be secured around the perimeter of the room strictly horizontally along a pre-designated line. The recommended step for attaching the plinth corner is 400 mm. To install a vertical step, you should have vertical racks frame at the required distance from the wall and fasten 30-40 cm from each other.
The next stage of installation is the installation of direct hangers; a profile with a cross-section of 60×27 mm will be attached to them, onto which soundproofing tape must first be glued. The profile can be fastened with ceiling dowels in increments of 2 pieces per linear m. The number of direct hangers can be calculated using the simplest formula: divide the ceiling area by the area of the slab and divide the resulting amount by 2. When installing a suspended ceiling, on average, 2-4 hangers are required for each rail . The suspensions must be secured at the points of intersection with the intermediate guides according to the design, using metal anchors with a head diameter of at least 13 mm. It is advisable to maintain a distance of 1000 mm between anchor dowels.
After this, you should begin hanging the main guides. The 3.6 m long rail is the end of the main guide; it must be cut so that the 1.2 m long rail, which is the intermediate guide, can fit into the main groove at a distance equal to the length of the corresponding end plate. At the same time, with its cut edge, the main guide should rest on the wall plinth corner. It is recommended to install an additional suspension at their connection points. The main and intermediate guides must be connected using self-tapping screws (3.5×25).
Then you need to hang the main guides so that the junction of the main and intermediate guides is at a right angle. To complete this part of the work, you need to secure the intermediate guides. Keeping an interval equal to the width of the slab, we insert them between the main supporting rails. The intermediate guides at the junction with the wall plinth must be cut to size so that one end of them, which should fit clearly, can be inserted into the wall plinth corner, and the other end into the groove of the main guide. If the design of the ceilings in the structure has radius curves, they should be mounted using a special profile with horizontal notches.
These notches are designed specifically to allow the profile to be bent to the desired radius. In order to eliminate errors in the radii of curvature and make all angles the same, you should compare each subsequent bent profile with the first one and adjust it exactly according to the first one.
A simple installation of a plasterboard ceiling makes it possible to do it yourself without involving professionals. Special skills creation order ceiling structure does not require, no need to purchase special tools, since they are found in almost every family.
Construction solution
The device of a plasterboard ceiling is a metal frame rigidly fixed to the ceiling and walls, which is sheathed underneath with plasterboard sheets. To create the base of the structure, a special profile made of galvanized metal is used, it is suspended on a rigid suspension to the base ceiling or use a rod suspension with special brackets.
The components of the frame are positioned so that lining the ceilings with plasterboard is as simple as possible, and the ceiling structure itself is held firmly and reliably. In order to ensure greater rigidity, the suspended ceiling is also fixed to the walls of the room, using a specially shaped profile.
The construction of a plasterboard ceiling can be single-level or multi-level (each tier is located on a separate level). Fundamental differences both types of ceiling structures do not have. Therefore, the one who works out the technology of their creation well at the most simple options, over time will be able to create a plasterboard ceiling of complex shape.
Materials and tools
After a decision has been made on the shape of the future ceiling structure, it is necessary to purchase everything for the plasterboard ceiling: materials and missing tools.
To create a design you need the following tools:
- perforator;
- metal scissors;
- screwdriver;
- saw or knife;
- building level and tape measure.

The following materials will be required for a plasterboard ceiling:
- plasterboard sheets . The number of sheets is calculated based on the surface area of the ceiling and the number of tiers of the structure. As a rule, manufacturers produce plasterboard slabs standard size– 250 by 120 centimeters. You need to know which drywall to use for the ceiling in this particular case. This material can be ordinary or moisture resistant;
- profile. It is necessary for the construction of the frame. The starting type of profile is mounted around the perimeter of the room on the walls, and the load-bearing (main) profile is suspended from the ceiling;
- pendants. They are selected taking into account the distance between the surface suspended structure and the base foundation. When the future ceiling is planned to be installed at a significant distance from the base, choose a suspension with a bracket on a wire rod;
- fasteners. These include screws and dowels;
- putty. Required to eliminate cracks at the joints of sheets after the ceiling has been covered with plasterboard.
Creating a plasterboard ceiling
Stage one . The installation of a plasterboard ceiling begins with the manufacture metal frame from profile. The base floor is cleared of the previous finish, lighting fixtures are removed and communications are prepared. A base line is drawn on the walls around the perimeter of the room - the level of the structure will be located along it. Since the final result depends on how smoothly it is laid, when applying markings they use a building level, preferably a laser one.
According to the markings, the starting profile is attached. To do this, holes are made in the walls using a hammer drill, into which dowels are then driven. You can use both metal and plastic products, since the load exerted on this node is insignificant.

After completing the fastening of the starting profile, the main lines are drawn on the base ceiling and hangers are attached to it, and then they are bent upward. When using a rod suspension, its base is mounted in the ceiling on a dowel. Then a frame consisting of longitudinal and transverse elements is assembled from the supporting profile. They are attached to hangers and connected to each other, for which longitudinal connectors or so-called “crabs” are used, which allow the profile beams to be joined at right angles.
A level is used to control the horizontal position of the lower plane of the metal frame.
Stage two . The technology for installing plasterboard ceilings involves installing slabs of material after the frame is completed (read: ""). As already mentioned, the choice of material depends on the installation location of the ceiling structure.

What kind of drywall is needed for the ceiling? If it is a living room, bedroom, children's room, office or library, use regular sheets. When you plan to install the ceiling in the bathroom, choose a moisture-resistant type of material.
GCR fastening sequence:
- Using a saw (knife), the sheets are cut to the right size. This is not difficult to do; usually you only cut upper layer, and then the slab is broken according to the cut line;
- the prepared gypsum board is applied to the frame and secured. In the absence of an assistant for installation and ensuring accuracy, experts advise fixing the slabs to the frame using clamps;
- when partitions and ceilings are made from plasterboard, the sheets are attached to the frame using a screwdriver and self-tapping screws. The head of the fastener should not protrude above the surface of the sheet, and should not be pressed into it too much, since the cardboard will break through.

The attached drywall is puttied, paying particular attention to Special attention joints and locations of screw heads. When the putty has dried well, the surface is sanded manually with fine sandpaper or using a grinder. Next, the surface of the ceiling system is finished.
The above-described technology for creating a plasterboard ceiling allows you to create both single-level simple ceilings and original complex multi-tiered structures.