The technology for arranging ventilated facades makes it possible to protect the facade of a building and insulate it, while preventing destruction of the load-bearing wall due to exposure to moisture and temperature changes. Key Feature ventilation facade is the presence of an air gap.
Structurally, the ventilation façade structure can be imagined as a pie consisting of three layers: a supporting system of profiles (frame), thermal insulation material and a protective screen (cladding material).
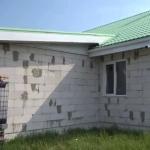
Ventilated facade made of porcelain stoneware - cladding the basement of a private house
The ventilated facade system allows the use of a variety of facing materials from vinyl siding to metal cassettes. One of modern materials, which can often be found on the facades of buildings, is ceramic granite (porcelain stoneware).
Advantages of finishing the facade with porcelain stoneware:
- aesthetic appearance. The porcelain stoneware facade gives the building a solid and stylish appearance;
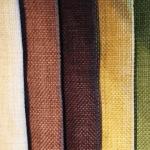
- variety of decor. Wide range of colors, possibility of combining colors, different size facade tiles from porcelain stoneware - all this allows you to implement your own project and make the house unique;
- possibility of replacement. Ease of installation makes it possible to replace part of the tiles or all of the facing material when changing design, style, fashion, and other factors;
- resistance to environmental factors;
- soundproofing properties;
- Fire safety;
- environmental friendliness;
- resistance to dynamic and static loads;
- ease of operation and maintenance;
- high maintainability;
- long service life.
In addition, porcelain stoneware makes it possible to cladding the facade at any time of the year with a high speed of work. Also, façade porcelain tiles are distinguished by their relatively low cost. The price of porcelain stoneware today is lower than the price of fiber cement or composite materials.
The disadvantages of a ventilated façade made of porcelain stoneware include:
- significant weight, which entails the installation of a powerful subsystem (frame);
- high total costs for arranging a ventilation façade (due to high weight)
Porcelain tiles for facade
Facade porcelain tiles belong to the group of artificial finishing materials. The following raw materials are used for the production of porcelain tiles: clay, sand (quartz), feldspar. The use of natural dyes allows you to obtain slabs of different colors or stylized “granite-like”.
The manufacturing technology of porcelain tiles is similar to tiles, only the tiles are fired at a temperature of 1200 °C, which gives it high strength characteristics. In terms of strength, porcelain stoneware is superior to natural stone.
Porcelain tiles for facades - technical characteristics
Analysis of façade porcelain tile parameters
| Dimensions (length x width) | 300x300, 600x300, 600x600, 1200x295 and 1200x600 | The most optimal (popular) size of porcelain stoneware tiles for the facade is 600x600 mm. |
| Caliber | Actual size of porcelain tiles. Permissible deviation 0.5 mm. | There is a concept of “monocaliber”. In this case, the tiles undergo additional calibration to give them the same size. |
| Thickness | Minimum – 5 mm Maximum – 12 mm |
|
| Moisture absorption | not > 3.5% | |
| Flexural strength | > 28 MPa | |
| Frost resistance | > 25 cycles | |
| Wear resistance of the coating | classes: PEI I, II, III, IV, V | Class PEI minimum wear resistance. Classes IV, V are intended for finishing facades on a busy street |
| Specific gravity | 2400 kg/m3 | Allows you to calculate the weight of one tile |
| Texture | – unpolished | The result of natural firing of clay. Distinctive characteristic: low cost |
| – polished | Processing on a diamond wheel. Defining property: smooth sparkling surface. | |
| – polished (matte) | Additional processing. Main quality: ease of care | |
| – embossed | Transferring the texture of the material (stone, wood) Parameter: anti-slip properties. | |
| Manufacturers | Italy, Russia, China | |
| Price | 4000-1500 rub. per m2 |
 Dimensions of façade porcelain tiles
Which façade porcelain tiles are best to use?
In order for a ventilated facade made of porcelain stoneware to effectively perform its functions, you need to competently approach the choice of material, namely, pay attention to:
- multiplicity of tiles. To avoid unnecessary seams, you need to design the façade cladding in such a way that only whole tiles are used. The calculation is made taking into account the thickness of the seam;
- tile size. The smaller the tile, the more seams there will be, the more it will “ripple” in the eyes (subjective opinion);
- caliber. The greater the difference in tile sizes, the more difficult its installation will be and the lower the aesthetics of the cladding;
- color, texture, texture. It is important, both from the point of view of the identity of the tiles with each other, and from the point of view of compatibility with other elements of the facade;
- operational parameters (wear resistance, frost resistance);
- price.
Important. Porcelain tiles are purchased taking into account trimming, breaking, etc. When designing, the margin should be 7-10%.
 Color palette of façade porcelain tiles
Installation of ventilated facades made of porcelain stoneware
The significant weight of porcelain stoneware leaves its mark on the installation of ventilated facades, namely on the subsystem of load-bearing profiles.
The frame for a ventilation facade made of porcelain stoneware consists of a complex system of profiles (main and intermediate), brackets and hardware.
A ventilated facade made of porcelain stoneware is mounted only on an aluminum profile system (manufacturers’ recommendation). However, in order to reduce the cost, installation is carried out on a galvanized system.
Fastening porcelain stoneware to the facade
The choice of porcelain tile fastening system is important for the aesthetics of the building. There are two methods of fastening:
Glue method - installation of porcelain tiles with glue
To fix the slabs, adhesives based on elastic polyurethanes are used. The elasticity of the adhesive composition allows you to compensate for the mobility of building elements under the influence of high temperatures and dynamic loads.
Specifics adhesive fastening using glue and double-sided tape, which are applied to the slab and allow it to be fixed to the profile. The tape performs a supporting function until the glue is completely polymerized.
Mechanical method - installation of porcelain stoneware on clamps
The technology for installing slabs involves the use of fastening elements - clamps.
There are two types of fastening here.
- hidden fastening of porcelain tiles to the facade. In this case, a guide profile is used, onto which porcelain stoneware is installed using a clamp for hidden fastening;
- visible fastening of porcelain stoneware to the façade. An ordinary clamp is used for installation. The disadvantage of this system is that the fasteners remain visible (clasp antennae). And the advantage is greater speed of work completion and lower installation costs.
Another way to attach porcelain stoneware to the facade using a rusticated profile.
Installation of ventilated facades made of porcelain stoneware
Facade porcelain tiles are used primarily for cladding large buildings (high number of floors and large area): administrative, shopping centers, entertainment complexes, etc. But finishing of low-rise buildings - country houses, private houses - is not excluded.
It should be understood that it is quite difficult to install a ventilated facade made of porcelain stoneware with your own hands; this requires knowledge and experience, as well as a clear understanding of the installation technology, the features of the device and the intricacies of this process.
Installation technology for ventilation facades made of porcelain stoneware
The installation of porcelain stoneware facades is carried out step by step in several stages:
Design of suspended ventilated facades
The number of porcelain tiles, the number of clamps, brackets, guides are calculated, and the location of their installation is also calculated.
Approximate consumption of materials per 1 sq.m. in tables
Preparatory work
They involve fencing the site for installation work (a distance of 3 mp from the building), ensuring work safety, purchasing, delivering, sorting (if necessary) material, etc.;
Preparation (façade) of the wall surface
Involves inspecting the wall surface, removing strongly protruding elements, eliminating falling elements, and priming. As part of this stage, the surface is marked and the points on which the brackets will be mounted are determined. In this case, the procedure for applying markings is carried out in strict accordance with the design documentation:
- a horizontal bottom line is applied;
- The installation locations of the brackets are marked along the line;
- two vertical lines are drawn along the edge of the wall surface;
It is convenient to apply markings with paint rather than chalk. A level is used to control the accuracy of application.
Installation of brackets (supporting and load-bearing)
A 5 mm hole is drilled under the bracket for the ventilation façade using a hammer drill. less than the diameter of the hardware. A paronite gasket is placed between the bracket and the wall. The fastening of brackets is approached responsibly, because... This is a key element for fastening the ventilation façade.
Installation of thermal insulation material
Soft insulation in slabs (for example, basalt wool) is placed between the brackets and fixed to the wall with umbrella dowels. At this stage, 2 fastening options are used: dowels or a plate can be fixed with foam glue. The main thing is that the sheet does not move.
It is worth noting that installation begins from the bottom row, while it is advisable to install the bottom plates on the starting or base profile. The purpose of the profile is to support the bottom row of sheets during installation and protect it from rodents and other pests. Subsequent sheets of insulation are mounted offset by half the sheet (slab).
Installation of film (membrane)
A diffusion membrane or helicopter protection film covers the insulation and prevents its destruction from the air flow that passes through the ventilation gap. The film is attached with an overlap of 100-150 mm along all edges. After installing the film, umbrella dowels are inserted through it, with which the insulation is thoroughly secured (nailed).
Installation of guide profiles
The procedure for installing profiles for curtain façade:
- install the profile into the groove of the support and guide brackets;
- leave the profile unfixed in the support brackets, this will allow it to move, providing compensation for thermal expansion;
- in the guide brackets the profile is fixed with rivets;
- at the vertical intersection of the profiles, it is necessary to provide a gap of 10 mm. It is also designed to compensate for thermal deformations.
Installation of porcelain stoneware slabs
Cladding using glue is carried out according to the instructions of the glue manufacturer. Installation of porcelain tiles on the clamp is performed in the following sequence:
- determine the installation location of the clamps on the T-shaped profile (in accordance with the project);
- drill holes for them. Please note that the work is performed not with a hammer drill, but with a drill;
- secure the clamp with rivets;
- install porcelain tiles on the clamp.
Fastening facade porcelain tiles in a hidden way requires a slightly different procedure. The sequential installation of the frame is shown in the diagram.
And the plate is attached to the clamp by making cuts at its ends. This approach allows you to hide the porcelain tile fastening point and reduce the load on the frame. There must be at least four attachment points for the plate.
In conclusion, we note that installing a ventilated facade made of porcelain stoneware on a large building is really a difficult task, requiring the involvement of professionals. However, in private construction it is quite possible to do it yourself. Because due to the smaller amount of work, the complexity of installation is reduced. In this case, it is advisable to consult a specialist when designing and calculating the material.
Finishing the facade of a private house with porcelain stoneware will allow you to get a modern and reliably protected facade with a long service life.
Tags: Facade Ventilated facade Porcelain tile
To reliably protect a building from the effects of weather factors, a ventilated curtain façade made of porcelain stoneware is increasingly being used. With its help, the appearance of the building is improved, heat saving is increased, and good temperature regulation is ensured. The design is complex system, the functionality and durability of which depends on precise adherence to the technology for installing a ventilated façade made of porcelain stoneware.

This type of curtain wall consists of a frame and cladding, the role of which is performed by porcelain stoneware. In rare cases, tiles made of natural stone, metal or plastic are installed instead. The frame is made of a metal profile attached to the wall, onto which porcelain stoneware is hung. The structure is assembled using a guide profile, brackets, anchors, inserts and rivets, and when assembled it consists of the following elements:
- Metal profile frame.
- Thermal insulation material.
- Vapor barrier and ventilation gap.
- External cladding.
Preparatory work
Before starting work, the vertical and horizontal deviations of the plane on which the work will be carried out are checked with a plumb line or theodolite. This will let you know where shortened or extended brackets will be needed. Marks are made on the location of the cladding on the wall, taking into account the thickness of the seams, which will allow you to approximately calculate the consumption of the tiles.
There is a zero mark for the building so that you can use it to guide you when checking the horizontal seam on the façade cladding. Vertical axes equal to the size of the tile plus the thickness of the seam are broken down.
Subsystem
Installation of the structure begins with the installation of brackets. This is the most loaded part of the system, and the stability of the entire structure depends on the strength of its fit. It consists of a fixed part, attached to the wall through a gasket, and a movable part, where a vertical profile is mounted. The parts are bolted together through an oblong hole in the moving part, which serves to adjust the length.

The second type of bracket is a movable corner bracket; it is assembled in the same way as a simple one and is attached to the outer corners. The choice of the length of these parts depends on the unevenness of the wall and the thickness of the insulation layer. If the length of the bracket is more than 1100 mm, use a reinforcing washer installed under the anchor. A thermal break plate must be placed under the bracket itself.
The length of the bracket is calculated so that there is an air gap of 50 mm between the slab and the vapor barrier.
Almost always the walls of a building are uneven. But installation of panels requires a leveled plane, for this:
- Two brackets are nailed to the upper corners of the building and plumb lines are thrown.
- A cord is pulled between the brackets to check the curvature of the wall, and it is measured relative to this indicator.
- The brackets are aligned with the plumb line vertically and along the length of the overhang while simultaneously fastening them to the wall. This creates an even vertical on one side of the wall. The same operation is repeated on the other side.
- The remaining fasteners are mounted in the resulting plane. The first row is mounted 50-60 cm above ground level, so that a subbase is placed in this place, which is recessed to a depth of 2.5 cm.
- The distance between the brackets in the horizontal and vertical directions is specified by the design and depends on the type of system.
- For the lower subbase, additional brackets are installed in a horizontal position.

Porcelain stoneware façade installation diagram
Thermal insulation installation technology
After attaching the brackets, begin installing the insulation. For this:
- Under the brackets, holes are cut in the insulating material board through which the metal parts pass out. After placing the insulation, the cracks are sealed with pieces of material used for insulation.
- Placement of thermal insulation boards on the wall and their fixation with special fasteners with wide caps. The joint between the slabs must be filled.
If the insulation needs to be placed in two layers, it is unacceptable to combine the seams. At the corners, the slabs overlap, completely covering the corner.
After installing the insulation, the facade is protected from the penetration of moisture and wind by a breathable vapor barrier film, which does not let moisture in, but allows it to evaporate from the insulation. From above and from the side it is folded between the insulation and the wall. It is fixed using insulation fasteners with a consumption rate of 5 pcs/m². At the junction, the lower layer overlaps 10 cm under the upper layer to prevent draining condensate from getting inside. All overlaps are pierced with insulation fasteners.
Installation of vertical profile
Parts of the vertical profile are divided into 3 types:
- T-shaped, for slab joints;
- L-shaped, for the middle of the slab;
- Corner profile, placed on the openings of windows and doors, and corners of the building.
Before starting installation, pay attention to the joint of the vertical profile. It should not be allowed to be docked on the bracket. This is done between the brackets using a mounting rail. The connection must be secured with all rivets.
Fastening porcelain stoneware
Ceramic slabs are fastened using clamps, which come in four types:
- Single clamp side;
- Double-clamp side;
- Double-clamp upper and lower;
- Four-clamp.
A sealing gasket is inserted between the tile and the clamp. If you install it without it, there will be no rigidity of fastening. The procedure for fixing tiles is as follows:
- According to the previously applied mark relative to the “zero”, the first clamp is set, and through drilled hole connected by riveting.
- A tile is placed on it, and the next one is attached to it. All other tiles are installed using this principle.
- Installation of slopes and ebbs that go under the tiles. Fire cut-offs must be installed.
A ventilated façade made of porcelain stoneware is a reliable, practical and durable type of exterior covering. At the same time, its installation is complicated, which will not allow a person without experience to carry out all the operations without qualified outside help. High-quality work is impossible without phased implementation the entire installation process in full accordance with design documents by experienced specialists.
Although the material has been on the construction market for several decades, it is still little known to some developers. In order to make a conscious choice, you need to familiarize yourself with porcelain stoneware in more detail.
Facade porcelain tiles
Installation of a ventilated facade
Manufacturing technology and main types
Artificial stone is made from powders by pressing under high pressure followed by firing. Pressing pressure up to 500 kg/cm2, firing temperature up to +1300°C. The powder contains quartz sand, clay, kaolins, feldspars and mineral dyes. To give an original appearance, other additives can be used. At first, porcelain tiles were used only as technical tiles, but later they began to use them for the manufacture of flooring and sanitary equipment. Recently, facades of various buildings and structures have been covered with porcelain tiles.
Porcelain tiles allow you to implement complex architectural projects
One of the options for porcelain stoneware finishing
Unlike flooring, the thickness of porcelain stoneware slabs for facades does not exceed ten millimeters. Otherwise, the large weight of the structures has a Negative influence on the foundations of buildings. In addition, the requirements for the load-bearing performance of facade walls are increasing; not all of them are suitable for cladding with such material. Standard overall dimensions does not exist, manufacturers are guided by their own specifications. But for facades it is not recommended to use tiles that are too small or large; the size should be at least 40x40 cm and no more than 80x80 cm.
Porcelain tiles for facade
Porcelain stoneware facing tiles
Unfortunately, domestic companies (Kerabud, Estima and others) are not yet able to produce high-quality large-sized tiles for facade decoration. Professional builders strongly recommend purchasing products from Spanish or Italian companies: Alfa Ceramiche, AO Ceramicas Aparici, etc. You should not deal with the Chinese; the surface of the facade will be uneven due to problems with the accuracy of the slabs. The material belongs to the expensive category, you don’t need to throw away a lot of money and end up with crooked facades, even if they are made of fashionable porcelain stoneware.
Table of external surface options
| The cheapest option, porcelain stoneware slabs are not polished after firing, but only ground. | |
|
Glossy (polished) |
A more expensive option, after grinding the surfaces are polished. Manufacturing requires sophisticated equipment. Dust does not accumulate on the surface, but microscratches are noticeable. Recommended for use on prestigious buildings. |
|
Satin |
Before firing, mineral salt is sprayed onto the surface - due to the technology, one slab can have different colors. Satin porcelain tiles make it possible to create original geometric patterns on facade walls. In terms of cost, it belongs to the middle segment. |
|
Semi polished |
During polishing, larger fractions of polishing materials are used, the technology is somewhat simpler, losses in stone thickness are reduced, and direct production costs are reduced. Due to this, the cost is reduced. |
|
Structured |
The surface has a matte appearance and imitates different kinds natural stone. |
Features of porcelain tiles for facades
Companies produce mosaic, glazed and other types of porcelain tiles, but they are not used for finishing facades due to their very high cost. In order for the edges of the artificial stone to have perfect sizes, during production they are cut with high-precision machines. The higher the quality of the tile and the smaller the deviation from dimensions, the easier it is to work with. But such material is not available to all consumers due to the high price.
Physical characteristics of porcelain stoneware
| Frost resistance | At least 100 freeze/thaw cycles. According to these indicators, the slabs can be used in all climatic regions of our country without exception. |
| Water absorption | The high density of the material and the absence of micropores significantly minimizes the ability to absorb water. Water absorption does not exceed 0.05%, this is one of the lowest rates among all materials used for finishing facade walls. |
| Hardness | According to Mohs, the values are in the range of 8–9, only glass has a higher value. But high hardness becomes a disadvantage - there is no ductility, the material becomes brittle. |
| Wear resistance | According to international standards, the material is divided into five groups. The first group is used for facades; in terms of wear resistance, it ranks last among all types of porcelain stoneware. Due to this, the cost of cladding the surfaces of facades is noticeably reduced, and for them wear resistance does not play any role. |
| Friction coefficient | Regulated by DIN 51130, minimum coefficient R9, maximum R13. For facing slabs, the coefficient of friction is not taken into account. |
Facade ventilated porcelain stoneware with wood effect
Advantages of porcelain stoneware facade slabs
The relatively high cost of the facing material is fully justified by its excellent performance characteristics.
- The material is completely non-flammable and is recommended by fire organizations for creating barriers.
The material is absolutely non-flammable
- Minimum service life is 50 years. But if you follow the manufacturers' recommendations, the period increases significantly.
- Excellent technological characteristics. It is easy to cut and does not crack or chip. During the cladding of buildings, non-productive waste approaches zero.
- The specific gravity is less than that of natural stone, and only a professional builder can distinguish the materials by the appearance of the front surfaces. Due to their low weight, the scope of use of the slabs is expanding; they can be installed not only on new buildings in which this type of finishing is provided for by the project, but also during overhaul old Of course, the residual load-bearing capacity of the walls must withstand the additional load. The same requirement applies to foundations.
- Fast installation. Due to the use of special fastening structures, manufacturability and small specific gravity worker productivity increases by at least 40% compared to finishing facades with natural stone.
- Wide range of textures of external surfaces, variety color solutions. By using this material, architects and designers can create facade walls in various styles.
Original facade solutions
- Easy to care for. Porcelain stoneware inhibits the proliferation of various microorganisms; mosses and lichens do not grow on it.
- Chemical resistance. The material is not afraid of the effects of aggressive chemical compounds and city smog. The surface does not absorb moisture - porcelain stoneware does not change its original properties after repeated freezing/freezing.
- Environmental friendliness. Unlike plastic materials, porcelain stoneware does not release chemical compounds into the air that are hazardous to the health of others. It can be used without restrictions for both external and internal work.
Ventilated façade properties
In all respects, porcelain stoneware for facade cladding is superior to traditional materials. The only problem is the price, but when you consider the additional savings on surface maintenance and excellent design performance, the high cost is justified.
Porcelain tiles for facades are currently the most durable solution for cladding buildings
White and black exterior, porcelain stoneware finish
Step-by-step instructions for installing façade porcelain stoneware slabs
Important. Installation of façade porcelain tiles is a very responsible job. If you don't have any experience, don't take it. Poor quality execution will result in the loss of significant financial resources. In addition, a slab falling from a height can cause serious injury. Unconditionally follow all manufacturers' recommendations, use only those fasteners that are designed for a specific weight.
Wall cladding with slabs (ventilated facade system) consists of several structural elements:
- carrier system. It includes mounting brackets, vertical and horizontal guides. They are made of thick galvanized steel; special holes are provided to adjust the spatial position. They must not only withstand the weight of porcelain stoneware slabs, but also the wind load;
- thermal insulation layer, if you plan to install one. All modern buildings must be thermally insulated, this is provided for by current regulations. On old buildings the decision to additional insulation walls are accepted by each owner individually;
- facing finishing slabs. The dimensions and appearance of porcelain tiles are selected taking into account the planned design of the facade walls.
Facade system
To carry out the work you will need an electric drill with a hammer drill, a device for installing rivets (if the supporting frame is assembled with their help), spanners, plumb line and long precise level. If there laser level– great, marking will be done much faster and more accurately. If not, you will have to use a hydraulic level.
Fasteners for installing porcelain tiles
Before starting installation, remove near the wall, assemble scaffolding, and think about where to store materials. Be sure to work together, or better yet, three. The final number of people is determined taking into account the size and weight of the slabs. It is advisable to draw a wall on paper, indicate its dimensions and first think through a plan for placing the brackets, taking into account the linear dimensions of the slabs and the method of their fastening. Determine the places where the brackets are fixed, calculate their number and linear meters horizontal and vertical slats. Taking into account the weight, choose dowels or anchors; the heavier the slabs, the stronger the hardware should be.
Assembly diagram of substructure elements and porcelain stoneware slabs. Option 1
Option 2
During preliminary planning, count the number of window openings and doors, determine entry/exit locations engineering communications. They must be accessible for prompt elimination of emergency situations.
Any installation of a ventilation facade must first be correctly calculated
Step 1. Marking the wall. You need to immediately mark the location of the brackets on the wall. Drawings for the placement of brackets are included in the documentation for ventilated facades. Using them, determine the extreme control points.
Important. The brackets must be at least 10 cm from the corner of the building, window and doorways, otherwise there are risks of violating the strength of the frame.
Secure the two uppermost brackets, lower a long plumb line from them and mark the lowest points. Use a rope with blue to beat off the vertical lines.
Mounting bracket to the building wall
Step 2. Taking into account the dimensions of the porcelain tiles and the manufacturer's instructions, beat off the remaining vertical lines at the recommended distance. For most cases of finishing facades with porcelain stoneware slabs, the vertical distances between brackets are up to 1000 mm, horizontal distances are up to 800 mm. When calculating the quantities for the entire wall, round the resulting values taking into account the dimensions of the façade wall.
Step 3. Use a laser or hydraulic level to make horizontal marks at the corners of the wall, and use a rope and blue to mark parallel lines. After marking, a grid with identical cell sizes should appear on the wall of the house. Check them in all respects, everything is fine - start drilling holes. Keep in mind that load-bearing brackets must also be installed around the perimeter of window and door openings.
Step 4. Use a hammer drill with a pobedit drill bit. The depth of the holes should be several centimeters greater than the length of the dowels or anchors. For porcelain stoneware slabs, it is recommended to use anchors; they can withstand significant forces. It is not safe to work with dowels.
Marking and drilling holes
Dowel installation
Step 5. Immediately install the brackets within reach and carefully check the strength of the fixation. To prevent the appearance of cold bridges, gaskets can be installed between the wall and the brackets. Use only paronite ones, they have greater strength and do not deform under prolonged exposure to loads. Plastic ones can bend, which has an extremely negative effect on the strength of the entire structure. The design of the brackets has special holes for adjusting their exact position.
L-shaped bracket for installation of guides
Bracket Attachment
Step 6. After all the brackets are secured, proceed to insulating the walls. Building codes and the rules allow the use of only non-combustible materials; only those foams that do not support open fire are allowed. But it is better not to use it either; during combustion it releases deadly toxic substances. To lose consciousness, you only need to inhale the smoke a few times. The optimal solution is pressed mineral wool.
Schematic diagram of insulation installation
Schematic diagram of installation of two-layer insulation
Practical advice. For insulation, take sheets at least 10 cm thick; thinner ones give little effect, and the labor costs are the same. But the final decision depends on the thermal conductivity of the wall.
Glass wool is secured with special dowels with large heads. Press the mats tightly against each other, install them in a checkerboard pattern, and do not allow any gaps to form. Any violations of technology lead to a significant decrease in heat saving efficiency. For one mat standard size there must be at least five fixation points. Remember that a gap of 2-3 cm between glass wool and the wall reduces the efficiency of heat saving by at least 60%. Air convection occurs in the gap due to the temperature difference, warm air goes outside, and the wall is cooled by the incoming cold.
Installation of insulation
Sequence of fixing plates
Fastening insulation with dowels
Installation of insulation
Important. Do not cut large holes in the locations of the supporting brackets or create additional areas of heat loss. Figure out where the bracket will come out and only here cut the mat lengthwise or crosswise. How exactly to cut depends on the characteristics of the bracket.
Mineral wool should be reliably protected from water. Cover it with a moisture-proof cloth; there is a huge selection of them on sale today. Polyethylene film do not use, moisture will accumulate under it, and condensation will appear in winter. Mineral wool is moistened, and as the relative humidity increases, the heat saving values rapidly decrease.
Wind-hydroprotective membrane installation diagram
At this point, the first part of the installation of porcelain stoneware slabs is completed, you can proceed to the second stage.
Step 1. Begin installing vertical and horizontal profiles. This is a very important moment; if all the elements are not located strictly in one plane, then great difficulties will arise during the fixation of the slabs. How to install elements correctly?
Installation of guides
Adjustment
- Fix the two outer supporting profiles strictly level and adjust their position in relation to the wall. Check the spatial position again.
- Stretch ropes between them and mount the rest along them vertical elements. We have already mentioned that fixation can be done with rivets or bolts. Never buy elements that are fastened with self-tapping screws; they are made of thin steel and are not designed for heavy loads.
- After the vertical slats are installed, fix the horizontal slats to them. The more often you check their position, the less disappointment you expect during the installation of porcelain stoneware slabs.
Step 2. Install the slabs. They are fixed using metal clamps.
Porcelain tile fastening diagram
This is what the clamps for installing porcelain tiles look like
Attaching starting clamps
Secure the two lower clamps, place the plate on them and fix the two upper ones. One clamp has two ears; they must hold two adjacent slabs. Thanks to this technology, their position is automatically adjusted; the edges will lie strictly on the same line.
Installation of porcelain tiles
Installation of porcelain tiles
It is important to maintain the gaps between the plates
The distance between the side edges of the slabs is controlled visually, but some types of clamps have special stops. Working with them is faster and easier, and the appearance of the façade wall improves.
Porcelain tile fastening unit in the guide
Porcelain tile fastening unit on the inner corner of the facade
Feudal attachment point on the outer corner of the building
Step 3. If there are pipe outlets on the wall or electrical cables, then technological holes should be made in these places in the porcelain slabs.
With a correctly installed frame, work is completed quickly. Remember that time lost on marking and installing load-bearing elements is always returned during installation.
Before choosing a specific installation method for porcelain tiles, consider the following factors:
- house dimensions;
- climatic features - temperature factor, prevailing wind direction, average annual precipitation;
- designer look and personal budget options.
The load-bearing elements of the frame must be made of the same metal, otherwise currents will appear at the contact points, accelerating corrosion. Never skimp on the strength of the brackets, always buy the most reliable ones. Porcelain tiles have a lot of weight, you need to constantly remember this.
Work only in good weather; if there is a chance of rain, protect structures from water ingress. Manufacturers claim that structures can be installed at air temperatures down to -15°C, but we do not recommend listening to them. Not because the structures won’t hold up, but because working in such conditions is very difficult. As a result, there may be a violation of technology, errors during marking or fixing frame elements. In addition, snow that falls on mineral wool will definitely melt someday. And increasing the humidity of the insulation by just 5% increases thermal conductivity by 50%. Mineral wool gets wet quickly, but takes a long time to dry. Moreover, if it is protected by façade membranes.
For porcelain stoneware slabs, be sure to install vertical and horizontal supporting profiles. The combined frame evenly redistributes bending and torsion, compression and tension loads. The design becomes very reliable and durable. If the strength of fixation of vertical profiles is impaired, the load is taken by horizontal ones and vice versa. The disadvantage of the combined system is the increased cost. But you shouldn’t skimp on safety.
Window frame installation diagram
Assembly of the façade to the window opening, lower
Junction of the facade to the window opening, side
Assembly of the façade to the window opening, upper
Carefully make connections and frames; cover the side ends only with solid slabs. Pay special attention to the base and areas where it joins the roof. Eliminate the possibility of moisture ingress, but do not close the ventilation. Based on the results of inspection of defective facades, it was found that 55% of problems were due to improper installation porcelain stoneware slabs, 40% due to incorrect markings and 5% due to unprofessional selection of load-bearing elements.
Facade finishing - photo
This is what a ventilated porcelain stoneware façade looks like
Video - Installation of a ventilated facade made of porcelain stoneware
The technology for constructing ventilated facades is quite complex and does not tolerate free interpretations of certain principles underlying it. When constructing such a facade, one must strictly adhere to those rules and standards, the implementation of which is required according to the technology.
Installation of a ventilated curtain-type facade using finishing in the form of porcelain stoneware slabs
Stage No. 1 - Preparatory
Porcelain stoneware slabs can give the facade a unique exterior
To erect a ventilated façade, a number of preparatory works are required. Moreover, all work should be carried out in a certain order, which is recorded in the relevant requirements of the sanitary and epidemiological service for the organization of any construction production.
Read also the article about installing facade tiles with metal fasteners yourself and find answers to your questions.
The preparatory stage should include the following steps:
- the border should be marked construction work at a distance of about three meters from the walls along the entire perimeter of the building;
- on this site you should place everything necessary for construction finishing works materials;
- here you should also equip a place for work related to assembly and installation frame structure;
- in unfavorable weather conditions, any construction and finishing work should be completely excluded.
Read also about finishing the facade with putty in addition to this material.
This spectrum preparatory activities more relevant for cladding multi-storey buildings. However, it is necessary to adhere to them when arranging the facade of a one-story private house - this approach will serve as a guarantee of safety for you and your household from any force majeure situations and surprises.
Stage No. 2 - Marking walls for installation of fasteners
Before installing the sheathing, markings are made on the facade
Before you begin constructing a frame structure, you should make precise markings on the walls of the house in those places where the support and load-bearing mounting brackets will be installed, onto which the ventilated system itself will be fixed. In this case, you must adhere to the developed design and technical documentation.
Marking should be done in several stages:
- First, you should mark beacon lines: a horizontal line along the bottom edge of the facade and 2 vertical lines along the edges of the wall.
- Using paint along the drawn lines, draw all the points in those places where it is planned to install supporting and load-bearing fasteners-brackets on the last vertical lines.
Scheme of fastening profiles for porcelain tiles
Stage No. 3 – Fixing fasteners-brackets on the walls of the house
The brackets should be fixed according to the instructions for installing the ventilated façade. First you need to drill holes in the wall - this should be done using a hammer drill. Then paronite gaskets should be installed in the resulting holes. Installation of load-bearing type brackets is carried out using a screwdriver and dowel anchors.
Stage No. 4. – Laying heat-insulating material and organizing protection from wind and moisture
At this stage, the following manipulations should be performed:
To insulate and protect the facade, insulation and several layers of insulation are laid
- the insulation is “hung” directly on the wall of the building through the slots for the supporting brackets;
- A moisture-proof membrane film should be hung over the insulation layer and temporarily fixed. Adjacent strips of moisture-proof film should be overlapped and secured, with the edge of one strip overlapping the other by at least 10 cm.
- through the film and insulation, drill holes in the wall of the building to install dowel plates;
- install the heat-insulating material - this work should start from the lowest row (starting profile or building base) and move upward;
- heat-insulating boards should be laid end-to-end, without leaving through gaps or cracks;
- if the need arises, you can trim the heat-insulating boards using a hand saw with a fine tooth;
If according to the project, it is required install thermal insulation material in two layers, then you need to do it as follows:
- the bottom layer of insulation is attached to the wall using dowel plates; in this case, each layer of insulation must be secured with at least two dowels;
- upper layer insulation should be installed in a checkerboard pattern and also secured using dowel plates.
Stage No. 5 - Installation of guides
At this stage, installation should be carried out vertical profiles to load-bearing brackets. For this purpose you need:
Fastening scheme for porcelain stoneware slabs
- install and fix metal profiles in the corresponding grooves of the supporting fasteners-brackets;
- Using rivets, secure the metal guides to the supporting fasteners-brackets.
In those support brackets that can be adjusted, the profile is installed freely, without tightening. This ensures that the profile does not deform during sudden temperature changes.
In those places where adjacent vertical guides join, a small gap should be made (7-10 mm). This is done for the same purpose - to avoid deformation of the guides as a result of seasonal fluctuations in temperature.
Profile for fastening porcelain tiles
In addition, at this stage it is advisable to fix the cutoffs, serving to prevent fire (you should learn more about their installation from professionals).
Stage 6 - Finishing of the ventilated facade with porcelain tiles
The ventilated façade should be finished with porcelain tiles in strict accordance with the project documentation. This needs to be done in several stages:
- Using an electric drill, drill holes in the metal profile (the holes are marked in accordance with the project documentation);
- Insert clamps into the drilled holes and securely fix them with self-tapping screws to the frame profile.
Be sure to study the tips for installing a ventilated façade made of porcelain stoneware and get other answers to similar questions.
Video story telling in detail about the installation of porcelain tiles on a curtain wall
Installation of porcelain tiles can be carried out in two ways - with a seam visible to the eye and without it (We recommend studying the article on the use of façade porcelain tiles within of this material). The first option is much simpler to implement, the second is more complex, but the result will be more aesthetically attractive.
The seamless installation method is as follows: the tile is fixed to two adjacent profiles using a horizontal cut. In this case, the load on the frame is significantly reduced.
In conclusion, let's summarize
Constructing a ventilated curtain-type façade yourself is enough difficult process. However, if you approach the matter in strict accordance with the design documentation and follow all the recommendations step by step, you can achieve an ideal result without resorting to the help of professional builders and finishers.
Properly executed façade finishing with porcelain tiles will reliably protect your home from all unfavorable natural factors for many years! Good luck with your work!
Curtain facades made of porcelain stoneware are very popular due to their functional qualities and durability
A ventilated facade made of porcelain stoneware allows for natural air circulation under a layer of decorative coating. In addition, the use facing tiles This type helps to increase the service life of the structure due to the high strength characteristics of the material. The finishing of the façade with porcelain stoneware is carried out using a special technology. In this case, the thickness of the decorative layer is much greater than when laying directly on the rough surface of the wall.
This is the name of the system of cladding an object, which simultaneously provides the ability to protect the surface from moisture and insulate the supporting structure; it also makes the walls more attractive. The curtain wall is based on a frame made of metal profiles, which can be made of aluminum, galvanized or stainless steel.
Experts believe that porcelain tiles can only be installed on aluminum construction. This option will serve for a long time, it is sufficiently durable, lightweight, and less susceptible to corrosion, i.e. the service life of the structure is increased many times over.
The supporting profile is attached to the wall using brackets. When installing tiles, it is recommended to use a hidden fastening method, then the appearance of the coating will be further improved. Between the metal frame and load-bearing wall the object is insulated. It is laid on the surface, having previously been protected from moisture, and a windproof covering must be secured on top.

Thanks to the presence of insulation and membrane materials, heat loss is reduced. However, this is not a mandatory step when installing a ventilation facade. There is an option to install a frame without insulation. This reduces the cost of finishing work, but increases the cost of heating the house. For this reason, a thermal insulation layer is still much more often included in the design of a ventilation facade.
There must be a gap between the insulation and porcelain stoneware. It is left to ensure natural circulation. The presence of an air gap also helps reduce heat loss. Thanks to this feature, it is possible to use thinner insulation. Its effectiveness will not decrease, but at the same time the acquisition costs will be reduced. thermal insulation material(the price of slabs of small thickness is lower).

Which buildings are best suited for porcelain stoneware façades?
When this material first appeared on the construction market, it was used for finishing large commercial and administrative buildings: banks, restaurants, consulates, international hotels. Today, porcelain stoneware is used to cladding the facades of private housing, shopping centers of any size, and small offices. Tile provides additional protection from fire at facilities with increased fire hazard. The facade made of porcelain stoneware makes the buildings of schools, hospitals, kindergartens (mostly private) more attractive.

Types of facing porcelain stoneware
This type of material is represented by a small number of options, different in color and texture. The tiles are divided into groups according to dimensions:
- porcelain tiles for facades standard thickness— 10-12 mm;
- ultra-thin material 3-6 mm thick.
The last option is characterized by large dimensions, sometimes the side length of the product reaches 3 m. The composition of the material does not differ from its standard thickness counterpart, but is produced using rolling technology. This ensures a minimum thickness of porcelain stoneware. To fasten large slabs, an adhesive method is used; in order to strengthen the structure, a special strip is used.
Products of standard thickness (10-12 mm) have the following dimensions: 600x600, 1200x600 and 300x600 mm. The most common way to fix slabs is to use a clamp. This is a fastener for hidden installation. Thanks to these elements, it becomes possible to replace a deformed section of the coating.

Porcelain tiles for ventilated facades are distinguished by texture:
- polished (glossy);
- matte;
- rough (using the grinding method).
The choice is made in accordance with operating conditions. Thus, polished products are more often used in areas with hot climates, since this type of porcelain stoneware reflects well Sun rays.

Specifications
Facing material goes through several stages of production: pressing, firing, surface treatment. Thanks to this technology, positive coating properties are ensured, such as:
- wear resistance (there are 5 classes, differing in the degree of susceptibility of the tile mechanical impact);
- lower thermal conductivity coefficient of the material compared to natural stone, which makes it possible to obtain a more effective thermal insulation structure;
- frost resistance (facade tiles can withstand up to 50 freezing/defrosting cycles, thereby increasing their service life);
- minimum water absorption rate (0.05%). For comparison, most types of tiles absorb moisture more intensively (up to 4.5%), and it is recommended to use material for a ventilated façade that absorbs no more than 3% of water from the total volume;
- non-exposure to ultraviolet radiation (the material retains its color and properties throughout the entire period of operation);
- high strength (in this parameter the material is similar to granite, but is offered at a lower price than natural stone).

Advantages and disadvantages of use
The material has a lot of positive qualities. For example, fastening of porcelain stoneware is carried out different ways, the choice is made taking into account financial capabilities. In addition, the likelihood of future repairs is taken into account. If glue is used, the slabs can only be dismantled by breaking their integrity. Other benefits:
- long period of operation, due to the properties of the material;
- fireproof qualities;
- high thermal insulation properties of insulation (due to low thermal conductivity);
- easy maintenance, no need to use aggressive agents to remove complex stains, since the roughness of the tiles is small, and polished porcelain stoneware is characterized by smoothness;
- Relatively simple installation allows you to do the work of installing vertical guides and plates yourself.

There are few disadvantages to this type of coverage. Thus, the increased weight of the material is noted. If large slabs are used, the supporting structure is under greater pressure. In addition, the price of porcelain stoneware is higher than most modern analogues of artificial origin.
Step-by-step instructions for creating such a facade
At the initial stage, marking is made. It is necessary to indicate the beacon lines formed when drawing the bottom line and side mark, and intermediate attachment points.
Using this marking, the installation of load-bearing profiles (vertical U-shaped and horizontal L-shaped) is carried out. They are attached using brackets. When the holes are connected on 2 elements at the intersection of the profiles, fasteners are installed: screws and dowels. If you plan to install insulation, then the slabs of heat-insulating material are fixed to the wall using disc dowels before the horizontal and vertical guides are installed.
A wind barrier is attached on top of the insulation - a membrane material that does not allow moisture and wind to pass through. It must be taken into account that the thermal insulation must be between the bracket and the wall. Clamps are used to fix porcelain stoneware. These fasteners are installed on profile design using rivets.
Any structure collapses and deteriorates over time under the influence of water and temperature. Cracks appear in the material, which expand and lead to destruction. To prevent such a process, special protective measures are used to reduce the impact on the walls of the structure. A ventilated porcelain stoneware façade is one such measure.
Ceramic granite is second only to diamond in terms of hardness. It is wear-resistant and highly durable. To make this material, quartz sand, several types of clay, feldspar, dyes and mineral additives are mixed.
There are several types of ceramic granite:
- polished - has a shiny surface. This effect is achieved with an even cut;
- matte - distinguished by its untreated appearance and similarity to natural stone;
- semi-polished - characterized by alternating polished and untreated areas.

In addition, porcelain tiles vary in patterns on the slabs and in color. Due to its diversity, this material is considered one of the best.
Pros and cons of finishing
The task of finishing the facade is to protect the walls from destruction. To do this, an additional layer is created, which is the first to receive external influence. A ventilated façade made of porcelain stoneware has certain advantages:
- resistance to impact external factors;
- aesthetic appearance. The building acquires a stylish and respectable appearance;
- variety of decor. An extensive range of colors makes it possible to implement any author’s project, combining shades and different sizes of tiles;
- ease of installation allows, if necessary, to partially replace the tiles or completely change the design and style;
- Fire safety;
- soundproofing properties;
- environmental friendliness;
- long service life;
- high maintainability;
- resistance to statistical and dynamic loads;
- possibility of installation at any temperature;
- environmentally friendly material.
Disadvantages include: significant weight and high total installation costs due to the heavy weight.
A ventilated facade made of porcelain stoneware creates an air channel in the wall that works like an exhaust hood - it removes excess moisture from under the cladding and protects the walls from its influence. The main elements of a ventilated facade include:

The fastening of porcelain stoneware can be visible or invisible. For the first case, special clamps are used. Hidden fastening is carried out in several ways:
- glue the cladding onto the profile for porcelain tiles;
- secured with pins;
- fastening with retention at the ends by the slots.
Preparatory stage
When constructing a ventilated facade, preparatory work should be performed in a certain order. This is recorded in the requirements for the organization of construction production of the sanitary and epidemiological service. The preparatory stage includes the following:
- marking the boundary of construction work along the entire perimeter of the building at a distance of three meters from the wall;
- placing on the site all the tools necessary for finishing work;
- organizing a place for work related to the installation and assembly of the frame structure.
This procedure is relevant for cladding multi-story buildings, but they must also be followed when arranging the facade one-story houses. This will serve as a guarantee of safety in force majeure situations.
Wall marking work
Before you begin constructing a frame structure on the wall, you need to make precise markings in the places where the load-bearing and supporting mounting brackets will be mounted. The ventilated system will be fixed on them. In this case, it is necessary to adhere to the design and technical documentation.

For marking, beacon lines are first drawn: two vertical lines along the edges of the wall and one horizontal along the lower edge of the facade. Then, along the drawn lines, paint all the points in the places where the load-bearing and support brackets are supposed to be installed vertically on the last lines.
To calculate the extreme points on the lower horizontal line, you should use a level. Having drawn them with paint, the intermediate ones are marked at the same distance from each other. To do this, use a measuring tape, water level or laser level.
When forming strict vertical lines, you can use a plumb line. To do this, it is lowered from the parapet of the house and the horizontal is marked.
The brackets are fixed following the instructions for installing ventilated facades. Holes are drilled in the wall of the house using a hammer drill. Paronite gaskets are installed in them. Installation of load-bearing type brackets is carried out using a screwdriver and dowel anchors.
The next stage is laying heat-insulating material. To do this, you need to perform the following manipulations:

If it is necessary to install thermal insulation material in two layers, this should be done as follows:
- Using dowel plates, the bottom layer of insulation is attached to the wall. Each layer of insulation is secured with two dowels;
- the top layer is mounted in a checkerboard pattern.
Installation of guide profiles
 At this stage of work, the vertical profiles are connected to the supporting bracket. To do this, you will need to install metal profiles, fix them in the corresponding grooves of the support fasteners and secure the metal guides with rivets to the supporting brackets.
In support brackets that can be adjusted, the profiles are installed without tightening in a loose manner. This protects against profile deformation under the influence of sudden temperature changes.
In the places where adjacent guides join vertically, a small gap (7-10mm) is made. This also helps to avoid deformation of the guides. At this stage, in addition, it is advisable to fix the cutoffs. They are necessary to prevent fire.
The construction of a suspended ventilated facade is a rather complex process. But, if you approach the matter with full responsibility and carry out the work, adhering to project documentation, you can achieve excellent results without the help of professional builders and finishers.
made of porcelain stoneware - an excellent balance between the functionality of external walls in terms of heat conservation and the aesthetic properties of the finish. The method of finishing facades with porcelain stoneware is extremely common in Russia, primarily due to its affordable cost. Porcelain stoneware can be used to cover the load-bearing walls of any building: residential, commercial, office, industrial. Installation of the ventilation facade system can be done at any time of the year; low air temperature only limits the abilities of the installers and does not affect the system.
Sealed external protection of a building from atmospheric moisture does not solve the problem of condensation of vapors escaping from interior spaces out. We found an interesting way out of this situation. When installing them, a gap is left between the porcelain stoneware finishing of the house and the internal layers of insulation. Convection air currents circulate freely in the resulting space, drawing water vapor from the walls.
Facing the facade with porcelain stoneware provides the building with a presentable appearance and protects it from all types of external weather factors. And its use as the outer layer of a ventilated facade creates favorable conditions for long service building structures and creating a healthy microclimate in interior spaces.
Porcelain stoneware is an artificial material that is produced from a mixture of crushed natural minerals by pressing at high temperatures. Finishing tiles obtained in this way are distinguished by a uniform structure and have a set of remarkable properties:
- High impact strength, wear resistance, durability.
- Easy to care for. The tiles can be washed and cleaned using any household chemicals. If necessary, it can be easily replaced with a new one.
- Porcelain stoneware cladding imitates various types of natural building stone, giving the building a solid and aesthetic appearance. There is a large variety of this material on the market in all colors and varied textures.
- Immunity to ultraviolet radiation and sudden temperature changes, frost resistance.
- Fire safety and environmental cleanliness.
- Low cost.
Installation procedure for a ventilated façade with porcelain stoneware finishing
If we are talking about the reconstruction of a building, then at the preparatory stage, loosely secured pieces of old cladding are removed from the wall. There is no need to level the surface, since it will be hidden by the finishing of the porcelain stoneware façade. The ability of load-bearing structures to withstand additional loads is assessed. All necessary materials are imported. The territory is fenced.

If the installation of a porcelain stoneware façade will be carried out at a height, then scaffolding or cradles. The wall is marked for installation of brackets clearly in accordance with the project. The standard pitch of vertical guides for porcelain stoneware is 600mm, even if the board is 1200mm wide. The system pitch can be shortened at corners, under windows, and wherever trimming of porcelain slabs is required.
Exist different types systems depending on the metal used in the design:
- galvanized;
- aluminum;
- stainless steel
Used in galvanized systems vertical-horizontal installation method. This means that in addition to vertical guides, horizontal ones will also be used. Connecting to each other, the guides form a cage on the facade, where the cell is 600*600mm. This is convenient for installers, because it is possible to shift left/right.
When the system is vertically positioned, the possibility of moving the tile is limited by the permissible method of moving the clamp relative to the top flange of the profile. The clasp can be moved, but the main condition for the permissibility of such a unit is that each clasp must be secured with at least two rivets diagonally in the upper and lower holes.
Installers should be limited in making independent decisions regarding the layout of porcelain tiles on the façade. The interests of the owner of the building and the contractor are different; the aesthetic appearance is important to the owner, and the layout must be agreed with him. We are talking about a project for a curtain wall façade with porcelain tiles; the project is a must. The project defines the layout and location of each structural unit.
If you do not plan to carry out a curtain façade project on a building, it is easier to use a galvanized system, laying out and cutting the tiles after the fact. If the building is expert, you need a project.
 In most cases, porcelain stoneware is installed in horizontal rows. To do this, using a level, you need to draw a lower starting line on the wall parallel to the zero mark and determine the exact location of the corners. In the future, tiles will be installed from them, but to do this, the frame must be correctly placed under it in advance.
When manufacturing a ventilated facade from porcelain stoneware, the installation technology must be observed in accordance with the Album of Technical Solutions and the project for the facade. Album of technical solutions - set typical units, acceptable for use on a specific system. The album of technical solutions is approved by the FAA Federal Central Service when issuing a Technical Certificate for the system; each certified manufacturer has it.
In accordance with the markings made, they are installed on the wall through paronite gaskets. They are secured with anchor dowels, which should go into the concrete or masonry by at least 5-6 centimeters. It is necessary to carry out anchor pullout tests in advance in order to select an acceptable anchor in accordance with the loads transmitted to the attachment point.
A profile made of galvanized steel, stainless steel or aluminum is attached to the supporting brackets using self-tapping screws or rivets. In this case, two mandatory conditions must be met:
- the upper flanges of the profiles form a perfectly flat plane for correct fastening porcelain stoneware on the facade;
- Between the layers of cladding and thermal protection, space is left for natural ventilation;
- Depending on the project, the profile is installed in vertical rows or forms a lattice of the correct shape.
Insulation in suspended structures
 Installation of a ventilated facade made of porcelain stoneware usually requires the presence of a continuous layer of insulation. For this purpose, mats made from mineral wool with a density of at least 80 kg/m3. They are pressed against the wall with disc-shaped dowels. Each mat has five dowels: four in the corners and one in the center. Outside on them. It allows water vapor to pass through and prevents the thermal insulation material from weathering by rising air currents. You can use two-layer. The bottom layer of basalt insulation can be of lower density - from 50 kg/m3. With two-layer insulation, each subsequent insulation slab is laid on the previous one, overlapping the joints. This ensures maximum heat retention in the building.
Visible and hidden method of fastening porcelain tiles
There are three ways to attach porcelain tiles:
- The visible method is a clamp;
- The hidden method is through a German Keil bolt;
- The hidden method is to use clamps in the side cuts of the slab.
What clamps to use for porcelain tiles
 The visible method is the most common, the clamp legs hold the plate with outside. To give the cladding a more organic look, the facade clamp is painted in the color of the porcelain stoneware. From a distance of several meters, visible elements become difficult to distinguish and merge with the cladding. Therefore, the method is very common.
Use clamps for ventilated facades with a rustication limiter or with multi-directional legs, so the rustications will be perfect even after decades.
 Rust in porcelain stoneware is the distance between the cladding slabs. The distance is determined by the clamp used. Only in, when facing with porcelain stoneware, it is possible to use clasps with a horizontal rustication of 4-5mm. The use of these clamps on aluminum subsystems is prohibited, because it is possible to extrude the tiles due to climatic thermal expansion of the aluminum guides. Standard rust in aluminum systems: 6..8mm.
Regardless of the system used, it is permitted to use exclusively stainless steel clamps with a thickness of at least 1.2 mm. Such a clamp cannot cost less than 18 rubles. And you still have to manage to find such a price.
Facade fasteners for porcelain stoneware: German Keil bolt
The method of hidden fastening came to us from Germany. A Keil bolt is a bolt and anchor that is attached to a trapezoidal hole on the back of a porcelain stoneware slab. Thus, there are no visible elements on the outside of the cladding.
The frame of the system in the case of a hidden method of fastening the cladding is vertical-horizontal. Fastening of porcelain tiles to the facade is ensured through special hooks - agrafs. The detailed installation process looks like this:
In the workshop, on a special machine, a trapezoidal hole is drilled from the back side of the slab using a diamond-coated drill. The hole needs to be blown out.
 Install the anchor inside the hole. The bolt is the second fastening element; it is screwed into the anchor. At the same time, the anchor expands downward at the base. The principle is similar to a butterfly-type furniture fastening, when one element is screwed in and a second fastening element is attracted to it. The adequacy of the tightening is checked with a measuring device. The measuring device is a flat stainless probe; it should fit tightly between the anchor washer and the porcelain stoneware slab, but not fall out without effort. This means that between the anchor bolt and the porcelain stoneware there must be minimum distance. The measuring device, special diamond-coated drills and the drilling machine itself with water cooling, table and rollers are produced by a German company that has a patent for the Keil anchor bolt.
 The anchor reliably attaches the hook - agraf to the porcelain stoneware slab. Then the agraphs act as a hook, which is hung on horizontal guides. There are three types of agrafs: the upper fixed, adjustable agraf, the upper fixed but not adjustable agraf, and the lower non-fixed, non-adjustable agraf. The agraf is fixed with a rivet to the horizontal profile; the fastening prevents the cladding from being torn off by gusts of wind. The agraf is adjusted using a special adjusting bolt. Adjustment is necessary to catch all the cladding slabs on one plane. The lower agrafs are not fixed, they are needed only as an element of additional fastening and work for tearing.
There is no need to dwell in detail on the installation of the substructure, because The location of the brackets and the pitch of the guides are determined by the project, and are not specific in the case of installation of porcelain stoneware. We only note that horizontal guides must have a branched cross-section in order to withstand significant loads. As a rule, there are two horizontal guides per slab of porcelain stoneware - for the upper and lower tiles. Agraph, standard, four per slab 600*600mm.
The method is expensive, labor-intensive, and requires special drilling machine. A machine with a table costs about ten thousand euros. The price of one Keil anchor bolt is approximately 1.8..2 euros. Plus drills, measuring device. The cost of one square meter of the subsystem is higher, because the metal consumption, due to the horizontal profile, is greater. Only specialized contractors can carry out work on the hidden method of fixing porcelain tiles.

The main thing is a presentable, chic and “expensive” facade, which very few can afford. Such a facade will favorably distinguish your building from other buildings. The choice, of course, is yours.
Hidden method - using clamps in the side cuts of the slab
The method of installing the system will not differ in any way from the visible method, with the exception of one feature. In case of hidden fastening, a different clamp will be needed. The clamp legs of the hidden fastening are installed in the side cut of the porcelain stoneware, and thus remain in the thickness of the slab. That's why the method is called hidden.
The method is highly certified because the beautiful method hides its unreliability. The thickness of porcelain stoneware for this method must be at least 12mm. However, 12mm thick porcelain tiles are difficult to find and more expensive. Therefore, even for this method, as a rule, a 10mm plate is used. Minuses hidden way using side cutting method in porcelain stoneware:
- when cutting a hole on the side of 10mm porcelain stoneware, a lot of chips appear - you need to lay a lot of waste along the cladding;
- Water will accumulate in the upper cuts. Expanding when converted into ice, the water will cause chipping and the slab may fall out. To prevent this, coat the hole with sealant. The sealant is not safe from a fire point of view and its service life is shorter than that of the NVF system.
- This method is certified for buildings up to 45 meters high. In fact, it is permissible to use it up to two floors and it is better if the building is not expert.
On the other hand, you get a beautiful, expensive look for a very affordable price. The owner is a gentleman.
Subsystem for ventilation façade made of porcelain stoneware
Components of a ventilated facade made of porcelain stoneware
For each system there is an Album of Technical Solutions, which contains a complete list of components for the system, developed by the manufacturer. But to get acquainted with some of the nodes, let's consider the options. 
Junction points of porcelain tiles, distances between tiles, external corner and other.

In custody…
Porcelain stoneware can be used to create a variety of designs. The traditional method involves laying slabs of the same color and size in a continuous array, highlighting the base or corners with panels of a different color. Shifting rows horizontally gives the effect brickwork. Sometimes it is diversified with colored inserts in random order. The combined use of façade elements of different sizes and shapes makes it possible to create complex compositions. Rectangular panels can be laid in a parquet pattern.

If you are thinking about how to clad a building, do not waste time going through numerous options. The use of ventilated facade technology with porcelain stoneware finishing will make any building not only beautiful, but also cozy and durable.
A facade system for porcelain stoneware is a complex of elements made of corrosion-resistant or galvanized steel, forming a subsystem for the installation of porcelain stoneware slabs. Application mounted systems allows you to significantly improve the performance of thermal protection, noise insulation, and also expressively design the façade of the building.
A wide palette of colors and textures of ceramic granite slabs allows you to implement almost any architectural solutions regardless of the complexity of the configuration.
The facade subsystem can be installed on new buildings, as well as on reconstructed buildings with any design option load-bearing walls(concrete, brick, foam block). from porcelain stoneware using our subsystem - it’s fast and reliable.
STRUCTURAL DIAGRAM OF FS-CERAMOGRANITE
The hanging system for porcelain tiles comes in two types:
- Horizontal-vertical
- Vertical
The choice of subsystem frame option is determined after technical analysis object, carrying out calculations of the load-bearing capacity of external enclosing structures.
TECHNICAL INDICATORS
Our subsystem has high load-bearing capacity and is used on buildings with a height of up to 70 meters. For production we use galvanized steel of class 1. The use of telescopic brackets allows you to mount a curtain facade on unprepared planes of walls and ceilings, with various differences and irregularities. The fire hazard class of the system is K0.
MAIN ELEMENTS OF THE SUBSYSTEM
| № | Image | Name of the email | Options |
| 1 |  |
L-shaped bracket |
50, 70, 90, 100, 110, 120, 150, 170, 180, 200, 250 S(H): 50, 60, 70 |
| 2 |  |
Bracket G, reinforced |
B: 80, 90, 120, 150, 180, 230 |
| 3 |  |
A: 20, 30, 35, 40, 45, 50, 60 B: 25, 30, 35, 40, 44, 45, 50 Galvanized steel: 1.2; 2.0 mm. |
|
| 4 |  |
||
| 5 |  |
A: 65, 80, 90, 100 Galvanized steel: 1.2; 1.5 mm. |
|
| 6 |  |
Z-shaped profile |
B: 20, 30, 26.5 Galvanized steel: 1.2; 1.5 mm. |
| 7 |  |
Private and starter clamp | Galvanized steel: 1.0 mm. |
COST OF FAÇADE SYSTEM UNDER PORCELAIN TILES
Price complete set fastening and load-bearing elements of the facade subsystem made of galvanized steel (without insulation and facing material):
from 380 rub. per m 2
You can make a preliminary estimate of the cost of work and materials for a curtain wall right now using our service:
ONLINE CALCULATION OF FACADE SYSTEM
Draw your attention to! The façade system calculator produces an approximate (averaged) calculation of the cost of a subsystem for porcelain tiles. The data obtained may differ significantly from the calculation compiled by a specialist taking into account the specifications of your object!
This calculation shows retail prices (excluding volume discounts). The calculation uses a painted (primed) version of the galvanized system!
| № | Name | Unit change | Qty | Price | Price |
|---|---|---|---|---|---|
| Load-bearing elements | |||||
| 1 | L-shaped bracket 50x50x50x2mm. | PC. | |||
| 2 | Paronite gasket bracket | PC. | |||
| 3 | U-shaped profile 65x22x20x1.2mm. | linear m | |||
| 4 | L-shaped profile 40x40x1.2mm. | linear m | |||
| 5 | Z-shaped profile 40x22x20x1.2mm. | linear m | |||
| Fasteners | |||||
| 6 | Anchors for fastening brackets | PC. | |||
| 7 | Rivets A2/A2 4x10mm. | PC. | |||
| 8 | Stainless steel clamp private 1.0mm. | PC. | |||
| 9 | Stainless steel clamp end 1.0mm. | PC. | |||
| TOTAL: | |||||
| TOTAL per m2: |
Prices include VAT 18%