A hammock for a summer house with or without a frame is an excellent tool for a perfect rest. It fits easily into a bag, can be taken with you anywhere, and can be hung either in the countryside or in the forest. True, the situation is such that in stores hammocks are presented in a huge number of specimens and types. And the prices often bite. But for everyone who wants to acquire such a structure, there is a cheaper and more interesting way out - to make a hammock with your own hands: select materials, choose a method and assemble your own hammock, dear to the heart, but not to the pocket.
The entire article is divided into three parts. In the first, we’ll talk about the classification of hammocks, their advantages and differences from swings, fabrics and fastenings. In the second part of the material, we will consider 6 master classes that answer the question of how to make a hammock with your own hands:
- Single classic for two trees;
- Double made of fabric on a stand;
- Macrame;
- Hammock chair for a summer cottage made of fabric;
- From jeans;
- Children's for home.
In conclusion, you will learn about design improvements and operating rules. Make yourself comfortable!
Advantages and disadvantages
Before you start creating your own hammock, you need to better understand the features of the device, study the advantages and disadvantages. And they, in fact, directly follow from its design and the materials used in its creation.
Advantages:

Flaws:
- The only drawback that can influence a person’s opinion is the limited number of comfortable positions for relaxation. There are only two ways to sit normally in a hammock - lie on your back or side. Any other positions will be extremely uncomfortable: the spine will bend and the muscles will become numb.
How is a hammock different from a swing?
Before you start directly creating a hammock for your dacha with your own hands, you need to clarify one more point - what is the main difference between a swing and a hammock? Many people confuse these two concepts and often come across different production technologies. And the fundamental difference here is in the most important thing - the design. 
In the case of a swing, this is a bed or seat that is attached to a horizontal crossbar. It would seem, so what? A hammock can also be hung this way. But then it will be uncomfortable to lie in it - it does not have the right type of fastening, and the method of installing the bed itself is not what is needed.
So, the main difference between a swing and a hammock is the method of attachment - the hammock is attached to two vertical posts or trees, and the swing is attached to a horizontal crossbar. The second difference: in a large swing you can sit or lie down; a hammock can only be used while lying down.
Classification of hammocks
Another important point that requires close attention of anyone who decides to make a hammock for themselves - what kind of hammock are they? Let's look at the entire existing classification in as much detail as possible.

By type of fastening
Based on the shape and method of fastening, there are two main types of hammocks: with and without a bar.

According to the material of manufacture
If we consider hammocks based on the material they are made of, we can distinguish three main types. It is worth noting that each of them can be attached in any available way - either to a frame made of planks, or simply directly to the racks.
The first type is a mesh hammock. As the name suggests, it is made from a wide piece of mesh. But, of course, the first material you come across will not work. Several centuries ago, sailors made such rookeries for themselves from ordinary fishing nets. But now this method is unacceptable. Hammocks with large weaving are often sold, but in this case you need to get something that can be placed under your back - otherwise the mesh will dig into the skin quite painfully. But if you take or make a rookery with fine, even flat weaving, then such bedding will no longer be needed. In one of today's master classes we will look at how to weave a hammock from a rope with our own hands.

The main advantage and advantage of this choice of materials is breathability. A mesh hammock allows the breeze to pass through, has excellent ventilation and will always keep you cool.
The second type is a fabric hammock. Here you need to pay a lot of attention to what kind of fabric the bed is made of. It must meet the requirements of air permeability and strength. It is also more difficult to handle, because such material needs to be stored somewhere - it gets dirty easily, and stains are difficult to remove later. Rough materials will rub the skin, leaving unpleasant and even painful marks. So be careful what you buy and from whom.

It is necessary to correctly assess the strength of the material, because it may simply not withstand the weight of an adult. Lightweight fabric may be suitable for children, but never for parents. Although with such material the airflow will be better.
The third type is a synthetic hammock. It is often chosen for several reasons.
- The first and main thing is strength. Synthetics, thanks to recent developments in this area, have greatly increased their strength and can withstand incredible loads.
- The second is ease of use. This refers mainly to the fact that synthetic fabrics are difficult to get dirty and easy to wash. And new research into this topic has led to the creation of synthetics that repel dirt and other wet pollutants. So after use, all that remains is to shake off dust and stuck leaves.
- The third reason is durability. It is inextricably linked with the first, because durable materials are almost resistant to temporary aging and any corrosion. This fully applies to synthetic fabrics.

The main problem with such materials is poor air permeability, so you need to carefully monitor what you buy.
Fourth - wicker hammock made of wood. This is another traditional type, when a bed is formed from strips of tree bark. You can still order it in many stores or even make it yourself. It is also worth noting that such an outdoor hammock is more difficult to store - tree bark does not tolerate bending well and it is not recommended to store it folded for a long time. It will crack, lose its appearance and mechanical properties.

By historical affiliation
In addition to the types of hammocks already indicated, there is another division that dictates its own conventions and limitations. This is a division based on historical affiliation. Over the course of history, many peoples have developed their own traditions for creating and decorating hammocks.
| Name | Photo (clickable) | Peculiarities | Description |
|---|---|---|---|
| Brazilian |   | ● They are well blown by the wind and allow fresh air to pass through; ● highly comfortable products; ● very durable, can withstand significant weight; ● not the cheapest if bought in stores. | They are created in the hot lands of the southern country from the most traditional materials for this area - natural cotton or from strips of Brazil nut wood. It is also a Brazilian tradition to make rich decorations for hammocks - mainly from fringe. They are woven from the same raw materials as the stock, by hand and hung on the edges of the product. |
| Mexican hammock |   | ● They are practical and reliable – strong and durable; ● As a rule, they are not decorated with anything other than coloring and patterns. | Mexicans use synthetic fabrics, not forgetting to test them for strength and breathability. Everything should be as functional and convenient as possible. Synthetics also allow you to paint hammocks in any color, which are arranged in stripes along the entire length of the product. |
| Colombian |  | ● Colored using natural dyes; ● retain color and brightness for a long time, even after prolonged use; | The main material for their production is vine bark or long strips of hamak, and occasionally strips of agave are used. The secrets of weaving technology do not leave the country, but you can find many similar patterns or do something yourself. Tree bark does not wear off or dry out. It is treated with special mixtures that deeply impregnate the wood. |
| Soviet macrame hammocks |   | ● Produced mainly in one color – white; ● made exclusively in the form of a grid; ● low price and mass production. | Like any other inventions of the Soviet state, these products are distinguished by their simplicity, designed for mass production. They were made using simple technology - weaving ropes. The result was a mesh hanging hammock for a summer house with a frame made of aluminum crossbars, which was bought in huge quantities. True, it is unlikely that you will be able to lie in this for a long time, because the net, which is slightly different from a volleyball net, will painfully dig into the skin over time. So you need to use some kind of padding. |
By shape
They also make a clear division according to shape. Each type of hammock has its own purpose, its pros and cons. Some are more compact and suitable for hiking, while others are more bulky, but provide the greatest possible comfort. The choice depends on the application in practice, and the complexity of production.
First group- hanging hammock chair.
Made specifically to make it comfortable for a person to spend a lot of time sitting, as the name suggests. This shape allows you to sit comfortably in nature and relieve the stress on your spine. They are the most compact of all the options and, with some research, the cheapest. But no matter how comfortable they are, they cannot replace a real chair.
Such products are most often assembled from fine mesh, less often from fabric. And for children it will become a favorite place for games and pranks - you can swing comfortably in it, especially since wisely selected materials will help the “chair” withstand such loads. We will also look at how to make a hanging hammock chair with your own hands for a summer house in this article.


The second group is a camping tourist hammock-cocoon.
Round hammocks are reputedly the easiest to make. All you need is two fairly large pieces of material. Some people reinforce a circle of strong metal inside, but you can do without it if the person is not annoyed by the feeling of being covered with fabric.
They also like to use such tourist hammocks on hikes - the devices are easily attached to a branch. You can install a mosquito net on the cocoons and insects will not interfere with your rest. Some hobbyists even make tents based on this technology - you just need to get hold of enough waterproof fabric.


The third group is a classic hanging hammock.
If ordinary hammocks with two reinforced slats can be seen in almost every summer cottage, then there are more sophisticated options. Some craftsmen make real beds designed for several people, with mattresses and everything else.
This can be either a very bulky bed, in its complexity and richness of details, more reminiscent of a bed from the time of Henry the 5th than an ordinary hammock, or an ordinary small fabric structure. Such hammocks can be assembled based on any material, synthetic or natural.


By strength
The strength of a hammock, as well as its durability, greatly depend on the fabrics chosen during production. Lightweight ones provide better air flow under the body, but often last much less than stronger, synthetic ones. Especially recently, when the production of such fabrics has reached a new stage of development, allowing one to achieve amazing results. But they still divide into several main groups based on their ability to withstand certain loads. By the way, the price of the product often depends on this factor - the stronger the fabric, the more expensive the hammock will cost.
The first group is children's hammocks. These products are aimed at children and teenagers and can easily support their weight. But you shouldn’t expect that such a bed will support an adult. They are assembled from lightweight materials, using not the most durable wood, because they are aimed at children, not parents. Usually these are natural fabrics and wood that cannot cause an allergic reaction in a child. They are also much cheaper than full-size designs. 
The second group is hammocks for adults. They may differ in the weight they can bear, because adults also come in different, so to speak, sizes. But at the same time, in general, they are calculated based on more or less the same data. It’s just that in the case of the average representative of the human race, the hammock will have a much greater margin of safety than when a massive person lies on it. Synthetic fabrics, strong wood or even metal, steel are widely used here - it all depends on the production budget and specific needs.

The third and group are hammocks for two. They are designed so that several adults can comfortably lie on them, which imposes its own requirements on materials and their choice. This group more often than others uses the latest developments in the synthetic industry and even steel production. Still, these products must withstand the weight of several adults, which is a large load for any bed. This means that the price of such hammocks will be several times higher than the cost of ordinary, traditional products.

The most reliable materials for hammocks
Before choosing a hammock, you need to correctly calculate the maximum load that it can withstand. If you do this incorrectly, your vacation can end in trouble and even injury, especially if the person hits the back of the head hard.
In order to determine the maximum load as accurately as possible, you need to clearly define the material for the hammock. This is logical, because each of them has its own strength limits. Yes, in principle, you can make a hammock from ship chains or a ten-centimeter layer of fabric, but such a product is unlikely to be convenient to use and transport.
It is worth saying that most existing hammock models are designed to easily withstand a weight of about 110-130 kilograms.
Let's look at the most reliable materials for making hammocks:

Also, the load withstand depends on the length of the bed itself. With a length of 2 meters and a width of one and a half meters, the hammock can easily withstand a load of up to 100 kilograms. This applies to materials that, in terms of load, lie in the so-called “golden mean” of up to 130 kilograms.
Mounting features
When developing your own hammock, it is worth considering how the future product will be attached. This is an important point on which the entire enterprise will depend. There are several basic fastening methods that have stood the test of time and are used in the vast majority of cases. But everyone is free to come up with something of their own, the main thing is to know the features of fastening different hammocks.
Wooden hammock stand
A wooden stand is a rather extravagant way to attach a hammock; it is not often seen. It consists of a wooden base on which several horns are attached. The hammock itself stretches between them.

Having acquired one hammock stand it can be installed literally anywhere, as long as there is enough free space. With such a mount, it becomes possible to install the bed even in an apartment, if you free up the necessary space.
What should you pay attention to if you are planning to make a hammock on such a stand?
- Wood. We determine both its quality and structure, as well as processing methods. Is it protected from moisture, direct sunlight and other negative factors?
- Correct installation of the horn. The angle at which they are installed should be sufficient - not too obtuse and not too sharp. Basically angle = 135 degrees.
- Safety regulations. The stand has a certain stability - if it is disturbed, the entire structure can fall on its side.
- Dimensions. Decide whether you need a single hammock or for the whole family? Only then draw conclusions about the size of the stand.
Metal frame for a hammock
The metal hammock frame is very reliable. The achievements of modern metallurgy make it possible to ensure amazing wear resistance and strength of such a design, although purely aesthetically it is suitable for few. Externally, the design looks like a wooden stand. Usually these are tubes or slats, occasionally - profiles (also the frame for a hammock can be folding).

Although if you reconsider your views, you can get a very strong structure. And, most importantly, cheap. It costs less than a similar wooden stand. This is because metal processing technology is simpler and cheaper. Rivets, profiles and other methods of securing horns are also widely used.
Classic two tree mount
In this case, the structure is stretched between two trees or beams and fixed to them. How to hang a hammock correctly?
- using various loops, tying a tree trunk;
- on a strong branch that has grown in the desired position from the tree trunk;
- secured with special hooks.
This is the simplest and cheapest method for hanging a hammock on a tree.

This is one of the main methods of attaching a hammock in nature. It is usually installed to a horizontal, strong branch.

For this, a fairly long and strong cable is used. It is pulled vertically upward and wound around a strong branch, after which the hammock hangs in the air. Also, instead of winding, they use loops, carabiners and anything else they can think of that is suitable.
Many lovers of this type of recreation install hammocks with vertical suspension at home. To do this, you need to get a strong anchor or hook that will need to be securely screwed into the ceiling.
We advise you to be extremely careful with such experiments, because such a mount may simply not withstand the weight of an adult, especially several, and not every ceiling is suitable for such purposes (only major ones).
What fabric can a hammock be made from?
Fabric is one of the main materials used in the production of a hammock. It is easy to obtain in any quantity, it provides a sufficient level of comfort and can be painted and decorated the way the creator wants. But you need to know which fabrics to choose from, because they must meet several requirements.

- Strength. You can sew a fabric hammock with your own hands from ordinary gabardine, but it is definitely not designed for such loads.
- Comfort. Many fabrics that are suitable in terms of strength characteristics are not suitable in terms of ease of use. They can chafe and leave painful marks on the skin.
- Availability. Not all fabrics may be affordable. And in the case when a person decides to do everything on his own, this is extremely important, because people decide on such events when they want to save money.
Types of fabrics for a hammock or which one to choose


Physical characteristics of the specified fabrics
Burlap is assembled from a variety of materials. It can be either flax or jute - in different proportions or only from them. This ensures strength and durability. Also, hemp or kenaf fibers and yarn are often added to it. The density of burlap varies from 170 g/m2 to 425 g/m2. To create hammocks, it is recommended to use the densest types of burlap; they best withstand loads and almost do not irritate the skin due to the high content of flax and natural jute.
Cotton consists of a large number of soft and elastic fibers. Its characteristic properties have always been high resistance, which allows it to resist exposure to sunlight for a long time. It is also very heat resistant, can withstand temperatures up to 140-150 degrees Celsius. But the fact that cotton wrinkles easily is explained by its hygroscopicity - within 17-20%. Easily damaged by friction. In order for the mechanical properties of cotton to decrease by 45%, it needs to be exposed to direct ultraviolet radiation for more than 1000 hours. It also withstands over 2,400 full wash cycles.
The high density of flax is ensured by the high content of highly organized cellulose in the fibers. It significantly increases the fabric’s resistance to external, aggressive factors. Flax fibers have excellent reflective properties, which helps combat the effects of sunlight.
It is worth mentioning that parachute silk is much, much more elastic than natural silk. It stretches better and retains its original shape. 0.1 millimeters of its fibers can withstand loads of up to 0.56 kilograms.
Let's summarize: comparison table of fabrics with points
Let's summarize and give each type of fabric points for advantages and disadvantages. + 1 point for an advantage, -1 point for a disadvantage.
However, when choosing, we recommend relying more on your own opinion, because the fabric should meet the requirements that you put forward. If you need something more durable, then you should choose parachute silk; to save money, you should choose burlap. It all depends on what you want to achieve as a result.
So, we’ve dealt with the theoretical part, it’s time to move on to the practical part - directly to the master classes.
Single classic hammock with two trees
This is the easiest type of hammock to make. The design is elementary - there is a bed made of fabric or mesh, there is a fastening. Ready. All that remains is to sort out the details, select materials, select the desired design, and you can begin. The main thing is to immediately imagine what the future hammock should look like.
The main feature is to correctly make the support for the hammock and distribute the cables that will be attached to the tree. If both of these operations are done incorrectly, then most of the work will have to be redone - the hammock will not be stable.
Let's make it with our own hands
In order to make such a classic hammock for your dacha with your own hands, you need to prepare. You will need a canvas measuring 2200x1400mm (we use 100% cotton) - this is a standard size, suitable for most people. You also need to prepare the strips - this can be wood specially prepared for this purpose, or simply a cut holder of a wooden mop.
You will also need 16 meters of rope. It can be taken based only on reasons of strength, because the cable will not come into contact with the skin. You also need to have a drill and sewing machine with you. If there is no machine, then a needle and thread. And don’t forget to grab eyelets - in total you will need 10 of them.
 | 1. If there are short sections on the fabric, then they must be folded and stitched, without fail. It is also necessary to make a special edge along the width through which we will pass the side ropes. |
 | 2. We mark the fabric for the eyelets - these are the places where the cord will be attached. The distance between the eyelets should be within 220 mm, depending on the selected fabric size. The distance from the edges is 150 mm. The more accurate the markings, the better. Attach the eyelet half to the material, making an indentation of a few cm. It is necessary to draw the inner diameter of the ring. Use scissors to cut out the resulting holes. |
 | 3. Fit the eyelets to the holes, then snap the halves together. You will need to make 5 of these on each side where the cord will be attached. |
 | 4. Now you need to mark the sticks. We mark 17mm on each edge, mark the hole, and then the distance - 112mm. In total, you need to mark 10 main holes in each stick and 2 side holes through which the side rope will go. As a result, each eyelet in the fabric should be between two holes in the bar. |
 | 5. Drill according to the hole markings. Their diameter should be 15 millimeters so that a cable 7 millimeters thick can pass through them freely, even if it is folded twice. |
 | 6. Now it’s the cord’s turn. It is necessary to cut it into equal pieces, each one meter in length. Then you need to pass the cord through the hole made in the stick, through the grommet in the fabric and again through the stick into the next hole - so that both ends of the cord are on the side of the frame. It is also necessary to pass two long cords of 2700 mm each through the side edges. |
 | 7. We collect all the cords behind the stick into one bundle, make a secure knot and tie it tightly. The resulting knot needs to be braided. |
Done - see photo below! Now all that remains is to disassemble the hammock mount on the tree. Read more about this.

Methods for attaching a hammock to trees
Let's make a hammock mount with our own hands. All that is needed is enough materials to cover the entire column.
The first way is using a loop. You need to get a long enough belt or piece of cable. Its length greatly depends on the thickness of the tree to which the hammock will need to be attached. There are a huge variety of suitable loops - a bowline, a noose, and a simple knot.
| Name | Scheme |
|---|---|
 |
|
 |
|
 |
The second method is using a sling tape. With its help, a tightening loop is formed. It is necessary to throw a ribbon over the tree trunk and thread one end into the eye of the other. A wooden stopper is inserted into the free eye, which becomes the main one for winding.

Also, if there is a free carabiner, the sling tape can be used differently. It is wrapped around a tree trunk, its ends are brought together and a carabiner is threaded through them, which is used as the basis for the knot. If you have no questions about how to secure a hammock in your dacha, move on – we’ll build a stand.

Double fabric hammock on a stand
This variety is also in demand among people who have decided that they will make a hammock themselves. In this case, of course, the task will be somewhat more difficult, but also doable. Before starting work, you need to decide on the materials. It is necessary to clearly know not only the fabric for the bed itself, but also the wood that will be used for the stand.
Advantages and disadvantages
Advantages:
- The main advantage is mobility. The fact is that it is very easy to find a place for a hammock on a stand - the only important thing is that there is free space. And you can put it both in the forest and in an apartment (however, it all depends on the design of the stand; it can be stationary).
- Convenience. Even after making just one stand, you can hang different hammocks on it. And with a double, you can comfortably sit alone, spread out as you please, or with someone close or dear.
- Durability. If you treat the wood correctly, the stand will last for many years.
Flaws:
- Transportability. Unlike hammocks in other groups, this one will have to be transported in a large vehicle.
DIY hammock stand
As part of this master class, we will build a stand for a hammock with our own hands from wood, as in the photo below (the hammock will be different). Everything you need is described in the table below. We also made two drawings for you, top and side views. Look further!

 | You need to purchase 6 bars 100x100x2000 mm, or two 100x100x6000. They will form the basis of the structure. This will cost you approximately 1000 rubles. (The cost of a bar 100x100x6000 mm is on average 500 rubles, i.e. it will cost 1000 rubles.) |
 | We process it with a manual milling cutter. The appearance of the stand depends more on the processing. If you don't have a router, you can skip this step. |
 | The legs of the hammock holder have dimensions (2 pieces) 100x100x1500 (we saw off the extra 500 mm from each leg). The entire structure will be installed on them. |
 | The support inserts have dimensions (2 pcs) 100x100x350 (from a higher height), the cutting angle is 45 degrees. Attached between the lower support beams and the pillars. |
 | The standing beam has dimensions (2 pieces) 100x100x2000, installed at an angle of 45 degrees between the lower support beams. |
 | The lower support bars of the holder have dimensions (2 pieces) 100x100x2000. Installed on top of the legs, parallel to each other. |
 | The studs are 12 mm in diameter, a total of 3000 mm is required. You can take three M12x1000 (in stores for about 600 rubles). Long drills will be needed. |
 | We cut the first stud into 4 parts of 250 mm each. These are fastenings of the lower support bars on both sides, in total there will be 8 such fastenings. The farthest one is attached at a distance of 400 mm from the edge, the nearest one – 100 mm from the edge. |
 | We saw the remaining 2 studs into 6 more pieces. We will get 3 fastenings on each side. We use the first two on the lower support bars in the legs, 2 on each side. |
 | One fastening at an angle of 45 degrees to the ground (90 degrees to the beam) between the post and support beams. |
 | Under long legs, it is advisable to screw small underlays 50 mm in height. This will prevent the main bars from rotting. |
  | The hammock will be attached using carabiners. And those, in turn, are attached to anchors 12 mm in diameter and 110 mm in length. The anchors are driven into the timber and secured with nuts and wide washers. The distance between the anchors to which the hammock is attached is 3750 mm. |
 | Drawing of a stand for a hammock with your own hands, “top view”. |
 | Drawing and dimensions of a stand for a wooden hammock with captions, “side view”. |
After you assemble the frame for the hammock with your own hands, you need to treat it with a special impregnation for wood so that it rots when standing outside.
We make and secure the hammock on the stand
For this design, a simple hammock model without frame slats is best suited. You will need:
- Fabric (linen strand), 1.5 meters wide and 3 meters long (or sew two cuts to get the desired size).
- Scissors, sewing machine, thread.
- Two skeins of nylon cord with minimal stretch, 2.5 meters each.
 | It is necessary to prepare a dense sheet of teak fabric (linen strand) measuring 1500x3000mm. |
 | You need to make a hem on both edges using a sewing machine. |
 | The fabric for the hammock is folded into 3 layers and a loop is made to pass the rope inside, then tied with a noose knot. A rope, folded in half, is passed through the ends on one side and tied around the resulting long loop on the other. |
 | The other end of the rope is secured with a knot to a carabiner, which clings to an anchor with a ring. Ready! We made a hammock and a support for it with our own hands. |
Macrame hammock made of rope - back to the USSR
This type of hammock was very popular in the Soviet Union. Many people then became interested in such an interesting practice as macrame, which made it possible to adapt it to production. This method is very economical, although it requires more time than other similar methods. True, for a successful completion you need to know exactly what needs to be done.
The main feature of a hammock lies in the production method used. For macrame of this scale you will need a fairly large amount of cord. But this also allows a person to immediately give the product the desired texture and color. Most other types of hammocks require painting or some difficult combination of materials, when with the macrame technique you can simply choose the right cords.
How to weave a macrame hammock correctly - photo instructions
This part of the article is made in the form of step-by-step photo instructions. If you have weaving skills and are willing to spend more than one hour making a macrame hammock with your own hands, then start studying the photo instructions. To begin with, preparation.
 | Before weaving a hammock, you need to take care of ease of use. You will need special fastenings for ropes as in the photo, which will help you weave correctly. Such tools are used when weaving hammocks on an industrial scale. |
 | If you cannot get such devices, then you will need a block to which the ropes will be attached. We will make holes in the block with a pitch of 50 mm and a diameter for the rope. |
 | Prepare approximately 290 meters of nylon cord no more than 5 mm wide. This should be enough to knit a hammock measuring 3100x1000 mm. |


Hammock dimensions: 3100 mm long, 1000 mm wide. The estimated weight of the product is 4 kg, and can withstand a load of 130 kg.

You can learn more about the process of weaving a hammock in this video.
Hanging
After everything is ready and you have secured the hammock to the beam (as discussed in preparation), you can start hanging the product. Considering that we are dealing with a classic design, it is suspended from two points - trees standing opposite each other or vertical piles. You can hang it using the same methods as a classic hammock (described in paragraph 7.2), that is:
- Loop.
- Rafter tape, on a stopper or carabiner.
Seated hammock in the form of a chair made of fabric on wood
It’s worth mentioning separately , that the sitting hammock chair has relatively recently entered modern fashion. This is a fashion accessory that can be used both at home and outdoors. Quite comfortable and provides a comfortable pastime in any conditions. It is not surprising that many have decided to take such a step as collecting G DIY amak chair.
Advantages and disadvantages
Like any type of hammock, this one also has its pros and cons that you need to understand before getting started.
Advantages:
- Hammock chairs are very convenient and comfortable; sitting in them relaxes your back.
- This is very original furniture that helps brighten up any environment.
- Another positive factor will be exclusivity - few people have such a sitting hammock, which is also handmade.
Flaws:
- Fastenings must be selected taking into account heavy loads.
- You can’t hang it in every apartment (you need free space and solid ceilings).
Step-by-step master class
Let's sew a sitting hammock like in the photo below with our own hands.

 | First of all, we will need to buy 14*2=28 eyelets for fastenings with a diameter of 12 mm. The price of a set of 30 pieces is up to 600 rubles. |
 | We will need a piece of white thick fabric, which can be used on a cotton basis. Dimensions 2 x 600 mm by 1100 mm. |
 | For hanging we use 8 mm nylon thread. Take 20 meters, it will cost about 350 rubles. We will also take 2 meters of stronger 14 mm rope (or we can take more than 8 mm and then weave it). |
 | Also don't forget 30-40mm carabiners or rings for hanging. You will need 3 pieces. |
 | We sew two pieces of fabric for the hammock so that the base of the structure is denser. |
 | We mark at a distance of 87 mm between the centers of the holes for the eyelets, as shown in the drawing. Step back 5 mm from the edges. Next we drill the holes. |
 | The next step is to take an 8 mm rope and cut it in the following sizes in two copies: 1 piece – 400 mm 1 piece – 500 mm 1 piece – 600 mm 1 piece – 700 mm 1 piece – 800 mm 1 piece – 900 mm 1 piece – 1000 mm 7 pcs – 1075 mm The total is 14 shares in total 12425 mm *2=24850 mm. These pieces of rope will act as attachments for the chair to the hanging rings. We also cut the thick rope into two parts of 750 mm each. |
 | Everything else is simple. We must thread the ends of each piece of rope through the grommets and tie them in knots. Shorter ropes are located at the top of the seat. The longer ones are from the bottom in a row. On the reverse side we fasten the ropes to the rings for hanging on each side. To do this, you will need to weave them into one knot and tie them properly. As you may have guessed, we made different sizes for the ropes on purpose - so that when suspended, a back and seat would be formed. |
 | Now we take a wooden block 1000 mm long and 25 mm in diameter. If a heavier person will be seated in the chair, take one with a diameter of 35 mm. We need to drill 3 holes (shown by red arrows). Each of them is under a thick rope (black line in the diagram). The rope is pulled in the direction as shown in the figure through the block and the ring. Two knots are also made to secure the structure. |
 | Next, we stretch two thick ropes together with the resulting structure, weave it in the middle and tie it on the third ring. Now that the hammock is ready, all that remains is to hang it up! |
How to hang a hammock
There are two main ways to hang such a chair: on a horizontal beam and in the ceiling.

Keep in mind that such fastenings can only be made to solid concrete ceilings. To hang a hammock on a balcony or loggia, it is better to use special pre-prepared mounts.

Do-it-yourself jeans hammock - how to make it
Jeans are a very strong and dense material. If you have accumulated a large number of old pants, then you can, of course, recycle or throw them away, but it’s better to use them for good. Make a hammock out of them, for example.
To construct it, you will need skills in using a sewing machine to sew jeans together.
Stage 1. In total, to build a hammock from jeans with your own hands, you will need 6 pairs of old pants. It is advisable to take jeans that are as tight as possible and not particularly ripped.

Stage 2. The first step is to sew the jeans. We sew all 6 so that we get 3 identically sewn pairs, as in the picture below.

Stage 3. Here you are required to sew all three pairs along the edges, as in the picture below. We think you have already guessed what will happen next.

Stage 4. Now you need to sew all the pairs of jeans for the hammock along the edges together: we sew the right edge of the first pair with the left edge of the second pair, the right edge of the second pair we sew with the left edge of the third pair. As a result, we get a fairly thick denim fabric.

Stage 5. Through the loops on the jeans on each side we pass a strong rope with minimal stretch as indicated below. Then we tie the rope into a knot and attach it to the carabiners. Next, we attach the resulting structure to the support posts, or to a tree, according to the principles that were already described earlier in this article. Your homemade hammock is ready – try it yourself!

Children's hammock for home
A hammock for a child does not have the same strength requirements as for an adult. Still, the child weighs several times lighter, which means the load will not be so significant. So, in principle, you can make a children’s hammock for your home with your own hands even from scrap materials.
We will need:
- Clothesline with a diameter of 5 millimeters.
- A piece of fabric 140 centimeters long and 180 centimeters wide.

How can the design be improved?
The hammock opens up a large number of opportunities for modernization and improvements. These improvements help to significantly improve the comfort of the bed. And, most importantly, they solve many problems, such as the bright sun, or annoying midges.
Hammock with mosquito net
One of the most important modifications for people who love hiking with a hammock. A mosquito net can:
- included with purchase;
- purchase separately;
- do it yourself.

If you purchase an additional mosquito net for your hammock, use our advice. Small patches with “ears” are attached to the mesh, which will work as additional guy wires. Next you need to sew the mosquito net to one side of the hammock - from the long and narrow edge. On the other side, a zipper is sewn, right side out. Now the hammock is protected from attacks by harmful insects!
Selection of soft pillows
When choosing soft pillows for a hammock, you should always pay attention to several main factors:
- Pillow structure. Will it be comfortable to lie on? The hammock dictates its conditions based on the position of the body.
- Rationality. Everything is very simple here - is it worth buying a very soft, large pillow, the purpose of which is hiking?
- Materials. It is best to buy simpler and more practical pillows - after all, the hammock is more designed for hiking than for sedentary activities. If it is stationary, give free rein to your imagination!
- Color. Choose pillows by color so that there is no dissonance when looking at them.

We paint the frame and decorate the hammock
The hammock has rather limited options regarding external decorations. The main decoration methods can be divided into:
- Fringe. Many designs are richly decorated with it, and the fashion for them began with representatives of some indigenous tribes from Africa, Brazil and other southern countries. For many centuries they have been decorating their beds with a variety of colorful threads and knots.
- Macrame. It is often adapted to hang over the edge of a hammock.
- Embroidery and patterns. Mesh hammocks can be decorated with embroidery, patterns and weaving from the mesh itself.

These are not the only ways you can decorate a hammock. You can also paint the frame in different colors. In the case of a stand, this is quite easy to do - remove the stock, put everything in a ventilated place, paint and wait until it dries.
If we are dealing with a frame made of crossbars, then they will need to be first pulled out of the structure. And wait until it dries.
Operating and safety rules
A home hammock also has its own safety precautions. It is based on the fact that the bed itself turns over very easily and can cause quite serious injuries, especially if a person falls on the back of his head.

The basic rules are:
- The attachment points must easily withstand a weight that will be 2.5 times greater than the weight of the person who is going to rest on the bed.
- The place where the hammock is attached should not have a cutting edge or sharp edges.
- The main attention should be paid to how a person sits on a hammock and how to get off it.
- Try to reduce contact of the hammock with rainwater, especially over long periods of time.
- If the device is hanging at a height of more than 600 millimeters from the ground, you need to lay something soft to absorb part of the impact in the event of a possible fall.
We hope that our tips will help you make a hammock with your own hands, and it will serve you faithfully for many years!
This hammock is a symbiosis of a chair and a swing. It can be hung in the house on a hook screwed into the ceiling, and outside - on a crossbar or a fairly strong tree branch. To ensure that the hammock itself is strong and reliable, choose the appropriate fabric (thick cotton, tarpaulin), threads, cord and carabiners.
You will need:
Wooden plank (optimally oak),
Durable cord
About 2 sq. meters of durable fabric,
A durable carabiner (2 pcs.),
Sewing machine and strong threads,
Iron and ironing board.

1. Fold the fabric in half and cut it as shown in photo 1. Tuck the parallel sides of the piece and sew on the machine (photo 2).

2. Now on the two raw sides of the part you need to make drawstrings into which the cord will be threaded. When measuring the width of the drawstring, be guided by the thickness of your cord. Tuck and stitch the fabric as shown in photos 3, 4 and 5.
3. Drill two holes at both ends of the board, as shown in photo 6.

4. Thread the cord through the drawstrings and into the holes of the board as shown in the photo. Be sure to tie the knots tightly.


5. All that remains is to organize a place to attach the hammock and hang it.

2. Wicker hammock using macrame technique: master class

Macrame is the art of knot weaving from cords or thick threads. To make such a wicker hammock, you need to master a couple of the simplest knots of the macrame technique - it’s not difficult.
You will need:
Durable thick cord in one or more colors,
Scissors,
Ruler,
Two dies for the edges of the hammock (in this case, the dies are taken from an old hammock; you can also drill holes in strong planks of the length you need).

1. First, one of the hammock dies will serve as the basis for weaving. Secure it in a position convenient for work (mounts for the curtain rod are used here, but you can come up with something else).

2. Cut 21 pieces from the cord, each about 730 cm long. Fold each piece in half and secure it to a die, as shown in the photo.

3. When all the pieces of cord are secured, start tying knots. Step back a few centimeters from the die and proceed as shown in the photo.

4. Continue making knots. You should end up with something like this:

5. Having weaved the first row of knots, step back some distance from it and start a second row of the same knots in a checkerboard pattern. Continue in this manner until you have a network like the one in the photo.

6. Now remove the loops from the die. Trim the lower ends of the work and tie it to form loops. Thread ropes into the upper and lower loops and secure the edges of the hammock to the dies. Tie the ropes at the top and bottom in a knot, making a loop to which the hammock will be attached.

3. Hammock with leather loops: master class
Another version of the classic hammock is with hinges made of durable leather. If your machine will not accept thick leather, replace it with a fairly thick and wide braid made of cotton or synthetics.
You will need:
Hammock fabric (thick cotton, tarpaulin, other durable fabric),
Fabric for strengthening the edges of the hammock,
Machine and strong threads,
Leather for loops (option - braid for loops),
Twine or strong rope,
Scissors, pins.

1. Decide on the length and width of the hammock you need and cut out a piece of appropriate size fabric. Tuck the long sides of the piece and sew on the machine.

2. Finish the sides of the hammock to which the loops will be attached by making the hem wider and strengthening it with an additional strip of fabric folded in half on each side.

3. Cut the leather into pieces for loops. Focus on the thickness of your hammock cord.

4. At equal distances from each other, mark places for attaching the hinges.

5. Sew the loops as shown in the photo.


6. Thread a rope through the loops. Tie the ends with a knot on each side, making a loop (see photo). Wrap both loops with rope for strength.


4. A simple hammock in 10 minutes: master class
This hammock option is one of the easiest to make. In addition, it turns out to be very light (due to the low weight of the fabric) and mobile, since it does not have heavy and rigid parts. It is convenient to take such a hammock with you to the forest or park for a walk.
You will need:
Lining fabric (3x150 cm),
A pair of carbines,
About 6 meters of strong rope.
Follow the instructions shown in the video.
More hammock ideas:
1. This hammock can be made from a rug or blanket.

2,3. Two versions of hammock chairs - in different colors they look completely different.

Photo: decoritem.com, deas4homes.com
Today it is quite difficult to imagine a full-fledged comfortable summer holiday on a country site without a hammock. Hammocks in the country are very comfortable and practical; you can sunbathe on them, read a book, or just take a nap in the fresh air. In addition, you can make an original hammock with your own hands, you just need to put in a little effort.

Frame hammocks can be prefabricated or stationary. The latter option is more reliable and stable, but transporting this product can cause problems. Prefabricated hammocks do not have a high level of reliability, since they are made from more fragile materials, but such hammocks can be easily disassembled and transported from place to place. Hammocks with a frame can have different shapes and colors.
Hanging hammocks. These models can be considered classic, since people first began to use them. Positive characteristics include versatility, the presence of a synthetic base that does not allow moisture to pass through. The use of a mosquito net will be especially important in warm evening hours, when mosquitoes fly out to hunt.
You can build a hanging hammock for your summer house with your own hands. To do this, just find two trees standing next to each other and attach the base to their trunks. Tension elements or carabiners are used as fasteners. If there are no suitable trees nearby, then poles are used to create a hammock.
Hammock chair. This product is in high demand because it is practical and versatile. The presence of a hammock chair brings additional convenience to a simple stay in the fresh air.
This hammock model can be large in size, which will especially appeal to people who relax with a group of friends. The comfortable base can accommodate several people at the same time. Here you can chat while swaying slightly or drink a glass of lemonade. The cost of hammock chairs will be slightly higher than other varieties, especially if such a hammock is equipped with additional devices and accessories. It is possible to make a hammock chair with your own hands.
Hammocks-swings. Such hammocks have a rather unusual design, which makes them an original decoration for any summer cottage. The fulcrum for hammock chairs can be the same trees and a seat; the main condition is the ability to swing freely. Modern models of such hammocks can take on the most bizarre shapes and have a variety of designs.
Rules for using a hammock
As you can see, there are a great many modifications and varieties of hammocks. However, they all require compliance with certain operating rules that can protect you from various negative situations and make your vacation truly enjoyable.
Consider these rules:
- First of all, after installing any hammock, you need to check its stability and reliability of the fastenings. Trees or poles on which the entire structure is supported must have a diameter of 20 cm. The poles are dug into the ground approximately 1 m. You should not use a product that sag a lot, as this will only damage the base of the hammock;
- As for the distances, between the supports of the hammock it ranges from 3 m, and the fastening from the ground is 1 - 1.5 m;
- The reliability of the fastenings must be checked in advance. The cables that bear the entire load must have a diameter of at least 8 mm.
Advice! To achieve an even greater level of safety, experts recommend using eyelets. There are times when their use is impossible - it all depends on the specific hammock model.
- The base of the hammock should consist of durable, dense fabrics - tarpaulin or camouflage. You should not skimp on fabric, as it can protect you from injury if you fall. The matter needs to be replaced every 2 - 3 years;
- In order to make a hammock from a mesh with your own hands, it is best to use cotton threads that do not fray, do not slip and are tightened quite tightly.
Decorating a hammock
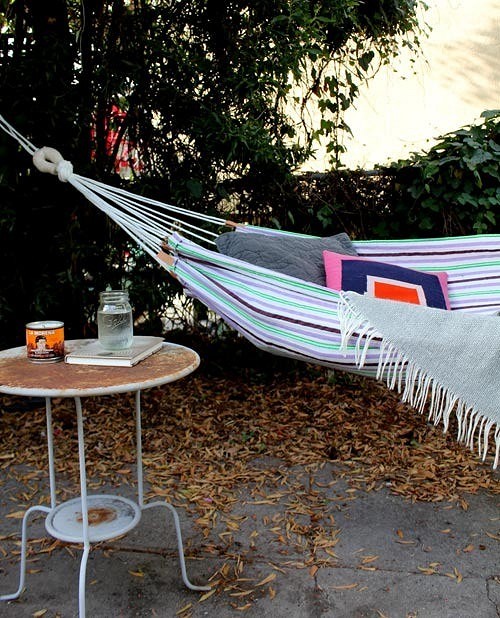
After the hammock has been purchased and installed or built yourself, you can take care of decorating it. The design itself is considered a good decoration for a suburban area, but there is no limit to perfection. Hammocks are often decorated with canopies made of transparent or dense fabrics, which perform not only an aesthetic, but also a practical function - they protect from bright sun rays and wind.
To achieve comfortable conditions, the hammock is equipped with additional soft cushions, painted in bright colors. Ribbons will also be an excellent decoration that will make the hammock design elegant, light and airy.
How to make a hammock with your own hands?
Method No. 1
In order to make a hanging hammock with your own hands, it is enough to acquire strong ropes, reliable material of a suitable color and a sewing machine. No special skills are required for this work.
- Preparing the base
The dimensions of the base for the hammock are calculated in accordance with the height of the person, and for an allowance on both sides, another 60 cm should be added to these indicators.
The uneven edges of the material are cut off, and on both narrow sides places for mounting the drawstring are marked. To do this, 30 cm incisions are made at a distance of 18 cm from each other.
Materials for a hammock Possible hammock layout Elements of a hammock
- Making drawstrings
The drawstrings are located along the edges of the fabric on its narrower sides. This is where the ropes are pulled. The cuts in 2 layers are folded and stitched with double seams. The ends of the seams are securely fastened.
- Making loops and installing rope
Let's look at how you can weave a hammock with your own hands. The rope must be threaded into the ready-made drawstrings, leaving a margin of approximately 180 cm; it is pulled through the cuts for 1 m. To make a hammock, you will need about 40 m of rope.

Creating loops
The ends of the rope are tied two at a time on one side, and four loops are pulled out in the middle, which must be wrapped in rope and gathered together. It will take about 10 m of rope to make a good winding. Before joining, the loops are straightened and tied at the top of the bend. As for the transverse winding, it should be carried out only after all the longitudinal loops have been laid and the rope has been secured. Longitudinal loops are made from thinner rope, the length of which will be slightly less than half a meter.
A longitudinal loop is necessary to securely fix the ends of the winding. The remaining winding threads at the end of the work are crossed with each other and pressed tightly. Next, a rope is pulled through the securing loop, and then the longitudinal part is wound. When work with the load-bearing loop is completed, you should connect the two remaining ends of the rope and wrap them together. After creating two turns, tie the remaining ends of the rope tightly.
- Installation
As mentioned earlier, the easiest way to install a hanging hammock is to attach it to two nearby trees. The main condition is that the fastening must be strong and reliable. In addition, poles dug into the ground provide excellent support, as does a stand for a homemade hammock.
- Decor
For a comfortable rest in a hammock, you need to use soft, comfortable pillows that you can sew yourself using holofiber, down or padding polyester as a filler. It is better if the pillows are painted in a color contrasting with the color of the hammock itself.
Method number 2
If you are still tormented by the question of how to make a hammock with your own hands, then you can use the second, no less accessible method. To do this you will need the following materials:
- Approximately 2.5 m of durable tarpaulin or other material;
- 20 eyelets, as well as tools for their installation;
- 35 m of rope with a diameter of 6 mm;
- A pair of large metal rings;
- Drill and drill bit 12 mm;
- A pair of hardwood beams with a size of 30x50. The length of these products should correspond to the width of the future hammock;
- Sewing machine.
- Preparing the base
After choosing a suitable fabric, you need to measure and cut a piece 2.7 m long. If the structure is located under a canopy, you can not take into account the resistance of the material to getting wet. If the hammock will stand without a roof, then this factor must be taken into account.
The edges of the fabric must be folded and stitched using a sewing machine. The fabric is folded up by about 6 cm. For more convenient stitching, the rolled tip is ironed, then re-folded and ironed again.

We fix the spacer on the frame
The length of the bars is measured depending on the width of the hammock. The through holes in the beams must exactly coincide with the location of the eyelets. The thickness of the products must be at least 25 mm, any width can be selected (from 50 to 120 mm). The finished spacers are sanded and coated with a varnish composition.
Installing a hammock
Initially, the hammock slings are installed; to simplify the process, a special frame is often made, but you can also do without it. To do this, a metal ring is fixed on the hook, and the canvas is laid out on the floor and secured in place with something heavy.
A spacer is mounted on the frame. Each line must pass through a specific grommet, then through a hole made in the spacer and a ring, and then the rope comes back. Once the tying is completed, the ends of the rope are tied. If desired, you can braid the metal ring with the ends of the strings to give the finished product a more attractive look.
Exactly the same manipulations must be carried out with the other end of the hammock. The hammock is hung on any supports suitable for these purposes.
DIY hammock stand
Unfortunately, not in every yard you can find a couple of trees located in a cozy corner, and even at the required distance from each other. The optimal solution to this problem is to create a hammock stand with your own hands.
This design has many advantages:
- it is light, mobile and compact, it is easy to transport it to any place in the summer cottage;
- quickly made with your own hands from available materials, the cost of which is significantly lower than the price of a ready-made hammock frame;
- it is durable and attractive in appearance.
Required materials and tools:
- wooden beams with a section of 80x80;
- board with a section of 100x30;
- studs, nuts, washers for fastening;
- grinder, circular saw, drill;
- wood stain or varnish;
- hooks for securing the fabric.

DIY hammock frame step by step. photo
The lower, supporting part of the rack will consist of two longitudinal beams of 3 m each and two crossbars of 1.5 m each. The side part - 2 fastening beams (beam 2 m long) and 2 stops (beam 1.45 m long).

hammock frame drawing. Photo
The first stage is the manufacture of the jib - the side part of the stand on which the hammock fabric will be attached using hooks. To do this, the beam and the stop are rigidly fastened to each other and cut off at the bottom in such a way that a vertical, but at the same time stable structure is obtained with a camber at the upper points of at least 4 m.

The resulting side parts are installed and secured vertically between two longitudinal beams. Their location should be mirrored relative to each other.

The crossbar consists of 2 pieces of board (1.3 and 1.5 m), which are located one on top of the other to ensure better stability.

At the final stage, the longitudinal beams are fastened to the crossbars at a distance of 60 cm from each edge.

We sand it, cover it with stain or varnish - and the frame for the hammock with your own hands is ready. All that remains is to secure the canvas.
DIY hammock frame

hammock frame drawing 2
You can also make a slightly different design, which some find more convenient. The materials and tools are the same as in the first case.


DIY hammock frame step by step. Photo
The difference between this frame is the method of manufacturing the jib and the presence of a small handle for comfortable lifting from a lying position.
Thus, making a hammock stand with your own hands is not at all difficult. And enjoying the result of your work will be doubly pleasant.
Photos of hammocks
In the presented photos you can see what hammocks are like, belonging to different types. You can notice significant differences in the design of the products, as well as in their design and methods of decoration. All these photos can be used to build a hammock with your own hands.


How to make a hammock with your own hands - video
In order to make a hammock with your own hands, you do not have to be a specialist in the construction field, since the video shows and describes the work process in great detail. Now, in order to enjoy a good rest at the dacha, you only need to make a little effort. Follow the recommendations and instructions - and everything will definitely work out!
Compared to a bed, sofa or chaise lounge, a hammock has a huge advantage in the sense that resting on it restores strength much better. The invention is not new - the Mayan Indians came up with it. This invention has not lost its relevance to this day.

Types of hammocks
Manufacturers are coming up with more and more new product models, but, despite the delights and bells and whistles, they are classified into several main groups.

The first group is classic hanging hammocks. They are lightweight, durable and reliable, easy to install and dismantle. They are relatively easy to manufacture - they do not require making a frame; you need two trees or poles to which the hammock is attached.


The second group includes frame hammocks. Their main advantage is the ability to install them anywhere on a flat surface. They are divided into collapsible and stationary.

A stationary frame hammock is more reliable than a collapsible one, but when transporting it, you should take into account its weight and dimensions, since it will not be possible to disassemble it, which can cause some inconvenience. Although such problems do not arise with a prefabricated hammock, it is significantly inferior in strength, reliability and durability to a stationary one.

The hammock chair is versatile and practical. Manufacturers often make it so large that several people can sit on it. The price of such a product is slightly higher than that of a classic hanging hammock.

Hammock swings, thanks to their unique design and interesting design, not only serve their intended purpose, but also decorate the site. Some models require two poles or trees to mount, others have their own frame.


A hammock with a canopy is a type of frame hammock, characterized by increased comfort, protecting from direct sunlight in hot weather, and to some extent from precipitation in rainy weather. The price of such a product will be significantly higher than that of a simple frame one.

Rules for using hanging hammocks
Despite the variety of types of hammocks, there are certain rules for their operation. By adhering to them, you will be able to extend the life of the product and make your vacation safe and comfortable.

These are the rules that apply more to hanging hammocks, but in terms of the strength of the base they are also valid for frame hammocks:
After installing the hammock, you should make sure that it is securely and correctly fastened. The thickness of the pillars or tree trunks acting as supports must be at least 20 cm. The depth of the hole in which the pillars are dug should not be less than a meter. If the hammock sags too much, this is unacceptable - its base is damaged.


The distance between trees or poles to which the hammock is attached should be 3 meters, the height of the attachment should be from 1 to 1.5 meters.

First check the reliability of the fastenings. The thickness of the cable, which bears the main load, should not be less than 8 mm.

A tarpaulin or durable fabric is used as a base for a hammock. By saving on fabric, there is a certain risk that you will have to fork out money at the pharmacy. The service life of the base is two to three years, after which the fabric needs to be replaced.

When making your own hanging hammock from a mesh, it is recommended to use cotton threads that are resistant to abrasion, non-slip and well-tightened.


Decorating a hammock
After purchasing or making your own hammock and installing it, you should take care of its pleasant, aesthetic appearance. Although the hammock itself is a decoration for a summer cottage, if there is an opportunity to further decorate it, then why not?


Firstly, if you decorate a hammock with a canopy made of translucent fabric, then in addition to the decor you will receive protection from ultraviolet radiation and, to a large extent, from moisture and wind. To give the bed a more luxurious look, pillows in oriental colors and ribbons with bows are used - all these attributes are conducive to a comfortable rest.

Photo of a hammock for a summer cottage with your own hands


Making a simple hammock from fabric for a summer cottage with your own hands, several options for making a hammock: diagram, photo, video.
A hammock is a hanging bed for sleeping and relaxing and consists of a piece of dense fabric or mesh suspended at opposite ends. The hammock was invented by the South American Indians, and since then it has been widely used throughout the world. You can make a hammock with your own hands; in this article we will look in detail at several options for making a simple hammock from fabric.
First, let's look at the simplest version of a hammock - the Mexican “cocoon”.
To make a hammock, you will need a “cocoon” type
- Two pieces of thick fabric measuring 3.2 x 1.5 m.
- Travel mat or small blanket.
- Strong rope.
What fabric should I use to make a hammock?
To make a hammock, you need to take thick, durable fabric (canvas, mattress teak, camouflage, thick upholstery fabric). Do not use synthetic fabrics, it is uncomfortable to rest in a synthetic hammock, the body wrapped in synthetics does not breathe, use only natural fabrics.
Let's start production.
We fold two identical pieces of fabric and sew them together using a sewing machine. We do not sew all the way along the long sides; we leave slits, this is necessary so that later we can put the lining there.

We sew both pieces of fabric together, leaving slits for the lining.
We bend the fabric along the short sides and stitch it so that we get a tunnel for the rope.
We stretch a rope into the tunnel from each end of the hammock, select the fabric, wrap it around it and tie it in a knot.

We thread the cord and tighten the edge of the hammock into a knot.
To prevent the hammock from completely sticking to the body, insert a blanket lining or a camping mat into the slots.
The hammock is ready, we pull it by the ropes between the trees and use it.
How to make a hammock from fabric: option No. 2.

Hammock with loops.
To make a hammock you will need:
- A piece of thick fabric measuring approximately 1.2 x 2.2 m.
- Sling or thick fabric.
- A strong rope, a clothesline will do.
Take a piece of fabric, the size of the fabric is approximately 120 x 220 cm and fold it along the edges. Using a sewing machine, sew the edges with a seam.
Now we need to strengthen the edges of the hammock.
From the tarpaulin we cut out two strips 5 cm wide and a length equal to the width of the hammock fabric. We place these strips on the narrow edges of the fabric, wrap them in fabric and stitch them. This way we will strengthen the edges of our hammock.
We sew the loops to the edges of the hammock, the distance between the loops should be uniform.

Sew the loops to the hammock.
We insert a rope into each loop, collect the ends of the ropes into one large loop and make a knot. The hammock is ready.

A simple fabric hammock.
How to make a hammock from fabric: option No. 3.
The hammock version is similar to the previous one, but here two wooden sticks are attached to the edges, which do not allow the hammock to fold.

Side poles keep the hammock open.
The hammock is made in the same way as the previous version, only we use hardwood sticks at the edges.
The length of the sticks is about a meter, the thickness is 3 cm, we drill 10 holes in the sticks at an even distance and stretch the ropes coming from the loops of the hammock through them.
This design allows you to make the hammock wider and more comfortable for relaxation.
How to hang a hammock.
The hammock can be hung between two trees located at a distance of approximately 3 - 4 meters. If this is not possible, you can install support pillars dug into the ground to a depth of about a meter. The hammock is suspended at a height of just over a meter above the ground.