Two-level suspended ceiling made of plasterboard will look original in the hall, living room, bedroom. It will fit perfectly into classic and modern design. And by installing it yourself, you can turn your idea of decorating a room into reality. Our tips will help you.
Methods for installing two-tier plasterboard ceilings

Ceiling shapes can be very different. This is a convex box of a bizarre shape or, on the contrary, an original niche with lighting in a frame.
The frame of a two-level plasterboard ceiling is equipped with several methods:
- Second level installation. The best option for even coverage. In this case, the lighting elements are fixed in the frame.
- Sequential installation. First, the first tier is mounted, to which the second is attached. The method is suitable for those projects in which the second level occupies a small area, since its weight is completely supported by the first tier.
- Reverse fixation. In this case, it is necessary to initially make a second-level frame and install the first between its profiles. This method is considered the most difficult.
Features of designing a two-level plasterboard ceiling

Before starting work, you need to draw up a diagram of the ceiling structure. This will make your work much easier and avoid many mistakes. It is especially important to draw up a project if you are a beginner and do not have special installation skills. If possible, it is better to make a drawing future design in 3D format using special computer programs.
During the process, the following nuances must be taken into account:
- Room height. A two-level ceiling takes up almost 10 cm of ceiling height. To save space, you can level the covering and install a second tier on it.
- Lighting. You need to think about the location of the lamps at the design stage. Please note that with the help of well-chosen and placed lighting fixtures, you can zone a room or focus on the necessary decorative elements.
- Humidity level. Installation of ordinary drywall in rooms with high humidity is not carried out. For this purpose, special moisture-resistant sheets are produced. They are distinguished by the greenish tint of cardboard. For installation in the kitchen, where the humidity is not much increased, they are suitable regular sheets, but they should be treated with several primer layers.
Selection of materials and tools for installing a two-level plasterboard ceiling

You need to purchase plasterboard sheets from reliable suppliers. It is important to pay attention to the availability of quality certificates for products. Select plasterboard sheets depending on the operating conditions of the room in which they will be installed. Drywall can be regular (brown-gray), moisture-resistant (greenish), fire-resistant (red).
Plasterboard with a thickness of 8-9.5 mm is suitable for installing ceilings. Sheets 1.2 cm thick are not recommended for installation on the ceiling due to their heavy weight and inefficient use of wall height. The second tier is traditionally made of arched gypsum boards, the thickness of which is 6 mm. Please note that it is not recommended to buy drywall back to back. Buy with a reserve of 3-5%.
It is necessary to take a responsible approach to the selection of other structural elements (profiles and fasteners). The use of low-quality frame parts will significantly reduce the service life of the structure and the reliability of fixation. For installation you will need UD and CD profiles, CD connectors, “crabs”, corner and two-level (try to use the latter as rarely as possible), straight and spring hangers.
As for fastening elements, during installation work dowel screws, anchor wedges, metal screws with press washers (“fleas” 9.5 * 3.5 mm) and self-tapping screws for fixing gypsum boards are used. There should be plenty of fasteners.
When calculating, consider the following indicators:
- The frame is fixed to the base ceiling in increments of 60 cm.
- Plasterboard sheets are attached in increments of 25 cm.
- To install one “crab” you will need 8 screws.
- One suspension unit is fixed with six self-tapping screws.
As for tools, in addition to a hammer drill and a screwdriver, you will need a knife for cutting plasterboard, a hydraulic level, a profile cutter and a painting cord.
Preparatory work before installing a two-level plasterboard ceiling

First you need to prepare the basic ceiling covering. We carry out the work in this way: remove old finishing and crumbling plaster, if necessary, we get rid of stains of fungus, mold, rust, soot and grease, we seal large cracks with cement-based putty, and prime the surface.
It is also necessary to bring the sheets into the room in advance and leave them in a horizontal position for several days to adapt to the temperature and humidity conditions. Before starting work, it is recommended to turn off the power to the room. Prepare protective equipment in advance: goggles, gloves and a respirator.
DIY two-level plasterboard ceiling
This method is step-by-step installation first and second levels of construction. Thus, it is possible to implement a project with a small second tier, since it will be attached to the first.
Instructions for marking the surface for attaching drywall

This is one of the main stages of installing two-level plasterboard ceilings. The entire course depends on the correct application of markings to the surface. further work.
In the process, we adhere to the following action plan:
- We mark the installation network from the reference width and length.
- In the middle of the circles we screw temporary self-tapping screws into the base covering and wrap a cord around them with a pencil fixed at the edges. We draw circles.
- We apply curved elements on thick cardboard in real scale, cut them out and display them on the base coat.
- When the markings on the ceiling are completed, we begin measuring and marking the levels. To do this, we measure all angles.
- In the lowest corner we mark the distance to the first level. Usually it is from 10 cm.
- We stretch the painting cord along the wall, measuring the evenness with a hydraulic level.
- We make a beating around the perimeter of the entire room.
Installation of the first level frame for a plasterboard ceiling

During the work, be sure to accurately follow the contours that were previously drawn on the surfaces.
We install the frame in the following order:
- Along the perimeter of the room on the walls in increments of 60 cm we fix guide profiles (UD). On the ceiling, we maintain a distance of 40 cm. For fastening on rounded areas, we make notches on the profile in increments of 2.5 cm and bend it to the required radius.
- We attach straight hangers in 60 cm increments. We bend or cut the ends.
- We fix the ceiling profiles (CD) onto the hangers.
- We attach “crabs” to the places where the second tier will be installed.
Installation of a second-level frame for a plasterboard ceiling

Work can begin only after the second level drawing has been applied to the ceiling. During work, be sure to compare the result obtained with the drawing to avoid mistakes.
We install according to the following instructions:
- We fix the ceiling profile (UD) on the ceiling and wall according to the drawing.
- We cut the guide profile to the length on which the second tier will be placed.
- On one side of the made sections we cut out peculiar “tongues”, cutting off the profile sides.
- We insert it with a smooth edge into the UD profile on the ceiling and fix it with metal screws in increments of 50-60 cm. Reducing the pitch will make the structure heavier, while increasing it will make it less reliable and not rigid enough.
- On curved areas we attach profile sections in increments of 20-30 cm.
- We install a ceiling profile on the hanging sections, using metal screws as fasteners.
- We cut the guide profile along the length of the side of the base to the ceiling profile on the wall and fasten both sides with metal screws.
At the same stage, you should start laying the wiring and supplying communications. All cables are placed in a corrugated sleeve made of heat-resistant plastic, which is fixed to the base covering. You also need to fix the split systems, ventilation ducts and pipes. Where lighting fixtures are installed, wires must be removed.
Features of fixing plasterboard to the ceiling

The optimal mode for working with plasterboard is the following: humidity - up to 75%, temperature - from 16 degrees. To cover the frame, you will need an assistant, since the sheets are quite heavy and difficult to handle alone.
We fix the drywall, adhering to the following algorithm of actions:
- Using self-tapping screws in 15 cm increments, we fix the first corner sheet. We deepen the fastener caps, but moderately, so as not to damage the base.
- On the opposite side we attach the second sheet in the same way.
- If necessary, mark the sheet according to the drawing and cut out the desired shape using a knife or jigsaw.
- We fix the side parts to vertically located guides.
- We cut out round horizontal surfaces from a whole sheet or compose them from separate segments.
- If curved elements are required for vertical fixation, we roll the cut out part with a needle roller.
- Spray the treated plasterboard and leave for an hour.
- We cut it on the convex side, place it on the edge and bend it on the floor.
- Using weights, fix the sheet in this position and wait for it to dry.
- We attach it to the ceiling.
Technology for finishing a two-level plasterboard ceiling

The final stage of installing a two-level plasterboard ceiling with your own hands is grouting the seams and reinforcing the coating. We carry out the work in this order: glue sickle tape at the joints, apply putty mixture along the seam with a small spatula, and putty on the screws.
Next, attach squares of fiberglass to PVA glue, apply a layer of finishing putty up to 1.5 cm thick. After drying, sand with fine-grained paper and prime the surface. After this, you can begin finishing and installing lighting fixtures.
How to make a two-level plasterboard ceiling using the reverse fixation method

This method differs from the previous one in that the lower level of the structure is installed first and only then the upper one.
During the process, we adhere to the following instructions:
- We apply markings to the ceiling and walls according to the design of the future structure.
- We fix the guide profile along the lines on the ceiling and walls. If bends are necessary, we make cuts on adjacent sides.
- We mark the mounting points of the ceiling profile in increments of 0.4 meters.
- We carry out projections of the profile axes and install spring hangers in these places in increments of 0.6 meters. We use anchor dowels as fasteners. But it is not advisable to use dowel-nails. The plastic base softens when heated, so in the event of a fire in your apartment or on the floor above, the ceiling will simply fall on your head.
- We cut sections from the ceiling profile to the height of the second tier, make tongues and fix them on the guide profile.
- We form the lower contour from the ceiling profile and attach it to the resulting racks.
- We fix individual longitudinal sections between the structure and the wall profile.
- We fix the transverse profiles using “crabs”.
- We install direct hangers at the upper level installation area.
- We sheathe the gypsum board ceiling using self-tapping screws.
- We putty the joints and reinforce the coating with fiberglass.
- Apply finishing putty, sand the surface and prime.
In the same way, you can make a plasterboard two-tier structure with only the equipment of the lower level. The base ceiling itself will be used as the top ceiling. In this case, the surface will need to be completely leveled with plaster or putty.
Watch a video about installing a two-level plasterboard ceiling:
It’s not difficult to figure out how to make a two-level plasterboard ceiling. You will not have any difficulties in the process if you follow the instructions above. All that remains is to choose optimal type location of the structure and select the material. And then follow our installation tips.
4969 0 0
Making a two-level ceiling with gypsum plasterboard covering: detailed photo report from installation work
Greetings. This time you will learn how to make a two-level ceiling. That is, in this article I will describe step by step the technology of work that you can handle on your own.
The good thing about the design that we will make is that it can be installed on any, even not the most even, base. In addition, in the gap between the multi-level structure and the ceiling, if desired, various communications can be laid, starting with low-current and power wiring and ending with the installation of lighting and ventilation systems.
Selection of materials
There are many materials from which you can assemble a multi-level ceiling. For example, a two or three-level ceiling can be assembled:
- from plastic panels- relevant for economic and non-residential premises With high level air humidity;
- from wood panels- an expensive solution for finishing residential premises decorated primarily in a classical style;
- from vinyl cloth– these are the so-called suspended ceilings, which are universal solution for any premises;
- from plasterboard sheets(GKL) is optimal solution for residential premises.
Regardless of the type selected facing material You need to understand that multi-level structures are based on a supporting frame, which must be strong enough to support the weight of the heavy cladding. As a material for making load-bearing frame Traditionally, a wooden beam or metal profile is used.
Features of installation of plasterboard multi-level ceilings
I present to your attention photo report on how the two-level ceiling with lighting was assembled from an ordinary centrally located chandelier. The structure is based on metal frame, covered with sheet plasterboard.

To make it clear what we will build, pay attention to these drawings.
Under no circumstances do we start work without having a drawing of the ceiling and frame. IN best case scenario the absence of a drawing may cause cost overruns building materials. In the worst case, due to the lack of a drawing, serious mistakes may be made and the assembled structure will have to be redone.
In the drawing, the perimeter of the room is 4.10×3.75 m; if you use this diagram to decorate another room, the dimensions will have to be recalculated.
The first level will be located in the center, while the second level will serve as a decorative frame around the perimeter.

The strip along the short wall is a niche that we will provide for installing curtains along the entire wall. In the center of the first level there is provision for installation of a polyurethane socket, selected in one style decision with the entire structure.
The difference between the first and second levels will be 40 mm, which is enough for apartments with a ceiling height of 2.50 or 2.60 m. If the difference in level is made more significant, the structure will visually put pressure. If indoors high ceilings, then the distance between the levels can be increased, but then the drawing will have to be redone.

Now let's take a closer look at the frame diagram.
We will install a 27×28 mm profile around the perimeter. The main profiles will be located in increments of 50 cm, and the intermediate profiles will be installed in increments of 40 cm. The profile for installing gypsum board joints will be installed staggered, which is correct, since the design will provide higher strength.
The frame configuration, which can be seen in the proposed diagram, is attractive due to its ease of assembly, and also because the profile can be installed without cutting a large number of different-sized pieces. In the center of the frame there will be embedded elements for fastening lighting fixtures.
So, we have reviewed the installation drawings, all that remains is to start assembling.
Assembly of the supporting frame of the first level
Assembling the supporting frame is the most complex and time-consuming stage, on which the quality depends finished ceiling. To assemble the frame you will need the following tools and materials:
- Steel mounting profile with a cross section of 27×28 mm;
- Damper tape around the perimeter of the room;
- Suspensions for mounting the profile to the rough ceiling;
- Dowel-nails for attaching the profile to the walls based on installation in increments of 40 cm;
- Self-tapping screws;
- Hacksaw and metal scissors;
- Screwdriver with drill function with drills and bits;
- Water level;
- Lace for filling the level;
- Durable and stable stepladder.
- We attach the necessary communications along the ceiling, namely wiring, which we will subsequently cover with plasterboard sheathing;
- We beat the level using a spirit level and a painter's cord;
- If the profile you purchased does not have perforations, drill holes to match the diameter of the dowel nails;

- According to the intended level, we apply the profile to the wall, so that the lower side of the profile coincides with the marked level;
- Through the holes in the profile, we drill holes in the wall to the length of the dowel-nail seal;
- We nail the profile with dowel nails around the perimeter of the room;
- After the profile is fixed around the perimeter, we mark the directions along which the intermediate profiles will be installed;
- We measure the distance and, in accordance with the measurements taken, increase the profiles;

- We insert and fasten the extended pro-oils according to the markings made so that the joints are spaced apart, that is, offset relative to each other;

- We attach pre-bent metal hangers to the ceiling above the profile in increments of 50 cm and fasten them with dowel nails or self-tapping screws, depending on what materials the ceiling is made of;
- We fasten the suspension strips to the sidewalls of the profile with self-tapping screws;

The installed beams bend under their own weight. Therefore, when fixing them on hangers, we check the degree of curvature using a laser level and, if necessary, raise or lower them. By the way, it is mandatory to install the suspension at the joints of the connected profiles.
- In accordance with the drawing, we mark the places for installing transverse profiles;

- Using the marks, we attach the narrow profile scraps as shown in the previous photo;

- We cut the transverse jumpers and install them into pre-screwed profile trims and fix them with self-tapping screws;

- In the center of the room we install embedded elements for the lighting fixture.
How to beat a level? We place a mark in one corner of the room at the lowest point of the ceiling. From this mark on the wall we place a flat strip with a spirit level attached to it.

Move the edge of the bar up and down until the required level is found. After this, a second mark is placed. A string is pulled between the two marks and a mark is made.
We pass along the remaining walls in the same way. The initial and final marks after determining the level must coincide.

However, there is a simpler, more accurate, and therefore more effective method. In the middle of the room, a spacer is installed strictly vertically on which the laser level is attached. Using this device, we place marks in the corners and beat off a line using the marks already made.
Do you think that a laser level is expensive, and therefore it is better to work the old fashioned way with a spirit level? The laser level is really expensive, but it can be rented, which is quite justified for one-time use.
How to increase intermediate profiles? The fact is that the standard length of profiles is 3 meters, which is more than a meter less than the length of our room.

You can increase the length as follows. We take a piece of profile 30-40 cm long and cut off the rolled edge from the sides. We insert the workpiece into the ends of adjacent profiles so that all parts are located evenly.

On the sides we screw the connected parts to the insert with several self-tapping screws. The assembled connection is strong, but sheets of plasterboard attached to it will make the structure even more rigid and reliable.
What hangers should I use to attach the profile to the sub-ceiling? There are many types of hangers on sale, which differ in the type of perforation, as well as the thickness and rigidity of the metal.

What to choose? Optimal choice are suspensions with four holes made of thick metal. The presence of four holes, instead of two, allows you to more securely screw the profile to the ceiling and avoid subsequent sagging.
The choice of hardware made of thick metal is due to the fact that such products are more rigid, which means that it is more convenient to work with them and that assembled structure will be more static.
Self-cladding of the gypsum board frame
So, the first level of the frame has been assembled, all that remains is to cover it with plasterboard. The word “independent” in the name was not used by chance, since few people do this stage themselves, mostly resorting to the help of one or two helpers.
From this instruction you will learn how to do everything yourself without an assistant:
- Before we begin sheathing, we cut out the sheets so that they line up along the length from one wall to the other;

- We mark on the gypsum board the passage of profiles in a pre-assembled sheathing;

- Based on the markings, we apply the rule and draw stripes;

- We apply the prepared sheets to the frame and screw them with self-tapping screws;

- After the entire ceiling is covered, the installation of the first level can be considered complete.
Comments on the installation of drywall on the first level
How to mark and cut sheets? We simply count how many times the length of the sheet will fit along the wall. Accordingly, we prepare so many whole sheets, and cut a small piece to fit the size of the remaining area.
Do not try to prepare sheets for the entire ceiling at once. The angles between the walls may not be straight, as a result, the outer slabs will have to be shortened or, on the contrary, increased. Therefore, we cut the slabs into one row, and after installation we take separate measurements for the next row.
Markings on the slabs in accordance with the passage of the profiles are done for your convenience. If you work without markings, it is almost impossible to determine the location of the beams in the middle of the sheet.
How to tighten a self-tapping screw? The self-tapping screw must be tightened so that the head is flush with the surface of the sheet. In this case, the screws cannot be twisted so as not to break the threads cut in the profile.
How do you know when the screw is tightened enough? Experience comes with time and this moment can be felt after two or three screws have been screwed in.
By the way, expensive screwdriver sets include bits with a limiter. The limiter is designed for a certain screw-in depth, which will prevent the drywall from being pushed through and the threads on the profile from being licked off.

How to work with heavy sheet plasterboard yourself? Despite the fact that gypsum board weighs a lot, this sheet material You can lift it, fit it in place and fix it with your own hands.

The trick is to use inclined beams along which we push the edge of the sheet under the ceiling. After this, all we have to do is, holding the other edge, climb up the stepladder and fix the sheet with self-tapping screws.

However, this method is relevant if the installation takes place along the walls. How to work in the center of the room?

When working in the center of the room, you will need to make two shelves from the profile, as shown in the photo.

We attach the first shelf at a distance of 20-30 cm from the place where the joint of the plates will be located. We screw the second shelf on one side about 20 cm closer than the edge of the slab will be located.

During installation, we place the edge of the sheet in, secured on both sides. We lift the free edge of the sheet, pull up the second partially secured shelf and fasten it on the second side.

As a result, the sheet lies on two shelves, which means we can level it and secure it with high-quality self-tapping screws.
So, we have completely dealt with the first level, all that remains is to proceed to the second level.
Installation of the second level frame

Before we begin installing the second-level frame, let’s finalize our drawing a little, namely, we’ll mark where the frame will come.
A frame will be attached along the perimeter of the room, repeating the frame of the first level. Next, the frame will pass along the patterned part, where the second level will join the first level.
Also, from the frame fixed around the perimeter of the room to the central decorative part there will be profiles on which the joints of the sheets will be attached. To strengthen the structure, diagonally located inserts will run from the decorative part to the corners.
To assemble the structure, the same profile with a section of 27 by 28 will be used.
The installation instructions are as follows:

- We glue the joints of the ceiling and the wall where the glazing is located with sickle tape and apply a leveling layer of putty;
- We transfer the markings from the drawing to the ceiling;
- We connect the applied markings with lines and draw out the radii of the decorative part;

You may not have a large compass at hand, what should you do in this case? Take a piece of profile longer than the radius of the required circle.
At one end of the strip we drill a hole for a self-tapping screw. From this hole we measure a length equal to the radius that needs to be drawn and drill another hole. We fasten the bar with a self-tapping screw to the center of the circle, and insert a pencil into the opposite hole. By rotating the bar around its axis, you can draw the required circle.
- We cut the profile along the length of the radius elements (the length of the radius elements can be measured with a tape measure);

- On the side walls of the profile we make cuts in increments of 5 cm;
The cuts on one side should match the cuts on the other side. If the cutouts on one side and the other are spaced apart, the profile cannot be bent evenly.

- We install the prepared “snakes” on top of the markings of the radius elements so that the cutouts look at the perimeter of the walls;

- We fasten straight structural elements according to the markings;

- We fasten the frame around the perimeter;
Since the first level was carefully leveled during installation, we make the frame of the second level without a spirit level or similar devices. We simply press the profile to the joint and fix it with self-tapping screws in increments of 20 cm.
- We install and fasten the mortgages that will accommodate the joints of adjacent sheets;
- We install diagonal jumpers to provide additional structural strength;

- For greater reliability, we attach the diagonal jumpers not only at the ends, but also in the middle, using corners cut from the profile.
At this point, the installation of the frame is complete and you can begin covering it.
Installation of drywall on the second level
Installation of a two-level ceiling, namely, covering the frame, is carried out as follows:
- In accordance with the drawing, we make markings on the drywall;

- Based on the markings made, we cut out the main elements and sides that will go along the perimeter of the decorative difference between the first and second levels;
Thin strips for covering the perimeter of radius and straight elements are cut from plasterboard across the sheet. If you cut the strips lengthwise, they will break when bent. If you cut the strips transversely, they can be bent.

The surface of the cut strips should be the same - this will significantly simplify installation
- We collect the sides into a stack, connect them with a clamp and sandpaper, and remove various irregularities from the end;
- We sand the ends of the remaining cladding elements;

- We attach a narrow side along the perimeter of straight and radius parts;

- We fix a niche along the wall with glazing;
- We install and fasten the main casing;

Since installation work is carried out alone, you will have to take care of devices with which you can hold massive cladding elements. In our case, a spring-loaded rod from laser level. We rest the bar with one end against the floor, and with the other end against the structural element that is to be installed.

- Removing irregularities at joints installed elements sheathing using a jigsaw, a segment knife or sandpaper attached to a grater.

- We embroider the joints between adjacent slabs, cutting off the edge with a segment knife.
After execution listed works installation can be considered completed, which means you can proceed finishing ceiling. You can find detailed instructions for puttying plasterboard surfaces in my previous articles.
Conclusion
Now you know how to make a two-level ceiling in the kitchen or living area. I hope the following instructions were helpful to you.
If you have any questions, ask them in your comments to the text and be sure to watch the video in this article. After finishing the installation work at home, tell us about your results. I'm sure everyone will be interested.
October 3, 2016If you want to express gratitude, add a clarification or objection, or ask the author something - add a comment or say thank you!
Our topic today is two-level plasterboard ceilings. We have to find out what and how the frame of such a ceiling is assembled from, how to properly sheathe it with plasterboard, prepare it for painting and install built-in lamps or hidden lighting. Let's get started.
Execution options
In most cases, the lower level of the ceiling is a box with a niche mounted around the perimeter of the room. Built-in lamps are mounted in it, and lighting is located in the niche.
The top level can be:
- Plastering;
- Plasterboard (with installation of gypsum boards on lathing or glue);

Please note: in the latter case, the frame of the box is reinforced. The point is that stretch film creates a horizontal load of approximately 70 kgf per meter on the baguette to which it is attached.
General notes
There are several of them:
- For this purpose, we strongly recommend using not a bar, but a galvanized profile produced specifically for these purposes. Unlike wood, it has impeccable geometry, unlimited service life and is not prone to deformation when the humidity and temperature in the room changes;

- It is customary to fasten frame elements to the ceiling and walls using dowel-nails. However, we, following the leading manufacturer of drywall, profiles and building mixtures - the Knauf company - recommend using wedge anchors for attaching hangers and guides to the ceiling. They will keep the suspended ceiling from falling in case of fire and, perhaps, save the lives of you and your loved ones;
In addition: dowel-nails do not hold well in the hollow-core floor slab. Anchors do not have this drawback.

- The types of profiles and frame design are selected depending on the specific requirements for the ceiling and the characteristics of the local building materials market. For example, ceiling profiles in some cases can be replaced with racks or guides. We will just give a few examples of how plasterboard two-level ceilings can be assembled.

Design
It is better not to start installing the ceiling without a detailed, scaled drawing. If a single-level ceiling does not require precise calculations, then two-level ceiling plans will not only make your work easier, but will also allow you to choose the most optimal shape. An excellent solution would be to create a model of the future ceiling in a 3D program.

When finished project you are completely satisfied, you can begin to calculate the amount of materials needed and carry out the electrical wiring.
Materials
What materials are needed to mount a two-level plasterboard ceiling with your own hands?
| Image | Description |
|
|
For ceiling structures It is customary to use gypsum board with a thickness of 9.5 mm (moisture resistant in wet rooms). However, it can be replaced with a thicker (12.5 mm) and durable wall one. |
|
|
Ceiling galvanized profile measuring 27x60 millimeters. It is used for assembling the sheathing of the upper level of the ceiling, installing boxes and niches. |
|
|
PNP is an abbreviation for “ceiling guide profile”. Used to connect PPs to each other and to capital structures. Section - 28x27 mm. |
|
|
The rack profile, as the name suggests, serves, along with PP, for the manufacture of racks for ceiling boxes and transitions between levels. It differs from it in the increased height of the side walls (50 mm with a width of 50-100 mm) and, accordingly, increased rigidity. |
|
|
The guide profile connects the racks to each other and is responsible for attaching them to the upper and lower levels of the ceiling, or to the ceiling. Width - 50-100 mm, height of side walls - 40 mm. |
|
|
A flexible galvanized profile is used to create curved transitions between levels. If necessary, it can be replaced with PN or PNP profiles with side walls cut in small increments. |
|
|
Direct ceiling hangers connect the frame to the ceiling. |
|
|
Self-tapping screws with press washers (optional with a drill) connect the hangers and profiles to each other. |
|
|
Phosphated screws secure drywall to frame |
|
|
Fasteners allow you to securely fix hangers and guides on the floor surface |
|
|
This type of fastener is used for wall mounting guides. |
|
|
Gypsum putty (finish or universal) is needed for sealing fasteners and seams when finishing gypsum boards for painting. |
|
|
Fiberglass mesh with an adhesive coating on one side is used to reinforce seams and internal corners. It prevents the appearance of cracks due to thermal expansion of drywall. |
|
|
A plastic or galvanized corner is used for reinforcement external corners transition between levels. It can be rigid and flexible. |
|
|
A primer, or penetrating primer, finally prepares the plasterboard ceiling - two-level or single-level - for painting. The primer adheres the dust remaining after sanding, improves the adhesion of paint to the surface and reduces its consumption. |


Upper level frame
The upper ceiling level can be:
- Plastering(that is, represent a leveled overlap);
- tension. In this case, the tension fabric (fabric or) is mounted on a fixed, frame-reinforced baguette;

- Plasterboard. This technology of two-level plasterboard ceilings allows you to hide significant unevenness in the ceiling and provide both levels with built-in lighting. It is with her that we will meet.
The easiest way to assemble the lathing is from PP, PNP profiles and direct hangers. This is done like this:
- Mark a horizontal line on the walls along which the PNP profile will be attached. If recessed lamps are to be installed in the upper level of the ceiling, it should be 4-8 cm away from the ceiling (depending on the dimensions of the lamp housings);

- Using dowel nails, secure the guide profiles according to the markings. They are mounted end-to-end or with a slight overlap (the end of the profile is inserted into the adjacent one). The fastening step is half a meter. The holes are drilled with a hammer drill directly through the profile pressed to the wall;

By the way: many manufacturers supply PNP with ready-made holes for fastening.
- Mark the position of the sheathing profiles on the ceiling in 60-centimeter increments;
Note: the pitch of the profiles is always selected so that one of the dimensions of the drywall sheet (length or width) is a multiple of it. With a pitch of 600 mm, the side edges of a standard sheet with a width of 1200 mm will be exactly in the middle of the profiles.
- With the same step, fasten the hangers along the lines of the markings you made;

- Cut to length and insert the ends into the guide ceiling profiles fixed to the wall, then press them to the ceiling with the bent and interlocked ears of the hangers;
Attention: Only tin snips are used to cut galvanized steel. During abrasive cutting (with a grinder), the zinc near the cut evaporates and the metal begins to rust.
- Pull a cord between the guides across the sheathing. It will serve as a guideline allowing you to align the PP in the horizontal plane;
- One by one, release the profiles from the suspension ears, align them along the stretched cord and screw them to them.

Lower level frame
How to properly make a two-level plasterboard ceiling depends on its design. We will look at several relatively simple and popular solutions.
Lamp box
A ceiling box along the perimeter of the room allows you to zone the lighting: soffits built into the box create soft peripheral light, complemented, if necessary, by a central chandelier. In addition, the box can hide communications of a significant cross-section ( ventilation duct, air conditioning lines, water supply, etc.).

How to assemble a two-level plasterboard ceiling with a box around the perimeter?
To install a vertical transition between levels, a set of PP and PNP or PN and PS profiles can be used.
We'll look at the first scenario:
- Mark the boundaries of the box on the walls and the upper level of the ceiling;
- Secure the guides according to the markings. They are attached to the walls with dowel-nails, and to the upper-level frame with self-tapping screws;
Please note: you can hem drywall to the sheathing of the upper ceiling level before installing the frame of the second. In the first case, to attach the ceiling guides through the plasterboard, you have to use longer, 25 mm self-tapping screws.


double ceiling: how to make a device with your own hands
- Make racks from the PP profile and secure them to the ceiling guide with short self-tapping screws. The pitch between the posts, as in the case of the sheathing, is selected so that it is a multiple of one of the dimensions of the plasterboard sheet;
- Connect two PNPs with self-tapping screws so that the bottom wall of one profile is screwed to the side wall of the other;
- Screw the double guide to the posts, connecting their lower ends together;
- Connect the wall rail to the newly secured pieces of PP. The profiles are inserted into the PNP grooves obliquely, aligned and fixed with self-tapping screws.
Please note: if the box width is large (over 600 mm), the horizontal profiles should be reinforced with intermediate posts or hangers.

Horizontal profiles are reinforced with DIY hangers
Illuminated box
How to make a two-level plasterboard ceiling with a niche for lighting?

Two-tier surfaces: step by step instructions
The instructions differ only slightly from the above:
- Horizontal profiles are not attached to the guide connecting the posts, but directly to the posts;
- Length horizontal profiles 100-250 mm exceeds the width of the box. The part of the frame protruding beyond the racks will form a niche;

Two-tier ceilings
- The ends of the horizontal profiles are connected with a PNP profile. At finishing it is sheathed with plasterboard or pasted over with baguette.

Curvilinear transitions
How to make two-level ceilings with curved transition lines from plasterboard?
The easiest way to install a curved frame of small height (up to 10 cm) is to use a flexible profile or a cut PN attached to the side wall of the first-level frame.

With a higher frame height, the same technique is used as when installing the box: the transition is formed by racks connected by guides. The only difference is that the guides are cut in small increments and attached along the curved markings.

Sheathing
How to sheathe two-level plasterboard ceilings?
GCR cutting
Curvilinear ones made it most convenient to cut electric jigsaw with a wood saw. Internal cutouts (for example, for lamps) are made by first drilling the hole with a drill with a diameter of 8-10 mm: a jigsaw file is inserted through it.

Attention: before sawing gypsum plasterboard, you need to turn off all equipment from forced ventilation(microwave, computer, laptop) and cover it with polyethylene or thick cloth. The price of failure to comply with this rule is fans tightly jammed with gypsum dust.
Along straight lines, it is better to break gypsum boards along pre-made cuts, rather than sawing them: then there will be practically no dust.
This is done like this:
- Draw the cutting line several times sharp knife along a steel ruler or profile;
- Place the sheet with a cut on the flat edge of any elevation (table, stack of plasterboard);
- Press the edge of the sheet. In this case, it will break off along the cut;
- Cut off the cardboard cover from the back of the sheet;
- If necessary, remove small irregularities from the edge with a plane or sharp knife.

Fastening
The drywall is screwed with phosphated screws to all profiles covered by the part (including the guides).

Some practical tips for covering the frame:
- Try not to screw in the screws close to the edges of the sheet: they may chip and crumble;
- Sink the head of the screw a millimeter below the surface of the sheet: it will need to be puttyed;
Hint: screwing in the fasteners to the required depth will be greatly simplified if you buy a bit with a limiter, designed specifically for installing gypsum boards.

- The normal step between the gypsum board attachment points is 150-200 millimeters;
- The edges of adjacent parts must be attached to the same profile. If there is no frame element under the seam between the sheets, screw a piece of the PP profile to the back of the first sheet, then fasten the second one to it.
Gypsum putty is prepared as follows:
- Pour water into a clean container (liter per 1.6 kg of gypsum);
- Pour gypsum putty into the container, spreading it over the surface of the water;
- Allow the putty to swell for 3 minutes;
- Mix the mixture thoroughly with a drill and whisk or spatula;

- Wait another 3 minutes. The putty is ready for application.
Gypsum is prepared in small portions (3-5 kg of finished putty): after mixing, it is suitable for application for only 30-45 minutes.
It’s curious: ordinary alabaster sets much faster - in 5-10 minutes. The putty contains additives that slow down the hydration of gypsum.
The seams are puttied in at least two layers: the first fills the seam cavity, the second covers the reinforcing material. Serpyanka can be glued before applying the first layer: the seam will be filled through its cells.

Use self-tapping screws to attach the reinforcing corners. The putty will hide them.
In some cases (for example, if the reinforcement makes the seams noticeable due to its thickness), the ceiling requires filling of the entire surface. This is done with a wide spatula (regular or rectangular). The putty is applied to the spatula using a narrower tool.

Attention: tools and the putty container must be washed before preparing a new batch. If this is not done, lumps of hardened plaster caught under the spatula will leave grooves on the surface of the seams.

Preparing for painting
How to prepare two-level plasterboard ceilings for painting?
We have three operations ahead:
- . It removes trowel streaks and putty build-ups;
- Dust removal. Gypsum dust will impair paint adhesion and make the coating surface uneven;
- The primer is applied in one layer, with a brush or roller.

Grinding has a couple of subtleties:
- It is best to perform it in two steps, using grids with different sizes abrasive Mesh No. 80 removes large irregularities, and mesh No. 120-150 makes the ceiling surface smooth;

- It is advisable to brightly illuminate the ceiling at a slight angle to its plane. Light will help you see even minor defects due to the shadows they cast.

Lamps
And recessed lights, and hidden backlight installed after painting the ceiling and completely drying the coating.
The luminaires are connected to pre-wired wiring using terminal blocks. To install the soffit, simply bend upward the spring clamps on the back side of its body.

The tape is pasted after being removed from its back side protective film. As a backlight, they usually use LED strip with a low specific power (up to 7 watts per meter), so it can be glued directly to the gypsum board, without preliminary installation of a heat-dissipating aluminum profile.

The power supply for the low-voltage tape is installed in a ceiling niche or (in the case of a bathroom) placed in a dry room.

Conclusion
As you can see, installation plasterboard structures It is relatively simple and does not require much time. If you want to learn more about what two-level plasterboard ceilings are, the video attached to the article will help with this. Good luck!
We will send the material to you by e-mail
TO As a rule, all unusually shaped ceilings today are made from gypsum plasterboard. The use of this particular material is not at all accidental: it is soft and plastic, it is easy to cut, bend and sew, it is easy to build a structure from it, either one level or two, three or more. Making such a ceiling yourself is not at all difficult, but it will require maximum care and attention. In this article we will look at how to make two-level ceilings from ourselves. Photos, videos and detailed recommendations are included.
Two-level ceiling - practical and effective solution for the interior of your home
Two-level plasterboard ceilings: photos and descriptions of construction types
It's no secret that uneven ceilings are a big headache for those who decide to make repairs. An excellent way to hide unevenness is to install suspended structure. This option is not only practical and affordable, but also allows you to bring to life any, even the most original and daring ideas.
We will look at the types of two-level plasterboard ceilings, with photos and detailed description applications.

There are a whole variety of similar structures made from gypsum plasterboard various types, among which it is easy to find a suitable one
One level design
A standard design that is installed directly to the slab floors. Most often used as a simple budget option in apartments and residential buildings X.
This option involves mounting on special hangers and is used, as a rule, in large premises, such as shopping malls and supermarkets. The lower level of this design can be made in any shape - both rectilinear and curved. Used in residential areas as an interesting design solution. Before starting work on the construction of a two-level plasterboard ceiling for the living room, photos of which are presented above, you need to pay attention to some preparatory points: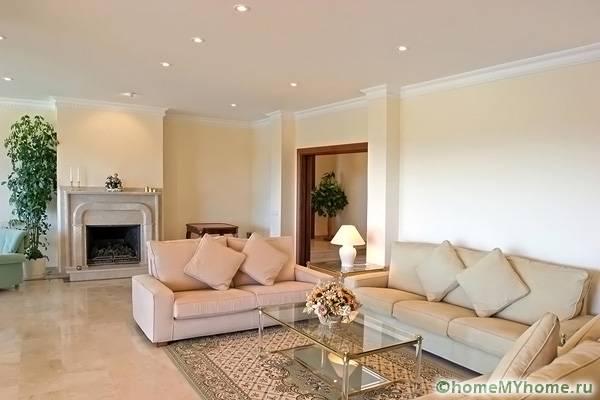
Single-level suspended ceiling
Two-level product
Beginning of preparations for ceiling installation. Installation technology
Preparation

- Complete all the necessary drawings and calculations, and only after you have precisely determined the shape, transfer its projection to the ceiling covering.

- Decide on the type of frame for making a plasterboard ceiling for which are presented in this article. Both wood and metal can be used as a frame. In terms of durability and strength, these materials have similar properties, while metal wins in its flexibility - you can bend a structure from it into any shape.

Required materials and tools
Two-level plasterboard ceilings, photos of which can be easily found on the Internet, require the presence of certain tools and materials:
- Plasterboard sheet, which must be thin and light. To pick up the right material, ask at hardware store namely ceiling gypsum plasterboard - this will help to make the ceiling correctly.

- Metal profiles or wooden beams. With their help, the frame of the future structure will be made.


DIY two-level plasterboard ceiling. Video and step-by-step guide
- The first step is to eliminate any unevenness and roundness between the wall and the ceiling. It is very important that the corners are even.
- Markings are being made for installing the ceiling frame. To do this, two people, using a water level, mark on each wall the height of the frame at least 2.5 centimeters. Marking is done using a special device with blue ink - a chokeline.

- Screw the profile or wooden slats so that their lower border is exactly on the marking line.
- Markings are made - a profile should be installed every half meter. After the markings are completed, the U-shaped fasteners are screwed to the ceiling, the guides are threaded through them and installed in the profile on the wall.

- According to the drawing, wiring is placed in the places where the lamps will be.
- Plasterboard sheets are installed using self-tapping screws, of which there should be about 60 pieces per sheet. This must be done very carefully, as this material very easy to damage.
- The joints of the sheets must be puttied. The tool for this step will be a narrow spatula.

Related article:
Plasterboard ceilings for the bedroom. Photos and description of the work on installing lamps
The chandelier is installed in the ceiling in the usual way. With lamps, more difficult work awaits: it is necessary to make holes in the places where the lighting is inserted according to the size of the device, carry out the wiring, and only then screw in the lamps themselves.

Two-level figured ceilings make it possible to make the design of a room elegant and unique; the use of plasterboard for their manufacture allows you to obtain a decorative highlight of the interior quickly and relatively inexpensively.
Types of suspended ceilings
What form the design will have is determined only by the designer. The direct form and design depends on the designer’s imagination. But still, any design belongs to one of the types:
- Single level;
- Simple of two or three levels;
- Complex figured ceiling.
Advantages of plasterboard coating
Most floors are installed using drywall. Advantages of using this material:
- Ease of operation;
- Comparatively cheap;
- The opportunity to get a full-fledged design masterpiece.
A variety of lighting is installed in plasterboard coverings, which makes it stunning.
Direct installation of a plasterboard covering with your own hands is not difficult; the main thing in this matter is the presence of desire and experience. It is difficult for beginners in the construction business to immediately make a complex structure with their own hands; it is better to start with a simple two- or three-level ceiling. There are many professional videos and photos on the RuNet that will become a source of construction experience.
General idea of two- and three-level ceilings
A two-level illuminated ceiling is shown in the photo:

Basic basis two- and three-level structures becomes basic ceiling or single-level ceiling.
Important! Two- and three-level structures must be mounted on the previous frame. Each subsequent level has a smaller area.
The main principles of do-it-yourself installation:
- Correct and accurate calculation;
- Direct combination of all levels of construction;
- Correct and neat design of edge parts.
Advantages:
- Visual change in the volume of the room;
- Giving individuality, sophistication, uniqueness;
- Isolation of the functional part of the room due to the design;
There are several options for creating a two- and three-level plasterboard ceiling.
The installation of a two-level ceiling, which is a step along the perimeter of the room, is relatively simple. This design is used in combination with lighting and is called a frame ceiling.
A popular method is to zone a room using a diagonal multi-level ceiling. The structure is based on a single-level area, and in the allocated corner a second level of the required size is made.
Design selection
Choosing a design design is not complete without viewing photos and videos of the direct installation of a two- or three-level ceiling with your own hands. There are many varieties of two-level flow types:
- With right angles;
- With wavy lines;
- With sudden or soft transitions;
- With hidden backlight;
- Using a variety of paintings.
For a small room or suitable for kitchens a strict two-level ceiling of exquisite design using spotlights along the perimeter.
Important! When studying the photo, pay attention to the location of the backlight and the color palette used.
How to install a two-level covering with your own hands - a guide
There is disagreement among professionals regarding the sequence of steps for constructing tiers. The following methods can be emphasized:
- The first method involves installing a first-level frame;
- The second involves the installation of the second tier, and the frame of the first level is placed between its components.
Important! Do-it-yourself installation is carried out by following the sequence of steps and strictly according to the instructions.
The method of manufacturing this type of ceiling provides the following procedure:
- Preparing the coating.
- Installation of the first level structure frame;
- Installation of the second level;
- Construction finishing.
Preparatory work
Regardless of the planned design main task preparatory work– accurate measurements and markings. Because due to poorly executed first steps, the product becomes distorted. The design usually consists of the following geometric shapes:
- Semicircle;
- Oval;
- Rectangle.
Important! The task of the preparatory work is to carry out rough finishing of the floor and walls.

The final finishing is done after installing the “skeleton” of the structure. It is important not to forget that the structure must be level. For this purpose, a level is applied every 0.5 m along the room and across the width. If the ceiling has unevenness of about 5 mm, then it is leveled.
Important! If the ceiling is dry and the plaster is firmly in place, the old layer is removed and leveled with finishing plaster.
Pay attention to this nuance: if the plaster peels off, it is removed all the way to the ceiling.
Do-it-yourself coating installation
To do it yourself two-level design made of plasterboard, mark the walls and ceiling for direct installation of the “skeleton” of the structure. First, markings are made in order to attach the guide profiles of the first level frame.
Important! Please note that the entire structure must be parallel to the floor.
First of all, they put a mark in the place where the wall has the smallest height at a distance of 7-8 cm from the ceiling. A similar mark is made in the opposite corner of the wall, taking into account the actual height. A clear, even straight line is drawn between the marks. A similar method is used to mark all walls. Next action– connection of all lines. The resulting line shows the minimum limit of the guide profile. For the second level, similar manipulations are carried out.
How to make markings correctly: photo

Important! If the room is low, the distance from the covering for the first level frame should not exceed 2.5 cm.
Installation of the first level structure frame
Subsequence:
- The procedure begins with mounting UD profiles. They are attached directly to the wall around the circumference of the building. The pitch is 600 mm. The same procedure is performed on the ceiling. The fastening method is shown in the photo.
- According to the markings, a direct suspension is attached to the coating.
Important! If the ceiling is flat, you can safely skip this step.
- A CD profile is attached to a direct suspension. The frame of the structure takes on the appearance shown in the photo.
- After this, the structure is sheathed with plasterboard.
Installation of the second level frame
For the construction of the second level, the following steps are performed, which include installation of drywall:
- Frame marking;
- Mounting the frame;
- Lowering the structure to the required length;
- Facing.
Drywall is an ideal option for kitchen areas. It allows you to select working and dining area using backlight, hide utility networks. However, those with low ceilings should not get carried away with bulky multi-level structures.
In the photo you can see an example of the design of a low ceiling in the kitchen.

Important! Special attention Pay attention to the placement and brightness of the lighting.


