Without exaggeration we can say that this option flooring tested for centuries. The technology of laying wooden floors on logs has been used for several centuries with minor changes. This is the most environmentally friendly solution for flooring, but at the same time this coating has a number of disadvantages and important nuances, which you need to know before starting work.
Currently, the main area of application for wooden floors is the construction of small private houses. Especially often the floor on joists is arranged in wooden houses and log houses, in which the floors between floors are made of beams.
Much less often, wooden floors are laid in city apartments with reinforced concrete floors. However, the technology is still used, especially in cases where pouring a full leveling screed is impossible for some reason.
Sometimes plank flooring is a finishing coating and part of the designer’s idea when creating a renovation concept. In this case, beautiful wood species such as oak, larch or pine are chosen for the flooring. The boards are thoroughly polished, impregnated with an antiseptic and covered with varnish or wax. The result is a very beautiful and durable coating that pleases the eye with the natural texture of wood.
Wooden floors can be used even when arranging wet rooms, such as baths and bathrooms. However, this is not done often, as it requires careful selection of wood, reliable waterproofing and impregnation of boards with very expensive solutions that prevent moisture absorption.
Features of laying wooden floors on joists
The main feature of this type of floor, which must be taken into account, is that wood can absorb moisture from environment, deform due to temperature changes, and are also susceptible to rotting. Therefore, when laying a wooden floor, it is extremely important to take care of reliable vapor barrier and impregnate the joists and boards with an antiseptic.
The joists must be attached to the base and the floor boards to the joists as securely as possible; it is necessary to prevent the formation of cracks, voids and “sagging” of the boards and joists. When laying the finishing boards, be sure to use expansion wedges that will press the boards together as tightly as possible.
Wood screws provide maximum security of fastening. The length of the screw must exceed the thickness of the board being fixed by at least 2.5 times. To prevent the board from splitting when you screw in the screw, you must first drill a hole in it with a diameter 2-3 mm smaller than the diameter of the screw.
If the boards are planned as a finishing coating, then care should be taken to hide the heads of the screws or nails. To do this, use either a special putty or small plugs made of the same type of wood as the entire floor. But the best option is screwing a screw into the chamfer of the board at an angle to the joist. The disadvantage of this option is that it is more labor intensive.
You should also make sure that all the finishing boards are from the same batch, because the color of the wood depends on the growing conditions, and the shade of different batches may differ.
What are the consequences of mistakes when laying a wooden floor on joists?
The biggest mistake you can make when laying a wooden floor is insufficient vapor barrier. It is usually made of dense polyethylene or foam foam, which will also provide additional sound insulation. If this step is neglected or the insulating coating is damaged, the floor will very soon begin to rot and mold will appear on it. This will not only significantly shorten the life of the floor, but can also negatively affect people’s health.
The second most common mistake is using wood that is not dry enough. The humidity of boards and joists should be no more than 15%. It is important to remember that in wet weather, even initially dry boards very quickly absorb moisture from the air. If there are prolonged rains outside the window, then it is better to refuse to lay the floor on these days. If you lay a floor with wet planks, they will begin to warp as they dry. This will lead to creaking, the appearance of cracks and differences in height between adjacent boards, which, in turn, will affect the finishing coating.
An insufficiently accurate level when laying joists will lead to creaking of the floor and gradual loosening of the boards. This will greatly reduce the service life of the coating and will require periodic repairs.
Another common mistake is insufficient distance from the end board to the wall; it should be at least 10 mm. This distance is necessary to compensate for the thermal expansion of wood. If it is neglected, then with seasonal temperature changes the floor will experience very serious internal loads, which will lead to cracking of some boards and the appearance of creaks.
Advantages and disadvantages of wooden floors on joists
The advantages of this coating

Disadvantages of wooden floors on joists

Step-by-step instructions for laying a wooden floor on joists
Below is step-by-step instruction for laying wooden floors. The installation of such a floor in a private house with a soil foundation is somewhat more complicated than in a house with a reinforced concrete foundation, but in general the stages of work are the same in both cases.
Laying logs on the ground base
If you are laying a wooden floor directly above the soil, then it must be cleared of turf and plant roots and a layer at least 20 cm thick must be removed. After which the soil is covered with fine crushed stone and thoroughly compacted.
On this basis, brick columns with a cross-section of 250 x 250 mm and a height of at least two layers of brick are built. The tops of all columns should be at the same level, this will prevent sagging of the joists and floor boards.
If beams 100 x 50 mm and up to 3 meters long are used as logs, then two columns at the edges of the logs are sufficient. The distance between the logs, and therefore between adjacent columns, should be 600 mm. If the length of the log is more than 3 meters, then one is strengthened with an additional column in the middle.
The top of the column is lined with a rigid waterproofing material, for example, dense polyethylene film. Installed on top of it wooden spacers or wedges, which are necessary for the final horizontal adjustment of the joists.
After this, you can begin laying the joists. Initially, the two outermost logs are laid level. A fishing line is stretched between them, along which all other logs are set. Adjustment is carried out using spacers or wedges. The lags are fastened to the posts using anchor bolts.
In this case, the procedure is much simpler; it is enough to cover the floor with waterproofing, for example, made of polyethylene, and logs are laid on top of it at a distance of 400-600 mm on wooden control pads. First, the two outer logs are laid level, after which a fishing line is stretched between them, along which the height of all other logs is adjusted.
Adjustment is carried out by adding or, conversely, removing adjusting shims.
Currently, the use of adjustable logs is sometimes practiced. These logs have drilled holes with threads into which a special pin is screwed, attached to the concrete base using dowels. Rotating the pin adjusts the height of the log.
After all the logs are aligned to the same level, the protruding parts of the studs are cut off using a grinder. This method greatly simplifies the horizontal alignment of the logs, but is not used very widely due to the noticeable increase in the cost of the structure.
Adjustable lags with clamps
It is important to remember that there must be a distance of at least 10 mm between the edges of the joist and the wall. It is necessary to compensate for the thermal expansion of wood.
Preparing for flooring
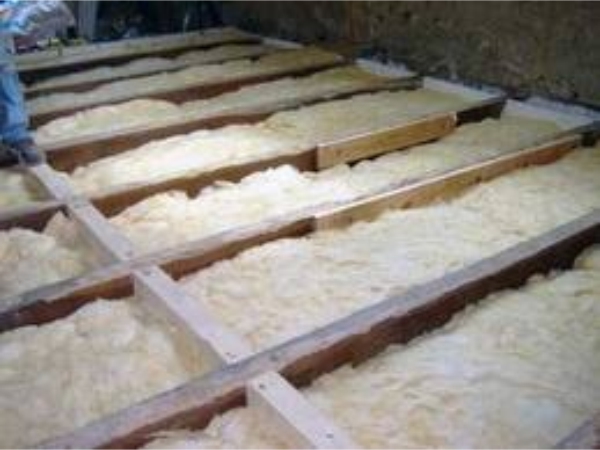
Before you begin laying the boards, you need to lay a layer of thermal insulation between the joists. It could be mineral wool or polystyrene. At the same stage, wires in plastic corrugation can be laid between the joists, if necessary. The standard width of insulation sheets is most often 600 mm, which makes it easy to lay it between the joists.
After all the necessary communications and insulation have been laid, you can begin laying the rough or finished floor.
Laying rough wood flooring
If laminate, carpet or linoleum is intended to be used as a finishing coating, then, as a rule, it is laid on the logs rough coating from uncut boards, plywood or fiberboard.
Sheets of plywood or fiberboard are laid on the joists and secured with nails or screws. You should not skimp on fastening points; screws should be screwed into each joist at intervals of no more than 30 cm. The head of the screw or nail should be recessed into the slab by 1-2 mm. It is important to leave a distance of at least 10 mm between the wall and the coating. This gap will also provide ventilation of the space under the floor. 2-3 weeks after completion of work, it can be covered with a plinth.
When laying a subfloor made of boards, you need to start work from the far corner of the room and move towards the entrance. The length of the boards is selected so that their joint is in the middle of the log. The boards are laid as closely as possible to each other and fixed with screws. To prevent the board from splitting when screwing in a screw, you must first drill a hole for it with a drill bit with a diameter slightly smaller than the diameter of the screw. Using a drill of a slightly larger diameter, you need to make a small recess into which the screw head will hide.
Laying finished wood flooring
A folded board or a board made of laminated veneer lumber is usually used as a final finishing coating. These boards must be soaked in a protective antiseptic solution. There are some nuances in laying such boards. Since this floor will no longer be covered with anything, it is extremely important to avoid the slightest gaps between the boards, and it is also important to hide the screw heads so that they do not spoil appearance floor.
Laying folded boards is carried out according to the same principle as laying boards for a subfloor, with the only difference being that two adjacent boards are pressed against each other as tightly as possible. To do this, a bracket is driven into the joist at a distance of 4-6 cm from the board, between which and the edge of the board a wedge is installed, pressing the board. When the pressure on the board is maximum, it is fixed with screws, after which the wedge and bracket are removed. The operation must be repeated for each row of boards, this will prevent the formation of cracks. The board is attached to the joist using a screw, which is screwed into the chamfer at an angle, this allows you to hide its head and improve the appearance of the floor. You can also use special decorative nails for the floor, driving them in strictly at equal distances, but this is a compromise option; the absence of visible fastening looks much better.
Comparative characteristics of floorboards
Batten. Prices
| Floor board. Name, material, size | Price, rub./m2 |
|---|---|
| Floorboard Pine K1-2 (25x90) 1.8m | 250 |
| Floorboard Pine K1-2 (25x90) 1.0m | 250 |
| Floorboard Pine K1-2 (28x130) 1.8m | 290 |
| Floorboard Pine K1-2 (28x130) 2.0m | 480 |
| Floorboard Pine K1-2 (28x130) 6.0m | 480 |
| Floorboard Pine K1-2 (32x100) 5.4m | 570 |
| Floorboard Pine K1-2 (32x130) 5.85m | 570 |
| Floorboard Larch K2-3 (27x90) 5.4m | 460 |
| Floorboard Larch K2-3 (27x90) 5.1m | 460 |
| Floorboard Larch K2-3 (27x90) 4.8m | 460 |
| Floorboard Larch K1-2 (27x130) 3.0m | 560 |
| Floorboard Larch K1-2 (27x110) 3.0m | 560 |
| Heat-treated pine LUNAWOOD (Finland). Floor board (tongue and groove) 26x92 | 195 rub. /linear m |
| Europol (pine, 32 mm) | grade 0 (Extra) 970.56 rub/m2; grade 1 (Prima) 676.80 rub/m2; grade 2 (B) 460.00 rub/m2; grade 3 (C) 384.00 rub/m2; grade N/K (D) 301.76 rub/m2. |
Video - Laying a wooden floor on joists
Wooden floors on joists are one of the oldest methods of flooring and the only one used in the northern regions of our country. Modern materials They have only improved ancient technologies, due to which the scope of application has significantly expanded and performance indicators have improved. Before proceeding directly to consideration various options, you should familiarize yourself a little with the engineering requirements for calculations.
Logs are distinguished from beams by their smaller size and mobility. If beams cannot be moved after installation, and repairs are very long and labor-intensive, then logs are a mobile architectural element. They are much easier to install and, if necessary, repairs are carried out faster.
Before you start building a floor, you need to study the requirements regulatory documents to the size of the joists and the distance between them, taking into account the thickness of the floorboards.
Table of lag sections at a pitch of 70 cm
Table of distance between joists depending on the thickness of the board
In order to learn how to independently make calculations based on tables, it will be useful to consider simplest example. Initial data: room length 10 m, take floorboard 30 mm thick.
Calculation method
According to the table, with such a thickness of the board, the distance between the logs is 50 cm; with a room length of 10 m, 20 logs will be needed. The distance between the logs and the walls cannot exceed 30 cm. This means that we will have to increase their number by one piece, the distance between the others will decrease to 45 centimeters.
Important note. During calculations, all roundings should be done only downwards, thus creating an additional margin of safety.
There is no need to calculate dimensions and distances accurate to the millimeter; no one takes such measurements. By the way, during construction, the vast majority of architectural elements and structures are measured in centimeters, the greatest accuracy is half a centimeter. Millimeters are almost never used during measurements.
Floor subfloor options
These types of floors can be installed on a wooden or concrete base or on the ground. Each option has its own technological features, which must be kept in mind during work. As for the specific purpose of the premises, taking this parameter into account, the base of the floor and its performance characteristics. The technology of the device itself remains almost unchanged. There are, of course, options for warm and cold floors, but these features also have a common construction algorithm.
Installation of a wooden floor on joists on wooden bases
Such floors can be made in both wooden and brick buildings and can have several varieties. The features of flooring need to be considered at the building design stage. Not only the purpose of each room and its dimensions are taken into account, but also climate zone accommodation, microclimate requirements and financial capabilities of the developer. Below are given step-by-step recommendations construction of this type of flooring.
Depending on specific conditions, the algorithm can be slightly modified, but all main construction operations must be completed. The base can be moisture-resistant OSB boards or sheets of plywood. The design of the floor coverings provides for the possibility of laying insulation; the use of rolled and pressed glass wool or polystyrene foam is allowed. If there are insulation materials, then you should definitely install hydro- and vapor barriers.
Step 1. Take the dimensions of the room and calculate the number of joists, taking into account the above recommendations. Prepare materials and tools, make markings. Do the work slowly; mistakes made at this stage are extremely Negative consequences. Eliminating them will take a lot of time.
Step 2. Start installing the logs from the outer wall ones. If the room has subfloors, then the logs can be fixed directly to them. To make work easier, it is better to use metal squares with perforations; such elements significantly speed up work and increase the stability of the joists. Using the mark on the wall, taking into account the thickness of the floorboards, align one end of the joist and fix its position.
Practical advice. When installing the outer joists, do not fix them immediately; first, you should only tighten the screws. This will allow you to make final fine adjustments.
Do the same actions at the second end of the log, constantly monitor its level position. Once the lag lays down normally, you can firmly fasten the ends and begin installing intermediate fasteners. The distance between them depends on the thickness of the boards that are used for the logs; it is approximately 70 centimeters.
Step 3. You need to stretch the ropes between the outermost joists; place all the remaining joists along this line. Constantly check with a level; installation accuracy should be ±1–2 mm. There is no point anymore, it takes a lot of extra time. A small difference in height will be removed during finishing of the front surface of the floorboards.
Step 4. If the floors are warm, then you need to lay thermal insulation between the joists; waterproofing and vapor barriers are used to prevent moisture from entering. The distances between the logs must be adjusted taking into account the length and width of the insulation. This can be either mineral wool or polystyrene foam, or bulk species insulation materials. If all preparatory work completed, you can begin laying the floorboards.
There are options for installing joists on floor beams. These are so-called ventilated floors and are most often used for non-residential premises. There is no need to be particularly precise; size alignment is done using lags. The logs are attached to the beams with nails or self-tapping screws from the side. The algorithm of work is the same. First, the extreme ones are placed, a rope is pulled between them and all the others are fixed along it.
Ventilation is carried out through special vents in the foundations; the distance between the ground and the floor must be at least fifty centimeters. Otherwise, the air exchange rate does not meet the required indicators, and this causes damage to wooden structures.
Installation of floors on wooden joists on concrete
Such floors are considered more complex, labor-intensive and expensive; all wooden structures must be reliably protected from direct contact with concrete. Otherwise, the structures will quickly become unusable and will have to be replaced prematurely. Eat chemical method protecting lags from rotting processes using various impregnations. They are quite effective and actually prevent the process of wood deterioration. But unfortunately, impregnated wooden structures can no longer be considered environmentally friendly, and it is for this indicator that most developers install natural wooden floors.
If the logs are laid over the entire area on concrete, then waterproofing is required between them.
But they can also be secured using metal squares, which allows you to create a gap between the base and the joist. It must be borne in mind that in this case the load-bearing characteristics of the floor are somewhat reduced.

This fixation method has its advantages. Firstly, direct contact of wooden structures with concrete ones is completely excluded. Secondly, logs can also be installed on a black screed. Using corners, you can eliminate irregularities of several centimeters; there is no need to make a finishing screed. This saves a lot of time and money.
The second installation method concrete screed– the logs are placed directly on it; a material based on modified bitumen is used for insulation.
Laying logs on the ground
The method is used for outbuildings, bathhouses, gazebos, verandas, etc. The wood must be treated with antiseptics. It is better to have a columnar foundation; if you want to make a more durable strip foundation, then it is necessary to provide vents for natural ventilation in advance.
How is this floor made?
Step 1. Remove the topsoil. You can use it to fill the beds or level the area in front of the house.
Step 2. Mark the columns. The distance between them is selected taking into account the load and size of the logs. The posts can be made of concrete, block or prefabricated. The dimensions of the supports are approximately 40x40 cm, the burial depth is within 30 cm. A layer of sand ≈ 10 cm thick should be poured onto the bottom and compacted.
Step 3. Fill the supports with concrete. To prepare concrete, you should use two parts crushed stone and three parts sand for one part of cement. Water is added as needed. There is no need to make formwork in the ground; formwork from boards or OSB scraps is installed above the ground level. During the manufacture of formwork, you need to use a level; all edges must be strictly vertical.
Practical advice. It is much easier to make columns from ready-made blocks. Horizontal alignment must be done along the rope. After the outer ones are aligned with the hydraulic level, a rope is pulled between them. Deviations should not exceed ± 1 cm. This variation is eliminated during installation of the log.
Step 4. Proceed to fixing the lags; you also need to start work from the outermost ones. For precise horizontal alignment, you can use shims. It is not advisable to take wedges made of wood; over time, they will dry out and wobble will appear: the floor will begin to creak unpleasantly when walking. Between wooden structures and concrete surfaces, it is imperative to lay two layers of roofing material for reliable waterproofing.
Step 5. After the outermost logs are laid, a rope is stretched between them and all the remaining ones are laid under it. The logs are fixed with metal squares on dowels and screws. To increase stability, it is recommended to install them on both sides. Floor boards can be laid directly on the joists or a subfloor can be laid first. The final choice depends on the characteristics of the operation and purpose of the room.
Always select joists with a safety margin, especially in cases where the installation method involves bending loads. It must be remembered that correcting mistakes made during the construction of flooring always costs much more than carrying out the work quality materials and in compliance with recommended technologies.
Choose your joist boards carefully. They must be absolutely healthy without signs of rot. The presence of through cracks and rotten knots is completely prohibited. If there are large healthy through knots, then you need to install the joists in such a way that there is a stop under them.
When attaching the logs, do not allow the possibility of wobbling.
Most loose joists cause very unpleasant squeaks in the flooring while walking. To eliminate such phenomena, you will have to remove floor coverings; this is time-consuming and expensive; it is not always possible to keep the dismantled materials in a condition suitable for reuse.
Video - Installation of wooden floors along joists
Rafters serve as the basis for the entire roofing structure, and their installation is one of the most important tasks when building a house. The frame of the future roof can be made and installed independently, observing the technological features of roofs of different configurations. We will present the basic rules for the development, calculation and selection of a rafter system, and also describe the step-by-step process of installing the “skeleton” of the roof.
Rafter system: rules for calculation and development
Rafter system - Basic structure, capable of resisting gusts of wind, taking on all external loads and evenly distributing them onto the internal supports of the house.

When calculating truss structure The following factors are taken into account:
- Roof angle:
- 2.5-10% - flat roof;
- more than 10% - pitched roof.
- Roof loads:
- permanent - total weight all elements " roofing pie»;
- temporary - wind pressure, the weight of snow, the weight of people carrying out repair work on the roof;
- force majeure, for example, seismic.

The amount of snow loads is calculated based on the climate characteristics of the region using the formula: S=Sg*m, Where Sg- weight of snow per 1 m2, m-calculation coefficient (depending on the slope of the roof). The determination of wind load is based on the following indicators: type of terrain, regional wind load standards, building height.
Coefficients, necessary standards and calculation formulas are contained in engineering and construction reference books
When developing a rafter system, it is necessary to calculate the parameters of all components of the structure.
Elements of the truss structure
The rafter system includes many components that perform a specific function:


Materials for making rafters
Rafters are most often made from trees coniferous species(spruce, larch or pine). For roofing, well-dried wood with a humidity level of up to 25% is used.

The wooden structure has one significant drawback- over time, rafters can become deformed, so metal elements are added to the supporting system.
On the one hand, metal adds rigidity to the rafter structure, but on the other hand, it reduces the service life of wooden parts. Condensation settles on metal platforms and supports, which leads to rotting and damage to the wood.

Advice. When installing a rafter system made of metal and wood, care must be taken to ensure that the materials do not come into contact with each other. You can use moisture-proofing agents or use film insulation
In industrial construction, metal rafters made of rolled steel (I-beams, T-beams, angles, channels, etc.) are used. This design is more compact than wood, but retains heat less well and therefore requires additional thermal insulation.

Choosing a rafter system: hanging and suspended structures
There are two types of rafter structures: hanging (spacer) and layered. The choice of system is determined by the type of roof, floor material and natural conditions region.
Hanging rafters rest solely on the external walls of the house, intermediate supports are not used. Hanging type rafter legs perform compression and bending work. The design creates a horizontal bursting force that is transmitted to the walls. Using wooden and metal ties you can reduce this load. The ties are mounted at the base of the rafters.

Hanging rafter system often used to create an attic or in situations where roof spans are 8-12 m, and additional supports are not provided.
Layered rafters mounted in houses with an intermediate columnar support or additional load-bearing wall. The lower edges of the rafters are fixed to external walls, and their middle parts are on the inner pier or supporting pillar.

Installation of a single roofing system over several spans must include spacer and layered roof trusses. In places with intermediate supports, layered rafters are installed, and where there are none, hanging rafters are installed.
Features of arranging rafters on different roofs
Gable roof
Gable roof, according to building regulations, has an inclination angle of up to 90°. The choice of slope is largely determined by the weather conditions of the area. In areas where heavy rainfall prevails, it is better to install steep slopes, and where strong winds- flat roofs to minimize the pressure on the structure.

Common option gable roof- design with an inclination angle of 35-45°. Experts call such parameters the “golden mean” of consumption. building materials and load distribution along the perimeter of the building. However, in this case attic space It will be cold and it will not be possible to arrange a living room here.
For a gable roof, a layered and hanging rafter system is used.
Hip roof
All roof slopes have the same area and the same angle of inclination. There is no ridge girder here, and the rafters are connected at one point, so the installation of such a structure is quite complicated.

It is advisable to install a hip roof if two conditions are met:
- the base of the building is square in shape;
- in the center of the structure there is a load-bearing support or wall onto which a post supporting the joint can be fixed rafter legs.
Create hip roof it is possible without a stand, but the structure must be strengthened additional modules- stand-up puffs.
Hip roof
The traditional design of a hip roof involves the presence of slanted rafters (diagonal) directed towards the corners of the building. The slope angle of such a roof does not exceed 40°. Diagonal runs are usually made with reinforcement, since they account for a significant part of the load. Such elements are made from double boards and durable timber.

The joining points of the elements must be supported by a stand, which increases the reliability of the structure. The support is located at a distance of ¼ of the length of the large rafters from the ridge. Shortened rafters are installed in place of the gable roof gables.
The rafter structure of a hipped roof can include very long diagonal elements (more than 7 m). In this case, it is necessary to install under the rafters vertical stand, which will rest on the floor beam. You can use a truss as a support - the beam is located in the corner of the roof and is fixed to adjacent walls. The truss truss is reinforced with struts.
broken roof
Sloping roofs are usually created to accommodate a larger attic. The installation of rafters with this roofing option can be divided into three stages:

- Installation of a U-shaped structure - supports for purlins that hold the rafter legs. The base of the structure is floor beams.
- At least 3 purlins are installed: two elements run through the corners of the U-shaped frame, and one (ridge purlin) is mounted in the center of the attic floor.
- Installation of rafter legs.
Gable roof: do-it-yourself rafter installation
Calculation of inclination angle and loads
Calculation gable roof Of course, you can do it yourself, but it’s still better to entrust it to professionals in order to eliminate errors and be confident in the reliability of the design.
When choosing the angle of inclination, it is necessary to take into account that:
- 5-15° angle is not suitable for everyone roofing materials, therefore, first choose the type of coating, and then make a calculation of the rafter system;
- at an angle of inclination over 45°, material costs for the purchase of components of the “roofing cake” increase.
Load limits from snow exposure range from 80 to 320 kg/m2. Calculated coefficient for roofs with a slope of less than 25° is 1, for roofs with a slope from 25° to 60° - 0.7. This means that if there are 140 kg of snow cover per 1 m2, then the load on a roof with a slope at an angle of 40° will be: 140 * 0.7 = 98 kg/m2.

To calculate the wind load, the aerodynamic influence coefficient and wind pressure fluctuations are taken. The value of the constant load is determined by summing the weight of all components of the “roofing cake” per m2 (on average 40-50 kg/m2).
Based on the results obtained, we find out the total load on the roof and determine the number of rafter legs, their size and cross-section.
Installation of Mauerlat and rafters
Do-it-yourself installation of rafters begins with the installation of a Mauerlat, which is fixed anchor bolts to the longitudinal walls.

Further construction of the structure is carried out in the following sequence:

Installation of rafters: video

Methods for connecting rafter structure elements: video
Laying the floor on the joists is done independently. Ease of installation and a number of advantages make this material indispensable for flooring. What determines the popularity of lag?
Firstly, the load on the floor (structure or ceiling) is distributed evenly along the entire perimeter. Secondly, laying the floor with joists means ensuring inner part apartments with heat and sound insulation properties.
Some benefits

Laying the floor on joists has the following technical features:
- Thanks to the free space that forms the log, communication can be carried out.
- It is possible to raise the floors to the required level or level them.
- The floor finished with lag is distinguished by its structural strength. The beams can withstand up to 5 tons of weight.
- Installation does not require any special skills in the construction industry. You only need tools and accessories.
- Logs are characterized by their low cost. If you plan to do the installation yourself, you will save money.
What is lag? These are beams made of wood or polymer that are laid on a finishing surface. The versatility of such a beam is determined by the fact that it can be mounted on a wooden, reinforced concrete and earthen base.
What are the joists made of? The log is a beam that is made of metal, wood, plastic, reinforced concrete. However, wooden ones are especially popular.
Return to contents
Construction and arrangement of logs

If the surface is made of wood, then flat surface will be difficult to achieve. To get the smoothest floor possible, you should attach the floor joists to the side joists. Usage this method does not require a special lining that regulates the height of the bars. The logs must be fastened with screws, which must be 2.5 times longer than the width of the beam with a diameter of at least 6 mm.
To avoid the formation of cracks in the wood, experts recommend making a hole in the beam and joist with a diameter of 2.5 mm smaller than the diameter of the screw.
If there is a large distance between the beams, repeated laying is required, which is perpendicular to the first laying. However, the distance should be less. Another option is to use thicker boards designed for finishing.
If you have concrete floors, then the floor structure on the joists looks completely different:
- It is necessary to foresee the location of the waterproofing in advance. It will provide the floors with warmth and resistance to dampness.
- The next step will be the placement of heat and sound insulation layers.
- A dry or cement screed is required.
- Finally, the logs are laid. The finishing coat is laid down last.

For such work, you need boards at least 2 m long. If this length is not enough, then you can join the parts end to end. When the logs are connected, you should take into account one important circumstance: the joints of adjacent boards should be shifted relative to each other by half a meter.
The beams can be laid either on a screed or on waterproofing. Otherwise, the log will absorb moisture, which will shorten its service life. It is not recommended to lay joists on soft insulation. Gradually, you will notice how the floor will deteriorate, ruining the finished floor. When installing thermal insulation, you can use boards of a certain width, but the beams must be located strictly between them. In any other case, the work will be in vain and will not bring the desired result.
If the insulation is longer than the beams, then select the location of the logs so that the distance between them can be filled with scraps. This is a very economical solution, since you do not have to buy additional lags.
If you want to lay timber on an earthen base, then you should prepare the surface. First remove the turf, then spread 5cm of gravel over the surface. The final stage will be pouring 5 cm of concrete on the floor. After this, apply waterproofing, screed, and insulation. In addition, if you are working with an earthen base, then the screed and insulation can be replaced with polystyrene concrete.

Now about the distance between the lags. It should be no more than 40 cm so that the load is evenly distributed on the floors.
Adviсe correct installation lag:
- Before work, the surface should be thoroughly cleaned. You should also apply a primer.
- The tree needs to be treated special solution. You can use an antiseptic, for example, bitumen. This is done in order to prevent mold and rot from occurring on the boards.
- Sound insulation can be made from sand, chipboard or slag.
- The bars are installed exclusively along the window; the gap between them and the walls should be no more than 4 cm.
- After installation, you should check the evenness of the surface according to the level (rule). There should be no gaps or gaps between the beams and the tool. If they are not there, then you did everything right. If gaps are found, you should pour sand into the space or, conversely, remove it.
Return to contents
How to lay a floor: step-by-step instructions
To make your own floors with joists, you need to develop a plan. In the plan, you can indicate the parameters of the beams, all kinds of preparatory work and devices that will be useful during the installation process.

Tools required for work: hammer drill, drill, wrench, hammer, jigsaw, axe.
You will need:
- Axe.
- Rule (or level).
- Hammer.
- Jigsaw (or saw).
- Drill.
- Screwdriver.
- Claw hammer.
- Wrench (size: 13-14).
- Board.
- Logs (dimensions: 50×50 mm).
- Insulation.
- Anchor bolts 1 cm.
- Self-tapping screws 5 cm.
- Nails 7 cm.
The beams are laid at a pre-calculated interval between them for sound insulation. A level should be used to ensure the surface is as level as possible. If the surface is concrete, then anchor-type bolts are used to fasten the logs. If the base is made of any other material, then dowels are used.
What are the advantages of wooden joists?
The technical properties of the beams are determined by strength, reliability, and ecology.
The log does not require any additional care. In addition, floors on joists have a presentable appearance.
The advantages of lag include:
- no effort is required to make the floor level;
- the beams have thermal insulation properties;
- installation is done quickly, in several stages;
- excellent sound insulation;
- possibility of locating communications.
Return to contents
Laying thermal insulation
As described earlier, logs are mounted with a certain step. Insulation (super-thin basalt fiber or expanded polystyrene) is placed in the remaining gaps. You can use it for these purposes roll insulation. In addition, expanded clay can be used for the insulating layer.
Thanks to their environmental friendliness, aesthetic appeal and natural naturalness, which provides warmth and comfort throughout the entire home, wooden floors have been used since ancient times today do not lose their positions in suburban construction and not only. When choosing a flooring option such as a wooden floor on joists, many questions arise: what are floor joists, how are they installed, and much more. This article will provide comprehensive answers to them.
What are lags
Lag- a transverse beam on which the flooring is laid. Logs are bars or boards and can be wooden, polymer, metal or reinforced concrete. Most often used wooden beam, because this material is cheaper, generally available and constructive in the case of installing a wooden floor. Although the arrangement of the floor on joists made of other materials is practically no different.
Functional advantages of using logs:
- Increased sound insulation;
- Correct redistribution of the load on the underlying layers;
- The presence of a ventilated underground, in which, if desired, utilities can be laid;
- Increased floor insulation;
- Creating a flat surface for laying floor boards;
- Structural strength and load resistance;
- Availability of elements for quick replacement in case of damage.
What is the required distance between floor joists?
Step lag directly depends on the thickness of the flooring. If strong thick boards are used for the covering, then the logs can be placed relatively sparingly. If the coating is not very durable and thin, then the logs are located often.
Lag pitch depending on the thickness of the floorboard:

Dependence of the distance between the lags on the thickness of the finishing flooring board
To more accurately determine the distance between the floor joists, you will have to make some calculations.
Example:
Room length = 11 m.
Joist width = 0,15 m (11 cm).
Considering that the floorboard will have a thickness of about 0.025 m (25 mm), we assume that the distance between the joists should be between 40 cm and 50 cm. We average our assumptions to 45 cm.
Estimated distance between joists 0,45 m.
Let us conditionally denote the number of lags - x .
Width of all joists = 0,15 x .
The first logs are located at a distance of 0.03 m from the wall (30 mm). That's why
The distance between the logs will be = x-1 .
Distance between all joists = 0,45(x-1) .
Let's make an equation:
Length of the room = width of the joists + distance between all joists + distance to the walls
11=0.15x+0.45(x-1)+0,06 ;
11=0.15x+0.45x-0.45+0.06;
11=0, 6x-0.39;
11, 39=0.6x;
x=18.983333.
The number of lags cannot be other than an integer, so we round the value.
Number of lags = 19 things.
Sum of all distances between lags = 11-0.06-19*0.15=8.09 m.
Divide the sum of all distances by the number of distances: 8,09 19-1 =0,44944444.
Total: the exact distance between the logs should be 0.4494 m = 44.94 cm.
Important! It is worth clarifying that so accurate calculations it is not necessary to carry out, it is quite enough to take the distance between the logs according to the average value, depending on the thickness of the flooring and the width of the log. If at the end of installation of the lag the distance turned out to be inaccurate, it’s okay, make the step between the last lags smaller, the structure will be stronger.
Installing floor joists
Floor construction using joists is carried out both on the earthen base and on the floors of buildings.
Laying joists on wooden floors

Laying the logs on wooden floors, it is better to attach them to the sides of the beams
The logs are attached to the beams. But given that the beams are unlikely to be perfectly level, it is better to attach the joists to the sides of the beams.
In this case, the horizontal position of the lag is checked with a control rod; there is no need to use shims. It is best to secure the logs with screws that have a diameter of 6 mm and are 2.5 times longer than the width of the logs.
Important! To avoid splitting the board, you can pre-drill a hole in the beam and joist using a drill 2.5 mm smaller in diameter than the screw.
If the beams are located too far apart from each other, you will have to make double logs. First, lay a layer of joists on the beams, and then another layer on top of them, but with a smaller step.
There are two ways to lay joists on concrete.
The first method involves linings of different thicknesses between the joists and the concrete in order to level the level. This method is used quite often, but it is not the best, since over time the linings can dry out, become deformed, or fly out, after which the floor begins to creak, sag, etc.

It is better to lay joists on a cement screed rather than on pads
The second method is to fill cement screed to level the floor surface. Then the logs are laid evenly on this screed. In this case, the floor does not deform, and the screed provides reliable and durable support along its entire length.
Before laying the joist on concrete base a number of activities need to be carried out:
- Waterproof the base, as concrete absorbs moisture well. Can be used plastic film 200 mm.
- Lay a layer of waterproofing and sound insulation. Soundproofing pads are needed to dampen impact noise and are placed directly under the joists. You can use cork or polyethylene foam pads 1-4 cm thick.
- Screed the floor, either cement or dry.
After all these procedures, you can lay the lag. To do this, it is advisable to take a beam equal to the length of the room. If this is not possible, then at least do not use timber less than 2 m long, it is impractical. If there is not enough length, the timber can be ground together at the ends.
Important! When laying connected joists, it is necessary to place the joints of adjacent rows not at the same level, but to shift them by 0.5-1 m.
It is impossible to lay logs on soft insulation, as they will be unstable. In this case, the insulation must be laid with sheets strictly between the joists. If there are free gaps or cells left, they can be filled with scraps of insulation.

The logs are laid on brick support posts
The first step is to level and compact the soil surface. This work can be done manually, using a large log, nailing a board to it from below, and moving the log along the surface together, tamping it down. The board should be at least 50 mm thick and slightly larger than the diameter of the log.
Now you need to take measurements and markings for the support columns for the logs. If beams serve as support for the logs bottom trim, then you can put marks directly on the bars with a pencil. If it is a grillage covered with roofing felt, put marks on the roofing felt.
The distance from the first joist to the wall should be from 3 to 20 cm.
To equip support pillars for logs, it is necessary to provide a foundation for these pillars. It can be separate for each column, or it can be under a row of columns. Minimum dimensions single pillar foundation 40*40 cm, the height must be at least 20 cm, of which 5 cm must be above the ground.
To pour the foundation for the pillars:
- From the axis marked on the beams, we put the logs in both directions by 20 cm. We mark them.
- We stretch the cord between the marks.
- We do the same in a plane perpendicular to the joists to mark the corners of the pillars that will be located at the intersection of the laces.
- We install pegs in the corners. At this stage, you can remove the laces.
Important! If a foundation is being made for a row of pillars, then we mark only the edges of the row with laces.
- In the designated places we remove part of the soil. We compact it, fill it with crushed stone, compact it again.
- In the protruding part of the foundation we make formwork 10 cm high.
- To waterproof concrete foundation, plastic film is placed in the pit. If the soil is clay, or has previously been carried out clay castle, then there is no need to waterproof.
- We reinforce with a mesh welded from metal reinforcement 8 mm in diameter. It must be installed just below the middle of the future concrete layer.
- We pour concrete. Most often, “lean concrete” is used, which contains more aggregate (sand, crushed stone) than binder element(cement). But it is better to use the same concrete as for the foundation of the entire building.
- Let it dry for 1-3 days.
After the concrete has dried, waterproofing can be done. To do this, we cut the material into lapels according to the size of the column, i.e. 40*40 cm, you can make an overlap of 0.5-1 cm. We lay it directly on the concrete, without coating it with bitumen.
Important! Very often they forget about waterproofing at this stage, performing it only between the brick and the joists. But concrete absorbs moisture well, since it is not designed for use in conditions of high humidity.

Scheme of arrangement of support columns for logs
We lay waterproofing on the brick. Cutting roofing felt 25*25 cm, the size of a brick column, and place it on top.
We put a soundproofing pad on top, which can be secured so that it does not move out.
Since the floor on the joists must be perfectly level, it is necessary to carefully check the horizontal position of the joists. To do this, we lay the “beacon” logs first, the outermost ones from the walls and at a distance of 2 m from each other.
Important! We check the horizontality of the logs relative to the ground and relative to each other. If the joists turn out to be uneven, then we remove the excess with a plane, and put pads under the deflections. The maximum deviation should be 1 mm per 1 m.
We lay all the intermediate joists.
We fasten the logs to the posts with corners, using self-tapping screws, which should go into the log beam by 3-5 cm. We fix the second part of the corner to the support with dowels.

Scheme of arranging a wooden floor according to logs
Before laying the finished floor, it is advisable to paint the walls so as not to contaminate the boards.
Insulation can be laid in the space between the joists
After laying the logs, it is necessary to insulate the floor. You can insulate it with expanded polystyrene, basalt fiber or other material, and it should be laid in the space between the joists if they are installed on a solid base. If the logs are installed on the ground, then the insulation is spread on the subfloor.
Laying the floor on the joists begins in the corner of the room farthest from the door. We lay the first row with a gap of 10 mm from the wall, turning the board with the tongue towards it. This is necessary to compensate for the expansion of the tree during operation. We fix it with self-tapping screws to the joists.
Important! To avoid splitting the board, we drill the holes in advance.
If the size of the flooring boards is less than the length of the room, then we lay the next rows offset. We insert them into the grooves of the previous row, and fasten them on the reverse side with self-tapping screws so as to hide the cap.
Important! We alternate the growth rings on the floor boards. In one row they should be located in one direction, in the other - in the other.
We press all the boards tightly against each other and secure them well to each joist.
We secure the last row of boards with screws so that the baseboard hides the caps. We make all fastenings of boards near the wall in such a way as to hide them with a plinth.
The construction of a wooden floor using joists is one of the most popular and durable. In addition, such a floor is easy to repair. The main thing is to carefully monitor and check the correct installation of the lags, then the structure will be strong and durable.