When building a new house or arranging an old one, an important part repair work laying the subfloor in accordance with the rules. In the article we will look at the features of folding the base and the use of insulating and insulating materials.
Features of laying subfloors along joists
Most builders recommend installing a subfloor as additional insulation and guarantees of strength and reliability. The installation features are not difficult, and therefore anyone can do all the work themselves. One disadvantage of this floor is poor insulation of impact noise, which is indicated by strong fastening of the elements. Experts do not recommend doing such arrangement in toilets, saunas, baths or baths, because high room humidity is not suitable for boards.

Subfloor in wooden house on the logs it consists of bars that make up the frame for laying and leveling. In this variation, boards that are not planed are used, of the second and third grade, preferably from coniferous species or soft deciduous. IN country houses you can use logs as logs, which creates a more durable and reliable design. At the beginning of work, all logs must be processed to level the material. In fact, the part of the beams that will be fastened to the boards must be leveled and hewn, but to achieve high level almost impossible.
The logs are laid in grooves, which are prepared at the beginning of construction, and the distance between the logs and the wall should be approximately 2 to 3 mm. This is explained by the method of laying the subfloor in a wooden house, which will not creak during operation. The boards are treated with antiseptic agents or bitumen to prevent the penetration of pests, mold and mildew. The grooves are not the only object of fastening, and therefore must have other supporting elements, for example, brick pillars.

Laying logs: installation
1. The distance between the logs should be 60 cm; when using boards of greater width or logs of significant diameter, the distance can increase to 1 meter.
2. After laying the logs, move on to the next step. We use beams with a section of 50x50, which acts as a support, and fasten them with self-tapping screws on each side of the log.
3. It is recommended to carry out the fastening procedure carefully, since the structure may turn out to be fragile and fall apart during the work. To do this, we fasten all fasteners carefully and securely to avoid harm to ourselves.
Some home-made builders purchase boards measuring 15x40, and then divide them into several parts, since the resulting beams are 50x40 in size, which is a good alternative to the previous process.

Fastening bars and laying subfloors: features of the work
The peculiarity of fastening the bars to the logs should be designed for additional space for the use of insulating materials. With an insulation thickness of 10 cm and a board thickness of 2.5 cm, the distance between the bars and logs should be 12.5 cm. Of course, all the data given may vary depending on the material you use.
The installation of a subfloor in a wooden house is the next stage of work. There are some points that can complicate the installation process. For example, logs are uneven in structure building material with different knots and depressions, so it will be difficult to finish boards of the same size and thickness. In this case, you will have to carefully process each element.
In the presence of beams, the work process is greatly simplified, especially when filing and dividing the material into boards. They are attached to bars that are attached to the logs on different sides. For fastening, you can use self-tapping screws and nails.
Such a preparatory floor is quite unstable and cannot support a person’s weight of more than 80 kg. With more weight, the boards may fail, which will have unpleasant consequences for workers. To avoid such incidents, it is recommended to put thicker boards on the joists and then proceed with the process of installing the subfloor in a wooden house.

Instructions for constructing sheathing for insulation inserts
After laying the boards, you can begin work on floor insulation using various insulating materials. IN construction stores We offer a wide selection of products with different prices and features. Therefore, choosing insulation is not difficult; for example, manufacturers offer mineral materials, as well as fiberglass or basalt, styrene boards and sprayed products.
If necessary, the insulation can be easily adjusted to the size of the repair area using construction knives. Some owners prefer to use environmental materials, which are expanded clay or slag. In wooden houses, insulating the subfloor with natural materials will preserve the ecology of the room and create more comfort.

Step-by-step instructions for installing sheathing for insulation:
1. Place the logs in the grooves prepared for this. All elements must be fastened tightly. Leveling the floor is carried out using a level, which affects the entire plane of the base.
2. Lay rough material on the joists following the previous recommendations.
3. Since wood absorbs moisture, the surface must be covered with a special film or rubber.

4. The material is attached to the surface using a stapler. It is important to ensure that the laid raw material is not swollen or has depressions. Thus, the subfloor in a wooden house is waterproofed, which prevents excess moisture from getting inside.
5. The next step is stuffing slats with a width of 5 cm, however, this parameter may vary depending on the type of insulation purchased. As in façade sheathing, the slats should be laid in the same direction horizontally or vertically. In a wooden house, such installation is especially important, since a schematic presentation of the boards will save the wood from rotting.
6. Placed in the created spaces insulation materials. When using expanded clay, it is carefully poured into the openings and a few centimeters are left from the surface. It is important that the sizes of the granules be different, because this will allow the base to be more compacted. Styrene or mineral wool They are also not laid to the very top, and this allows you to create a certain layer free of materials, which will serve to ventilate the floor and retain heat.
7. After this, a vapor barrier row is laid out on top of the bars, which is very important when installing a heated floor.
In wooden houses, as a rule, they use a water floor heating system, and therefore there is a possibility of condensation. To avoid this phenomenon, it is recommended to use vapor barrier material, it perfectly absorbs all fumes, preventing them from damaging the base.
The last step is laying the finished floor. To do this, use tongue-and-groove boards or special plywood that can absorb moisture. This material used for further finishing of the floor using linoleum or laminate. All surfaces must be carefully sanded to avoid unevenness or imperfections in the floor.

Do-it-yourself method for dry screeding a subfloor in a wooden house
If there is a concrete floor in a wooden house, the owners want to convert it into special floors. Of course, there is a conversion method using dry screed or a self-ventilated floor system. The first option is more affordable in construction. To install a subfloor with your own hands, it is recommended to use the following materials and tools:
- expanded clay;
- polyethylene film;
- GVL plywood or chipboard;
- damper tape;
- PVA glue;
- electric jigsaw;
- self-tapping screws;
- screwdriver;
- marker, ruler and tape measure.
All work is carried out in stages in accordance with the requirements and recommendations proposed below.
1. A polyethylene film is laid on the concrete floor, which is used as waterproofing. The flooring on the wall should be about 10-15 cm, and between the joints of the material there should be an overlap of 20 cm. To ensure reliable fastening of the elements, it is important to seal all seams with tape.
2. The next element is gluing the damper tape around the entire perimeter. The height of the tape at the edges should be slightly greater than the layer of expanded clay poured in as an insulating material.
3. Experts recommend using beacons when installing subfloors in a wooden house, a video of which can be viewed at the end of this article. They serve as a building level for pouring granules and placing them evenly on the film. With the use of bars, the height can be increased or decreased to create the plane you need.
4. Next, pour out expanded clay and level it, focusing on the installed beacons. It is not recommended to simultaneously pour insulation over the entire area of the room. First, process one part and cover it with a sheet of plywood, and then the second, and so on. Such work is carried out in order to better move around the repair area, while the expanded clay layer must be at least 2 cm, otherwise the plywood will slide underfoot.
Laying materials on expanded clay
The process of laying sheets of plywood or GLV on expanded clay is quite an important stage, because upon installation you will immediately understand how reliably the work has been done. To do this, it is important to walk on them, which is why you will feel the material sagging. For beginners, this situation may cause bewilderment, but the main test is to firmly subsidence the sheets, which should not move in the future.
It is important to remember that flooring sheets have a large weight of approximately 15-17 kg, and the movement of such slabs on the expanded clay layer can cause its deformation. You can connect the material using self-tapping screws, but they should be located closer to each other, the approximate distance between them should be 10-12 cm. To ensure that all parts of the sheets are securely fastened, it is recommended to glue them using PVA. The application process should occur in waves, and it is important not to exaggerate with the thickness of the layer, because the parts are already connected with self-tapping screws.
As a result, all joints of plywood or GLV sheets must be puttied with special mixtures. After drying, the surface is sanded and rubbed so that the entire base is level. To the question: how to make a subfloor in a wooden house using a dry screed in a bathroom or other room where there is high humidity, it is recommended to use waterproofing materials With different solutions with a cement component.

Wet screed method
Screeding the floor is a more popular method than laying it on logs, since the materials purchased are not so expensive and accessible. Subfloor in a wooden house, photos of which reflect the sequence of work in this technology.

The step-by-step instructions include the following steps:
1. Working surface completely cleared of debris and foreign objects.
2. Insulation materials are laid, which ensure the penetration of moisture into the premises and help retain heat.
3. Beacons are attached in increments of two meters, which act as a level and are shaped like steel slats. This way you will ensure the base is level horizontally.
5. The last stage is the formation of a coating for the finished floor using delicate materials. As a rule, mixtures are used that level the base and should have a thickness of 15 mm.
6. After drying, the rare solution is poured onto the cleaned and primed base and leveled with a roller to get rid of all bubbles. Subfloor thickness according to wet screed should be up to 3 mm. The drying time for the surface ranges from several days to two weeks.
The subfloor is important stage home improvement, which ensures the preservation of heat in the room in any weather conditions. Do-it-yourself technology is a thorough work process that will require the builder to be attentive and follow the rules and stages of the instructional material.
The subfloor is a prepared base for the finishing coating: laminate, linoleum, parquet. The subfloor can be wood or concrete.
Advantages of a wooden floor:
- environmental friendliness;
- thermal insulation;
- good breathability.
The disadvantage of a rough wooden floor is that this structure does not resist well high humidity. Therefore, wooden logs cannot be installed in baths and steam rooms.

Concrete screed also has its advantages:
- durability;
- soundproofing;
- high strength;
- resistance to moisture, combustion and chemical attack;
- quick installation and affordable price.
The disadvantage of the screed is its cold surface. Such a floor must be insulated.
Regardless of the choice of flooring, the technology for performing both designs is labor-intensive and requires careful work.
DIY floor made of wooden material

Making a wooden floor has its own technology:
- Wood preparation.
- Arrangement of sheathing.
- Laying insulation.
Second or third grade wood can be used as subfloor beams. Those sides of the beams on which the flooring will be laid should be leveled.
You can install logs in two ways: on the floor or on the base.
According to the first method, it is necessary to lay the logs of the lower trim and make grooves in them in those places where the logs of the upper trim will be laid. The depth of the grooves is equal to the width of the upper beams.
The harness must be securely installed. To do this, make brick columns that will serve as support for the logs.

The installation of the posts is carried out at the initial stage of the subfloor. This design also has the name " columnar foundation" The technology is like this:
- Along the line of the ceilings, holes are dug at the same distance from each other. Pit size: 20x20x40 mm.
- Layers of gravel and sand are poured onto the bottom, compacting well. Then lay the reinforcing mesh.
- The holes are filled sand-cement mortar. Cement, sand and water are taken respectively in the following parts: 1: 3: 0.5.
- Roofing felt is laid on the hardened concrete.
- Brick columns are built.
The distance between the lags depends on the thickness wood material: the thinner the beam, the closer the logs are located. The laid beams must be secured to each other.
Installing a log “at the base” involves removing the top layer of soil and filling the surface with small crushed stone. Overlapping logs are laid on the resulting base, as in the previous version.
Placed on the lower base waterproofing film, and a layer of insulation is laid on top.
At this stage it is necessary to decide on the finishing coating. If it's leafy chipboard material, then before laying it, it is recommended to make a sheathing of transverse bars, which are secured to the supports.
Sheets of flooring are laid on the sheathing so that their joints are located in the center of the lintels.
Return to contents
Subfloor of a concrete structure
When pouring a subfloor, imperfections and unevenness are allowed.
The purpose of the rough screed is to level out large differences in surface height and create a foundation for the finishing screed.

The step-by-step instructions look like this:
- Determine differences in unevenness and install beacons.
- Prepare the base.
- Prepare a cement mixture and pour the floor.
- Monitor the condition of the screed.
First, you need to clear the surface of debris and use a level to determine the height of the screed.
Heaps serve as beacons cement mixture required height, on which a metal profile is laid. The guides are secured with mortar. The height of the profiles is the level of the future screed.
For good adhesion of the rough screed to the base, it must be prepared. First, you need to seal all large depressions and cracks with mortar. Next, the surface is primed to improve the adhesion of concrete to the base surface.
All wires will be embedded in the screed. But before pouring, all communications must be wrapped in insulating material and secured to the base using dowels.
It is necessary to glue along the perimeter of the room damper tape, which compensates for the deformation of the screed.
To prepare the solution, cement and sand are taken in a ratio of 1:3. Water is added to the mixture gradually until the consistency of sour cream is obtained. Approximately, water consumption is 0.5 kg per 1 kg of cement-sand mixture.
Necessary tools for preparing the solution and pouring the screed:
- shovel;
- solution container or electric concrete mixer;
- buckets;
- workwear.
The solution is poured between the beacons and the slats; it is usually distributed. If voids form, then the mixture is added to those places and leveled again.
The cement mixture must be prepared in small portions, as the solution hardens quickly. It is recommended to fill the floor in one day so that the surface is uniform.
When drying, the screed may shrink. To prevent this, you must take the following measures:
- For the first 3 days you cannot walk on the screed.
- Avoid drafts and direct sunlight in the room.
- The next day after pouring, the screed must be covered with film.
A good subfloor is the key robust construction the entire room. High-quality installation and strict adherence to technology will allow the foundation to serve for many decades.
Later, insulation material is placed on the first base, in the space between the joists. Only after this the top flooring is made from boards. If you look at it, this process is not particularly difficult.
However, in order to make a subfloor with your own hands, you will need to become more familiar with the methodology of its installation, having read the description of each stage.
Lags
A separate bonus can be considered next fact. A properly executed rough foundation can significantly increase the service life of the final decorative covering floor. For this reason, it is highly desirable to use this technology. Familiar and simple procedures are quite possible to carry out with my own hands. Compared to analogues, for example, pouring a floor, the recommended design will have a much lower cost.
Are there any drawbacks to a wood subfloor?
There are few of them, but they are there:
- The device should not be used for dual wooden flooring in rooms where high humidity is expected.
- This design is not only durable, but also quite rigid. For this reason, it can dampen various impact noises quite poorly.
A detailed description in the article of various types will help a novice craftsman assemble a subfloor at home on his own. Guided by the above, you can get a clear idea of the order and correctness of the necessary construction activities.
To make a subfloor in a wooden house with your own hands without violating technology, you must comply with the requirements of SP 31-105 (Energy Efficient frame house single-family).
Subfloor is used according to wooden beams exclusively as a base for floor coverings that do not have the design strength for the planned operational loads (for example, linoleum, carpet, laminate).
In addition, the flooring provides a flat surface for small-format cladding (e.g. parquet, PVC tiles) by analogy with a continuous roof sheathing for flexible tiles. Or it protects floor coverings from excessive heating when installing underfloor heating contours (for example, linoleum).
The only guide on how to make a subfloor inside a wooden cottage is currently SP 31-105.
Foundation and ceiling of a wooden house
A cottage made of logs, timber or built according to frame technology, can rest on any type of foundation depending on the topography and soil conditions:

Important! In the latter option, the installation of a subfloor in a wooden house is made using the technology of cold or insulated flooring above the subfloor. Therefore, inside it requires natural ventilation, protection from radon and moisture. Materials must be laid taking into account the increase in vapor permeability from the inside to the outside.
What is a "subfloor"
We should start with the fact that, in the absence of specialized education, individual developers unfamiliar with professional terminology call different structures subfloors:

These structures are not always found in pairs in floors. For example, in garden house and other seasonal buildings without heating, there may be no lining along the skull block, since insulating the ceiling in this case does not make sense. But when choosing a laminate as a floor covering, installation of a subfloor in a wooden house in this example is necessary to ensure the strength of the cladding base.
Subfloor technology
In the regulations building codes shows how to properly lay a subfloor over wooden floors or beams along concrete slab, earthen floor. The flooring is made of board materials (plywood, chipboard, OSB), edged boards and tongue and groove. The main requirements are:

Important! Fastening is carried out with self-tapping screws, with the exception of the base for the elastic floor covering. In this option, you can only use nails with ribs or ruff notches.
Insulating materials are located inside the floor pie as follows:
- waterproofing - placed under beams/purlins, on top of the flooring on a tiled block, prevents moisture from being absorbed by wood from concrete, made of a diffusion/superdiffusion membrane;
- vapor barrier - immediately under the subfloor on top of all other layers, it is better to use foil, reflecting part of the heat back into the room;
- thermal insulation – reduces or completely eliminates heat loss in floors;
- sound insulation - in a wooden house it is usually installed only on the upper floors.

Wooden floor pie with subfloor.
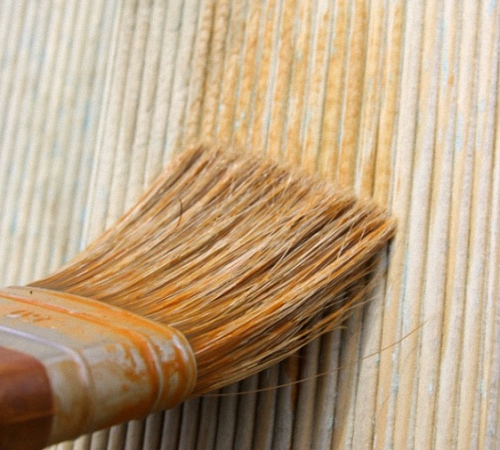
It is recommended to impregnate wood with antiseptics, fire retardants or complex fire-bioprotection before cutting materials. After sawing, drilling, etc. machining It is necessary to treat the cut area with a brush.
Even if impregnation with the specified substances was not carried out due to lack of time or the developer’s forgetfulness, this can be done after installation. However, before treating the subfloor with a fire retardant and antiseptic, you should clean the surface and, if possible, remove dust.
Material selection

It is allowed to use OSB boards and other materials with sufficient rigidity and strength. In wood-containing boards, the formaldehyde emission class must be low - only E0 or E1.
The thickness of the structural material is selected according to the table:
| Beam pitch, m | Material thickness, cm | |||
| DSP, plywood | GVL | board | Chipboard | |
| 0,4 | 1,5 | 3 | 1,6 | 1,6 |
| 0,5 | 1,6 | 3,6 | 2 | 2 |
| 0,6 | 1,8 | 3,6 | 2 | 2,5 |
Advice! The thickness of gypsum plasterboard and plywood can be reduced to 1.2 cm if the final floor covering is a tongue-and-groove board with a minimum thickness of 1.8 cm, laid strictly perpendicular to the beams in increments of 0.6 m.
Manufacturing of wooden floors
The main tasks when constructing this structure over an unheated underground are:
- waterproofing – diffusion/superdiffusion membrane;
- ventilation - vents in the basement of the building, protected from the penetration of rodents by a mesh, the size of each window is 20 x 20 cm minimum, the total size is 1/400 of the area of the foundation, it is prohibited to close for the winter, the blind area should be cleared of snow that can block the vents;
- insulation - blind areas to eliminate frost swelling at a depth of 0.4 m, the outer edges of the foundation/grillage.
Important! Regular polyethylene film harmful radon completely passes through, which is why it cannot be used as waterproofing in the presence of an underground floor. This material is destroyed by cold and has a low service life.
Therefore, currently only film membranes of the following types are used:

If you confuse which side to lay the hydro- and vapor barrier, all the moisture will remain inside the ceiling structure, which will lead to rapid destruction of the wood.

The location of the membranes inside the ceiling under the subfloor.
Installation of purlins and beams
The classic scheme of a subfloor on wooden floor joists looks like this:
- timber 10 x 15 or 15 x 15 cm in increments of 0.8 - 1 m;
- cranial block 4 x 4 cm or 5 x 5 cm along the bottom edge of the beams;
- solid lining made of boards, chipboards, 2.5 cm thick DSP;
- kraft paper or glassine as waterproofing;
- mineral wool 10 - 15 cm thick;
- film (polyethylene or vinyl);
- black floor board 3.8 - 5 cm.
The design has now been improved:
- board 5 x 20 cm per edge in increments of 0.4 - 0.6 m;
- polymer or wire mesh instead of continuous filing;
- waterproofing from a multilayer membrane;
- basalt wool 20 cm thick;
- vapor barrier;
- subfloor made of 3 - 3.5 cm coniferous tongue and groove, 1.6 - 2 cm DSP, plywood, chipboard or OSB-3;
- damper tape around the perimeter or a strip of polystyrene foam, stone wool.

Thanks to the damper layer, the structure becomes floating, the walls are relieved, and the service life is increased. However, as the height of the beams increases and the width decreases, stability deteriorates. Therefore, spacers and horizontal and vertical connections are used between adjacent 5 x 20 cm boards installed on edge.

If the project includes beams of 10 x 15 cm or 15 x 15 cm with a large step between them, the above-described floor scheme using modern methods will cost the developer less for the following reasons:
- a board 5 x 20 cm on edge every 0.6 m (standard insulation width) will cost less than a board 5 cm thick for the entire subfloor, which will have to be laid with a distance between beams of more than 1 m;
- large-section timber rarely has ideal geometry, so boards can be used to level the horizontal of the subfloor;
- the width of the insulation laid between the beams increases;
- To eliminate structural noise, it is enough to lay special material between the purlins and beams.

Floating soundproofed wooden floor.
Various ways to support beams on walls are shown in the figure below.

For independent choice beam sections, it is necessary to know the loads and span sizes. The table will help with this:

Binding options
In interfloor wooden floors, the owner usually uses a continuous board or slab material in his house.

IN basement floor There is no lower floor, so decorating the ceiling of the underground is not required. This allows you to reduce material consumption and construction time:

Advice! IN interfloor ceilings The ceiling lining can be immediately made from a block house or eurolining and used as a ceiling cladding.
Subfloor
After laying all the insulating layers into the finished on our own wooden frame flooring, subflooring is made:
- single-layer for large-format cladding;
- two-layer for parquet and PVC tiles.
For most existing siding, it doesn't make much of a difference what the subfloor is made of. However, for porcelain stoneware, tiles and mosaics, it is necessary to use DSP or GVL, with which the tile adhesive has normal adhesion.
Important! For sheet materials The recommended step for attaching screws, nails or self-tapping screws is 15 - 30 cm. The caps are usually recessed flush, then puttied. Chipboards, tongue and groove panels and gypsum fiber panels with locking joints provide ideal floor flatness, but are more expensive than edged boards, OSB and plywood without locks at the edges.
Wood processing materials
Since moisture can penetrate into the base of the flooring from the soil below and from the room above, the subfloor materials need to be impregnated with an antiseptic. In addition, to ensure the fire safety of lumber and wood-containing boards, they should be coated with fire retardants, which increase the fire resistance limit.
The most popular antiseptics are:
- on an organic basis - penetrate deeply, but have a pungent odor, it is necessary to ventilate the rooms;
- on water based– water-repellent additives are present in dispersions in the form of suspended particles; they do not penetrate deeply, but they allow the treatment of damp wood.
Important! When using organic-based antiseptics, the application technology is similar to dyeing; dipping materials into these liquids is allowed. Water-soluble antiseptics and dispersions should be intensively rubbed into lumber with a brush until foam appears, indicating the beginning of a reaction with the material and normal quality of impregnation.
To save construction budget, it is enough to choose a budget “preventative” water-soluble antiseptic for interior work. Unlike a “medicinal” hydrophobic liquid, it does not correct defects existing in wood, does not have decorative properties and does not require additional processing glaze composition, emphasizing the structure of the fibers. But it absorbs and dries faster, and is easier to wash off tools and workwear.
Fire retardants are rarely sold separately; they are usually included in combination products. For example, the fire-bioprotection product contains both fire retardants and antiseptics, which reduces the processing time of structural materials.
Nuances of technology
The black floor allows the use of decorative flooring facing material, which does not have self-supporting properties, rigidity and strength to bending loads. The main difficulties arise with the installation of partitions and remote consoles.
Partitions and walls
To ensure the operational life of the partitions, their installation should be carried out along the floor beams. If the internal bearing wall passes between the beams, they must be reinforced with jumpers made of boards or bars according to the diagram below. In order for the subfloor wood to withstand the loads, the following conditions must be met:
- jumper spacing within 1.2 m;
- The minimum section of the bar is 40 x 90 mm.
Important! Jumpers are not needed if the partitions run perpendicular to the beams.
The internal main wall of a wooden cottage must rest on the lower wall or floor purlin. It can be shifted by 0.6 m in any direction relative to the support unit of the floor beam between floors and by 0.9 m in the attic.

Bay windows and openings
If the size of the side of the opening in the ceiling perpendicular to the axes of the beams is more than 1.2 m, then they should be made double. Jumpers that limit the opening parallel to the beams are reinforced in a similar way if the size of the opening in the ceiling exceeds 0.8 m.

If there are bay windows in the wooden cottage project, the ceiling can extend beyond the perimeter of the walls in a cantilever manner. In this case, the following conditions must be met:

In the latter version, the beams are spliced “into the floor of the tree”; the cuts must be processed with hand or power tools.
Thus, the subfloor for laying flooring should be considered as part of a wooden floor, and not as a flooring made of edged boards. Before laying sheet piles or gypsum fiber boards, chipboards, it is necessary to check the correct location of other layers, treat the materials with fire protection and select a rational beam design.
Advice! If you need repairmen, there is a very convenient service for selecting them. Just submit in the form below detailed description work that needs to be done and you will receive offers with prices from construction teams and companies by email. You can see reviews about each of them and photographs with examples of work. It's FREE and there's no obligation.
Floors in wooden houses should be reliable, warm, durable and beautiful. You can achieve the desired result yourself or with the involvement of professional builders. Information about the features of flooring in a wooden house is important in both cases. Firstly, because it will be required to carry out the work independently, and secondly, to control employees.

Process Features
Floors in a wooden house consist of several layers. And to ensure comfortable conditions residence, it is important to correctly determine the components of the floor “pie”.
The main element of the building structure for the floor is the strapping. For permanent buildings, it is usually made of powerful timber with cross-sectional parameters of at least 150 x 80 millimeters.
Often the timber is replaced with several boards securely connected to each other. Plank strapping is more stable. The boards are not subjected to the stresses that the timber experiences.

Products used for strapping are subject to pre-treatment antiseptic. Used oils are often used as such. Wooden parts treated with oil do not rot or absorb moisture, so they last for many years. If there is no oil, use special means, available in every hardware store.
To extend the service life of the harness, you need to lay waterproofing on the foundation. Usually this is roofing material folded in two layers.
The strapping requires installation of logs. These are wide, powerful boards that need to be strengthened on the edge. They, just like the harness, need to be treated with an antiseptic. The joists must first be carefully inspected and cracks, if any, must be repaired. It is better to replace boards with major flaws with better ones.
In light buildings it is allowed to make prefabricated logs. For fastening components use special staples or pins. The docking points should be supported for greater reliability.


If the load is planned to be significant, it is better to strengthen the structure in advance. To do this, the cross-section of the lags is calculated, and their step is made small, from 60 centimeters.
The logs are hemmed with boards, on which a membrane is laid, preventing the penetration of wind and moisture into the room. Insulation is placed in the resulting cells. Depending on the chosen method, it can be either expanded clay or polystyrene foam, polyethylene foam or mineral wool. The insulation is covered with a vapor barrier. Further actions depend on the preferences of the home owners. Any available options can serve as a finished floor, including water-heated floors.

Structure of the structure
It’s not enough to build a wooden house, you need to build it correctly engineering Communication, such as:
- heating;
- water supply;
- sewerage;
- electrical wiring.
The abundance of engineering structures in the premises does not look aesthetically pleasing, so it is customary to hide them under the floor. The space between the joists allows you to cover most of the pipes. If there is an underground or ground floor You can install an electric water heater under the subfloor, or you can install a gas boiler room. The location of the water heater under the floor is especially important for a small shower.


When building a house, it is worth remembering that the wooden floor should be protected from water vapor. Modern building materials allow the structure to breathe and at the same time reliably protect it from moisture damage. Excellent insulation is obtained from isospan.
Izospan is used both when equipping the first floor and the second. It fits under mineral insulation and above him. Non-woven fabric Available in narrow rolls. When laying, individual parts should be overlapped and glued with a special double-sided tape. In places of contact with the joists, isospan is attached to them with a construction stapler.

The insulating layer is covered with a continuous flooring. Perhaps OSB plates are best suited for this purpose.
OSB boards widely used in housing construction. They are perfect for arranging floors in wooden houses. Oriented strand board floors are good as a base for wood flooring, parquet, linoleum, carpet and laminate. And here's the finish line OSB coating It's not worth doing.


For laying on joists installed in 50 cm increments, 18 mm is considered a sufficient thickness of the plates. If the distance between adjacent logs is 10 cm greater, a greater thickness will be required - 20 mm. OSB boards are made by pressing using a special adhesive composition. They are durable, do not rot or dry out. Floors laid according to OSB sheets, do not creak when walking.


Installation is done quickly because:
- does not require special skills;
- sheets have correct geometric shape, and no time is wasted on adjustment;
- one standard plate (2500 x 1250 mm) covers an area of 3.1 m2.
Types of floors
In private wooden houses, the type of floor depends on the method of covering. There are two options: concrete ( reinforced concrete slab) or wooden. On the second floor, the floors are usually made of wood, since heavier reinforced concrete slabs only increase the load on the foundation.


Inside the house you can equip any of modern options flooring: laminate, parquet, cork, tile and others.
Concrete floors are formed by pouring screed. In some cases, this option saves construction time. The screed is completely ready for further processing after a month. Raw wood requires drying, which takes much longer.
Concrete floors in wooden houses reduce construction costs finishing floors A well-made screed can serve as a basis for finishing without additional layers and surface leveling.

If it is necessary to raise the floor to a certain height, light expanded clay is poured under the screed. This reduces the load on the base without increasing the thickness of the screed itself.

In a new house, there is a high probability of cracking of the cement screed due to shrinkage of the structure. There will be no serious damage, but heat loss is possible. Prevent Negative consequences possible by installing reliable insulation.

Concrete flooring is possible after calculations have been carried out. As a rule, such a decision is made if the capital structure has a strip foundation.
The same is more suitable for a wooden house wooden floor. Wood is environmentally friendly and does not cause allergic reactions in residents: adults and children. Natural material owners are increasingly using country houses, preferring it to brick and various blocks.
It is easy to cover a plank floor with boards on both sides. Reliable fastening allows you to equip a “pie” of insulation, vapor and waterproofing. The multilayer structure can be made in the form of a floating floor. In this case, it will not have direct contact with the base and walls of the house.

Preparatory work
Regardless of whether on the foundation, the ground, screw piles or a structure is simply being erected on brick pillars, the arrangement of the floor begins with preparatory work.
First, prepare the walls by equipping them ventilation holes. Lack of air access to the underground will lead to rapid destruction of the wooden components of the structure.

The materials necessary for arranging the ceiling must be correctly calculated. A wood supply of 10-15 percent would also be useful.
Installation can begin when the bars and boards are sufficiently dry. When the humidity becomes normal, the material is inspected, sorted and treated with anti-rot and fungal agents.
Rough double-layer floors are made where the base is laid directly on open ground.
There are several ways to lay a floor on the ground. If you lower the floor to the minimum, you can compact the earth, lay out a bed of sand, gravel or expanded clay, and then fill it with concrete. True, this option is more suitable for the garage, and not for places intended for permanent residence of people.

In the lung country house, used for seasonal stay, the floor needs to be done differently. First you need to place brick pillars around the entire perimeter. It is very important to ensure that the surfaces of the supports have a uniform height (to the same horizon). Each support must be covered with a layer of roofing felt or roofing felt. A wooden lining 3 cm thick, treated with an antiseptic, should be placed on the waterproofing layer.
This entire structure is closed by beams, along which logs are placed with constant horizontal adjustments. The structure is finally fixed with fasteners. The floor is located on the joists if the production is carried out with a single flooring.
A double floor requires the installation of insulation, hydro- and vapor barriers, and, if necessary, other components between the rough and finished floors.

Laying methods
Rooms in a wooden house will acquire a presentable appearance, and staying in them will become truly comfortable if the flooring is in harmony with the walls. Homogeneous material will make the interior of the room holistic.


The choice of type of wood for the floor depends on:
- material opportunities;
- purpose of the premises;
- planned loads.
With an unlimited budget, they choose the most beautiful, durable and dense materials from foreign countries. Exotic trees, growing in tropical forests, have unique properties. They endure strong moisture, easy to process, resistant to abrasion. In addition, boards made from such trees have beautiful colors. For example, merbau wood can be golden orange or reddish brown. A purple floor can be made by using rosewood. And striped flooring is obtained when you buy very expensive zebrawood wood.

Boards made from coniferous trees, including pine and spruce, will not require large expenses. From such floors the room is filled with substances useful to humans and pleasant aroma. The wood always remains warm, so it is pleasant to walk on the floor with bare feet.
For showers, baths and saunas, aspen and linden boards are required. They do not emit resin and are resistant to water and high temperatures.


On a veranda open to precipitation, the floor is best made of corrugated oak or larch boards.
The thickness of the floorboards must be selected taking into account the distance between adjacent joists. At a distance of 600 – 700 mm, a thickness of 40 mm is sufficient. If the spans are larger than the specified size, preference should be given to boards with a thickness of 50 mm. As for the width, it is set by the design project or the preferences of the owners.
If you decide to install the floors yourself, remember that it is inconvenient to lay wide boards alone. In addition, the larger the canvas, the greater its shrinkage. The results of this inevitable process can affect the quality of the wood flooring. For this reason, it is better to take boards that are not wide and not too long.

One way to install a floor is to lay it staggered; in this method, the joints of the ends of the boards should not coincide in adjacent rows.
If plywood is used as a base, parquet boards glued with mastic or glue and additionally secured with self-tapping screws, as in the case of a solid board. It is necessary to glue over the entire area, without voids.
In addition to the traditional straight form of installation, a diagonal one is used. Laying at an angle of 45° to the wall looks especially elegant in a spacious room.

Arrangement of the floor requires thorough preparation, quite a lot of time and physical effort. Despite this, many believe that it is possible self installation without the involvement of specialists and additional costs. Indeed, by showing persistence, observing step by step guide, you can do without outside help and save significant money.
If it is necessary to re-lay the floor, the worn-out finishing coating is removed, the condition of the underlay is checked and, if necessary, repaired. Logs that have flaws must be replaced, as well as other components of the base affected by rot or fungus. During overhaul Wet or caked insulation, as well as insulation, are replaced on floors.

If the joists are in good condition, but begin to sag, you need to put a lining under them, for example, plywood coated with parquet glue.
Instead of expensive membrane films, glassine can be used as a moisture barrier.
When laying under the finishing coating is done with sheet building material (fibreboard, OSB, plywood), it is attached to the base with self-tapping screws. The fastening points must be located at a distance of at least 20 mm from the edge of the sheet with a pitch of about 150 mm. The screw caps should be recessed into the body by 3 mm. The resulting depressions should be filled with putty. Without putty, the finish at the attachment points will be damaged. negative impact. And after some time, traces of poorly performed work will appear on it.