In all cities there are companies providing services complex repairs loggias and free-standing balconies. Upon calling, you will be visited by specialists who will advise on this issue: they will tell you about the available materials, suggest the necessary “constructive” solution for renewing the old load-bearing slab, and provide information about the window systems available on the market.
And so, it was decided to improve the old balcony. Glaze, insulate and give it an attractive appearance not only from the inside, but also from the outside. But where does balcony repair begin? The first (also the most important) stage is the welding of the metal frame. Let's look at its technology using the example of a balcony of an ordinary five-story building.
Balcony renovation - where to start?
The work begins with the dismantling of the old railings and those attached to them gypsum boards. Next, the screed is removed and all foreign objects are removed, since metal carcass must lie on solid foundation, namely on a reinforced concrete slab.
After preliminary preparation the condition of the supporting foundation is assessed. Due to time and lingering moisture, usually the edge of the slab is partially destroyed and needs to be framed with a metal corner with a 63 mm shelf, on which the entire metal frame of the balcony will subsequently rest. Extension elements made of a metal strip 40*20*5 are welded to the corner, which are attached with anchors to the slab at a distance of 15 cm from the edge and securely fix it around the perimeter.
We are preparing new railings

New railings are placed on the already prepared base. For this you can use both the 40th corner and profile pipe, which has a number of advantages, such as rigidity and an almost perfectly even shape.
The 40*20 pipe is cut into pieces equal to the distance from the floor to the planned level of the window sill (taking into account that the floor will rise by 5 - 15 cm during finishing, depending on the chosen material and design), usually this is about a meter and welded vertically using a level along the edge of the frame corner. The outer casing is attached to these pipes, so they are placed in increments of 40-60 cm.
Unwelding the stem under the window sill

Since the balcony is not large, you can enlarge it usable area, making the window sill move forward. The stem size is usually 300 mm. In this option, the windows will be installed not along the edge of the slab, but along the edge of the external frame, that is, 30 cm further, thereby increasing the size of the balcony in the upper part.
The extension of the balcony under the window sill is made from the same 40*20 pipe and represents the upper contour of the frame around the perimeter on which the windows are placed. The “removal” is supported by inclined posts that transfer the load from the frames to the edge of the slab.
The operating procedure is as follows:
- We cut the pipe into 300 mm pieces.
- We weld them horizontally along the already standing railing posts, using a stretched thread between the pre-released pipes along the edges.
- We butt weld the front pipe. It is set according to level.
- We install support bevels, checking the horizontality of the front pipe.
At the corners, inclined elements can be made of galvanized wall profiles. It is smoother, has a larger shelf width and is easier to attach corners to. external cladding. The bottom of the frame with the extension under the window sill is ready.
Side racks

For blank walls, welding of the frame is also required. Vertical racks, welded onto the railing, are connected at the top by a jumper, on which the visor will then rest.
In order to avoid overheating of the metal and distortion of the entire structure, welding work is carried out in two stages - first, the structure is assembled using tacks, then it is finally scalded.
To avoid rapid corrosion, the metal is primed.

In the photo, the frame of the balcony with extension under the window sill and glazing on both sides is ready for exterior finishing.
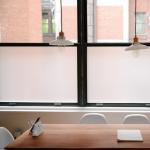
Balcony structures and loggias in modern houses have very different areas. They can be very spacious or very small. In the second case, it is possible to increase usable space during the glazing process. For this purpose, glazing of balconies is carried out with removal.
Removing the balcony without additional approvals can only be done by thirty centimeters. At first glance, the increase in space is quite small. However, if there is not enough space to place any items, such an increase will become very relevant.
If you get permission, you can make the balcony with your own hands more spacious. TO internal space from fifty to one hundred centimeters is added.
Rice. 1 Remote glazing of the balcony
There are two main ways to carry out a balcony with your own hands: along the window sill and along the floor. The specific option for glazing a balcony with an extension is chosen taking into account the design features and complexity of the work.
Extension along the window sill
For a balcony with an extension along the window sill, the base area does not change. Only the space above the window sill level increases. For this purpose, a special structure is created that extends beyond the fence. As a result, the glazing frames are extended beyond the base slab.

Rice. 2 Balcony with extension along the window sill
The space increases by about thirty centimeters. Remote balcony receives a wide window sill that can be used for different purposes.
One of the types of expansion along the window sill is the “butterfly” design. Triangular protrusions are created on the sides. The glazing rests on special trusses that are attached to the side balcony design and the walls of the building.

Rice. 3 Removing the balcony along the “butterfly” window sill
Balcony design with floor extension
Another expansion option is to move the balcony along the floor. In this case it expands concrete slab grounds. The reconstruction process is more complex and expensive, requiring the creation of a project and drawings.

Rice. 4 Option for a balcony with floor extension
This option increases the load on load-bearing floors. To prevent expansion from leading to problems, design calculations should be entrusted to professionals.
In the process of creating an external structure, the slab expands by the most different ways. Most often formwork is created the right size and concrete is poured with reinforcement installed. As a result, the base expands by several tens of centimeters.
When you can’t create a remote enlargement of a balcony
It is not always possible to arrange a balcony with removal. There are situations when this cannot be done.
- Significant weight of the structure, if it exceeds eighty kilograms.
- The loggia is more than twenty years old.
- A location that is not suitable for creating a takeaway. For example, first floor multi-storey building. If there is a take-out, water and debris from the above-located balcony structures will fall onto the roof.
Types of glazing of external structures
Remote glazing of loggias can be warm or cold. In the first case, well-insulating frames made of plastic profiles or wood are used, supplementing them with double-glazed windows.

Rice. 5 Removing the balcony with PVC glazing
Warm glazing is not often used, because it creates additional load on the balcony structure. Frames with double-glazed windows are quite heavy. In addition to their installation, it is necessary to insulate the walls, floor and ceiling. Insulation also has some weight.
If they talk about plastic windows, then German profiles are often chosen. Making frames from them allows you to obtain high-quality structures.
Much more often remote structures complemented with cold glazing. It uses frames made of aluminum profile, thin plastic profiles or wood.

Rice. 6 Glazing of balconies with aluminum extension
Another option is frameless glazing. It allows access to the loggia and rooms maximum amount natural light.
Creating an extension along the window sill
Creating a balcony glazing with extension along the window sill with your own hands begins with attaching strong brackets to the fence. If it is metal, then the brackets are welded. They are attached to brick or concrete using anchor bolts. The distance between the supports depends on the nature of the balcony structure. Usually it ranges from fifty to seventy centimeters.

Rice. 7 Frame for glazing loggia with extension
Mounted on brackets metal frame. For it, use a corner or strip of sufficient thickness. The structure is fastened by welding.
The frame is covered with cladding from the outside. For this, wood, sandwich panels or siding are used. The most important thing is that the casing is protected from moisture and corrosion.
Inside, the floor and walls are insulated. Insulation is carried out especially carefully in the case of warm glazing.
Then the balcony is glazed with your own hands using frames made of wood, plastic or aluminum profiles.
The process of external glazing is completed with the interior decoration of the balcony space and its landscaping.
If you carefully study how to make a takeout, you can do it yourself. But one person cannot do the job. The supporting structure is done by two people, at least.
Remote balconies have pros and cons, but positive and negative sides balance each other out.
It's no secret that most people use the balcony as a place to store unnecessary things. However, recently, an increasing number of residents of our country are trying to make the loggia a place where it is pleasant to be. To do this, you need to make a balcony with an extension, which can become an excellent additional room.
Removing the balcony can increase the usable area of this room
Enlarging your balcony with your own hands has become quite possible if you know how to do it. Removing the balcony allows you to add additional meters to your living space and use them the way you want. Is it possible to do all this yourself? Certainly! The main thing is to know some rules.
Types of balcony removal
First, you need to remember that you can take out the loggia different ways. The first is the removal of the balcony, which starts from the window sill. Its essence lies in the fact that the installation of windows begins not in front of the window sill, but behind it. In order for such a design to be reliable, it is necessary to use special channels that are durable. This option is different in that it does not require large financial investments. Increase the area of the balcony using similar method you can use the space in front or on the sides. If you enlarge three sides of the balcony, there will be much more space. However, it is worth remembering that the area will remain the same. What are the advantages of moving the balcony away from the window sill?

Increasing your balcony by moving it out will not require you to spend a lot of money
- The area of the loggia increases not only visually, but also in reality. All this space can be used to put beautiful flowers, make a table out of a wide window sill, and so on.
- Such an expansion of the balcony allows you to strengthen the structure thanks to reliable channels. This is especially true for residents of old houses who need structural strengthening.
You can also take it out. This restructuring requires more time and effort, but the balcony will become tens of centimeters larger. For such a removal of the loggia, reliable channels will also be required, because the load on the structure will be considerable.
The rarest way to expand a balcony is to extend it without a frame. Thanks to this, the balcony looks very light and spacious. I would also like to note the fact that such a structure weighs much less than a balcony with frames. This option is not inferior in terms of sound insulation and protection from dust and water to the removal of a loggia with frames. The disadvantage is the fact that a lot of light passes through the glass, and therefore it can be hot on the balcony. However, this can be solved by purchasing curtains or blinds along the entire height of the balcony.
What do you need to do to remove the balcony yourself?
Before you start making a balcony with your own hands, you need to remember that its length should be limited. This means that you cannot expand the loggia as much as you want, because there are maximum permissible standards. Expansion of the balcony is allowed by 20 centimeters without permission from special services. If you want to make the loggia larger by about half a meter, you will have to collect all the necessary papers. It is also worth remembering that a balcony with a DIY extension, which will increase by 50 centimeters or more, must be reinforced from below with steel trusses.
It is also worth remembering that even if you increase the balcony by 20 or 30 centimeters, you must first make sure that the wall of the house can withstand the new load. Therefore, safety precautions must be paramount.

To extend the balcony more than 20 centimeters you will need special permits
How to make a balcony removal yourself
In order to expand the loggia, you need to prepare. First, make sure you have all the tools. These include: angle, channel, anchor, mixture, knitting wire, primer for metal, marker and gun for knitting wire.
First of all, you need to cut the channel using a grinder. They should be located outside the tiles, where the balcony extension will be. The front part of the channels should be the same length as the slab itself, and the side channels should be shorter.

Installation of channels for moving the balcony along the floor
On the wall of the house it is necessary to mark the places where the structure will go deeper. Using a hammer drill, you need to cut holes. Their depth should be 2/3 of the wall thickness, but in no case less.
The channel pieces are inserted into the holes and then welded along the entire length. The fastenings to the reinforcement are secured with knitting wire. Welding is not recommended here. When this point is completed, you can concrete the reinforcement in the wall.

Installation of balcony railings
Now you need to tie the extension around the entire perimeter of the balcony. Strips of metal must be welded to the balcony floor so that they close the gap between the trim and the edge of the extension. If you need to expand a balcony whose base is destroyed, you must first fill it additionally. New reinforcement is attached to the channels and a new layer of concrete is poured. Remember that all this must be dried for at least two days.

External finishing of the balcony must be done before glazing
When the slab has been expanded and strengthened, installation of the fence can begin. It must be collected and all seams cleaned of slag. In the necessary places you can make holes for anchors. The structure must be welded in several places and checked if everything is normal. The side parts are attached to the anchors. It is worth making markings along the perimeter for future glazing of the balcony. After all, in any case, it is necessary to install double-glazed windows. You can read about glazing in detail in this article.

Installation of window frames on a balcony with removal
During these processes you can produce . Nowadays, people most often prefer siding, which is practical, low cost and easy to maintain. It's too early at this stage because you need to glaze it first.

Scheme of expanding the balcony along the floor and onto the window sill
Double-glazed windows on the balcony can be different. Now very popular. They differ in that they save a lot of space on the balcony. However, do not forget that they are not as airtight as plastic double glazed windows. Therefore, if you want to protect your balcony from dust and noise as effectively as possible, then choose plastic double-glazed windows. However, remember that they are heavy, and therefore it is worth making sure that the structure can withstand the load.
Once you take out your balcony, it won't look great right away. Therefore, it is necessary to carry out Finishing work inside. After all, all metal channels after removing the loggia will remain in sight, which spoils appearance balcony You can hide them using materials such as wood, plastic, etc. It is better to entrust such work to professionals who will do it quickly and efficiently. Also, the masters always have at hand the right tool, so they can easily turn the balcony into a beautiful room.

Original design of a balcony with take-out
Thus, we can conclude that a balcony with removal is perfect solution, which will allow you to make your apartment as spacious and comfortable as possible. After all, from a loggia you can make a room in which in the summer it will be pleasant to drink tea and admire the surrounding landscapes. Some people decide not to let anyone distract them.
If your apartment has a small balcony, then don’t despair. You can always expand it with your own hands and surprise your neighbors! Thanks to the removal of the balcony, you can make it modern, beautiful and spacious!
Useful video on the topic: how to increase the area of a balcony by taking it out with your own hands
September 12, 2016
Specialization: master of internal and exterior decoration(plaster, putty, tiles, drywall, lining, laminate and so on). In addition, plumbing, heating, electrical, conventional cladding and balcony extensions. That is, renovations in an apartment or house were done on a turnkey basis with all necessary types works
Balcony glazing with extension - 4 options in a row
Often the balcony area is very small, so you want to expand the space. I suggest that you familiarize yourself with the information on how to glaze a balcony with the window removed by several tens of centimeters.
Let me reassure you right away that this does not change much in the design - you just get space, for example, for flowerpots with which you can decorate your home.
Removing the window on the balcony
Let me immediately note that we are talking specifically about the balcony - this is not a loggia with a take-out, since the loggia is part of the building and has three walls.
Step one - dismantling the old structure

Let's figure out what is included in the preparation:
- all the work that you will do with the removal of the window sill must begin with the complete dismantling of the entire structure, that is, you should be left with one slab;
- first of all, if you leave the slab without any fencing, you will be able to assess its condition by its strength, and it does not matter what kind of house you do this in - in a Khrushchev, Stalin or Brezhnevka building;
- the whole point is that some reinforced concrete products are not made very well, and simply begin to crumble. Consequently, mortgages lose their stability - they do not last;
- each slab is reinforced and the embedded parts are placed on its perimeter, which allows fencing to be welded to it;
- in addition, the installation of the fence involves fixing it in the wall, and there can also be problems and most likely there are - this is observed in all houses that are more than 20-25 years old;
- more big problems it may be that when you have the top floor and the structure has a slate roof, it will need to be removed, and this is not so easy;
- the problem is that such balconies are many years old and the condition of the frame leaves much to be desired - it is simply dangerous to climb there;
- in such cases, a real problem can arise - it is easier to disassemble the lower fence along with the trim than the top;
- Of course, each case is individual, but I can give advice based on many years of practice (although this is not an instruction) - remove the old one first window frame, and then move on to the roof - dismantle everything else later;
- one more note about old frame- don’t try to remove it entirely - it’s better to cut the profiles - it’s much easier.
Step two - welding work

Whether you are going to extend the balcony along the floor or simply remove the window, you will need a reinforced slab. Buy 6m of corner 50x50 mm. Why exactly 6m?
The average width of the slab is 330 cm and about 80-90 cm at the edges, but don’t skimp - the leftovers will be useful to you in any case in future welding work. If your mortgages are “alive”, then you can calmly and without problems weld a corner to them, as shown in the photo above, but you may have to do them yourself.
There are many cases where a slab has collapsed. If concrete is made poorly and moisture can get inside it, then the reinforcement is destroyed and all strength is reduced to nothing. And then you need to do something about the mortgages yourself.
There is no particular difficulty here, even if it is moving the balcony along the slab without permitting documents - you just need profiles of different configurations. First of all, you need to fasten a strip of metal to the wall of the house on top of the slab and from it with the same strips (you can take 40 mm wide) weld embeds along the floor - 5-6 pieces will be enough for the entire floor.

Of course, permission and the law require certain actions, but I want to tell you that in most cities of the Russian Federation the authorities themselves welcome such structures - they strengthen the building. But, be that as it may, it is, of course, better for you to consult on this issue with a city architect or simply with someone who deals with this.
For railings and balusters, I advise you to use a 20×40 mm profile - this is the most the best option and this has been proven by many years of practice - I’ve tried a lot. Well, I can say that my son and I have been doing repairs for about 15 years (I took him with me when he was 14) and we tried different variants. I’ll tell you honestly that the removal of the balconies was not just done once, but installed, so to speak, “with sweat and blood” - I personally made more than 400 of them - it’s difficult to count.
You can use a 50x50 mm corner on the remote one - this is very convenient for the design - welders will understand me. It is best to apply 30 cm - no more.
Too much offset implies a large load, which means additional reinforcement of the frame is needed. This width of the window sill will give you the opportunity to build a whole greenhouse and also make a place for cats who love to sleep in the sun.

There is one more point on how to make a frame extension. I think everything is clear in the photo. The window needs a subframe so that there is somewhere to install it, and it is made from a metal profile. To do this (I prefer it this way), you need two 40x40 mm corners (for the risers) and one 20x40 mm profile (for the U-shaped crossbar).
Step three - covering

We continue to make a balcony with a window sill and are now sheathing the metal with wood. For this, slats 20 mm thick will suit you well - do not confuse them, not inches, but 20 mm!
The whole point is that there are two 20 mm slats and metallic profile 20x40mm will be 60mm, and this will be the thickness of your wall (50mm foam fits perfectly there). At the bottom you need a board 200 mm wide - it covers the slab completely (you can cover this with self-tapping screws on the slab).

In order to strengthen the siding, you will have to wood paneling fasten CD profiles, which are usually used for drywall (ceiling or wall lathing). This, in fact, is easy to do - each profile is cut on the jumpers (slats), that is, they are removed side shelves. It is simply screwed on with self-tapping screws.

Now you need to sew the siding on yourself, and this should have been done even before installing the window. The panels should be reinforced with self-tapping screws (you can use nails), but the fasteners should not be rigid, which means that the screw should not be tightened by 1.5-2 turns. But at the same time, all guides must be fastened firmly, all the way.
Step four - interior finishing


And one more stage that should be mentioned when considering the removal of the balcony when glazing PVC is interior decoration. Firstly, this includes insulation, and secondly, the installation of internal lining.
First of all, never do interior lining before installing it - it will create problems for you! If you want to sheathe a balcony wooden clapboard, then be sure to close the insulation plastic film- waterproofing is required!
And one more thing, regarding the floor - it’s best to cover it with OSB - it’s quite cheap, but it will save you from many problems!
I do not advise you to insulate the floor on your balcony with expanded clay - best insulation V in this case, this is polystyrene foam. It is not only lightweight, but also has excellent thermal insulation properties. Its thermal conductivity is approximately 5% lower than that of mineral basalt wool, therefore, it is a higher quality insulation.
Conclusion
In fact, I have already written more than once about a balcony with a take-out, so that, if you wish, you can compile the necessary information for yourself. However, if you have specific questions on the topic, I will be glad to read your comments.
September 12, 2016If you want to express gratitude, add a clarification or objection, or ask the author something - add a comment or say thank you!
In order to use additional square meters with benefit. In addition, such measures help protect the premises from the penetration of extraneous noise and dust from the street. In this regard, manufacturers have improved their technologies, thanks to which you can now glaze a balcony with your own hands, or resort to the services of professionals for this purpose.
This option became ideal solution for owners of narrow balconies, since in this way you can significantly expand the space, which is important. A take-out balcony has the following advantages:
- The presence of a large window sill that carries a functional load.
- Compared to other balconies in apartment building such a structure looks impressive.
- Using this method you can increase the strength of the parapet and the top balcony slab.
DIY installation work
You should not count on the fact that you will be able to expand the area several times in an apartment building, but it is quite possible to increase the balcony by about 0.5 m. A more accurate indicator depends on technical condition building and in particular the balcony itself.

There are two ways to implement this project:
- Removal of glazing of the entire balcony parapet.
- Removal of the front side.

To make a mounting system for carrying out a balcony, you need to use metal triangles. They are fixed to the parapet with screws or dowels. After this, metal strips are attached to the triangles by welding, and then metal corners are welded along the edges of the triangles. Thus, the structure acquires maximum strength, and the entire load is distributed along the entire perimeter of the structure.

In principle, the process is not very complicated, but for this you will need a welding partner.

Required tools:
- hammer;
- welding machine;
- grinder and protective equipment for work;
- building level;
- drill;
- mount;
- drill;
- felt-tip pen or chalk;
- anchor bolts 25 cm;
- primer paint and brush;
- profile pipe 4*4 cm.
Stages of work

- Take measurements of the length of the balcony, and also determine the desired width of the extension. If your balcony does not have side walls, you need to build them and then take these dimensions into account. As a result, the gap from the transverse lintels should be approximately 40 cm. After this, you will need to purchase a profile with a length equal to the length of the balcony, multiplied by two, taking into account the lintels.
- Then take a grinder and cut off the balcony railings without touching the posts. Measure the required section of the profile. If the length is too long, you can make two pieces and subsequently weld them.
- Place the profile on the edge of the balcony slab and weld it on one edge. Check the horizontal level along the entire length and weld the other edge. All seams must be of the highest quality, otherwise the profile will not cope with the pressure exerted.
- Next, cut the jumpers, taking into account the fact that they are butt welded.
- After cutting the jumpers, mark their attachment points and use building level put them out. Weld them at the top and bottom.

- Your next step will be cutting the profile for the outer part of the frame. This must be done taking into account that the profile will be suspended until it is fixed by welding, so measure short sections.
- Attach a piece of the profile and weld it to the ends of the jumpers. Drill a couple of holes in the jumpers fixed to the wall and fix them anchor bolts. If there are no side walls, the ends of the frame must be equipped with small supports. After assembling and welding the frame, treat the welds and coat it with primer.
Window installation

To install windows correctly, you will need to make 3 holes for each of them to fix the windows with screws. Remove glass or double-glazed windows completely from windows.
When making the ebb, calculate everything in such a way that it covers the distance from the window to the balcony and extends 15 cm into the balcony room. That is, if there is a standard length balcony tide 30 cm, of which 20 cm will protrude. If you carry out an offset of 25 cm, the ebb will be equal to 70 cm - the width of the ebb (30 cm) + the width of the outlet (25 cm) + an additional 15 cm.
Before starting installation work, secure the ebb on the window, make markings and drill holes in future fastening locations on top of the remote element. Next, proceed to installing the windows.

If you decide to entrust the installation window designs professionals, check with them about the possibility of removing the balcony themselves. Otherwise, you initially need to carry out the removal, and then invite specialists.
With the help of a balcony with a take-out, you can arrange additional space for yourself, which you will use at your discretion, from arranging a place to relax and ending with a place to store things.
Video
We bring to your attention videos that show the process of removing the balcony. By the way, you can increase the area of the balcony by expanding the floor area. You can see this in the second video.