Any owner of a private home is faced with the problem of long-term food storage. Especially if a lot of crops such as potatoes, carrots, apples, and other vegetables and fruits are grown on the site. The cellar in the house is precisely intended for storing food, household supplies in order to protect them from damage, and storing other necessary things.
How to make a cellar in a house
The most successful option would be to build a cellar during construction. In this case, the creation of the element must be taken into account in the design documentation of the structure, since the cellar can be made correctly only with proper calculation of the entire structure.
Making a cellar under a house with your own hands in an already built house is a more difficult task, but quite feasible. All excavation work will have to be done manually, and there will also be difficulties in ensuring the reliability of the structure. If you make a mistake when creating an underground cellar, the cottage itself may collapse or tilt, so you should carefully consider developing an action plan.
You can make a cellar with your own hands
Advantages of a cellar located in the house
The basement of a private house is convenient due to its compact placement and optimal air temperature inside for storing food. In addition, you do not need to leave the cottage to use the cellar.
A basement located separately from the housing will require special efforts in constructing its roof, insulating the walls, and other difficulties will arise. Therefore, professional builders recommend building a cellar in a private house, and not outside it.
Another option for using a basement is to install a boiler room in it. In this case, the heating system will not take up much space in the house; only pipes, radiators and a chimney will remain there.
Cellar construction
Structurally, the cellar consists of the following elements:
- ceiling;
- walls;
- ladder;
- ventilation system
- hatch cover.
In this video you will learn more about the cellar:
In addition, you can provide vertical ceilings (walls) to divide the internal space, as well as additional elements, such as built-in cabinets or shelves.
The structure of the walls and floor looks like this:
- the soil itself;
- clay castle;
- floor and walls (concrete);
- sand cushion on the floor between concrete and soil.
Preparing and digging a pit
Building a cellar under the house will require some effort, especially if the owner prefers to do all the work with his own hands. This can be described step by step as follows:
- planning;
- excavation;
- formation of walls and floors;
- finishing work, including installation of shelving;
- creating ventilation;
- hatch installation.
First you need to determine whether it is even possible to build a cellar on this site. To do this, you should ask your neighbors whether their buildings are flooding (if the answer is positive, it is better not to build a basement). Or invite hydrogeologists for consultation.
At the very beginning, you will have to choose where in the house the entrance to the underground will be located. Usually the hole is located in the hallway or in the kitchen area, if it is large enough.
The pit will have to be dug manually; during the work, you will need to strengthen the walls and ceiling with plywood panels and temporary supports.
The depth of the basement should be 2-2.1 meters, and if a boiler room is planned, then at least 2.5 meters.
It is important to remember that the floor should be located at a slope of 1-2 degrees, directed towards the technical gutter (pit).
When the excavation work is completed, the future floor and walls should be leveled.
 First you need to dig a pit
 After this, you need to pour out a layer of sand (the pillow should be up to 20 cm thick), compact and level it until it is firm and even, and then pour in gravel of different calibers.
A layer of waterproofing is laid on top of the cushion to protect against groundwater and leakage of liquid cement during pouring. You can use polyethylene or roofing felt.
A mesh of reinforcement should be laid on top, the thickness of the rods should be at least 5 mm.
Now you can fill it with cement, you should end up with a layer 10-15 cm thick, and wait at least 5-6 days. Complete hardening will only occur after a few weeks.
If everything is done correctly, the underground cellar will have a reliable floor that is not subject to deformation.
Walling
The best option would be to make monolithic concrete walls. But if you do the work in the house yourself, you will have to order ready-made concrete, since it will take too much time to create the required volume of solution yourself.
When ordering concrete, you should inform an employee of the manufacturer for what purposes the solution is intended, so that the builders add a special mixture to the solution, which will create penetrating moisture insulation.
Before pouring, you should prepare formwork from boards and bars. It is better to use planed lumber to make the structure easier to disassemble.
Important. When creating walls, you need to provide ventilation ducts, as well as install electrical wiring in advance if it is planned to be hidden.
After about 7-10 days, the formwork can be removed, but the concrete will “stand” completely in another 4-5 weeks.
Cellar ventilation
Since it is quite difficult to provide full ventilation in the cellar of a finished house, many owners prefer not to deal with this issue. The result is increased humidity indoors, since in any case liquid particles will penetrate into the cellar from the outside. Stored foods (vegetables, fruits) will also release moisture.
Ventilation pipes should be laid in pre-made shafts, and if the house has already been built, this will have to be done before pouring concrete.
The exhaust vent should be located under the ceiling and above the technical gutter (pit), and the supply opening should be located opposite it (at the bottom of the floor).
Both pipelines lead to the street. The exhaust pipe should be located as high as possible - in the area of the roof slope, and the air intake - at the bottom of the wall of the house. Be sure to use protective nets to protect against the penetration of rodents and insects or special filters.
 Cellar ventilation is an important element of the cellar
 If the cellar is small, then it is allowed to use a single pipe, which will ensure both the penetration of fresh air inside and the flow out.
Waterproofing the cellar from the inside
For internal waterproofing of walls in the basement, roll materials (such as roofing felt) or coating materials (bitumen mastic) are used. It’s even better to combine both materials, it’s much more reliable.
First, layers of mastic are applied (with a brush or roller), and after that the walls are covered with sheets of roofing felt in 2-3 layers. In some cases, it is advisable to lay a brick wall in one layer, this will significantly strengthen it.
Insulation of the cellar
Insulating the ceilings of the cellar will allow you to safely store various products; they will not be frozen even in winter. The most commonly used tile materials are polystyrene foam, polystyrene foam and their analogues. It is best to install panels with a density of 25 kg/m³ or higher.
It is also possible to use mineral wool, but if the humidity is too high, it will lose its properties in 1-2 years, so good preliminary waterproofing will be required.
Spraying a layer of polyurethane foam is the most reliable method, since the resulting coating will be seamless, and the material itself does not absorb moisture at all and retains heat well. But its cost is quite high when compared with mineral wool and polystyrene foam.
The main method of insulation involves creating a frame from wooden blocks or a galvanized metal profile, which is attached to the walls and ceiling.
Insulation is placed in the cells of the sheathing, after which it is recommended to stretch polyethylene film, and lay sheet plywood, boards made of boards on top, or simply glue the mounting mesh if solid materials (foam plastic or analogues) were used as insulation. After this, the wall surfaces can be plastered.
Ladder and manhole cover
The simplest solution to the question of how to easily build a staircase in a cellar is to use boards and bars of wood. If desired, you can use concrete or even metal. It all depends on personal preferences and capabilities.
It should be noted that wood will require impregnation with special compounds (to prevent rotting), and metal will require painting with a primer.
There are many types of stairs, for example:
- stationary wooden;
- complex concrete staircase;
- retractable.
 Don't forget about the hatch
 The hatch cover can be made hinged (hinged) or completely removable, it depends on how large the hole is inside and where it is located.
Conclusion
The presence of a cellar or underground in a private house is very important if you need to store food for a long time, but for this you should carefully consider the process of creating this element of the structure. If the basement is built incorrectly, vegetables and fruits will become moldy, and water may penetrate inside, which will make the existence of the cellar meaningless.
It is important to inspect your basement periodically. If condensation constantly accumulates somewhere, mold or mildew has appeared, the cause should be identified and eliminated.
The construction of a basement in a private house requires quite serious work before construction begins. As a rule, design engineers do this. But there are some nuances that the customer needs to know both during construction and when planning the rational use of the basement upon completion of construction work.
Step-by-step guide to building a basement
Depending on the intended use of the basement in an individual residential building, you will have to decide on some factors that influence both the geometry of the basement and the finishing methods.Preliminary preparation. The basement under the house allows you to increase the useful use of the land plot without increasing the building area; it creates a kind of air barrier between the ground and the living rooms of the 1st floor, which significantly affects the microclimate in the entire house. Based on the method of operating the basement, they are divided into heated and unheated:
- Heated basement. The merit of such a basement is the placement of additional recreational areas in a residential building: a gym or billiard room, a sauna or bathhouse, a swimming pool. Often, various workshops, a garage, and a heating unit with the installation of heating units are located in the basement. Such a basement is not suitable for storing food, winter stocks of agricultural products, conservation, but it has a beneficial effect on the performance of the structural elements of the foundation.
- Cold or unheated basement. Such a basement is a kind of large cellar or storage room in a residential building. Due to the constant cold and damp air in the basement, heating costs for the entire house increase; in some cases, additional work is required to insulate the foundations and basement floor structures.
The number of future residents, the minimum set of premises, the proposed types of heating, water supply, energy supply, sewerage, and the proposed type of use of the basement are clarified with the customer. Based on the data obtained, the designer develops a project in which he indicates the order of work according to construction technology.
Developing a design solution for installing the foundations of a residential building with a basement will help to avoid unexpected financial costs both during the period of active construction and during operation.
Excavation. Before the start of excavation work, alignment work is carried out: the location of the future building with a basement is determined, the axes are fixed on the ground, and they are linked to existing capital landmarks. Based on the results of the work, a plan diagram for securing and linking the axes of the future building is drawn up.
Based on the elevations of the existing terrain and the design of future basement floors, the depth of digging the pit for the building is determined. The recommended height of the basement is 2.3-2.5 m, the floor structure is up to 0.3 m. If the project provides for a completely underground basement, the pit is deepened immediately to the full depth, a semi-buried one - 1.2-1.5 m. Width and the length of the pit is increased by 0.5-0.8 m on each side for ease of installation and.
Construction of foundations. After finishing and removing the soil in the pit, foundations for the entire house are installed, which will serve as walls for the basement. The foundation is made of 2 types:
- . Repeats the plan of the main walls of the 1st floor. It is made of monolithic concrete with a reinforcement frame, foundation blocks or rubble masonry. With this type of foundation, the floors in the basement are installed separately after the installation of the basement walls is completed.
- Monolithic slab. Formwork is installed along the perimeter of the entire building, a frame is made of reinforcing steel, and the ready-mixed concrete is laid using surface vibrators. After the completed structure has gained strength and the formwork has been dismantled, the basement walls are erected. The same slab serves as the basement floor.
For each type of foundation, it is necessary to perform horizontal and vertical waterproofing. Typically, horizontal insulation is made from several layers of roll insulation materials using bitumen mastic between each layer. Vertical - bitumen, penetrating or roll. Each type of insulation has its own technology, which must be strictly followed.
Construction of basement walls. Walls can be made of various materials: concrete, stone, foundation blocks, fired clay bricks. During the construction of walls, all openings are provided: windows (if any), doors, installation openings - for sewerage, water supply, ventilation, electrical supply. The placement and dimensions of openings are always indicated in the design solution, which must be strictly observed.
Waterproofing walls. This is the main stage of construction production of basement walls. The quality of the completed waterproofing significantly affects the penetration of ground moisture into the basement.
External waterproofing is best done from rolled insulating materials. An important point is the sealing of the seam between the slab foundation and the basement wall being built. In this case, it is recommended to use a plastic profile made of acrylic polymers, which ensures complete sealing of “cold” joints during the construction process, which increases in geometric dimensions upon direct contact with water, fills all cracks and irregularities, creating an active barrier for the penetration of water into the interior of the structure.
It is better to fill the sinuses between the walls of the basement and the pit with clay, with layer-by-layer compaction, which creates an additional barrier to water.
It is better to entrust all work on the installation of load-bearing structures of the basement to highly qualified professionals, because mistakes can lead to subsidence of the foundation, the formation of cracks, flooding of basements, and the impossibility of its rational use.
Safety precautions when performing general construction work
All of the above stages of work involve the use of lifting or earth-moving equipment. When working to excavate soil from a pit, it is necessary to organize the process so that transport routes for removing soil do not intersect with the work of the excavator, and auxiliary workers are not in the working area of the bucket. In loose soils, provide for securing the pit slopes from collapse.Using a crane to move and install building elements on a construction site, a senior person is determined whose commands, previously agreed upon, are carried out by the crane operator. Do not use faulty or homemade lifting devices. The sound alarm on the tap must be in working order. Workers must have personal protective equipment: helmets, special gloves, hard-soled shoes.
When working with hot bitumen materials when performing insulation work, it is necessary to observe not only personal safety (protective clothing made of thick fabric, mittens, rubber boots or boots with rubber soles, eye glasses), but also fire safety.
The manufacture of a reinforcement frame for a monolithic slab and foundation walls does not involve the use of welding. Knitting work is done in stages: immediately the bottom layer, then the top. It is necessary to walk only along panel passages with securely fastened fittings.
When constructing monolithic concrete structures, both surface and deep vibrators operating using electricity are used. All tools must be reliably protected and grounded; people working with them must have personal protective equipment: gloves, rubber boots.
Selection of building materials
It is necessary to select building materials for the construction of a basement with the utmost care, since the walls of the basement are at the same time the foundation for the entire house. The materials must have the necessary strength and be able to withstand the load from the upper floors.
For the construction of external basement walls, it is not recommended to use porous materials (cellular concrete blocks), silicate and pressed bricks.
The best materials are concrete foundation blocks, natural hard rock (granite, tuff, limestone, sandstone), baked clay brick, monolithic waterproof concrete.
Types of rooms in the basement and features of their finishing
The final finishing of the entire set of rooms in the basement depends entirely on the purpose of each room individually:- Utility room. This could be a boiler room, a pantry or a cellar. In such rooms, simple plastering of the walls is carried out, followed by painting with water-based compounds. The floor is cement screed.
- Gym. Finishing depends on the imagination and financial capabilities of the owner. General requirements are improved plaster on the walls, plasterboard on the ceiling, linoleum on the floor.
- Sauna. As a rule, the walls and ceiling are finished with wood, after additional insulation of the walls has been performed. Floor – ceramic tiles. When decorating a sauna, you must always remember: this is a room with an increased fire hazard, regardless of the method of heating it. That is why it is necessary to strictly adhere to fire safety rules taking into account operation.
- Pool. The issue of protecting the surface of all enclosing structures from excess moisture should be at the forefront. The floor, walls, ceiling and the pool bowl itself must not allow water to pass to the structural elements of the enclosing structures. Ceramic or glass tiles are more often used.
- Billiard room. The finishing is usually done in a strict classical style. Particular attention is paid to the ceiling and lighting.
- Wine Vault. Many owners of wine collections prefer to decorate the cellar in the form of an ancient castle: made of natural stone, brick, untreated wood. Regardless of the finish, the main thing in such a room is maintaining the temperature regime.
Basement engineering equipment
The issues of ventilation and lighting in the basement only at first glance seem simple and do not require any special knowledge. In fact, there are some nuances that need to be paid attention to and taken into account when performing work on their installation:1. Lighting in the basement. When purchasing materials for basement lighting, you must first of all be guided by the reliability of materials with a high degree of protection against electric shock. These include hermetic lamps in technical rooms, and additional electrically safe hoses for laying wiring in saunas, steam baths, and swimming pools. Be sure to ground the sockets.
It is better not to place the input distribution device in the basement. Lighting panels and emergency voltage shutdown elements should be installed only in easily accessible places with obligatory inscriptions about the accessory.
The cross-section of the cable used must correspond to the power consumption of all electrical devices and have the necessary safety margin. It is better to use a double-insulated cable with copper conductors.
An incorrectly selected cross-section of cables, sockets, switches, electrical appliances, as well as an incorrectly installed power supply circuit, can lead to irreparable losses in the future.
2. Ventilation. The most important measure to prevent the formation of mold and fungi on the surface of the walls and ceiling of the basement. Regardless of the set of premises and the nature of their operation, it is necessary to arrange reliable ventilation in the basement of the house.

Ventilation can be:
- natural, ensuring the supply and removal of air due to the difference in temperature indoors and outdoors;
- forced, with the installation of both injection and exhaust units;
- combined, when using the 2 previous types in the same room.
Forced ventilation is installed in the basement with many functional rooms. Air supply and exhaust are ensured using appropriate electric fans of varying power.
To remove “exhaust” air, air ducts with air intake holes are laid under the ceiling throughout all rooms. To control such ventilation, it is better to install automation that will regulate the supply and removal of air depending on preset parameters in each room separately.
A combined ventilation system is the simultaneous installation and operation of two types of ventilation, when the inflow is carried out naturally and the exhaust is carried out using fans.
Is it necessary to insulate the basement?
The question is not at all idle, but quite significant. The answer is simple - it is necessary. According to technology, insulation of any structure is carried out from the outside of the walls. The basement is no exception.At the stage of foundation construction, external insulation of the walls is carried out to prevent their freezing in winter and heat penetration in summer. In this case, external waterproofing of the walls is carried out after completion of strengthening and plastering of the insulation.
To save heat, a device is carried out inside the basement, which is not much different from the technology of the external device.
For outdoor work, it is better to use extruded polystyrene foam boards, which have increased strength and the ability to withstand the pressure of external soil without destruction.
For internal insulation, any wall insulation is used. They are also recommended to insulate the ceiling. All insulation work is carried out at the finishing stage.
All issues related to construction and arrangement of the basement must be determined before construction begins. The reliability of the operational qualities of the basement in an individual house depends on the correct decision and adherence to the technology for performing all construction and installation work in the underground part of the building.
Nowadays it is hardly possible to imagine building a private house without a basement. A basement in a private house can be intended for a variety of purposes: storing food, equipment for a sauna, bathhouse or billiard room. Depending on the purpose for which the basement will be used, its shape and type of decoration of the walls, floor and ceiling are selected.
Small billiard room in the basement of the house
In order to build a basement in a house, it is necessary to establish the groundwater level on the site - it should be quite low. Otherwise, it will be a very common occurrence after heavy rain has passed. To prevent this from happening, the foundation of the overall structure is provided deep, and it is better if it is of a mixed type.
To build a utility basement, a height of 2-2.2 m is sufficient. It is also rational to install a heating boiler for the entire house in the basement. Due to this, all rooms of the cottage, including the basement, will have a constant temperature regime.
 Drawing and diagram of the construction of a private house with a utility basement
 Advice. If the groundwater level on the site is quite high, then instead of a full-fledged basement or cellar, you can build a basement space. Its depth can be no more than 120-150 cm.
In terms of its technical characteristics, the room is not inferior to a cellar, and has recently become very popular. The basement is being done simultaneously with the general construction. Its walls must be connected to the foundation, and the ceiling must be connected to the ground floor.
To ensure the safety of the basement, the walls of the structure must be thick enough to withstand the load of the soil on them. As a rule, this thickness is at least 30-40 cm. The construction of a basement directly depends on the quality of the soil on the site.
If the soil has a loose structure, then the walls of the basement can be made of brick, rubble stone, reinforced concrete, rubble concrete, concrete.
In order to ensure sufficient structural strength of the walls, which are lined with bricks, it is necessary to lay reinforcing mesh in horizontal seams in the masonry of the building material along the entire height of the wall in increments of 40-50 cm.
If there is high air humidity in the basement, then it is better to build the walls of the room as a monolith. For this purpose, a solution of concrete or reinforced concrete is pre-prepared. The walls must have a certain degree of inclination to allow the soil to expand.
 Durable monolithic basement walls
 The wall structures of the basement must not only have sufficient strength to withstand the loads of the soil on them, but also be well insulated and insulated. This will help ensure a constant temperature.
Expanded clay or mineral wool are widely used as insulation for floors. You can also use polystyrene foam or polystyrene foam. Similar insulation materials are used for walls.
Advice. It will be more effective to place insulation on the outer walls of the basement - then the walls will not freeze.
The best material for this is considered to be polystyrene foam. It has high thermal conductivity, which is several times less than that of mineral wool. Also, this insulation does not burn and does not emit toxic substances.
 External insulation of basement walls with foam plastic
 In order to make a floor in the basement of a house, you must first add broken brick or bitumen, gravel or crushed stone to the ground. Layers of material are laid and distributed evenly around the entire perimeter, after which they are compacted.
If the soil in the basement is too wet, a layer of insulating material should be laid before adding layers of brick or gravel. This can be polystyrene foam, polystyrene foam or polyurethane foam.
 Scheme of pouring and correct installation of the floor in the basement of a house
 Advice. It is better not to use mineral wool for such work, as it absorbs moisture very easily and can be deformed even under light loads.
A layer of clay or crushed stone is placed on this material, which is impregnated with heated bitumen.
As for the finished floor, it can be concrete or reinforced concrete, it can be made of ceramic tiles or linoleum, as well as wood.
The base for the latest flooring options must be level. It is for this reason that concrete or reinforced concrete floors are often used. Any material can be laid on top of it.
In this video you can see how to make a basement in a house with your own hands and equip it with everything you need
Read also
Plastic cellars for summer cottages
Cellar or basement
Very often it acts as a basement. It is usually located under the floor of a residential building. It can be placed in the hallway or kitchen. It is very common to have a cellar in the dressing room.

The walls of the cellar may not be connected to the foundation. They are usually built independently from brick, concrete or reinforced concrete. The form of this design comes in different shapes. The round shape has been considered the best option for a cellar for many centuries. It greatly helps to reflect the soil pressure on the walls, and the walls themselves can be made thin. It is also convenient to place food products for storage in a round cellar.
Waterproofing and ventilation of the basement
In order to ensure high-quality use of the basement, it is necessary to waterproof it internally or externally. For a cellar or basement, it is necessary to carry out waterproofing work, since the walls are in contact with the ground. And it, in turn, can be wet or dry, the condition of the external walls of such a structure will depend on this.
 Basement waterproofing diagram
 If the site has dry soil and groundwater is below the foundation structure, you can double coat the walls with heated bitumen. As for the wet structure of the soil, in this case it will be necessary to cover the walls of the basement with roofing felt.
Advice. Instead of roofing felt, you can use ordinary plastic film for the walls of a basement or cellar.
Quite serious measures will need to be taken during the waterproofing process if the basement is located at a level below groundwater on the site. In this case, make the floor in the room monolithic, and cover the outside walls with several layers of roofing material and lay plastic film on top of it.
 Scheme of waterproofing the basement of a house located below the groundwater level
 To ensure the strength of the floor and ensure the reliability of the entire structure, the base of the basement needs to be made of a monolith of reinforced concrete mortar.
Most of the work that is carried out to strengthen and waterproof a basement located below the groundwater level can take place in a flooded pit. It would be more rational to abandon the idea of building a room, since only a professional in this field can cope with such work.
In addition to waterproofing, you need to think about effective waterproofing. The quality of product storage will depend on how fresh air gets there; ventilation is also important to keep the air humidity in the basement normal. As a rule, when constructing walls, ventilation pipes are inserted into them. Their exit can be on the street or in the house itself.
 Drawing and the simplest diagram of a ventilation system for a cellar or basement in a private house
 Advice. It would be better to place the outlets of the ventilation ducts on the street, so fresh air gets into them, and the circulation of air masses will become much better.
The top of the pipes is covered with special unique roofs. They are cone-shaped and attached to the pipe using small diameter metal pipes. The minimum pipe size to ensure high-quality ventilation is considered to be 140x140 mm. This method of ventilation is called natural.
 Natural ventilation of the basement of a private house
 In the basement you can also make artificial ventilation using special equipment. But this method of ensuring air circulation will not be rational to use, since it is considered expensive. Ventilation ducts that lead from the basement to the roof must also be sufficiently protected from rainwater or snow entering them.
Sauna in the basement
Very often the basement under the house is used as a sauna. This is an option for saving space in a suburban area.
Building a sauna is considered not only fashionable, but also healthy.

To ensure comfort in the sauna, its size should be at least 12-15 square meters. m. This is necessary even if the sauna is located in the basement. Natural ventilation can be ensured by the correct arrangement of rooms. They must be adjacent to the walls of the main building.
In saunas located in basements, it is not possible to build a swimming pool, since groundwater can penetrate into the building. The average depth of the pool is 1.5 m, and you also need to take into account the deepening of the basement itself, in general, it will be 3.5 m. That is why you should not risk the integrity of the structure.
Read also
Construction of a basement floor in a house
Advice. To ensure quality relaxation in the basement sauna, you can use small showers instead of a swimming pool. They don't take up much space.
The removal of wastewater from a room of this type will need to be thought out in advance. As a rule, the sewer pipe goes at an angle into a drainage pit or any other septic tank. That is, it should be deepened into the ground by 2-2.5 m. Everything will depend on the height of the basement.
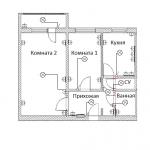
A sauna in the basement of a house, as well as a separate building of this type, should have two main rooms: a relaxation room and a steam room. Showers and toilets will be auxiliary. You can also build a small dressing room at the entrance where you can change clothes.
 Common layout of a sauna located in the basement of a house
 The steam room in the sauna must be safe, since the reliability of the entire residential building fully depends on this. Very often, an electric or gas stove is used for a steam room. An economical option is a gas stove, which is equipped specifically for use in a steam room. In order to supply gas to the sauna to ensure the operation of such a stove, you need to obtain the appropriate permission from certain authorities. Gas workers must independently connect this equipment to the gas supply. Connecting gas yourself is very dangerous to life.

The temperature in the steam room should be about 100 degrees. In this case, do not forget about the stones. They will be the main source of steam production, as they can withstand a variety of high temperatures. Stones for a steam room must be selected for strength and resistance to temperature changes.
Due attention should be paid to the decoration of the walls of such a room. As a rule, the finishing material for sauna walls is wooden lining. This material is considered environmentally friendly and can last for a very long period of time. Its surface is varnished, but this is not important.
Advice. Wooden lining for walls must be thoroughly dried and treated with antiseptic and structure-strengthening substances.
The ceiling of the room is usually covered with plastic; this finishing material is practical and durable. Even if moisture collects on its surface, it will not absorb it. The plastic is very easy to clean and simple to install.
Such a ceiling cannot be installed in a steam room, since plastic tends to deform under the influence of high temperatures. That is why it is best to make the ceiling from wooden beams, which will look harmonious with wooden walls. As a floor covering, you can choose any material that is intended for these purposes.

It would be better to make the floor in the sauna with ceramic tiles. It is durable, can withstand high temperatures without deforming.
In the recreation room, linoleum can be used as flooring.
Think in advance about how and where you will remove the excavated soil from the room.
This problem can be solved in two ways:
- The construction of a cellar in the basement is carried out during the construction of the house. It can be immediately concreted, insulated and all the work can be done in just a few days.
- When a private house already has walls and a basement, the only solution seems to be digging a hole for the cellar with your own hands. This is painstaking work that will require some physical effort.
It must be taken into account that the construction of the pit should not weaken the soil under the foundation of the house. If you dig a pit too close to the walls of the house, this can lead to subsidence of the building and its further deformation.
If the structure has a pile foundation, then carrying out excavation work and arranging a cellar does not pose any danger, because the entire load from the structure falls on the underlying soil layers, which cannot be reached with a shovel.
Storage floor
The most common option is to install a concrete floor. Arranging such a surface, of course, will not provide 100% waterproofing of the room, although concrete has many advantages over a ground floor, which are visible already at the construction stage:
After the reinforcing mesh is assembled, concrete can be poured.
- Anaerobic bacteria can emit gases that are potentially dangerous to humans, which will never enter the cellar through the concrete floor.
- A variety of pests will also not be able to enter the storage facility through the concrete surface, so installing such a floor is the right solution if you are concerned about this problem.
- Even large rodents cannot destroy a concrete floor.
- During high water, when the dirt floors simply begin to slip away from under your feet, the concrete surface will remain in place.
The construction of a concrete floor in a cellar in a private house involves the following steps:
- The first step is to dig a pit, decide on the size of the cellar and level the bottom of the hole.
- Next, you need to make a sand cushion, the thickness of which should not exceed 20 cm. It is compacted using available tools and water. The cushion must be firm and level, otherwise the concrete floor will undergo deformation in the future.
- Then it is recommended to lay a layer of gravel, which also needs to be thoroughly compacted and made as even as possible. The arrangement of this layer will ensure high reliability of the surface and the cellar under the house will not be subject to deformation.
- Waterproofing material is laid overlapping on the gravel-sand cushion (special polyethylene or roofing felt can be used). This is necessary not only as a barrier from groundwater, but so that the cement laitance does not go into the lower layers after pouring the solution. Thanks to this approach, concrete gains maximum strength. Of course, this will not provide an absolute guarantee against moisture penetration into the premises, but at least it will reduce the risks as much as possible.
- A stack of reinforcement is placed on the waterproofing layer. The thickness of the reinforcement bars should be 5 mm or more. Reinforcement of the floor surface ensures the resistance of the surface and its durability during operation.
- Finally, the floor is poured with cement mortar about 10-15 cm thick. You need to understand that the coating will gain working strength only after a few weeks. For the first days after completion of work, walking on such a floor is prohibited.
Monolithic walls
The walls of any basement are usually built from brick or foam concrete blocks. When the construction of a cellar is carried out in an already constructed house, certain difficulties may arise with waterproofing and backfilling. However, if you pay attention to the work, you can do it yourself.
Concrete is not poured to the top all at once, but little by little, compacting each layer.
The optimal solution is to build walls made of reinforced concrete. The procedure for constructing a reinforced concrete structure with your own hands is as follows:
- The first step is to install the reinforcing mesh. For these purposes, corrugated reinforcing bars with a cross section of 10-15 mm are usually used. If you cannot find rods of this thickness, you can fasten two small rods together, or use pipe scraps. To knit a reinforcing network from rods, it is recommended to use wire and special hooks; it is best not to use welding.
- Do-it-yourself vertical formwork involves the use of various available materials. Slabs, plywood sheets, and chipboard are excellent for these purposes. In principle, even large wood scraps will do. If there is not enough material for the formwork, the boards can be gradually rearranged as the walls are built. In this case, it will be possible to build a wall in a few days.
- For pouring, it is recommended to use concrete grade M200 (and more durable). In some cases, it is recommended to add some crushed stone to the solution. The formwork must be poured little by little, in layers of several tens of centimeters. In addition, each layer of concrete must be compacted. The wall must be built to the floor level.
Overlap
If the cellar in a private house is made with your own hands, then the installation of thermal insulation of the ceiling seems unnecessary to many. This opinion is erroneous, because inside the cellar a stable temperature must be maintained within +2, +5 degrees, which allows the products to remain in their original form for many months.
If the air in the cellar warms up too much, then the provisions will instantly spoil, almost all of them. In addition, in winter, without a high-quality insulated ceiling, heat will go into the cellar, thereby increasing heating costs.
It is quite possible to make a ceiling with your own hands from wood, but how to insulate it?
- A kind of “shield” of boards is attached to the supporting beams from below. The boards can be secured with self-tapping screws or nails. Nails must be driven in in different directions, at an angle, several nails per board. It is still better to fasten it with long self-tapping screws - it will be more reliable.
- A vapor barrier film material is attached to the shield, which is necessary to prevent the thermal insulation layer from getting wet.
- The entire space between the beams must be filled with thermal insulation material. In the case of a basement, mineral wool or glass wool is usually used, which is quite affordable.
- Waterproofing is placed on the thermal insulation material. A roll insulator that can be overlapped works well. It is recommended to seal all seams with construction tape.
- The load-bearing covering is laid on top and everything ends with the installation of the floor. If the entrance to the cellar is from the kitchen or living room, then it is necessary to lay the same floor covering on the lid as in the entire room.
How to deal with dampness under the house?
Having completed the installation of a cellar in the house and begun its operation, many are faced with the problem of dampness. How to prevent condensation from accumulating on the walls of the storage facility, and moisture from penetrating into the living space?
You need to understand that water will definitely seep into the cellar under the house due to groundwater and high water. No waterproofing can give a 100% guarantee. In addition, during storage, vegetables will release moisture, which will accumulate in the air.
The optimal solution in this case seems to be a do-it-yourself effective ventilation device. The ventilation system for the cellar should consist of two pipes. Through one pipe, fresh air will flow inside, and through the other, on the contrary, it will go outside. You can use any pipes: special ventilation pipes or ordinary ones made of polyvinyl chloride (which are usually used for sewage).
If your house has a small cellar, then you can make ventilation with just one pipe, which will be responsible for both air flow and exhaust. When the size of the cellar is significant, it is recommended to install special devices inside the ventilation pipes that will forcefully pump air out of the storage facility, preventing it from stagnating, leading to the formation of condensation.
The insect can enter the cellar through the ventilation.
The exhaust pipe must be brought to the roof of the house. The lower part of the exhaust pipe must be installed under the ceiling of the cellar (in accordance with the laws of physics). The lower part of the supply pipe is installed at a height of 20-30 from, and the upper part can be removed through any window. The supply pipe must be equipped with a metal filter, which will protect the cellar from debris and pests. In turn, a deflector can be installed in the exhaust pipe, which will increase draft from the cellar in windy weather.
With the help of a high-quality ventilation system, the cellar under the house can be used without problems for decades. Even a novice builder can make a storage facility correctly with his own hands.
The basement is an essential part of a home, especially a private one. This room contains communications, heating units, and often vegetable pits and pantries are located in the cellar. In addition to amenities, the basement serves as a protector for the walls and floor of the first floor from the penetration of cold and moisture. In order for all these tasks to be feasible, it is necessary to properly build a basement in a private house and equip it, and then maintain its condition throughout the entire period of operation.
What types of basements are there: general classification
Before designing a private house, you need to decide whether it will have a basement and what functions will be assigned to it.
The basement can be different:
- The basement is the first floor, partially buried in the ground. The finished floor level mark is located below the ground level. Depending on the degree of recess, full-fledged windows can be installed in such a floor. The construction of a basement floor is advisable when the space under the floor is not intended to be used and the developer wants to make the most efficient use of the entire construction volume.
- An unheated basement cellar does not require careful arrangement, insulation and finishing. The premises usually contain communications, utility rooms, vegetable storage, storerooms, and, if there is sufficient depth, workshops.
- The heated basement is more than half buried in the ground. A heating pipe is installed in such a basement; any offices or workshops can be placed.
- A basement garage will save space on the site, but in this case it is necessary to organize a good access to it.
Depending on the preferred type of premises under the floor of the first floor, the design engineer draws up a construction project, analyzes the feasibility of the structure, since it is not always possible to arrange it due to various factors, for example, geological conditions.
What you need to consider before starting work
Construction of a basement in a private house begins with soil analysis. The result of the geological study will answer a number of questions:
- To what depth can underground spaces be immersed and the level of their clean floor;
- What waterproofing to use for structures;
- Will a drainage system be required around the house?
The answer to these questions is included in the project, where the diagrams reflect all the necessary dimensions of the structures, design marks, dimensions of the foundation wall, and the material of its manufacture.
At the design stage, the issue of heating and thermal insulation of walls and floors must be resolved.
For normal operation the following must also be developed:
- Ventilation system with hood and windows;
- Methods of finishing all surfaces of the room (walls, ceiling, floor).
How to make a basement in a private house: stages of construction

Of course, the first thing you need to start with is laying the foundation correctly. Its lower mark should be 20-30 cm below the level of the finished floor. This reserve is taken to install the cushion, waterproofing and screed.
1) According to the project drawing, we place pegs around the perimeter of the external foundation walls, then move them by 0.5 meters and stretch a rope between them. The indentation is made for the slope of the pit wall. It may not exist if the depth is small (no more than 1.5 meters), then the stakes or reinforcement must strictly follow the contour of the foundation wall.
2) We dig a pit.
3) We arrange the basement floor. This is a whole complex of works:
- We roll the bottom with a roller, fill the sand and gravel mixture with a thick layer of 15-20 cm, compact it thoroughly.
- We lay out the reinforcing mesh. It is enough to use rods 8 mm in diameter with a cell size of 80x80 or 60x60 mm. To protect it from moisture coming from the ground through the PGS, we place bars 3-4 cm high, they will raise the reinforcement, and later the lower space will be filled with concrete.
- We pour a layer of concrete grade M150-M200 to secure the sand and gravel layer and reinforcement. Layer thickness 3-4 cm under the mesh + 2-3 cm above the mesh. We stand for 5-7 days.
- Now we line the waterproofing: roofing felt or other roll polymers. To obtain a reliable effect, you should lay 2 layers with overlapping strips of 5-10 cm. The seams should be glued with glue, waterproof tape or coated with bitumen mastic, and melted with a burner. It is necessary to achieve maximum tightness of the layer.
- We lay thermal insulation. It is optimal to use penoplex for the floor: it is resistant to compression, is not afraid of moisture and has excellent thermal insulation characteristics.
- Now we make another layer of cement or concrete screed for further finishing; it will preserve the insulation during construction work.
After laying the floor, we begin building the walls. If you plan to use concrete and reinforced concrete blocks, lay them on a bed of sand and crushed stone. When installing a monolithic foundation, we build formwork.
For prefabricated and monolithic walls, it is important to make high-quality waterproofing of external surfaces that will constantly or periodically come into contact with water. To do this, after constructing the walls, we glue roofing material on the outside in several layers. When installing the formwork, waterproofing can be laid along its walls immediately. Then the poured concrete immediately adheres to the waterproofing, which facilitates the process of insulation work and separation of the formwork frame after the stone has hardened.
During the construction phase, external thermal insulation of the basement walls can be done. To do this, penoplex slabs are attached to the external walls and covered with waterproofing from the outside.
Construction work with high groundwater levels
If the groundwater level is high, there are 2 options:
- 1) Lower the level of hot water below the level of the base of the foundation;
- 2) Deepen the base to the ground level, and bring the rest of the basement into the basement above the ground.
The choice of the appropriate option is determined by the financial capabilities of the developer and the desire to obtain a certain result.
How to lower the groundwater level
The main way to lower the groundwater level is to install a drainage system. During the work, you will need a machine with a pump to pump out the incoming water. It will pump out the leaking liquid before laying the drainage pipes.
- We place pegs along the perimeter of the future foundation and move them 0.5 meters from the future foundation wall. We dig a trench 30-40 cm deep below the level of the base of the structure.
- We cover the bottom of the trench with geotextile, the edges of which are laid out on the walls of the ditch for future wrapping of the system;
- We pour a layer of crushed stone and sand onto the geotextile, the total thickness is 10...15 cm. This will be the drainage layer;
- We lay out the drainage pipe at a slope of 10 meters, about 3-5 cm. We install small inspection wells at the intersections of the walls. The entire system must be directed to an irrigation reservoir, a well or a natural reservoir.
- We fill the pipe with a sand-gravel mixture and wrap the resulting “roll” with geotextiles. Now you can fill up the ditch or start excavating the pit.
Basement leading to basement

If the groundwater level is high, you can not arrange drainage, but simply place the structures closer to the surface of the earth.
- To do this, survey work is carried out to detect an underwater formation;
- They dig a pit without reaching the water mark;
- The foundation is laid using enhanced waterproofing of the floor and walls;
- The lack of basement height is removed above the ground by extending the foundation walls to the desired level.
Blind area
The blind area is the most important element in the construction of a basement. It drains water away from the foundation walls and keeps the soil dry.
The width of the blind area must be at least 0.5 meters or correspond to the overhang of the roof eaves.
- We dig a 10-15 cm depression around the perimeter of the finished walls.
- We put clay on the bottom.
- We lay out 1-2 layers of roofing material.
- We make a 5 cm sand cushion and compact it.
- We fill in 10 cm of crushed stone and compact it.
- Pour concrete on top of the crushed stone, maintaining the slope.
- We fill in another layer of sand and lay facing tiles on top of it.
Along the edge of the blind area you can arrange a storm drain. To do this, gutters are laid along the edge of the structure, which drain rainwater into the appropriate well. In this way, you can further protect the foundation walls and basement from the penetration of water from rainfall and melted snow.
How to finish a basement in a private house with your own hands
When the construction of the basement walls is completed and the floor slab of the first floor is laid, you can arrange the internal walls, floor, ceiling, and resolve the issue with the ventilation system.
Insulation and finishing of the ceiling
The ceiling must be insulated if the basement is not heated. Penoplex mats or mineral wool can be attached to dowels that are inserted into the concrete floor. If the rough ceiling is made of wooden logs, it is necessary to lay boards on them to create a basis for further finishing. In this case, the insulation will be laid from the side of the first floor into the space between the joists.
If heating is installed in the basement, there is no need to insulate the ceiling from cold air.
The ceiling can be finished first. Any available materials are suitable for this:
- Cement based plaster;
- Tiling;
- Paneling.
It is better to give preference to those materials that are not afraid of moisture.

How to insulate walls
Thermal insulation of walls should only be done after the basement has been built. Of course, if the insulation was not installed on the outside of the wall.
Protection of basement walls with thermal insulation materials is carried out when installing both a warm and a cold basement.
- 1) The first step is to waterproof the walls from the inside. To do this, you can use coating or roll waterproofing. The thickness of the coating should be 1.5 - 2.0 cm for seams between blocks and joints and 1.0-1.5 cm for walls. We attach the roll materials to bitumen in 2-3 layers.
- 2) When the bitumen has completely polymerized and hardened, you can begin insulating the walls. For the basement it is better to use polystyrene foam and basalt. These materials are not afraid of water and do not change their properties when wet. Water does not penetrate inside basalt and polymer slabs. We attach the mats/slabs to the waterproofing on bitumen. We do not use dowels and anchors, since they violate the sealed layer of waterproofing, which we do not need at all.
- 3) Wall cladding can be of any kind: plastering, paneling, ceramic tile cladding. The design of the room must correspond to the purpose of the basement; with high-quality heat and waterproofing, you can use any available finish.
Floor finishing
The finishing of the floor is done last. The insulation has already been done previously, so all that remains is to properly veneer the floor covering. It is better to choose a material with waterproof tiles or cover the area with concrete contact and paint over the surface. Using wooden panels, laminate and parquet in the basement is risky: the room is damp, wood easily absorbs moisture and the products are deformed, the coating swells.
At the end of the finishing activities, we complete the floor covering by installing the plinth.
Ventilation
The basement is a humid room, even with high-quality thick-layer waterproofing there is always steam in the air. To avoid high levels of humidity and air stagnation, it must be constantly updated. Especially if there are no windows in the room.
To organize air exchange, you can install supply and exhaust ventilation. To do this, pipes are fixed under the ceiling, one end of which is exposed to the street. Air renewal occurs due to the difference in temperature: cold (fresh) air enters through the supply pipe, warm (used) air exits through the exhaust pipe. The pipes are placed at different ends of the room so that complete air exchange occurs. In this case, the volume constantly circulates without lingering in secluded corners.