It seems that doing a kitchen renovation yourself is not so difficult. But this appearance is false. After all, this room, in addition to aesthetics, should also be functional. Not to mention practicality and ergonomics. Therefore, it is very important to correctly approach the repair processes, which are carried out in a certain sequence. After all, the quality of the final result is not just good quality building materials. This is a precisely maintained technology for each construction operation. That is, when talking about updating the kitchen space, we need to talk about everything: from the sequence of kitchen renovation to minor nuances.

The principle of kitchen renovation
This principle is simple. And it can be determined by the sequence of actions - from dirty activities to clean ones. To help you understand what we are talking about, here is an example of an incorrect sequence. First, we glued wallpaper or laid tiles on the walls, and then began to pour screed onto the floor. The most important thing is that this sequence must be followed when renovating the entire kitchen or when updating just part of it.
Therefore, the entire repair process can be divided into four main stages: dismantling, replacing communication networks, leveling the repaired surfaces in the kitchen, and finishing them. This is the main sequence of kitchen renovations. It will need to be translated onto a plane. It is very important to maintain priorities, which are based on nuances construction technologies. For example, if you are pouring screed, you must immediately be prepared for the fact that you will not be able to enter the room for several days. Therefore, it would probably be better to first carry out repair work on the walls and ceiling, and then move on to the floor base. Although all this is controversial, so each master tries to find his own path along the technological chain.

Dismantling is the first stage of kitchen renovation
Related article: Choosing bathroom furniture: what should it be made of?
But as for the sequence from dismantling to finishing, this is the main line of construction operations. Therefore, first of all, it is necessary to dismantle old finishing materials and communication systems. However, it should be noted that everything will depend on what kind of renovation is planned for the kitchen: major or cosmetic.
- In the first case, dismantling will be carried out globally, even with the removal of windows and doors. It is even possible to redevelop the space with the construction or dismantling of partitions. In this case, you can destroy everything without leaving any materials or objects that can be used somewhere else. Everything goes into the trash.
- WITH cosmetic repairs everything is wrong. Basically, finishing materials are dismantled, surfaces are checked for defects, which are repaired. These surfaces must be leveled. Communications may be partially or completely replaced. Finishing is required.
Sequence of repair operations
So, the sequence of work after dismantling. If sewerage, water supply and heating pipes have been dismantled, then it’s time to restore them. But here the question arises: will the installation be done open or in a closed way? If closed, then the pipe wiring is being done right now. If it is open, then you will have to wait until the walls are leveled. As for electrical wiring, it is almost always closed in the kitchen.

Now we need to fill the screed. We will not delve into the details of this process, but let us point out that most often the repair of the floor base is associated specifically with the screed. Therefore, manufacturers have long established production ready-made mixtures, which are diluted with water and poured onto the floor. It's not difficult, it's not difficult. Main task– horizontal evenness of the screed layer.
After this, you can move on to the ceiling and walls. First the first one is leveled, then the second ones. For this you can use either putty mixtures or plasterboard sheets. If the house was built of brick, then before leveling the surfaces of the walls they will need to be plastered.
Related article: New plumbing products - 2019: faucets, sinks and toilets of amazing design
Now to the question of what is easier: putty or drywall. In terms of simplicity of work, both options are not as simple as it might seem at first glance. But plasterboard construction It assembles faster, while the finished surfaces have almost maximum evenness. But experts do not recommend using gypsum plasterboard in kitchens, even moisture-resistant ones. Therefore, the ceiling can be sheathed, for example, plastic panels. This material is two in one. It evens out ceiling surface and is immediately decorated. Moreover, for the kitchen it is an ideal finishing material.
As for the walls, it is better to level them with putty. True, this will take a lot of time. Because the sequence of applying layers of putty mixture and other different materials like this:
- First the wall is primed. It will take 4-6 hours to dry.
- Then it is puttied with a thick layer. This removes the main difference in the plane. This layer will dry for a day.
- Another coat of primer that takes 4-6 hours to dry.
- A thin layer of putty is the final leveling. Dries up to 8 hours.
- If the walls are painted or wallpaper is pasted on them, the surface will have to be additionally sanded with sandpaper. If ceramic tiles are to be faced, then even a small plane difference of up to 2 mm is acceptable, not to mention grinding.
- Another layer of primer, which will take 4-6 hours to dry.

Leveling walls with primer
Add to this the time required to carry out all these operations, and it turns out that leveling the walls with putty will require 3-4 days. That is, the kitchen renovation will be delayed only due to the drying of each building material, which is laid or applied wet.
So, the DIY kitchen renovation sequence led us to the floor base. In principle, the floor repair itself has already been completed, all that remains is to finish it. The sequence of finishing the walls and floor will depend on what material it is decided to decorate both surfaces with. That is, in what order to carry out finishing operations.
Inexpensive, but Anyone can do a quality kitchen renovation. To do this, you need to draw up a budget plan and select all the necessary finishing materials.
Any renovation, regardless of whether the property is an apartment or a private house, requires a significant investment of money. Special attention In residential buildings, the kitchen deserves its place: it should be beautiful, clean and fresh, which is why it is so important to choose practical and high-quality materials. How to organize inexpensive repair kitchens so that the quality of the coating does not suffer? In this case, it is important to be smart by choosing simplicity, cheapness, safety and functionality.
Getting started
Before making renovations, it is important to think about the general concept of the future room. In determining the style of the room, the personal preferences of the residents play the main role, then a list of the main materials and installation accessories is drawn up. This item allows you to significantly save your own budget. When purchasing cheap materials, it is important to be careful; it is advisable to consult with specialists who will advise on any issue.
Independent activities will allow you to minimize costs when carrying out repair work. So, every person can get rid of the old coating, bring in or remove the material. Complex types of work that require professionalism are best left to specialists. They will carry out inexpensive kitchen renovations without any difficulty.
Listing events
Designating a list of things necessary to carry out restoration work will help simplify the actions.
Key points included in the list:
- Elementary work such as cleaning the base surface, punching holes, dismantling old coatings.
- It is better to entrust the activities of leveling the surface, laying electrical wiring, and replacing pipes to experienced craftsmen.
- Surface priming and painting are carried out in-house.
- Laying tiles and linoleum is not difficult, so it can be done by anyone.
In the photo you can see the process of self-assembly.

Advice! Analysis of the list of works allows us to conclude that the bulk of the work can be done without asking for outside help.
Functionality is the main purpose of a kitchen, therefore, while caring about reducing the cost of renovation, it is important not to forget about its main purpose. It is important to remember that excessive simplicity in the future can result in sheer inconvenience and discomfort. Therefore, inexpensive, with proper planning, will add significance, convenience and originality to the room.
Competent repair planning
Before making renovations in a room, it is important to find out what type it will be: current or major. If the first option involves a superficial change in external data, then the second is associated with a complete transformation of the room. In connection with this point, planning for the future kitchen is carried out:
- Zonal division of the room into a work area and a place for eating.
- Dismantling of old coverings, sinks, windows, doors, communications.
- Designation of future installation points household appliances, installation of sockets.
- Determining the placement of kitchen furniture.
- Marking the location of the kitchen apron on the wall, tiling the work area with tiles.

How to meet the minimum amount?
Organize budget renovation The kitchen will help to clearly plan expenses, purchase the essentials and ideally match the overall environment.
How to properly purchase materials for subsequent repairs?
- exercise patience and prudence, buying only necessary things;
- purchase building materials in one place for the purpose of exchanging goods if necessary;
- small parts, minor cladding elements, and accessories are purchased last.
Demonstrates certain types of materials bright photo. Attributes are selected according to color scheme premises. You can make repairs that are accessible to everyone by using simple, non-standard materials for finishing. expensive materials. So, inexpensive types of linoleum are suitable for flooring. The photo clearly shows examples of such floor coverings. Upon completion of the restoration work, the kitchen is furnished with furniture and household appliances.

Inexpensive materials for decorating kitchen areas
You can update the room with cheap materials that are optimal for the installed part of the room. When finishing the ceiling, the following are allowed: plasterboard, plastic, putty. Coverings in the form of laminate, tiles, and linoleum are suitable for the floor. It is better to decorate the walls with tiles, treat the remaining surfaces with putty or paste wallpaper. The photo successfully demonstrates the finishing of the kitchen.
Cheap materials have both strong and weaknesses. The precise use of plastic elements will allow you to carry out kitchen renovations inexpensively. This material is quickly installed, durable and easy to maintain. However, such coatings quickly become unusable when exposed to bulk objects and melt when high temperatures. Examples of such materials are visible in the photo.
- GKL sheets perfectly level the base, but such material is not entirely practical: the high moisture content in the kitchen will quickly warp the coating.
- Only a person who is well acquainted with all the intricacies of the process can lay tiles.
- It is much easier to make repairs using laminate and linoleum, but any types of damage during operation cannot be excluded.
- Renovating walls will make it cheaper self-application putty if the base coat is smooth and a person who knows the basic nuances of the work.
- When choosing wallpaper you should focus on vinyl sheets: they will simplify the gluing process, which is especially important for a beginner. The photo shows cladding with this type of material.

How to use your own hands and not make a mistake with the repair?
Restoration work needs to start from the ceiling. Finishing this area without the use of additional structures will make repairs cheaper. The base base is carefully leveled, cleaned, primed, and puttied. As the layers dry, the procedure is repeated, after which the ceiling is painted with light paint. A chandelier or fluorescent lamp is selected as a lighting device. In the photo you can see the results of this finishing.
For cladding the kitchen walls, it is better to choose washable wallpaper in discreet shades to match the interior. The work area is finished with tiles, because they are not afraid of heat and soot, and any splashes can be easily cleaned.
First, it is important to prepare the surface: clean, level, prime, putty. Usually glue is applied to the canvas and work begins from the window.
To make floor repairs the cheapest possible, purchase discounted types or remnants of the appropriate coating. When choosing a laminate, the degree of its wear resistance and moisture resistance, which are so necessary for the kitchen, is taken into account. When laying this material, it is important to prepare a high-quality substrate.
Your repost will change the Internet :)
We were able to begin the repairs by sending the entire family to their historical homeland. To make repairs less boring, I decided to take pictures of everything along the way. Maybe someone will find my experience useful.
So, IT WAS: an ordinary smoky gray room with an area of 6.5 square meters. m (I forgot to take a photo, sorry).
I wanted something cool and lofty, but money was tight.
The first two days I studied the assortment of Ikea, Leruamarlen and Obi and tried to compare my desires and possibilities. The results were not very pleasing, so first I decided to dismantle everything old.
To begin the renovation, you need to disassemble everything old, unscrew it and drag what you need into the next room.


I took 5 heavy bags to the trash heap. As luck would have it, the elevator did not work.
I tried to get close to the wiring to do everything the way I needed.

Finally managed to clear the last wall of wallpaper. The war was going on for every centimeter: a hellish mixture of glue, which becomes terribly slippery from water, left me practically without hands.
This richness of the textures of the peeled wall, which time has worked on, is terribly inspiring to me. If I lived alone, I would ask a designer to design such walls.


He started making holes for 4 - all the neighbors came running. As soon as I remember, I will tremble.

The ceiling has already been done, all that remains are the walls and furniture. I decided to leave the work area above the stove as is.

And our ceilings are crooked. Door frame set according to level.

Having cleared the paint from the window sill, I saw such a stunning color that I couldn’t raise my hand to paint it back. And I will select the color of the laminate to match the color of the window sill.

I could not find a lamp that was suitable in size and price in stores. Refurbished an old chandelier. Here is the result.

Installed new doors on the mezzanine

I'm starting to laminate the floor.

The most interesting thing is that the last stage of repair turned out to be the most protracted and costly. Hanging furniture, connecting the washing machine, shelves, hooks and other little things took more time and money than the renovation itself.
To be honest, the impetus for starting the renovation was the dream of such a faucet (switching modes, pull-out sprayer) and a sink.

This is what our kitchen looked like after the renovation:


The concrete was thoroughly washed and covered with wax from Ikea

I decided not to put up wallpaper, so I painted the walls water-based paint. The top was covered with mother-of-pearl enamel from Leroy. It feels nice to the touch and washes perfectly.

If you have free time and some money, but life has become too monotonous, you can do a kitchen renovation yourself. This will not only save money, but also acquire useful skills and even improve your health, because physical activity I haven't harmed anyone yet.
The chances of getting a result in which you are not afraid to invite people into your kitchen after doing your own renovation will increase significantly if you take the advice of a specialist.
When deciding how to renovate a kitchen, you must first consider the finishing materials, taking into account the costs of purchasing them and the possibility of self-installation.
Style selection
So that the kitchen does not stand out too much from the rest of the rooms, it is advisable to do everything in the same style
When determining where to start renovating a kitchen, the first thing to do is choose a style. There are more than a dozen of them for kitchen decoration, the most famous: classic, high-tech, modern, minimalism, baroque - the implementation of many requires considerable funds.
The classics use expensive natural materials - wooden kitchen set, parquet on the floor. High-tech and modern require the presence of expensive materials made of plastic and glass and are more suitable for modern young people, baroque with carved furniture Looks best in living rooms and bedrooms.
For established people, one of the options that is simple and affordable is to decorate the kitchen in the Provence style on your own, allowing you to create a beautiful cozy interior characterized by comfort and elegance.
Recently, Provence has been quite popular, it implies the presence of light pastel colors in the decoration of the room and the furniture itself (finishing for natural wood light rocks), the presence of plants and decorative elements. Provence excludes the presence of bulky interior items (heavy curtains, massive chandeliers), the kitchen should be light and a little romantic.

Provence will give your kitchen coziness and warmth, as it looks organic
It is not difficult to do a kitchen renovation with your own hands on a small budget in the Provence style; it does not require much construction experience or special expensive tools.
Ceiling
The most common ceilings used in the kitchen are plasterboard, suspended, painted or wallpapered. You can also use polystyrene foam or polystyrene foam ceiling trim ceiling tiles or PVC panels - it’s not difficult to do the repair yourself, although in the latter case you will need to build a wooden or metal frame to attach the PVC panels.
Coloring
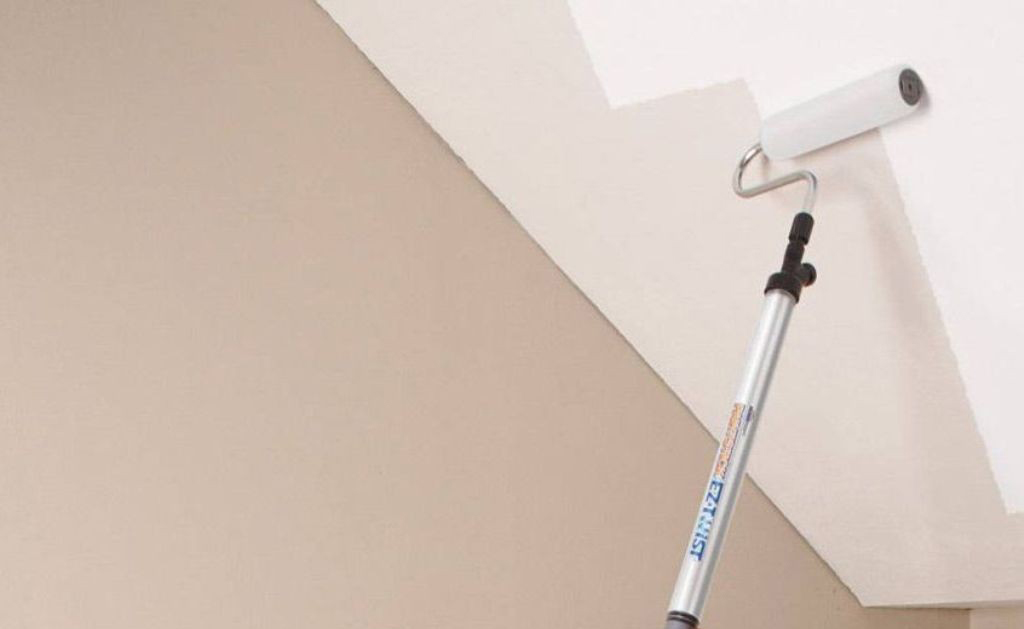
Painting the ceiling is not difficult, all you need is a roller with a long handle
Typically, kitchen ceilings are painted with waterproof paints - acrylic latex, water-based. If the ceiling is fairly smooth and has been painted with waterproof paint, repainting it with a roller will not be difficult.
This must be done at least twice, the first time painting occurs perpendicular to the direction of light from the window, the second time along.
In some cases, it may be necessary to level the ceiling - to do this, you need to rinse it very well and clean it down to the floor slab, prime it and apply putty, and after it dries, sand it with sandpaper.
Wallpaper

Wallpaper on the ceiling looks unusual, but it is advisable to buy a waterproof version
Gluing thick, waterproof types of wallpaper to the ceiling will eliminate the need to level it and give it a more interesting look. aesthetic appearance than in the case of coloring.
The choice of wallpaper for the ceiling is budget option, besides, the ceiling pasting is quite simple work, which even housewives can handle. It is advisable to prime the ceiling before wallpapering; the stripes should be glued in the direction of the light.
Floor
Do-it-yourself Provence style decoration requires a light wooden floor. Naturally, in the kitchen with high humidity natural wood is expensive and impractical, it can be replaced with such common finishing materials for flooring, such as ceramic tiles, laminate or linoleum - all of them are available with a natural light wood finish.
Ceramic tiles

Ceramic tiles - durable material with water-resistant properties, but requires care with heavy objects
Not the best suitable option to decorate the kitchen with your own hands, to lay tiles on the kitchen floor you will need special tool(tile cutter, grinder) and skills of a qualified tiler.
In almost all kitchen areas, due to the fact that the tile floor is quite cold, it is laid on an electric heating mat in the form of a wire about 5 mm thick. on the grid. This further complicates the task of laying tiles and requires connecting the heater control unit with knock-out holes in the wall and a groove for connecting the electrical wire to install it.
Considering that finishing a kitchen in the Provence style on your own will require hiring specialists to lay the tiles, and the work will be quite expensive, you can refuse this option.
Laminate

It is advisable to choose a waterproof laminate, since there is quite a lot of humidity in the kitchen, and there is a high probability of frequent water getting on the floor
Regular laminate is not a very suitable material for the kitchen due to its low water resistance, so more expensive moisture-resistant types with special surface treatment and locking joints should be used. Carrying out a kitchen renovation with your own hands by laying laminate flooring on a substrate is quite simple if you follow simple work technology.
Moisture-resistant types of laminate can withstand exposure to water for about 6 hours without consequences, while water-resistant types are not afraid of its impact. Waterproof laminate is also made in the form of panels of various thicknesses or glued to the floor; its only drawback is its very high price.
Linoleum

If linoleum tears in one place, you will have to replace it in the entire room
A budget option for laying on the kitchen floor, modern views They have a wide range of colors and patterns; commercial brands are highly durable and wear-resistant.
The disadvantages of linoleum when laying in the kitchen include its small thickness, which leads to different levels floor if laminate flooring is laid in the corridor. This is why many people prefer to lay out the kitchen floor from impractical ceramic tiles.
This problem has a simple solution - the floor in the kitchen is filled with a leveling, self-leveling mixture to the required thickness (3 - 10 mm) - this allows you not only to raise the level, but also to level the floor.
You can do the filling work yourself if you have a special toothed roller and a mixer for mixing the solution (self-levelling equipment is sold in bags in the form of a dry mixture).

Before laying linoleum, it is necessary to make a perfectly flat floor so that there are no differences in height.
A construction mixer can be replaced with a household drill by purchasing an inexpensive whisk for mixing the solution, a roller with a metal comb with teeth (using this option is very risky, the liquid self-leveler may not spread well on the floor and it will be damaged).
You can repair the floor by laying linoleum on KS or PVA construction adhesive yourself; this is not a very complicated construction job.
Walls

The walls in the kitchen should also be practical and easy to clean
Kitchen renovation in Provence style involves light colors, for finishing walls, MDF or PVC panels, ceramic tiles, painting, wallpapering are most often used, and often the types of finishing are combined.
Ceramic tiles Nowadays, it is rare for anyone to finish the entire kitchen even to the middle of the walls; it is too expensive and has gone out of fashion; the work area is mostly tiled.
MDF, fiberboard or PVC panels come in 2 types: from a single sheet ( medium size 1.2 m by 3 m) or typesetting, which are mounted on a wooden or metal frame.
In the latter case, the use of stacked panels is impractical, since this significantly reduces the free space of the kitchen by the thickness of the frame and panel. In kitchens, it is better to use MDF panels covered with moisture-resistant PVC film or one of the types of fiberboard - laminated hardboard. The sheet panels are about 3 mm thick and are attached to the walls using glue.
Painting

Choose only waterproof paint which will not lose its appearance after washing
To paint walls, preparation is necessary by leveling using putty and rubbing, otherwise the light falling from the windows will highlight all the unevenness. The work is quite complex for a non-specialist and will require additional financial expenses Also, plain coloring of the walls looks rather boring and is unlikely to become an interior decoration.
It is well known that they are water resistant acrylic paints It can be washed, but this statement is not entirely true. In the area of the work area, drops of food and grease often fall on the wall, which are absorbed into the porous surface of the paint and practically cannot be washed off.
Wallpaper

3D wallpaper has an unusual texture that will help hide unevenness
The most budget-friendly option is to wallpaper the walls; the most practical way to do this is with glass wallpaper for painting or vinyl. The latter, due to their thickness, will hide unevenness on the walls, and their smooth water-repellent surface perfectly removes all types of contaminants, including grease.
For every housewife, the kitchen is the main place in the house, so its arrangement is very important for her, because the kitchen is a place not only for preparing food, but also for eating it. The kitchen is the place where the whole family gathers for breakfast, lunch and dinner, so it is in the kitchen that everyone should feel cozy and comfortable.
Where to start renovating a kitchen
This is a very multifunctional place in the house. As usual, the kitchen area is small, so it is very important:
- Arrange all household appliances and furniture in the most convenient and rational way.
- You also need to take into account that when cooking in the kitchen, fat and steam always splash.
- All dirt is better washed off from moisture-resistant surfaces, so materials and furniture for this room should be moisture-resistant and easy to wash.
Of course, it’s not even easy to cope without professionals. So where to start renovating a kitchen?
- First you need to make a drawing or drawing of your future kitchen. This way you will quickly understand where and how to place furniture, what color scheme your kitchen will be in and what accessories you will need for its interior.
- After a sketch or project, it is necessary to calculate the materials needed for repairs. Here it is better to turn to specialists. They will help you make calculations, think through the placement of water supply, sewerage, replacement of sockets and electrical wiring.
- Then the dismantling of floors, ceilings, old communications, etc. begins.
- If necessary, replace.
- Next, all communications are carried out, new partitions are erected, and the walls, ceiling and floor are leveled.
- When finishing the ceiling, you can use various panels or slabs, as well as suspended ceilings. But the simplest thing is water-repellent paint on water based. Here you choose what is best and cheaper for you.
- For flooring Only waterproof materials should be used – natural stone, .
- The walls in the kitchen must also be resistant to moisture, so they use either washable wallpaper or tiles, but for work surface better than tile. Although, you can also use it for an apron.
- Installation household appliances and furniture is made after all coatings have hardened and dried well.
- Very important point when renovating this room is correct. To make it more convenient for the housewife to work on the work surface, it is necessary to install fluorescent lamps located on hanging cabinets, and above dining table hang a lamp. But if in your kitchen high ceiling, then multi-level lighting will look very impressive.
- Then comes the stage of installing various accessories that will make your kitchen the most comfortable, cozy and unique.
When planning any kitchen, you need to remember that the basis of the room is the working triangle:
- plate;
- fridge;
- washing.
These three objects should be at the closest distance from each other. Therefore, it is imperative to take this point into account. Now the work plan has become more or less clear and you know where to start renovating the kitchen. And the rest depends only on your imagination and the size of your wallet.
Now let's talk about common mistakes.
 Arrange furniture according to the working triangle, depending on the type of kitchen layout
Arrangement of a small kitchen
If the kitchen is small, then all the furniture and appliances may not fit in one row. In this case, it is better to use the corner type of furniture placement. It is important to take into account that the length of all sides of the workspace should be from 3 to 6 meters - these are the optimal values so that there is enough space and you don’t have to make a lot of movements when preparing food. Experts also advise that the distance between the sides of the kitchen triangle (sink, stove, refrigerator) should be approximately equal, and no more than 1.85 m.
 Work area location
 The location of all lockers on the plan should be noted in advance. If you are planning to order a specific kitchen set, then it is better to measure all its parameters in advance and estimate how it fits into the kitchen. You can use it to create a design project simple programs and even mobile applications, in which all actions are simplified as much as possible: you only need to enter the parameters of the room and the parameters of the desired furniture.
There are also original way think over the location of all pieces of furniture. A box is created from cardboard that will serve as a model of the kitchen. Naturally, it is necessary to adhere to the scale. Figures of furniture and equipment are also made from foam plastic to scale, and then all these parts are placed in a box until the ideal option is found. Whatever the method, the result should be a clear visual representation of what the future kitchen should look like.
20 most common mistakes when renovating a kitchen
Even the slightest mistake made when planning a kitchen can cause a lot of inconvenience later. So what shortcomings should be eliminated at the earliest stage of repair or redevelopment, where to start?
- Excessively large working surface - typical mistake owners large kitchens who try to place all the furniture along one wall. This arrangement will make the cooking process inconvenient because you will have to run from one end of the kitchen to the other. If the layout and size of the room allows, then it is better to build a U-shaped structure or “island”. The total area of the work surface will not change, but you will no longer have to run around the entire kitchen. The vertices of such a “working triangle” (refrigerator, stove and sink) should be located as close to each other as possible.
- Protruding handles reduce the opening angle of the door of a cabinet located in the corner. At the same time, the drawer stops sliding out.
- Narrow “labyrinths” make it difficult to move freely around the kitchen. Between kitchen facades with an “island” or U imaginative kitchen there must be a distance of at least 120 cm. Only under this condition will the drawers be fully extended and the owners will have enough space to pass through.
- Floors and work surfaces made of natural marble are difficult to maintain. Marble has a porous structure, which allows dirt to penetrate quite deeply and makes it impossible to remove. Therefore, it is better to choose a countertop made of granite or artificial stone– they are easier to clean.
- “Invulnerable” Corian – many people mistakenly believe this material the most durable and strong. Over time, even stone countertops also become covered with scratches or stains. The only advantage of this material is that it can be easily restored. But this procedure can only be trusted to specialists.
- Facing kitchen facades mosaic - this finish should not be used for drawers and doors, as it will greatly burden the structure, and the plasterboard base will “eat up” the usable area.
- Massive air ducts - such designs are not at all necessary even if the stove and vent are located far from each other. It is better to purchase a hood with a carbon filter. It does not require an air duct, you only need to periodically change the filter.
- Glossy facades look impressive, but quickly get dirty with fingerprints. Such surfaces must be wiped down every day.
- Wooden floors are an extremely poor option for a kitchen. They quickly become dirty and lose their presentation.
- Of the 20 mistakes made when renovating a kitchen, we are already close to half. Glass table tops for dining tables - have gained great popularity due to the fact that they do not make the space visually cluttered. But such models are absolutely not suitable for the kitchen. Even the most durable glass will develop scratches over time. You won’t be able to have breakfast at such a table without waking up your peacefully sleeping household members. No matter how hard you try to carefully place a cup or plate on the table, a rather loud knock will still be heard.
- Excessively wide drawers - more spacious does not mean better. Furniture stores are happy to offer us drawers up to 120 cm wide, which are easy to pull out and supposedly convenient to use. But you should read the fact that in the store they are pristinely empty and, accordingly, very light. If you fill such a drawer tightly, for example, with jars of pickles or dishes, then you will have to make a lot of effort to pull it out.
- A shelf instead of a drawer is a fairly common mistake. The advantage of the box is that its contents are easy to glance at and the right thing can be found very quickly. In the case of shelves, you will have to remove some of the contents in order to find something or just “get there.”
- Lots of seams bad decision. If you decide to cover the entire kitchen “apron” with wallpaper, then do not forget to protect it with glass. For this purpose, it is better to use one large glass sheet rather than several small ones connected end-to-end.
- A sink that has an “irregular” shape is a kitchen detail that can not only please the eye, but also irritate its owner for years. Therefore, you should not experiment with unusual shapes. It is best to stick to classic, familiar forms. This is where you need to start, because you also spend a lot of time at the sink.
- There is no space for all kinds of small household appliances. In the kitchen you can’t get by with built-in appliances alone. Therefore, you need to immediately provide space and sockets for free-standing household appliances.
- Heavy cabinets hung on light walls. The storage system can only be hung on a solid wall. A plasterboard partition may not be able to withstand such weight. In this case, you need to attach a special support to the wall on which the upper cabinets are mounted.
- Incorrectly hung equipment. Built-in ovens, coffee machines and steamers should not be placed either too low or too high. The ideal solution here the position is considered to be at waist level.
- Few . The kitchen requires several levels of lighting: a lamp located above the dining table; lamps built under the upper cabinets and illuminating work area, overhead light. It is also necessary to place switches correctly.
- No free areas on the countertop. Between elements such as the stove, sink and refrigerator there must be sections of the working surface on which you can place, for example, food taken from the refrigerator.
- The base is too high - standard height equal to 10 - 15 cm, but today most built-in household appliances for some reason are designed for a base no higher than 10 cm.
So we looked at 20 mistakes when renovating a kitchen with your own hands or with the help of professionals. Now you know where to start best and what nuances need to be taken into account.


