After reading the recommendations, even those who have never held a spatula in their hands can make cosmetic repairs. The article was written based on personal experience. If a non-professional woman was able to update the room, then you will succeed all the more.
Not everyone has the means to hire a construction crew to carry out renovations. In addition, people found through an ad do not always do everything conscientiously. If you do not need a global refurbishment of the premises, you can do cosmetic repairs yourself. This is a very fun and easy process. The main thing is to purchase everything you need, follow the stages of work, do everything carefully and with soul.
Necessary materials, tools
Here's what you need to purchase before you start redecorating:
- Spatulas - wide and narrow;
- Primer;
- Putty (dry or ready-made);
- Wallpaper;
- Ceiling tiles and glue for them;
- Flat brush, rag;
- Skirting boards for floors and ceilings;
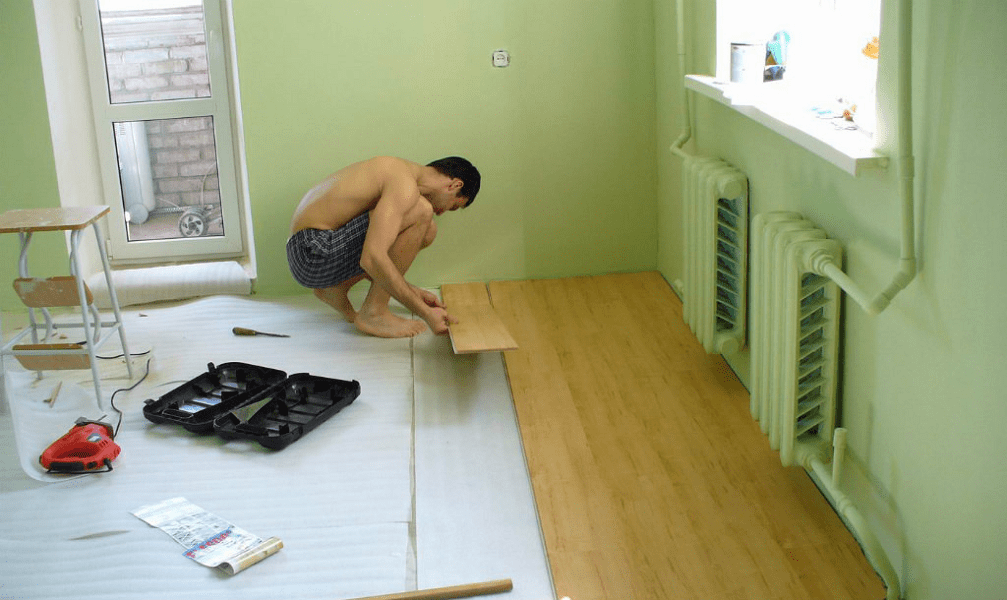
- Flooring (linoleum, laminate);
- Roller on a long handle;
- Cuvette;
- Glue for linoleum (if you are laying it);
- Film, tape for covering furniture.
Preparatory work, wallpaper dismantling

To free up space, remove furniture. Place things from the closets in large bags or sacks and also move them to another room. If the cabinet is heavy and there is no way to move it to another room, disassemble it and carefully fold the components. If this method also does not suit you, move the cabinet away from the wall, cover it on all sides with wide cellophane film, and secure it with a stapler or tape.
After everything unnecessary has been removed from the room, proceed to dismantling. First, tear off the old baseboards. If they are wooden, it is convenient to remove them using a nail puller. If this plastic skirting boards on screws, a screwdriver or screwdriver will help.
If you are renovating a Khrushchev building with your own hands and want to save money, you can lay linoleum on the floor. To do this, roll it out, lay it wrong side up, let it rest, then apply glue, turn it over and glue it to the base. If the floor is uneven, you can lay a hard base, such as plywood.

When the wallpaper is completely dry, drape the top of it with the ceiling plinth. To do this, apply glue to the underside of it. PVC tiles, apply to the desired location and hold for 10–15 seconds. After you have glued the first one, proceed to the second one.
You will remove the wires into the wall part of the floor plinth and screw it on with screws. After this, put on the top part of the plastic skirting board.
- Read the article about doing it yourself.
Video about cosmetic repairs in 3 days:
Think about design and redevelopment
At the very beginning, decide what you want to see in your apartment: what its design will be, the arrangement of furniture. Where will there be blind and where will there be light zoning partitions? To ensure you don't forget anything, get your ideas down on paper or in a spreadsheet. Consider your long-standing desires: when else can you make them come true if not now? This could be replacing old windows, installing heated floors, or remodeling.
Decide what you are not willing to give up. Often, it is precisely these fundamental desires that people start from when they think about the arrangement of furniture and other details. For example, the decision to turn a wide window sill into a relaxation area may entail a remodel kitchen set. Adjust the written points by comparing them with real possibilities.
Write out the work plan
List everything that needs to be done. In the next column or a separate table, make notes: a shopping list, the approximate cost of materials and services of craftsmen.
Create a budget for the entire project
At the same stage, draw up a schedule for the delivery of materials. Downtime will increase costs, and disruption to the sequence of work will negatively affect the result. If you are out of the previously planned amount, decide what you can save on and what you definitely can’t. For example, inexpensive wallpaper is easier to replace after a couple of years than cheap linoleum that has become unusable.
For an approximate budget, it is also wisest to seek help from designers, architects or builders. They will help you estimate the amount of work and funds that will have to be invested. Determine the condition engineering communications, the degree of wear of the screed and, based on the data obtained, will develop an estimate that will be useful even if the repair is planned to be carried out on our own. Such services are not free, and there is a temptation to refuse to assess the condition of the apartment, hoping for chance. This decision can hardly be called reasonable - you will have to be prepared for unpleasant surprises and, as a result, unforeseen expenses.
How can you reduce costs?
We offer you 10 tricks that will help reduce the cost of the project with almost no damage to the future interior.
- Install warm floors only in open areas of rooms. But keep in mind that rearranging will not work.
- Consider what you can do on your own or with the help of friends, and what you will definitely need a specialist for.
- Reduce the cost of double-glazed windows by purchasing products of standard sizes in a standard configuration. Make sure in advance that the openings meet these requirements.
- Stationary plasterboard structures will cost several times less than sliding glass, stained glass and radius partitions. But sliding interior doors will not be much more expensive than swing doors.
- may cost you 10-20% less if you buy it online. Upon receipt, check the completeness and quality of the devices.
- Apply primer to the surface before painting. This will help reduce paint consumption.
- Find plain wallpaper- they can be purchased almost “on a budget” basis, since there will be little waste. But a drawing, especially a large one, requires a reserve of 20-30%, which sometimes takes a significant toll on your wallet.
- Not very expensive, but beautiful flooring- . Externally, it can be practically indistinguishable from oak boards or block parquet, but the price will be significantly lower. In addition, laminate flooring is extremely simple even for beginners, which means installation will be very inexpensive or you can do it yourself.
- To save on tension and hemming fabrics, order simple design, without cluttering levels and curved lines.
- You can reduce the cost of laying tiles by purchasing the remnants of different collections at a bargain price. Why not put them together into an original “patchwork quilt” and decorate part of the bathroom with it? If the rest of the space is tiled with neutral light tiles, the interior will look impressive.
Walls almost always have to be leveled - builders rarely achieve strict verticals and right angles. Quite a lot of plaster and putty may be required. You should not choose cheap mixtures - there is a very high risk that low-quality materials will soon begin to crack and crumble. If the walls are too far from the ideal geometry, it makes sense to abandon plastering them altogether and level the surfaces with drywall. Most likely it will be more profitable.
Once you have a final budget and list of changes, you can begin to take action.
Buy materials with a small (about 10%) reserve. Additional trips to the store or to the market are fraught with time and financial losses. Unused surplus can then be returned to the store using a receipt.
Find workers
Some processes are too labor-intensive and will take a long time to complete on your own. For example, dismantling partitions. No special qualifications are required for this, so people will be found quickly. But sometimes it’s better to entrust the installation of plumbing, wiring, and heated floors to specialists.
Finding them is not an easy task, and it is difficult to give any recommendations. Those for whom savings are important choose private teams, usually relying on word of mouth. That is, recommendations from those who have already collaborated with these masters and are satisfied with the result. Most likely, you will have to cooperate with such masters only by verbal agreement. If something goes wrong, it will be impossible to obtain compensation from them.
Official ones are more expensive, but the relationship between them and the customer is built on the basis of a contract, which clearly states the rights and obligations of the parties. In addition, according to the consumer rights law, they provide a warranty for a period of one year.
Give builders information in advance about all plumbing fixtures and their features. At this stage, detailed information from the architect-designer will be very useful.
Make a measurement plan and visualization
Measure the rooms and make them. Or entrust this task to designers. They also measure each room taking into account communications and provide you with several options for planning solutions already with the arrangement of furniture.
When you choose a project, it will be worked on stylistically. To have a clear idea of what your home will look like, you can order sketches or 3D visualizations using graphic editors. The last option is preferable for difficult decisions(reconstruction of space, built-in furniture, complex ceilings, many details). Visualization allows you to get a visual, realistic image of rooms from all possible angles, but it is quite expensive and for simple solutions just unnecessary.
After the project is approved, the specialist will make detailed drawings that can be used by contractors in the future. As a rule, it takes 2-3 weeks to create a design project from start to finish.
Stages and sequence of major repairs
If you live in an apartment, it is better to carry out repairs sequentially: first in one room, then in another, so as not to spread dirt around the house. They start from the room where the most garbage is expected. This is usually a bathroom, as tiles are often laid in it. Then they move into the back room and move towards the kitchen.
Furniture and things will have to be disassembled, packed and taken out to other rooms, some sent to the country house, to the garage, and some thrown away.
Dismantling old coatings
This stage is relevant only for a secondary fund. Removing old wallpaper, flooring, plaster, tiles, and windows may take one to two weeks. You also need to remove switches, sockets, doors, and plumbing fixtures. Entrance and interior openings are covered with thick film.
Are you planning a redevelopment? The demolition of partitions, the installation of new openings, and the dismantling of the old plumbing cabinet is being carried out right now. Please note: such transformations are considered redevelopment and are possible only after appropriate approval from the housing inspection.
After dismantling there will be a lot of bulky waste. They cannot be thrown into a garbage chute or a regular trash can - violation is fraught with administrative penalties.
Construction of new partitions
If a solid wall is needed, use brick or tongue-and-groove blocks. If you need lightweight design, which will visually separate one zone from another, sufficient sheets of drywall attached to a metal frame.
Hollow or porous bricks will require more labor. It will be faster and easier to build partitions from cellular concrete blocks. Construction from tongue-and-groove slabs and gypsum boards will take the least amount of time. Please note that block and brick structures are placed on a concrete floor base, plasterboard structures are placed on a finished screed. Duration - 2-3 weeks.
Entrance door installation
If necessary, adjust the openings: increase or decrease them. To meet deadlines, order in advance (preferably with spare rough panels). Dismantling old design and a new one will take only one day.
Experts advise installing two locks - a cylinder lock and a lever lock. We recommend giving the work crew only the key to cylinder lock. Subsequently, it can be recoded or the core replaced. By the way, in most companies this service is absolutely free.
Electrical work
The sequence begins with this step. It includes gating of walls, installation of electrical installation products and electrical panels, laying of TV, Internet and telephone cables. With a completed project, you will need five to ten days.
An electrical project is developed by an authorized organization that has the appropriate license. Next, it will have to be approved by supervisory and regulatory authorities in order to obtain permission for implementation. And after completion, you need to draw up a contract for electricity supply and a subscription book.
The approval authorities are the local authorities of Rostechnadzor and the energy sales company. They need to provide documents.
List of documents
- The act of delimiting the balance sheet and operational responsibilities of the parties.
- Specifications for connection to the electrical network, indicating the allocated power and a diagram of connecting the facility to the distribution board.
- Floor plan showing the location of lamps, sockets, switches, distribution devices and electrical wiring.
- Ready project power supply of the facility.
Development and approval of an electrical project is necessary if there is an increase in energy consumption or partitions are demolished. The number of devices that can be connected to the network depends on this parameter.
If there is no project, then you need to think about the location of the switches yourself. To do this, you will need a design project developed in preparatory stage- it already indicates the location of electrical appliances. Please note that the electric stove requires a special outlet. Grounding is required in the bathroom; all sockets must be waterproof.
IN panel houses It is recommended to ditch the walls vertically, and do the wiring under the ceiling or near the floor. Let's make a reservation that this step only includes cutting and laying wires. Switches and lamps are installed later - at the finishing stage.
Installation of air conditioner route
In one day they will lay wires and freon pipes for you, install outdoor unit. Indoor unit do not mount at this step.
Layout of sewerage, water supply and heating pipes
Old communications are dismantled and new ones are laid according to the layout plan for the heated towel rail, washing machine and plumbing. Install filters, gearboxes and meters, a module for hanging plumbing (if planned). Old radiators are removed and plugs are installed, new wiring is made, but the devices are not yet installed. Approximate period - 2 weeks.
Assembling new windows
It will take you one or two days depending on their quantity. Order new windows a little in advance - while they are being manufactured, you will complete the main stages. Do not remove from double glazed windows protective film until rough finishing is completed.
Please note that a number of jobs can be performed simultaneously. For example, the construction of partitions and subsequent steps. This will speed up the process.
Alignment of ceilings, windows, interior openings and walls
Duration - 1-2 months. The first in the repair sequence is the ceiling. We are talking specifically about plaster. GKL or stretch fabric installed at the very end. It is not necessary to putty and plaster the surface. The second is to level the walls, openings and slopes.
How to level surfaces:
- First, apply a primer primer to them, and after it dries, apply a plaster composition.
- Next, to seal minor defects - putty and finally a primer, which provides better adhesion to the finishing composition.
If for some reason the electrical wiring was done after puttying, we seal the places where the wires “lie.”
Please note that each layer must dry before the next one is applied. There is no need to rush contractors with the final finishing - all leveling layers must dry. You cannot force drying using heat guns. This measure will lead to the formation of cracks.
Once alignment is complete, be sure to check the corner geometry using . If it is broken, it may be difficult to install furniture (for example, a wardrobe). Uneven joining of floor slabs makes leveling the ceiling a time-consuming and expensive process.
You can reduce the time it takes to level walls and ceilings using plasterboard structures. At the same time, up to finishing you just need to putty the seams between the gypsum boards and prime the sheathing.
Floor screed
The process will take no more than three days. Composition on cement based sets in 12-24 hours, on plaster - 3-4 hours. Tiles can be laid on a gypsum screed after 3 days, and linoleum, laminate, carpet or parquet - after a week. On cement-sand screed The flooring should be laid no earlier than after 2 weeks.
There are technologies for prefabricating on a slab basis. The name itself suggests that no time is required for hardening and drying, which means the time is reduced. Experts include sensitivity to flooding as a disadvantage.
Installation of heated floors
Place on a flat base. Only allowed in apartments electrical system. It may take 30-45 days to arrange it. There is also a heating system based on mats - it can be installed in 8-10 days. Film heaters are the fastest to install, they can be installed in 1-2 days.
Continuation of electrical work
Installation of socket boxes and internal parts of sockets and switches usually takes place within two days or a week. This step is not recommended to be carried out earlier, since when leveling the surface it will be difficult to guess the depth at which the socket or switch needs to be installed.
When should you take out the garbage?
First of all, waste must be stored. Pieces of old wallpaper can be collected in ordinary plastic bags. For tiles, plaster and broken partitions you will need strong bags. They can be purchased at any construction supermarket. But where should we put what we have collected? In some new buildings, this task is taken on by the management company. She enters into a subcontract agreement with a transport company that removes the waste. The cost of its services is distributed among residents. However, more often the issue has to be resolved on its own.
The easiest option is to contact the waste removal company directly. In this case, you get rid of any hassle associated with disposal, but you should keep in mind that you have to pay for this service. And since it is expensive to call a car for every two or three bags, you will have to provide a place in the apartment for construction waste so that you can then remove it all at once.

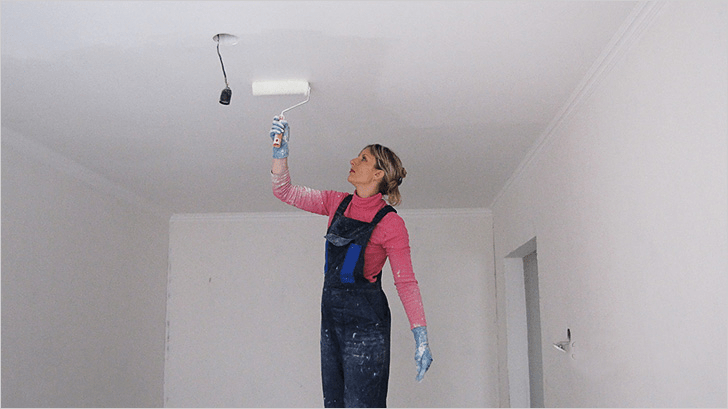
Finishing the ceiling
Painting usually takes three to four days. It is recommended to paint only even slabs with slight differences. Install hanging or tension structure it can be done in one or two days, provided that several people will do it. Pre-install the mounting brackets for the lamps. At the same stage, ceiling plinths and stucco molding are installed.
During a long break in work, the paint on brushes or rollers will not dry out if you place them in a tall container of water.
Finish wall covering
You can bring beauty in either ten days or 1.5 months. The period depends on the selected materials. They use paint, decorative plaster, porcelain tiles, metal or wooden mosaics, glass tiles, and tiles. Most popular. To prevent them from becoming deformed, after sticking them, do not open the windows for two to five days.
Wallpaper is glued at temperatures above 10°C and humidity no more than 65%, with windows and doors closed to avoid drafts. Glue the canvases starting from the window.
Radiator installation
Install when the walls are ready. Otherwise, painting the space behind them or covering it with wallpaper will no longer work. The work will take 1 day. Don't forget to contact us in advance management company with a statement to turn off the heating system.
Plumbing installation
A bathtub, shower cabin, toilet, washbasin, faucets, and washing machine are installed (if you plan to place it in the bathroom). Duration: three to five days.
Floor finishing
It is extremely important that at least 14 days have passed since the screed was poured. Better - 28. This is exactly how much is needed for moisture to evaporate from concrete. Otherwise, water vapor, rising, will penetrate the materials and destroy them. And if ceramic tile will withstand such tests, the parquet or laminate will be damaged. Laying floor coverings (parquet, laminate, tiles, etc.) takes an average of 2 weeks.
If you laid the flooring before finishing the ceiling and walls, cover them with film to prevent them from getting dirty.
Installation of interior doors
Before ordering them, you need to know the height of the flooring. Otherwise, there may be a large gap under the canvas or the box may not fit into the opening. The period will be one to three days.
If you are not replacing old interior doors with new ones, then during the work it is better to remove the panels and take them to a room where it is not so humid. Otherwise they may swell.
Arrangement of headset and household appliances
Within one to two days, assemblers will install furniture modules, countertops, stoves, hoods, dishwashers and washing machine, washing, which is specified when ordering the set and is fixed in the contract.
Installation of floor heating thermostats
The sequence of renovation of a bath, kitchen, or any other room is the same. First, the coatings, if any, are dismantled. Then - wiring of communications, leveling of surfaces and at the very end - finishing.
Stages of cosmetic repairs
Here you will need an individual approach, since each apartment has its own nuances. In some places you just need to re-glue the wallpaper, in others you only need to re-lay the floor, and in others you need to update the entire interior, but without leveling the surfaces, replacing jambs and wiring. Let's write down a rough action plan.
Purchasing materials
To avoid taking up space in your apartment, order them gradually. If you do everything with your own hands and in a small team, it will be more convenient. After all, you won’t be able to deal with several rooms or tasks at the same time. In this case, you need to first draw up a procurement plan with dates - this way you will avoid downtime.
Freeing up space
It’s better to start with the furthest room or the one in which the largest transformations are planned.
- Free her from all things. In the studio, they can be moved to the center of the room.
- Cover furniture and interior doors with film. The floor, if it does not need to be changed, also cover it.
Electrical disassembly
At this stage, chandeliers and the front part of sockets and switches are removed. The internal elements are sealed with masking tape.
Removing old materials
This process may take several days, or even weeks. Depending on quantity square meters. You need to remove everything that you decide to update.
Leveling surfaces
Now you need to eliminate the unevenness - putty them. Afterwards, primer and plaster are applied to smooth surfaces. You always have to start from the ceiling. Then there are the walls and floor.
The final stage
Painting, pasting and laying of new materials are carried out in the same sequence as in the previous stage. At the very end, the electrician is put back, the furniture is placed and Appliances.
Few people think that installing new communications can harm their neighbors. But it is enough to recall the stories of experienced people about the floods that occurred during the implementation of the project and caused damage to more than one apartment, and the question immediately arises of whether it is possible to protect yourself from scandals with residents and payments of material compensation.
There is a saving grace - this is civil liability insurance for the duration of repairs. Such a program assumes that if damage is caused to neighbors’ property, the insurance company will cover the losses. When it comes to light cosmetic finishing, such a policy will not be so relevant.
If your plans include reconstruction, pipe replacement and other major renovations, insurance should be one of the first mandatory items in your program. By the way, a similar agreement is drawn up after the redevelopment is completed - who knows what force majeure will happen.

The issue of renovating a room almost always depends on the budget for future work. Most often, the owners of an apartment or house are faced with a choice - to renovate the room with their own hands in a cosmetic way, without postponing the matter, or to plan a major overhaul for the indefinite future with redevelopment and a serious update of the design. Most craftsmen in such a situation recommend redecorating the room, during which the vast majority of problems with the interior of the room can be solved.
How to properly approach the organization of renovation in one room
Starting a room renovation is always inconvenient and even scary, especially if you don’t have enough experience, and the only assistants at hand are a cheat sheet on how to renovate a room with your own hands for beginners. But, as a rule, uncertainty and doubts pass when the scope of future work becomes clear and the question of in what sequence to make repairs in the room is resolved.
Therefore, the first thing to do is draw up general plan carrying out cosmetic repairs, and most importantly, before attempting to make repairs in a room, it is necessary to draw up a detailed estimate for the purchased materials and consumables. This is a mandatory condition; even for renovations in a small room you will need to make a list of several dozen items.

Where to start renovating a room is not important, it can be done renovation work in the sequence that seems more convenient under given specific conditions. Traditionally, renovating a room with your own hands begins with the most “dirty” or rough work and ends with delicate finishing procedures.
A typical list of work or sequence of repairs in a room is as follows:
- The old finish is removed from the walls, ceiling and floor. Removing the floor covering produces the largest percentage of dust and dirt, so it is removed first;
- Rough preparation of the floor is carried out for further laying of a new floor covering;
- Wiring repairs are carried out, lamps and switches are moved and hung, corrugations are laid out for television and Internet cables;
- The walls and ceiling are cleaned and puttied. If your redecoration plans involve changing the wallpaper to a more modern type of finish, you will need to level the walls gypsum plaster;
- The ceiling surface is leveled in a similar way. Before whitewashing or painting with water-based emulsion, the ceiling is rubbed down, plastered with a lime-gypsum mixture and a decorative coating is laid;
- Performed decorative finishing walls, ceiling plinths are glued, cladding is changed interior doors;
- New flooring is being laid, baseboards are being installed, lamps are being hung, and switches are being installed.
Of course, at each stage of room renovation, photo, a large amount of debris and dust will be generated. Not only will you have to regularly clean the room and remove rubbish rubble, you will also need to try to cover areas with already completed repairs with protective plastic film to avoid dust on the surface.

What Shouldn't Be Included in a Room Redecoration
Master decorators often call cosmetic repairs a “three-day job”; in order to update the interior of a room, as a rule, no more is required. The list of repair activities does not include the most expensive work:
- Redevelopment of premises with the transfer of interior partitions;
- Replacing the heating system;
- Installation of expensive multi-tiered suspended ceilings;
- Glazing of the balcony and replacement of windows with double-glazed windows;
- Equipment for heated floors in the room.
It is clear that all of the above components of repair require serious financial costs and the involvement of qualified specialists in the work. It will take more than a day or two to carry out such serious events. In addition, such is the specificity of the renovation in the room that, willy-nilly, dust and construction debris spread throughout the apartment. Therefore, the situation is regulated in this way - either cosmetic repairs are made in a single room, or the entire apartment is “stood up” for major repair work.
In general, the redecoration plan includes everything that can be done in a couple of days with your own hands for relatively little money.

The main task of cosmetic repairs
The main goal of renovation work is to refresh the interior of the room, remove minor defects and damage that have accumulated over the years, which are incredibly annoying and interfere with everyday life.
In rare cases, cosmetic repairs become a consequence of force majeure circumstances, for example, flooding of a room by neighbors on the floor above or preparing the premises for renting. There may be many reasons, but the main thing is still maintaining the premises in a comfortable condition for living.
Properly performed cosmetic repairs make it possible to save on future volumes overhaul For example, screeding the base of the floor and leveling the walls will at least reduce the time and effort required to prepare for a major overhaul, naturally, provided that the renovation of the room with your own hands (photo) is done as conscientiously and efficiently as possible.

The next stage of repair, distribution of costs and load
Budget planning and procurement of materials are rightly considered one of the most difficult stages of redecoration. Especially if you plan to do most of the repair procedures yourself. The reason is simple - amateurs and novice craftsmen have no idea how much specific material will be required for this or that area of work.
In this case, the problem can be solved in two ways:
- Compiled list works and estimates can be shown to an experienced master, which will help calculate the flow rate based on the square footage of the room;
- Calculate consumption based on standard recommendations from building materials manufacturers, increasing the stock of glue, plaster mixtures, wallpaper, flooring by 10% of the calculated figures.
In the latter case, the cost of purchasing materials will increase significantly, but ultimately, the remains of cement, dry plaster and glue can be used for cosmetic repairs of other rooms in the apartment. In addition, having a list often helps to get a wholesale discount, so there should not be significant gaps in the budget for a future cosmetic renovation of a room if the purchase is properly organized.

Preparatory stages of renovation in a room
The first, most labor-intensive stage has always been and remains the rough stripping of the walls and ceiling. Typically, renovations in a room begin with removing pieces of furniture and fixing up front door protective awning. You can use thick plastic film or an old blanket. An improvised curtain will protect the rest of the apartment from noise and dust, which, even with very careful work, using a vacuum cleaner and wet cleaning of floors, always accumulates in the room in considerable quantities.
Before repairs, the lamps must be removed; instead of a chandelier, a socket with a light bulb is left in the room. If double-glazed windows are installed in the room, then it would be useful to cover the window opening with film before the repair. It is clear that the film also covers the floor covering; it is easier to roll up the laid polyethylene than to wash the dirt in the room every evening.
Removing old finishes from walls
Preparing for a redecoration takes about a third of the planned time. During this time, you will need to remove the whitewash and wallpaper from the walls of the room. If there are areas with damaged plaster, it will take another day to knock the plaster off the walls.

Old wallpaper is removed either in one sheet or scraped off in small pieces for a long time, it all depends on the glue used. Before removing the wallpaper, moisten the surface with a small amount of water using a spray bottle. After 20-30 minutes, the trellises can be removed in patches. For special strong adhesives use boiling water and steam. In any case, after stripping the old trellises, you will need to use a vacuum cleaner and a stiff brush to remove dust and glue residues.
Peeling and restoration of the ceiling surface
The ceiling is freed from decorative covering much faster and easier than walls. If your plans for cosmetic repairs include sticking polystyrene plates or laying plastic panels, then it will be enough to remove upper layer whitewashing
The situation is more complicated if the ceiling in the room is painted water-based paint or whitewashed with lime. In this case, it will take at least a day to remove the durable layer of old finish.
The most common option for restoring the ceiling during cosmetic repairs involves leveling the plane ceiling. In any room of any apartment, the floor slabs lie with a differential of several degrees, which leads to a difference in ceiling height near the opposing walls of the room from 2 to 5 cm.
If time and budget for cosmetic repairs allow, then it is best to level the ceiling using high-quality gypsum plaster.

To do this, sew on the ceiling plastic slats and tighten the plane with a plaster mesh. Beacon slats are glued with alabaster, guided by pre-tensioned horizontal marking cords. The mesh is sewn on dowels. The total time required to completely level the ceiling in a room is 5-6 hours of work.
In one working day you can complete complete renovation ceiling. The next day you can sand, prime and paint the surface.
Cosmetic repair work to the walls of the room
During cosmetic repairs, walls are leveled and plastered only in exceptional situations, when the situation requires it, for example, the appearance of a large number of cracks or chipping of the plaster. In addition, the total area of the walls of the room, as a rule, is three times the area of the ceiling, which in itself requires a lot of time and materials.
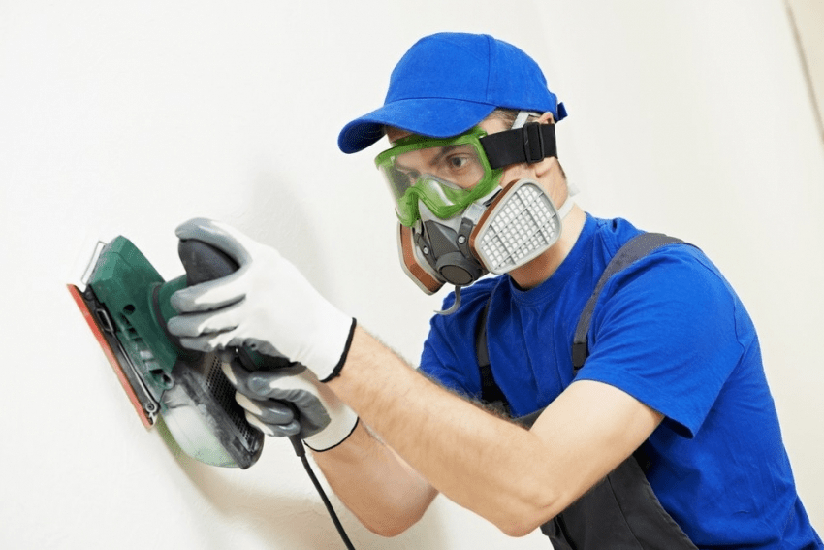
Therefore, during cosmetic repairs, the preparation process is limited to cutting small cracks, followed by puttying and grinding the surface. Sometimes, in order to level the plane of a single wall, particularly problematic areas are sanded with an electric sander.
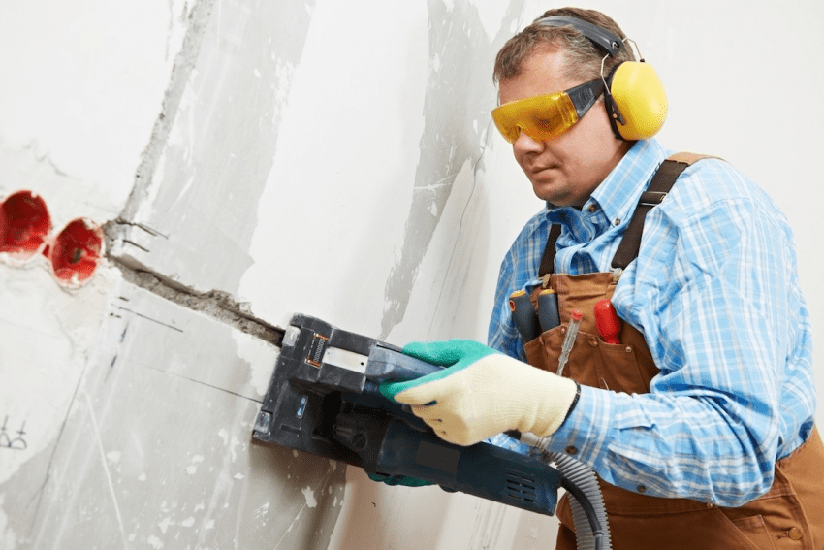
In addition, at this stage of the renovation work, it is easy to change the profile and configuration of the electrical wiring in the room. It is enough to drill channels in the lower part of the walls to the installation site of new electrical sockets, punch through “glasses” for the trimmers and install the sockets themselves. The corrugations with wiring laid in the channels can be rubbed with plaster or alabaster mass. All work will take a maximum of 2-3 hours. Upon completion of preparation for finishing, the surface is vacuumed and primed.
Rough floor preparation
After finishing the most labor-intensive work with preparing the ceiling and walls, you can move on to cleaning and preparing the floor. If the floors are concrete, with laminate flooring, then cosmetic repairs may be limited to re-laying the laminate slabs, with or without replacing the lining material. Most often, damaged slabs in a room are replaced, after which the coating is polished using wax mastic.
During cosmetic repairs, linoleum coverings are cut out, the base is cleaned down to concrete, primed and covered with a heat-insulating lining based on foamed polyethylene.

If the room has wooden floors, then first of all the floorboards themselves are cleaned and repaired, then the joints are hammered and hammered, after which the surface is sanded and prepared for painting.
Don't forget about garbage and dust
Any repair work, even the simplest and most superficial, is always accompanied by the formation of a large amount of debris and dust. Before repairs, you need to prepare two or three polypropylene bags into which all the garbage from the room will be collected daily. At the end of the day, after each finishing operation, the walls and floor are cleaned of crumbled crumbs and remnants of plaster mortar, and before finishing, the walls are cleaned with a vacuum cleaner or a damp brush.
If the walls of the room are supposed to be leveled with gypsum plaster, then the amount of debris will increase five to six times. It will be necessary to think in advance and find a way to collect and remove 150-200 kg of cement-sand waste screenings from the premises. You cannot send it to the garbage chute or trash cans; you will need to order a special service for the removal of construction waste.
Cleaning redecoration operations in the room
The first step is finishing the ceilings. Usually the repaired and sanded surface is primed and painted. acrylic paint light colors.

If wallpaper is used in the interior of the room, the ceilings can be decorated with non-woven or vinyl wallpaper to match the color of the future wall decoration. A common practice for decorating lamps and chandeliers is the use of imitation polystyrene stucco molding and decorative ceiling plinths.
Finishing the walls in a room is considered one of the most important and at the same time time-consuming cosmetic operations. Even taking into account the fact that half the walls in the room will be covered with furniture, it will still certain part the walls will be clearly visible to everyone present in the room. If during cosmetic repairs it was not possible to properly level the surface of the walls, you can hide the imperfections only under the wallpaper. It is best to use trellises on a fabric basis or with a pronounced relief textured surface. Pasting a room will take 7-8 hours or a full working day.

Repairing doors and floors in a small room
Wood plank floor old layout Often you have to hide it under linoleum or laminate. In this case, the surface of the floorboards is sanded with a sanding machine, and the joints are sewn together with nails driven at an angle to the board. At the next stage of repair, the floor surface is sewn up OSB boards, after which you can lay linoleum or any other flooring option in the room.

The situation becomes more complicated if the concrete floors are leveled to the level of the screed throughout the apartment. In this case, any floor covering in the room will lead to the appearance of a threshold, so the installation of laminate or parquet must be planned simultaneously in all rooms.
The final stage is the restoration of interior doors. The hatch and the door itself, if they are in good condition, can not be changed, but undergo restoration with cleaning and polishing of the surface. External cladding door frame during repairs they are traditionally replaced with a new one. The replacement of doors with a supporting frame is planned for a major overhaul, usually so that the entire apartment or house has doors of the same style and design.

Conclusion
Repairing a room, even in a cosmetic form, requires careful preparation, first of all, in the details of the future interior of the room, the method of decorating the walls and floor. Any attempts to postpone the decision to the future, to do it at random, as it turns out, will lead to a significant increase in costs and an increase in the time required to restore the room by two to three times.
T Anything can become a target for repair. For example, replacing a window unit with a plastic one. Then you will discover that everything in the room is connected to each other like a garland of monkeys holding each other’s tails.
At the same time, we clean off everything that is crumbling and can be cleaned without much effort.
If the coating, like an archaeological excavation, has many layers, we remove everything, if possible, down to the putty or plaster.
After clearing the main areas, we carefully remove all kinds of dowels, nails and screws.
Rough work is the basis for quality repairs
We begin the repair with rough work, the purpose of which is to repair and apply finishing coatings:

Good preparation of the base is the key to quality repairs
We cut out large cracks and stamp them with gypsum putty. We use the same compound to fill potholes, holes from dowels, screws, etc.
Plastic plugs - dowels, are easy to pull out using a self-tapping screw and pliers: insert the screw into the dowel and tighten it simply by hand until you have enough force, and then tighten it a couple more turns with a screwdriver. Pull the screw with pliers, the plug will easily come out of the wall.
Removing old sockets:
- turn off the electricity supply;
- unscrew the cover, remove or loosen the fastening and spacer screws, remove the socket and disconnect the wires;
- We insulate the ends of the wires and tuck them into the socket boxes, securing them with tape.
We clean the walls from roughness using fine plaster mesh. Apply a deep penetration primer. It will solve three problems at once:
- will increase adhesion;
- strengthens the top layer of structures;
- will remove dust from the surface.
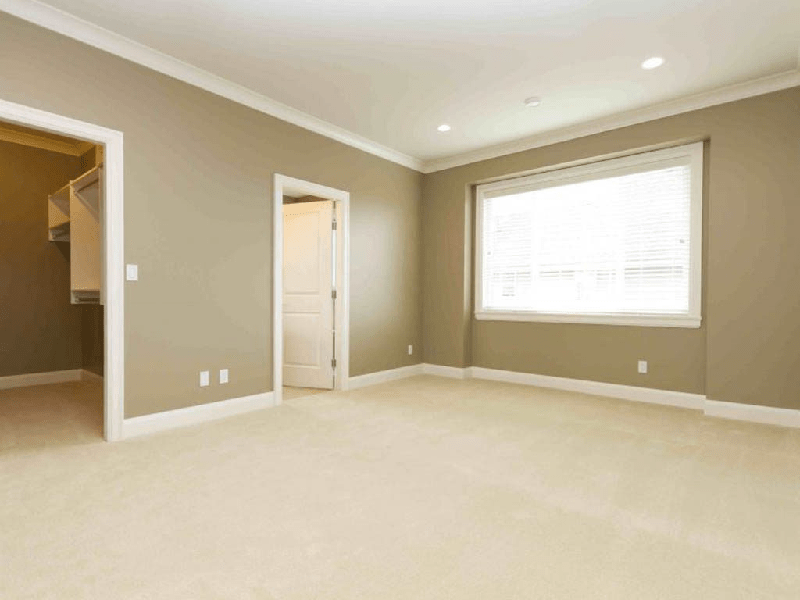
Doing a bedroom renovation with your own hands is the dream of many homeowners. Although this is not a “public” place in a house or apartment, children do not play here, guests or the whole family do not gather, quite a lot of attention should be paid to renovations in the bedroom.
At the same time, many want the interior to correspond to all the plans of its owners; they invest their wildest dreams into it. This article will tell you how to properly make repairs in a bedroom with your own hands.
A bedroom is a room where every person spends a lot of time. The room can be multifunctional or suitable only for sleeping, which requires appropriate technical and design techniques.
This leads to the fact that before renovating a bedroom, you should carefully consider all its stages, taking into account the types of such a room, how it will be used, and what the renovated room will look like.
Based on the overall characteristics of the bedroom, the following categories can be roughly distinguished:
- Spousal or parental. Here it is necessary to create the necessary psychological mood for both spouses (see).
- Children's(cm. ) . This room is where children not only sleep, but also play and do their homework, which requires a special approach to its design.
- Bachelor's bedroom(cm. ). Its features are that it is usually small room, which can easily be transformed from a relaxation area into a study or a bedroom for two.
- In a one-room apartment. This type of bedroom is characterized by its versatility. It has a matrimonial room, a room for children, and a dining room. Design example studio apartment shown in the photo.
Any of these types can have a simple configuration in plan or be with an alcove, have:
- Niche for the bed.
- Balcony or loggia (see. ).
What types of repairs are there?
The degree of increasing complexity characterizes the type of bedroom renovation.
He can be:
- Cosmetic or simple. In this case, the repair comes down to cleaning the room; it is possible to replace a window or balcony block, or re-glue the wallpaper. Before carrying out it, the main thing is to choose the right wallpaper and new furniture. During this repair:
- a new one-piece flexible floor covering is laid over the existing one, without repairing the floor;
- curtains are changed (see);
- lambrequin pendant;
- If necessary, screens are installed.
- Decorative. It's more complex repairs premises. In addition to the activities listed above, this includes:
- installation of a new ceiling;
- new wall decoration;
- floors are being re-laid;
- it is possible to insulate a balcony or loggia;
That's enough already complex work, but still quite doable on your own. Decorative repairs also include the installation of lightweight partitions made of tongue-and-groove blocks or plasterboard, plywood or lumber.
- Capital. In addition to completely cleaning the room and drying it, it includes:
- major repairs of walls, floors, ceilings and installation of their insulation;
- floor repair, in which the screed is changed and its sealing, insulation and vapor barrier are done.
- European-quality renovation. The concept of “European-quality renovation” is a style, the creation of an unusual appearance for a bedroom that will express the individuality of its owners. Such repairs can be of any kind, even cosmetic, but it requires either good artistic taste of the owner of the premises, his knowledge of special work techniques, or recommendations experienced designer. The price of European-quality repairs, in any case, will be quite high.
- Repair with redevelopment. In this case, the following are most often performed:
- combining a balcony with a bedroom;
- heavy capital partitions are installed, giving a large concentrated load that acts on the floors;
- installation of a panoramic or French window in the bedroom.
This renovation requires the development of a project, a special permit for work, accompanied by complex documentation, professional technical supervision of all operations, their acceptance with confirmation by a certificate of commissioning of the premises. Carrying out such work is possible with an experienced builder who can make technical calculations and knows SNiPs. Repairs and redevelopment are carried out on our own only in exceptional cases.
Tip: Any bedroom should have a corner for setting up a boudoir, in which will be placed: a chest of drawers or a pencil case, a dressing table, an ottoman. In the bachelor's bedroom, the functions of a boudoir and a desk for work are perfectly combined by a secretary with a mirror located in its niche.
Room with design features
When it comes to bedrooms, another problem quite often occurs: the room has a pencil case configuration, that is, it is narrow and long. Let's see how professional designers get out of this situation.
Such a room must be zoned, and in the photo below you see that this was done using suspended ceiling with lighting and curtains.
So:
- The coffered plasterboard ceiling is made only in that part of the room where the bed is located, and it is located under the window. That's why, heating battery They covered it with a decorative grille and hung roller blinds on the window. The curtains were placed not above the window, as is usually done, but in front of the bed, thus creating a kind of boudoir.
- This idea may be of interest to owners of Khrushchev apartment buildings, where there are rooms of a similar configuration. By the way, partial zoning can also be done by arranging a figured plasterboard partition. Most often, it is an element of a ceiling-wall zoning structure.
- This or that option for dividing a room into zones is selected taking into account the location of the windows in it. The boudoir example is good when the window is at the far end of the room, as is often the case.
In the example below, it is located on the side wall, close to the entrance.
- The bed is in a part of the room not illuminated by daylight, and if it is covered with curtains, the sleeping area will be almost in darkness. Therefore, a different zoning option was chosen here.
- A short figured partition separates the zones only visually, without blocking the light. Due to insufficient daylight, white and muted pink colors were taken as the basis for decorating this bedroom.
- And also, in multi-storey buildings There are long balconies with two exits, one of which is in the bedroom, or it can be an exit to the loggia. One way or another, this is not entirely convenient, and there is a desire to remove this door, especially since rooms with a balcony often have poor lighting.
- What can you come up with in this situation? The door leading to the balcony can, of course, be removed, but only if it is well insulated and heating is installed there. Now there are all the possibilities to do this, although they will require certain costs.
- It is necessary to seal the cracks well and insulate the parapet and ceiling of the balcony according to all the rules. An expanded clay concrete screed will raise the floor higher, and a heated floor system installed under the floor covering will even save you from the need to install traditional heating on the balcony.
How to renovate your bedroom
Instructions for repairing the premises include:
- A design project is being drawn up.
It reflects what the bedroom should look like after the renovation is completed. The sketch is applied to paper or reproduced using a special computer program, if available.
In this case, it is necessary to take into account all the dimensions of the room and correctly zoning the space of the room. Usually the bedroom is isolated from all other rooms of the apartment, but you can organize a dressing room or work space here.
- An estimate for repairs is being prepared.
After determining the design of the room, a list of materials needed to complete the work is compiled, and repair costs are determined. In this case, the main condition is to correctly maintain the ratio good quality and a reasonable price for renovating the premises.
- The workplace is being prepared.
Before starting a bedroom renovation, you should remove all the furniture from it, remove chandeliers, sockets and switches. If you do not plan to replace windows and doors, they need to be protected with a special film from scratches and dust.
- Old coverings are dismantled.
This removes:
- old wallpaper;
- traces of whitewash;
- dye;
- old tiles;
- damaged floor covering.
Dismantling is a fairly long procedure that requires certain skills and attention. Skirting boards and thresholds should be removed.
- The premises are being redesigned and its structural elements are being replaced.
Repairs can begin with the redevelopment of the room, which involves the demolition or installation of partitions. In addition, when renovating a bedroom you can do:
- replacement of radiators;
- installation of air conditioners;
- carry out electrical work;
- replace windows and doors.
Tip: The bedroom, more than any other room, should be finished with environmentally friendly materials that are safe for human health.
How to decorate the ceiling in the bedroom
The ceiling takes up a significant place when decorating a room.
He can be:
- Putty.
This is a rather labor-intensive process that requires skill and experience.
- From plasterboard.
You can make such a device yourself. The advantages of plasterboard structures are:
- leveling surface differences;
- concealment of all communications;
- suitable for any lighting device;
- are an ideal option for creating multi-level structures of any complexity.
- Tension.
Features of such devices may be:
- they hide all the imperfections of the ceiling surface;
- protect the room from unexpected moisture entering the room from the ceiling;
- wide selection of textures and colors.
Stretch ceilings can be installed in multi-level versions, where they will add a touch of uniqueness and originality to the bedroom.
Much attention must be paid to the color scheme of the ceiling. This depends on the dimensions of the room being renovated and the style used. Reduce visual space dark colors, and increase - light.
Tip: It is not recommended to install glossy and multi-colored ceilings in the bedroom, as they distract attention and do not contribute to relaxation. All shades are chosen so that they are calm and unobtrusive, and for inclusion in the interior rich color, it is better to do a small color accent in the middle.
Window and door repair
Doors are selected in such a way that they are combined with the design of the entire room. Window - important element interior Their shape and size dictate the design of the room.
In addition, they prevent the penetration of cold into the bedroom and have thermal insulation properties. The sound insulation of a window depends on the thickness of the glass, the distance between the panes, and the density of the joints.
Depending on the type of window opening, they can be:
- Combined.
- Swing vertical.
- Swing horizontal.
There are the most different models windows:
- Standard made of plastic.
- Original wooden ones with an attractive design.
Tip: When designing a house plan, you need to take into account that the windows are directed to the south or east. Then a sufficient amount of sunlight will enter the room, which improves the functioning of the human body, stimulates the activity of the central nervous system and controls metabolism.
How to decorate the walls in the bedroom
Wall finishing is the main operation when renovating a room. First of all, they are leveled.
To do this, you can use one of the options:
- Leveling walls with plasterboard. This is a simple and quite time-efficient option. Plasterboard can hide quite large differences that exist on the surface of the walls and create an ideal flat surface. The disadvantage of the material is the reduction in the area of the room and the unusual hollowness of the walls of the room.
- Plastering. This is a more difficult, time-consuming and costly procedure. In addition, it cannot be used for rooms where there are large surface differences. The advantage of this method is preserving the usable area of the bedroom.
To finish the walls in the bedroom, wallpaper or decorative plaster is most often used. When choosing wallpaper:
Tip: Most best option for wall decoration - paper wallpaper, which is environmentally friendly and affordable. Their only drawback is their short service life.
- For those who have a creative approach to organizing the interior, you can use non-woven wallpaper for painting. Such materials allow air to pass through well, are environmentally friendly, they can be repainted, and if desired, change the color and style of the room.
- Textile wallpaper looks quite original in the bedroom:
- have long term operation;
- a large abundance of colors and structures;
- provide excellent sound insulation in the room.
It allows you to create an original work of art in the bedroom, and its owner can be sure that the design of his room will be one and only.
The best color shades for the bedroom are:
- Blue.
- Light green.
- Pearl grey.
- Light pink.
How to repair a floor
The floor in the bedroom should not be cold. If possible, it is better to install a “warm floor” system.
The following can be used as flooring:
- Laminate. This available material, it fits easily. No coating required special care, but when installing it, a soundproofing substrate should be laid under it.
- Parquet. The material is quite expensive, very capricious and requires special care.
- Linoleum. It has high wear resistance and is unpretentious in operation.
- Cork floor. The coating is pleasant to the touch, warm, comfortable and environmentally friendly. Does not tolerate aggressive cleaning agents.
- Self-leveling floor. Original and modern type of decoration. With its help you can get a very flat surface on which you can apply a 3D design.
Tip: If the bedroom is small, laminate or parquet laid diagonally will make the room visually more voluminous.
Installing furniture in the bedroom
The bedroom renovation is being completed by selecting textiles:
- curtains;
- curtains;
- bedspreads;
- capes;
- decorative pillows.
Bedroom podium
The simplest version of the podium is a frame made of wooden beam, covered with plywood or OSB wood-polymer boards. As a front finish, the body of the podium can be finished with carpet, piece parquet, laminate, cork.
So:
- Experienced specialists manage, with the help of a podium, to organize the space of the most cramped bedroom so that everything you need fits in it: from a table to a linen closet. In general, it is believed that the podium should be made: either in a small one or in a fairly large one. spacious room- the main thing is that the ceiling height allows this.
- In interiors decorated in Japanese style, you almost never see traditional beds - just a soft mattress installed on a low podium. IN big room it can also be located in the center of the room. Then it makes sense to decorate its surface with expensive wood and provide lighting.
- If, when starting to renovate your bedroom, you decide to make a podium, you will need to dismantle the flooring in this part of the room. Next, you will have to level the base and cover it with a cork backing, which is usually laid under the laminate. This layer will not only serve as a shock absorber, but will also provide normal sound insulation.
- The size of the timber for the frame should be selected taking into account the expected loads - if it is just a bed, a section of 30 * 30 mm will be quite enough. In principle, an aluminum profile can also be used for this purpose, especially if the podium is sheathed with gypsum fiber board. Distance between vertical posts should be no more than 40 cm.
- In those places where the podium is adjacent to the walls, the frame elements can be rigidly fixed to their surface. Horizontal and vertical belts are installed at right angles; if they are bars, they should be additionally secured with metal corners.
- If you use plywood to cover the horizontal surface of the podium, then in order not to feel deflection under load, you need to take material with a maximum thickness (21 cm). The use of OSB boards allows the thickness to be reduced to 15 cm - they are much stronger than plywood due to the polymer filler. Gypsum fiber sheets (GVL) can have a thickness of 12 mm, but the pitch between the lags should be less: 30 cm.
To build such a structure, no special knowledge is required - every second man will cope with this task perfectly. For covering visible vertical surfaces, making the front side of the drawer, you can take chipboard from laminated coating, or use parts of unnecessary cabinet furniture.
Loggia as part of the bedroom
What most disfigures any room are pipes and heating radiators, which are not always possible to hide. And if the room also has access to a loggia, the entire wall is practically not involved in the design.
So:
- Of course you can hang it chic curtains, but if you constantly pull them when going out to the balcony and back, they appearance pretty soon it will be deplorable. You have to move the curtain so that it does not interfere with free walking.
- For this reason, owners of such premises often prefer to connect the room with a loggia. Why with a loggia and not a balcony? The answer is simple: a balcony is an external structure, and making it as warm as a room is quite difficult.
- The loggia is, in principle, part of the interior, and its floor and ceiling are not balcony slabs, and floor slabs. Therefore, in winter the loggia room is much warmer than on a glassed-in balcony - and this is very important, especially for the bedroom.
Before removing the window and door, you need to get rid of the battery under the window and decide main question: how the room will be heated.
And the choice is:
- If you make the parapet low or do without it altogether by installing a glass wall, the bedroom will have excellent natural light, and you will be pleased with the panorama of the city that opens up to your gaze. It will only be necessary to raise the level of the loggia floor to the floor level of the room, make a general floor covering and finishing that is in harmony with common interior- and you get a large bedroom with a separate area reserved for relaxation or study.
- Don't forget that interior decoration walls and ceiling on the loggia should be made using a frame method. This will make it possible to waterproof the surfaces and lay a layer of insulation under the sheathing. By the way, when removing the window and the door leading to the loggia, the partition that is located under the window can be left - it will play the role of a zoning partition.
- The opening can be decorated with a contrasting platband, mounted along the wall and along the ceiling with beams of the same color, and you will get a design similar to the one in the picture above. You can also install a decorative partition made of wood or plasterboard above the wall.
- If you prefer to leave the partition, then you don’t have to remove the battery, but cover it with a decorative grille. As an option, you can make a table on the base of the wall, fortunately its height is ideal for this.
All the details on renovating a bedroom are well shown in the video in this article on the topic: “We do renovations in the bedroom with our own hands.”