Today, designers use the most different materials and their combinations, as well as technologies for fence construction. One of the most durable is stone. He will last long term and will reliably protect property from unauthorized entry. In most cases, construction is carried out by professional builders. But if you have time, you can build a stone fence with your own hands. To do this, you need to take into account the advice of experts, and also follow the step-by-step instructions provided in this article.
Fence stone has been used for a long time. Even in ancient times, people used it to protect their homes. IN modern construction And landscape design natural materials are very popular. The wide variety of natural and artificial stone can lead you to confusion. It is important to choose the right type of stone that will emphasize the intended style and direction.
There are many varieties of natural stones. Among them are several of the most popular:
- Cobblestone (boulder stone). Quite common and affordable option. Despite its simplicity, it is one of the most durable stones. Basically the cobblestone has gray, which not everyone likes. But you can buy red-brown cobblestones.
- Gravel. No less popular material. Thanks to the different factions, you can create a fence of any shape. Many people combine coarse and fine gravel. The last option is suitable for filling an iron frame. It is often combined with brick to create a durable fence.
- Dolomite stone. Has a flat shape different sizes and thickness. It is mined in mountain quarries. Thanks to high quality fence from natural stone will not only be attractive, but also durable.
- Limestone. This stone is divided into several types, namely shell rock, marble-like, and bryozoan. Due to its softness, limestone is very easy to work with. This is why this option is chosen by many beginners who decide to experiment with their fence. The only drawback is moisture absorption. To prevent destruction, limestone is pre-treated with a water repellent.
- Sandstone. For many years, sandstone has been used to build fences on sites. Among the advantages are high strength, frost resistance and moisture resistance.
- Booth. It is mined from sandstones, limestones and dolomites. This stone has an irregular shape. The length of the rib can be from 15 to 50 cm. It can be used not only for construction, but also for cladding a fence.
No less popular recently is the option of a fence made of artificial stone. Its cost will be several times less natural stone. In most cases, concrete is used to produce it, to which pigments are added. The resulting products are difficult to distinguish from natural stone.
Before making a choice, it is necessary to study the state of groundwater, the surrounding area, and also take into account atmospheric influences.

Before construction, experts advise familiarizing yourself with all the positive aspects of a natural stone fence. Main advantages:
- service life is at least half a century, and with high-quality and correct masonry even more;
- since stone is a natural material, it means it is completely environmentally friendly and safe;
- a wide range of prices, which vary depending on the type of stone and its fractions;
- increased fire safety;
- ease of installation (you can handle all the work alone);
- the aesthetic properties of the stone will harmoniously fit into any landscape;
- Possibility of combination with various materials.

Despite the presence of a large list of positive aspects, a fence made of stone has several disadvantages:
- high price (prices for some materials are very high);
- To ensure the strength of the entire structure, a foundation is required.
If you do the work of building a stone fence with your own hands, you can significantly reduce costs.

There are a variety of stone fences, below are some combinations of stone and other materials:
- Wood and stone are an original combination, thanks to which you can obtain a harmonious fencing of the site. Enough complex process, which requires special attention, as well as special skills and preliminary development.
- Stone in a net. Among the latest design know-how, gabions have become very popular (with French means "stones in nets"). The basis for the fence will be a mesh of thick metal wire, which is filled with fine and medium gravel. In addition, you can use leftover building materials (brick, gravel, stone). The shape of the fence can be any - it all depends on the intended design. As a result, you can get a fence of high strength.
- Stone and brick. The most common combination of materials. Pillars and several rows for the foundation are laid on the poured brick foundation. In the resulting spans, stone is laid between the pillars. This combination allows you to create a presentable fence. High strength, endurance, resistance to sudden temperature changes and precipitation makes him popular.
If you decide to make a fence from gabions, you can additionally use live climbing plants. This solution looks very original.

If you don’t know how to make a stone fence with your own hands, then you can familiarize yourself with the following technology:
- Pouring strip foundation. It is worth noting that it can be done in two main ways: concrete, rubble stone and mortar. Undoubtedly, the technology with a bottle will be simpler, but such a foundation will not be very reliable. Therefore, it is better to use concrete, which, thanks to exposure to several months, will be durable. It is necessary to begin the next stage only after the base has completely dried.
- Waterproofing. Special attention paid to waterproofing the foundation, which is performed in 2 stages. The first must be done before pouring concrete using roofing felt. They cover both walls and the bottom. The second stage is performed after the foundation has completely dried. The same roofing material is laid on top of the prepared site. Thanks to waterproofing, water from the soil will not get inside the structure and begin to destroy it.
- Stone laying. The main process is stone masonry. The main and rather labor-intensive process is the selection of stones according to size and shape. If necessary, you can cut the cobblestones, but this will require a lot of time and effort. The technology itself completely depends on the type of stone. For example, for sandstone and treated cobblestones, bricklaying technology can be used. When choosing rubble stone, it is worth considering the formwork installation technology. First of all, it is necessary to remove the pillars, which should be wider than the spans.
- Seam processing. Once the fence is completely erected, you can begin sealing all the seams. If you skip this one important point, then the attractiveness of the fence will be lost. For seams that are too deep, additional mortar must be used. If the stones are heavily soiled, it is necessary to clean off the excess using a metal brush. With some types of stones it is necessary to remove the solution that has not yet hardened.

Sometimes it becomes necessary to change the look or design of the fence. Changes in the landscape, the presence of blemishes or a large number of irregularities. In this case, crushed granite is perfect, which can be used to refresh the fence.
To complete the work, it is necessary to apply a façade primer. After it has completely dried, a special adhesive or cement solution is used, to which a plasticizer is added. Crushed granite is firmly fixed onto the prepared surface. Don’t forget to unstitch the seams and wipe the surface at the end.
For decorative finishing For a stone fence, you can use various combinations of flat materials and structural plaster.
Building a fence from any type of stone is a rather labor-intensive process. But the result will please everyone. The invested labor, time and costs will be repaid by the resulting beautiful and original look, as well as high-strength fencing. It will serve its owners for many years without losing its attractiveness.
Video
Learn from the video provided about the features of making a stone fence:
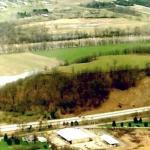
Photo
Below is a series of photographs where you can see different versions stone fence:


A stone fence has many distinctive features and benefits. Such fencing is characterized by incredible reliability, texture and durability. For construction, you can use a wide variety of stone materials, which allows you to translate an endless number of design ideas into reality - the finished structure can harmoniously fit into any landscape.
The service life of a stone fence as such has no restrictions. It all depends on the quality of the masonry mortar and the correctness of the work. The installation of fencing must be approached with maximum responsibility. Of course, you can invite a team of professional builders to do this, but in such a situation you will have to spend a lot of money. And why do this if all the necessary measures can be dealt with? on our own?

What is needed to build a fence?
First of all, we select the material for the construction of our fence. We can lay out rubble or hewn stone. Hewn stones are stones with specific dimensions and a specific shape. They are most convenient to use for masonry. If you have no experience in stone laying, it is definitely recommended to build pillars from hewn elements.

Rubble stone has an irregular shape and allows you to build structures with unique design. It is recommended to lay out spans from this material – it will turn out very beautiful and original.

Among the most popular materials for laying stone fences are limestone and dolomite, as well as granite and sandstone.

We buy or produce ourselves required quantity selected stone, and then prepare the following working tools:
- or a container for preparing the solution manually;
- roulette;
- shovel;
- trowel;
- level;
- rods and cord for marking.
A few words about preparing for work
After preparing all the necessary tools, we begin planning. We need to draw a sketch of the future fence, taking into account the features of its spatial location and size. In terms of dimensions, be guided entirely by your preferences and financial capabilities. Average height similar fences - 2-2.5 m.

We clear the site of plants and debris, level the soil and transfer the drawing to the area. For marking we use any stable rods and strong rope. We drive marking posts into the ground around the perimeter future design, pull the string between them and move on to the next stage.
Prices for facing stone
Facing stone
Making the foundation
A stone structure will have a significant weight, so before starting its construction we must pay due attention to arranging the foundation. We will build a fence on a continuous reinforced strip base - the most best option for heavy fencing.
We make the width of the foundation approximately 15 cm larger than that of the finished fence. We choose the height (the part of the base protruding above the ground) at our discretion. Builders recommend that it be no lower than 10-15 cm. We will be guided by this value during the further construction of formwork.
First step. We dig a trench about 70 cm deep.
Second step. We fill the bottom of the hole with a 5-centimeter layer of sand. We compact the pillow thoroughly.
Third step. We install the formwork. It can be assembled from boards, plywood and other suitable materials.

Fourth step. Place on sand cushion reinforcing frame. To strengthen the fence, 8 mm rods will be sufficient. We reinforce in 2 layers. First, we lay a mesh of reinforcement at a height of 50 mm from the sand cushion.
We fix the second mesh 50 cm below the ground level. To fasten both reinforcing layers and further strengthen the foundation, we first drive reinforcement or pipes with a diameter of about 10 mm into the ground.
Fifth step. Fill it in. We remove the formwork after at least 2 weeks. The concrete itself will gain strength in about 1 month.

We build pillars
We will build the pillars using the sliding formwork method. The recommended dimensions of the pillars are 300x300 or 400x400 mm at your discretion. We will assemble the formwork itself from boards, fastening them with self-tapping screws.
First step. We set up the formwork for the first row of stones. We maintain the selected dimensions of the pillars.

Second step. Temporarily lay out the first layer of the column without mortar. The stones should fit as tightly as possible against the walls of the formwork. We exclude gaps between masonry elements.

Third step. Having carefully aligned the stones for laying the first row, we lay them using mortar. We use a thick cement mixture. If the stones have smooth edges, simply lay them out on the solution like this. If the edges of the elements are uneven, you will have to tinker a little longer. In such a situation, additionally pour the solution into the gaps between the stones. We will lay out all subsequent rows in the same way.
Fourth step. Having filled one row of formwork, place another on top of it and continue laying the pillar. We will continue to follow a similar sequence.

Fifth step. After waiting a day after laying out the first tier, we dismantle the lower part of the formwork. At the same time, we leave the overlying fragment in order to be able to attach the next tier of the wooden structure.

Having removed part of the formwork, we carefully seal the gaps between the stones with thick cement mortar, ensuring a neat appearance of the pillar and making it more durable. In the future we will do unstitching. Guidelines for carrying out this work will be given below.
Useful advice! To ensure that the masonry does not collapse, we give each of its tier the opportunity to gain strength within 24 hours and only after that we continue work.
We lay out the spans
The foundation and pillars are ready. We can start laying out the spans. Optimal size stones for laying sections - up to 20-25 cm. Such elements have a relatively low weight, which makes working with them easier and more convenient. If necessary, we break large stones into smaller fragments using a hammer or crush them with a hammer drill.
We will fasten the stones with a thick mortar consisting of a portion of cement and three portions of sand. If we want to get seams of a different color from the mortar, add dry dye to the mixture.
As a rule, the width of the stone column exceeds that of the span section. In view of this, the wall must be evenly shifted in relation to the outer and internal sides pillars
We carry out the work in this sequence.
First step. Apply the cement mixture to the base.
Second step. We lay out the stones symmetrically along both sides of the span. We connect the edges of the section with thread. We will use it as a guide during further laying.

Third step. We completely lay out the first row of the span, filling the space between the edges laid out at the previous stage. It is best to place the stones with the flat side facing up. We fill the cracks and voids with a thick cement mixture.

Let the masonry gain strength within 24 hours and lay the next row in the same way. We work like this until we reach the planned height. It is strongly recommended to lay out the rows with bandaging.

Useful advice! To get an even top line fencing, the last row of each span is laid out from stones of the same height.
During the laying process we work as carefully as possible. We try to prevent the cement mixture from getting on the front side of the masonry elements. If solution does get on the stones, clean it off immediately.
Finishing the fence

To make the fence look more attractive, we fill out the seams. They can be convex, shallow and deep. The third option allows you to visually expand the volume of the masonry. For the rest, be guided by your preferences and features of the design idea.

For jointing we prepare the following:
- wire brush;
- guillemot;
- foam rubber
The seams are most easily unstitched 3-4 hours after laying. Next cement mixture becomes too tight and difficult to joint.

We work in this order.


First step. We clean the stones and seams with a wire brush.
Second step. Using a scraper, we create neat grooves in the seams up to 10-20 mm deep (at our discretion).
Third step. My fence. To do this, we use foam rubber, a brush and a solution of 30% hydrochloric acid. We take precautions: we wear protective gloves when handling acid.
The fence is ready.
Additionally, to decorate the fence and ensure rapid removal of atmospheric moisture, we install special caps on the posts. If desired, the design of the fence can be supplemented with all kinds of forged elements - this remains at the discretion of the owner.

How to make a fence from gabions


 The process of making a fence from gabions. Installation of gabions does not require special preparatory work. The walls of the boxes and the lids are connected to each other with special spirals or strapping wire. The boxes are then filled with natural material. It is allowed to place smaller stones in the central part, and large ones at the edges. When laying stones, it is necessary to reduce the formation of voids. The gabion is filled gradually, first by one third, after which the box is fixed from the inside, then the procedure is repeated
 | Length x Width x Height, meter | Cell, cm | Weight of 1 mesh, kg |
|---|---|---|
| 1x0.5x0.5 (Zn 240g/sq.m.) | 6x10 | 6,8 |
| 1x0.5x1 (Zn 240g/sq.m.) | 6x10 | 13 |
| 2x0.5x0.5 (Zn 240g/sq.m.) | 6x10 | 12 |
| 2x0.5x1 (Zn 240g/sq.m.) | 6x10 | 18,5 |

Good luck!
Video - Installation of a gabion fence
Video - Construction of a fence from gabions
Video - DIY natural stone fence
Man began to build stone buildings in ancient times, and they have not lost their popularity today. A stone fence has no analogues in terms of durability and strength - it is practically not exposed to bad weather, does not rust or rot. There is no need to paint the stone every year, unlike a wooden fence.
The downside is the rather high labor intensity of construction, and therefore the cost of construction work. But if you make the fence yourself, the costs will be significantly reduced.

Selecting material for the fence
The most popular materials for constructing fences are:
- Cobblestone - fragments of basalt or granite of gray-steel color, having a large mechanical strength and chemical resistance, is poorly processed, and usually has a round shape.
- Dolomite - color varies from white-yellow to light gray, flat, with clearly defined edges, similar in appearance to marble.
- Limestone, or shell rock - light color, a soft, porous stone, works well, but absorbs moisture very strongly.
- Sandstone is a hard stone with a layered structure, it repels moisture well, is frost-resistant, and is very popular when constructing fences.
- Bute – sandstone, limestone or granite is not correct form. Often used as a filler in the construction of foundations.


The easiest option to work with is processed limestone or shell rock. It is much easier to lay a fence from stones of a regular shape, reminiscent of a brick, than from shapeless rubble and cobblestones, however, even in the photo the fence is made of stone irregular shape looks much more original than from identical fragments.

Tools and Supplies
To build a fence you will need:
- Cement grade M400;
- Crushed stone and sand;
- Reinforcement 8-12 mm;
- Board for formwork, preferably edged;
- Decorative elements - finials, lanterns, fences, etc.
- Pipe 3-4 meters of large diameter;
- Concrete mixer, scoop and bayonet shovels, buckets;
- Cord, plumb line, tape measure, level.
- Wire brush;
- Sledgehammers and hammers;
- Grinder with a disc for stone.

Preparing and pouring the foundation
In order for the fence to stand on a sound foundation, it is necessary to pour under it strip foundation at least 10-20 cm thicker than the fence and at least 20 cm above the soil level.

The foundation is poured like this:
- Mark with pegs the area where the fence will stand and stretch a cord between them.
- Inside the perimeter fenced with pegs, the turf is removed, and the total width of the foundation must be at least 50 cm.
- The trench is deepened by 80 cm, and in places where the pillars are installed, by another 40 cm.
- Having carefully leveled the bottom of the trench, sprinkle it with sand in a layer of at least 5 cm and compact it well.
- Formwork panels 100-110 cm high are knocked together and installed on the sides of the trench, strengthening them with spacers and racks. You can also drill two holes in the shields on both sides and additionally tighten them at the top with knitting wire.
- A reinforcing grid with a square cell of 15-20 cm is installed in the trench using steel rods located in the trench at intervals of 50 cm.
- In the center of the cross-section of the pillars they are placed vertically steel pipes the corresponding height of the length pillars.
- Concrete is made from a mixture of cement, sand, crushed stone and plasticizers using a concrete mixer and poured into the trench.


After a week, the formwork can be removed, but construction of the fence continues after the concrete has completely hardened for 28 days.

Pillars
In order to speed up the construction process, the pillars are erected synchronously. To erect the pillars, you will need square or rectangular formwork made from boards 150-200 mm wide, assembled with self-tapping screws.

The algorithm of actions is as follows: after installing the formwork, stones are laid out as closely as possible inside it, and the voids between them are filled with a thick solution.

The same second formwork is mounted on top of the first formwork and filled with stones and mortar in the same way. After two or three days, the lower formworks are removed, and mortar is filled into the unfilled voids.

The formwork is mounted higher and the process is repeated. To protect poles from atmospheric influences, caps made of metal or plastic are used. The entire process of erecting pillars can last up to a month or more, depending on their height.

Walls
Before erecting the walls, the foundation is marked. The thickness of the wall is at least 10 cm less than the pillar, therefore, the distance from the edge of the pillar inward will be at least 5 cm. Stones are placed symmetrically in level from the edges of the wall, and a cord is pulled between them.

To make it more convenient to work, the stone is placed with its flat side up, and the cracks between them are filled with mortar. Rows of stones are placed with bandaging for greater structural strength. The discrepancy between the level and the vertical should not exceed 1 cm per 2 meters of fence height.

Joining
Joining the fence in decorative purposes carried out using a scraper, flat scrapers, foam rubber, rags and metal brush.

There are three options for jointing - deep, shallow and convex. The jointing is carried out 4 hours after laying, so that the solution has time to partially set.

It is done as follows:
- The stone and seams are cleaned of excess mortar with a wire brush;
- Using a scraper, externally aesthetic depressions are made in the solution up to 2 cm deep;
- The stone and seams are washed with a sponge and rags.

You should not ignore jointing, because without jointing the fence looks much worse from an aesthetic point of view.

Stone fences can be combined with other materials - you can make a fence made of corrugated board or forged metal, as well as wooden gates bound with iron - all this goes well with the stone and successfully complements it.

Photos of stone fences


Reading time ≈ 4 minutes
“My home is my fortress!” But in order to fully realize the literate saying, you should seriously think about fencing - reliable, safe and aesthetically beautiful. What building material to choose and the technology for constructing the structure itself is the first thing that needs to be decided, applying maximum creative ingenuity and skills.
It is important to remember that “everything new is well forgotten old.” Hundreds of centuries ago, our ancestors knew exactly how to build a carefree and at the same time durable fence. It is the fragments of stone fences that have survived to this day, demonstrating their excellent sustainable characteristics. And all because stone is a material natural origin, whose reliability has been tested by time. But let's get back to the main thing. How to build a stone fence with your own hands?
Construction technology

The technology for constructing a stone fence includes:
- marking the fence;
- laying the foundation;
- construction of fencing fabric.
Stone fence foundation
Before you start building a fence, the first thing you should do is make markings, which includes creating a preliminary plan-drawing indicating the length and height of the fence, not forgetting about the gate and gates, and then start digging a trench for the foundation. It should be borne in mind that natural stone is a fairly strong and heavy building material, so the foundation must be designed for the appropriate load to ensure the strength and reliability of the structure.

As shown in the photo, to build a stone fence with your own hands, it is enough to maintain a trench width of 35-40 cm and a depth of 70 cm. When erecting a fence more than 2 meters high, it is recommended to increase the depth of the trench by 10 cm with each meter of fencing. To avoid the appearance of cracks in the foundation, it is worth sprinkling the bottom of the trench with crushed stone or sand 3-5 cm thick and laying a frame of reinforcement. Having installed the formwork, begin filling with mortar.

IMPORTANT! The finished foundation should set completely, so stone laying must begin after a week.
Laying a stone fence with your own hands

After approximately 10 days, it is necessary to begin constructing the formwork for the support pillars, after which it is installed on the foundation, secured to the grillage, and the next stage is masonry.

To build a stone fence with your own hands, you should use a solution of cement and sand in a ratio of 1:3. For the purpose of aesthetic decoration, you can use brown pigment: for 10 buckets cement mortar 4 tablespoons of pigment are used.

The masonry is carried out by installing stones with the flat side outward, fitting them tightly to each other and adjusting the shape with a hammer. The voids are filled during laying sand-cement mortar. You should pay attention so that this mixture does not get on the surface of the stone itself, and if this happens, wait until it dries completely and remove it with a special metal brush. Under no circumstances should you use water, as it can get inside the stone along with the solution and change the color of the natural color of the stone block.

Based on the fact that the speed of erecting a stone fence by specialists is about 35 days per 100 meters, you need to call on several assistants to help you so that the masonry is not subject to hardening. If masonry is stopped due to any forced circumstances, it is worth spraying it with water before starting work.
Fencing at country houses or suburban areas- this is not only a way of protection from uninvited guests, but also a calling card of the house, decorating the main building and allowing the owner of the house to express himself.
An example of a fence made of natural granite stone
A fence made of stone makes a personal plot stand out from the crowd. In addition to superior aesthetics, such fences have many advantages. Let’s look at what the construction of a stone fence on a personal plot will allow you to achieve, and whether you can handle it yourself.
Features of stone fences
Stone fence To protect their homes, our ancestors built them far before us. Despite the fact that such fences have very ancient history, they can give a head start to some fences made from modern building materials. Let’s take a look at what makes these structures stand out so favorably:

Materials for the construction of stone fences
Let's consider what types of stones can be used to make a stone fence.
Boulders or cobblestones
If you are doing this and there is a need to save as much money as possible, then this stone option is most suitable. The price of such material is very low, especially since it can be obtained for free, for which you just need to look under your feet.
Such fences do not have a striking appearance and look quite simple and concise.

Example of a fence made of boulders
You can embellish such a fence made of natural stone a little by purchasing cobblestones bright colors. For example, you can find red boulders on the construction market, which will definitely make your site stand out from many others.
Gravel
This type of stone is the smallest one used for the construction of fences. Most likely, such a fence is made of wild stone you will rarely be able to see on your way: the size of the pebbles does not make their laying convenient. In this case, a fence is built from stone and brick, where the brick in the form of pillars is assigned load-bearing duties, and the gravel is assigned decorative duties.
The price of gravel, as well as cobblestones, is low, so if it is decided to make such a stone fence, the main expenses during construction will be associated with the purchase of bricks.
Dolomite
This type decorative stone has flat outlines. Its extraction is carried out using blasting operations in special quarries.

Original dolomite fence using forged elements
As a rule, if finishing fences with stone is necessary, then the choice is made in favor of this material. Price per square meter noticeably different: depending on the size and composition of the stone, it costs 200–3000 rubles.
Limestone
This type of stone, like the previous one, is used mainly for finishing finished fences. Its soft structure makes it very easy to work with. You can buy such material for 250–300 rubles/square meter. It is necessary to note some of it negative aspects. The structure of this stone is porous, which makes it hydrophobic.
In regions with a damp climate, such a fence made of decorative stone will quickly become unusable: moisture will penetrate the pores and destroy the limestone from the inside. Thanks to moisture-proofing impregnations, you can avoid problems associated with this, however, you must understand that this will entail additional costs.

Tiger sandstone fence using metal elements
Sandstone
This type of stone is used not only for the construction of fences for suburban areas, it is also actively used in the construction of houses. Sandstone is not afraid of water and cold, so the service life of fences made from this decorative stone is very long. Thanks to all the advantages, it is very popular and very expensive.
To buy a cube of such material you need to shell out about five thousand rubles.
If you only need to finish the fence, then you can buy tiles from this material, which will cost up to a thousand rubles per square meter.
Rubble stone
A fence made of rubble stone can be built entirely or can be lined with it. This material is very common in the construction of fences due to its strength characteristics. You can buy rubble stone for about 250 rubles per kilogram.
Artificial stone
Thanks to development modern technologies In the construction industry, new materials are increasingly appearing on the market. Very popular for finishing fences is artificial stone, using which an imitation of any natural stone is achieved.
Looks no worse than fences natural materials, and its cost is significantly less. Thanks to the variety of colors, textures and shapes, such a fence can fit into any exterior personal plot.
Construction of a stone fence
Building a stone fence with your own hands is not easy. You need to have a lot of free time, and also be prepared for some difficulties. Let's look at the process of constructing fences of this type step by step:

Let's talk about each of the stages of construction in more detail.
Marking
Determination of the boundaries of the future fence is carried out in the case of erecting fences from any materials. At this stage, you can determine the consumption of materials, for which you need to calculate the length of the fence, its height and width.
Construction of the foundation
Usually they provide for fences. Work begins with excavation of soil along the border of the fence being built. The trench is made up to 600 mm wide and up to 800 mm deep, after which it is filled with mortar. It is necessary to equip the foundation even where the gate will be located to ensure the integrity of the structure.
It should be noted that it is imperative to strengthen the foundation with reinforcement to prevent cracking in the future.

Installation of formwork for pouring the foundation
After pouring, the base is left to dry. If work is carried out in hot weather, it is necessary to periodically wet the hardening structure so that the foundation does not dry out.
Preparatory work
Since there are about three weeks before the foundation hardens, you can devote this time to preparation building material. First, you need to sort the stones by size, which will allow you to lay the stones much faster in the future.
If you come across very large elements, it is better to crush them, because they may not fit anywhere. You should also clean the stones from dirt and wash them.
Installation of poles
The pillars are needed in the fencing structure to ensure the reliability of the future structure. It is recommended to install them in glasses pre-installed into the foundation. The core of the pillars should not be left hollow; it is best to place stones there and fill with mortar.

Example of a natural stone fence post
To save money, you can use cheaper stones or use unnecessary leftovers. The height of the pillars can be equal to the height of the fence or be greater at the discretion of the builders. After completing the work, you need to let the pillars stand for two weeks, and only after that begin further work.