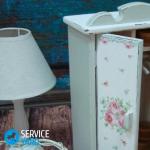
Creating a bathroom interior involves filling it with accessories, stylish details and color accents. The floor mat plays a big role in the design of the bathroom. In stores, despite the wide selection, it is not always possible to find suitable option. It's easy to make a bath mat with your own hands from materials that are found in every home.
Classification and purpose of rugs
All rugs that you can make with your own hands are divided into:
- textile;
- natural;
- synthetic.

A bathroom mat is an item necessary to ensure a safe and comfortable showering environment. If on ceramic floor tiles water has entered, it is unsafe to walk on it. A mat on the floor prevents slipping.
Bathroom rugs made in one piece color scheme with the interior of the room, they look like fashionable designer accessories.
Options for products made from natural materials
It’s easy to make a bath mat with your own hands if you stock up on natural ingredients and study a master class on how to make it. A product made from liquid concrete, stones, or moss always decorates the bathroom. The design of the room can be complemented with original products made from wicker and bamboo.
sea pebbles
A piece of the seashore to the feet of your bathtub is not a dream, but a reality! To make it come true, there is the easiest way No. 1 - sea pebbles glued to the base. It is beneficial for blood circulation to step on the smooth stone surface after taking a shower.

Sea pebble bath mat
To make such a rug you will need:
- sea stones small size;
- rubber mat;
- degreasing liquid;
- "Moment" type glue.
The sequence of work is as follows.
- Wash and dry the base of the mat and the stones.
- Degrease them and let the liquid dry completely.
- Place the stones on a flat surface to create the desired pattern.
- Apply a small amount of glue to the rug and stone, wait 30-60 seconds and glue the stone. Glue the following elements, maintaining a minimum gap between the stones.
- You can use the product within a day.
Cork
Make a rug for the bathroom from wine corks - perfect solution for any apartment, house or cottage. This mat has a number of advantages:
- environmentally friendly cork covering;
- perfectly absorbs moisture;
- massage effect for feet;
- easy to do yourself;
- suitable for any interior;
- cheapness and availability of traffic jams.
Related article: Assembly door frame do it yourself: recommendations

Wine cork rug
Before you begin to create such a rug, you need to prepare the piece material - wash and dry the corks. To create a small rug you will need 100-150 corks. You can clean corks from wine residues by soaking them overnight in a basin in warm water with bleach. In the morning they need to be washed in running water and lay out to dry.
When they are dry, you need to cut the corks in half into wooden board with a sharp knife. To cut the cork lengthwise into two halves without getting hurt, you should lay them on a round cut. This work will require physical effort. Sand the cut of each plug with sandpaper.
Prepare the base the right size and shapes. Soft plastic, an old rubber shower mat, or rubber coverings for car interiors will do. Wash the base, dry it and degrease it. Use glue to attach the plugs to the base.
Moss
Bathroom interior in ecological style easy to do if you get one natural rug from living moss. It does not require land, and the temperature and humidity conditions and the lack of natural light in the bathroom are the most suitable for such an accessory. It is very easy to make but will take several weeks to grow.
Operating procedure:
- take 3 handfuls of moss such as Racomitrium, Leucobryum without soil;
- place it in a blender, add 100 ml of liquid yogurt or kefir and 2 tsp. hydrogel for growing flowers;
- beat the mixture for 2-5 minutes at minimum speed;
- prepare a porous base, for example, a wooden surface, a product made of liquid concrete, stones;
- apply the moss mixture with a brush to the prepared surface in several layers;
- cover the surface with film and moisten it every day until the moss takes root;
- After 3-5 weeks, when the mat has grown, water it every day.
Areas where moss has not grown can be re-covered with the same mixture.
Related article: DIY tulle pompoms
Textile crafts
Every woman can make a rug for her bathroom with her own hands from leftover fabric, old things, and unnecessary threads. You don't even have to know how to sew or knit to do this. The main thing is to be able to fantasize.
Old things
Old knitted T-shirts will make your rug fluffy and soft. It is better to dry it immediately after use.
To make it you will need old T-shirts, as well as:
- dense fabric for the base, from which 2 parts of the rug are cut into the desired shape and size, taking into account allowances of 1.5-2 cm;
- sewing machine;
- scissors;
- threads
Work begins with the preparation of knitted “tubes”. Old clothes are cut into strips measuring 10x2 cm and each of them is stretched lengthwise. They are sewn on in rows perpendicular to the machine foot, using one seam. The seam should run in the middle of the knitted pieces. When one row is ready, begin sewing the next row. To do this, the ends of the sewn strips of knitwear are bent so as not to catch them in the second seam. The tubes for the next row are laid so that the distance between the first and second parallel seams is no more than 2-3 cm.
Perform a hem. On top of the base with sewn knitted tubes, a second similar piece without tubes is placed face to face and the ends of the strips are tucked inward. Both halves are sewn together, leaving 10-15 cm for turning. The rug is turned right side out and the seam is finished by hand.
From a towel
It's very easy to make a rug from old towels. Need 3 towels different colors. They are cut lengthwise into strips 4 cm wide. Take 3 strips of different colors and manually sew the edges of the strips together, placing them one on top of the other. A long braid is made from 3 strips. To continue weaving, the ends of the strips are sewn together, observing their color. The resulting braid is twisted on a horizontal surface in a spiral so that a round or oval rug is obtained.

Rug made of towels
Denim
There are many ways to make a bath mat from old jeans or thick fabric. These options have one drawback - threads, which have to be removed often and because of their presence, the rug looks sloppy. The following method solves these problems.
12747 1 0
DIY bathroom rug: 7 ways to surprise your family and guests
Are you tired of the same type of rugs that fill the shelves of themed stores, and do you feel like spending your family budget on design work? Then do an original product for your bathroom with my own hands. For example, I periodically do this when I have free time and will gladly share some interesting solutions with you.
A little about the purpose
Before you start making rugs for the toilet and bathroom, you need to understand why they are needed. This will help you accept right decisions when choosing materials and creating a design for your model.
The following functions can be distinguished:
- Increased security. This is the primary purpose of a rug in the bathroom. The fact is that wet tiles, which covers the bathroom floors of most apartments in our country, is very slippery and easy to fall on. Such a fall can result in a simple bruise, or maybe a very serious injury;
- Creating a pleasant tactile sensation for the feet. Ceramics feel cold and hard to the touch, and you don’t want to be convinced of this every time you get out of a warm bath. It’s better to wear something warm and soft or textured if you like heel massage;
- Room decoration. The aesthetic component also has a certain significance. Correctly selected colors or the presence of an attractive ornament will allow the product to become a real “highlight” of your bathroom.
From the above it follows that the created mat must have a non-slip base, as well as be pleasant to the touch and beautiful to look at:

Well, don’t forget, of course, about the moisture resistance that the finished sample must have, since its durability directly depends on this. Hydrophobic materials will not last long in the constant dampness typical of bathrooms.
We begin to surprise
So, how to make a bathroom rug with your own hands so that your household will appreciate your efforts? Here are some ways to solve such a sensitive issue:
Method No. 1: Seashore to the legs of your bathtub

Sea stone canvas is one of my favorite options. Of course, there is no need to talk about softness here, but a pleasant foot massage, stylish appearance, reminiscent of the sea, and a long service life are guaranteed.
To work you will need:

Be sure to buy waterproof glue, otherwise everything will decorative elements will soon begin to peel off under the influence of excessive humidity typical of bathrooms.

Master class on making a massage mat marine theme looks like that:

- First of all I I lay out the desired pattern of stones on a flat area;

- Then I treat rubber with acetone for the purpose of degreasing;
- Apply a small amount of glue on the base and the first stone, which I take from the corner of the already created and lying to the side ornament;
- I wait thirty seconds and I glue the fragment in the right place, after which I move on to the next one, and so on until the whole picture is transferred to the rubber base.

As you can see, everything is very simple and easy to do. Those who were fond of gluing models together as children will especially enjoy this process.

Method No. 2: We take old T-shirts into use and significantly modernize them

What I especially like this method The main thing about making a rug is that a stranger will never guess what you made it from. T-shirts here undergo a significant metamorphosis and no longer look the same as before.
The finished sample is shaggy, warm and cute. As for water resistance, the situation here is somewhat worse, so do not forget to regularly dry such a product if you want to extend its service life.
IN in this case you will need:

I am not comfortable with a sewing machine, so I have always delegated some of the work described below to those who are better at it:

- First things first T-shirts are cut into strips with scissors, the width of which does not exceed three centimeters;
If you use clothes of different colors, you can lay out a beautiful pattern, which will add aesthetics to the product and will especially appeal to children.
- Then the resulting fragments stretch so that their edges begin to wrap into tubes;
- The scissors are picked up again, and the resulting cylinders shortened to ten centimeters in length;
- Measurements of the floor in the bathroom are taken, and in accordance with the data obtained from dense matter a suitable base is cut out with a two-centimeter margin at the edges in order to implement an allowance;
- The prepared tubes are laid out on top of the fabric in rows, after which stitched in the middle;

- Warp edges tuck and adjust.
It’s fair to say that the finished result consists not only of T-shirts, but also of thread.
Method number 3: Festival of bags

A do-it-yourself knitted bath mat can be made in the form of a large number of bags made from different old things. The finished sample looks impressive and resembles a collection of some cartoon creatures. Pleasant tactile sensations upon contact are guaranteed here.
In this case, you will also need to sew, but you can already do without a machine, so I completed all the work myself:

- To begin with I took up the bags. How to sew them? Very simple:
- He sorted the pile of collected things into dense samples and softer ones;
- The first ones were cut into squares different sizes, and chopped the latter into shreds. One of the most durable pieces of fabric was left untouched;
- I laid the scraps on squares and sewed them into bags;
- I cut the remaining material to the size of the future rug and sewed all the prepared soft balls onto it one by one;
- Ready the product is glued to a rubber base to completely prevent it from slipping on wet tiles.
Method number 4: Denim braids

Another option for using old things, but this time I suggest using jeans. To do this, it will be enough to have on hand:
The needle and thread are used minimally here, so I coped with the task, the execution of which looks like this:
- I cut off the pockets and waistbands of the trousers, and cut the trouser legs into five-centimeter strips;

- I took three ribbons and secured their edges together with a needle and thread;

- Folding the strips in half braided them into a braid;

- After one set of strips was finished, I sewed the next one to it and continued weaving until all the fabric was finished;
- The end of the braid was turned up and hemmed, after which he laid it in a circle, forming the body of the rug.

- All rows together tied with thread to fix the overall shape.
By the way, a rug is also made from a towel using a similar technology. The result is somewhat less practical, but softer and fluffier.

Method number 5: Unruly ligature

Knitting is not my thing, and besides, I personally think such rugs are somewhat impractical for the bathroom. But it should be noted that they endow the room with warmth and comfort, which is valued much more by many.
Depending on how well you know how to knit, I can suggest two strategies for obtaining such a product:
- If your skills in this art are similar to mine, then it’s better to just turn to someone for help;
- If you associate the word “hook” not with fishing, but with threads, then the Internet is full of interesting patterns that will help you knit a beautiful and unusual rug.

Method #6: Grow

An excellent idea that allows you to create a small forest clearing in your bathroom with all the ensuing benefits:
- Excellent appearance, allowing you to imagine yourself walking through the forest;
- Amazing tactile sensations. Moss is soft and pleasant to the touch;
- Air purification. All plants absorb carbon dioxide and release oxygen;
- Minimum care requirements. The product lives its own life, regenerates itself and does not accumulate dust;
- Reducing the level of moisture that is absorbed by moss.
And the most important thing is that it is actually not difficult to realize such a miracle at home. For me it looked like this:
- I bought a rubber base with cup-shaped depressions over the entire surface. You can go the other way: a regular rubber sheet with silicone heat-resistant baking dishes. But I was lucky enough to find a ready-made suitable foundation;
- Bought three different types moss at the pet store. If you live near a forest, you can save money and collect samples there;

- I planted their samples in the recesses and left it to grow for a couple of weeks. As a result, I got a “forest lawn”.
Method number 7: Collecting wine corks

In fact, this option is very similar to creating a rug from sea stones, only the result is not a hard massager, but a fairly soft wood covering. Here's how I did it:
- In the nearest cafe agreed to take it from them required quantity wine corks, since I myself don’t like this drink enough to do without outside help;

- Then cut each wooden cylinder lengthwise into two parts;

- Next, as in the very first version, I first laid out the desired ornament on the floor, and then transferred it with glue to a rubber base.
Cork tolerates moisture very well, so you can be sure of the durability of such a product.
Conclusion
Making a rug for your bathroom with your own hands is not difficult. The main thing is to allocate some time for this and adopt one of the methods described above. Your family will certainly appreciate your efforts.

The video in this article contains additional information related to the topic discussed. If you have any questions about the material, ask them in the comments.
It would seem, how can an ordinary small rug change the interior? But it turns out that it can become not only useful, but also a bright, interesting detail in interior design. Of course, you can buy it in a store, fortunately, now there are rugs for every taste and color. But think how nice it will be when you make it yourself, especially since such a rug can be easily made from old things, for example: threads, fabrics, wine corks, belts, and much more. All you need is to know step by step instructions, stock up the necessary materials and patience.
1. Rug made from old leather belts
Making a mat from belts is very simple.
For this you will need:
- 10-12 natural or faux leather belts
- awl or leather punch
- twine or string.
First make the belts the same length by cutting off the buckle. Make holes along the edges of the straps at a distance of approximately 2-3 cm from each other and 0.5 cm from the edge. Sew them together using thin hemp rope. The order of pulling the rope is arbitrary; you can sew along the belts, across them, crosswise between the holes. Metal staples instead of rope will also look very stylish.
2. Soft rug made from old fabrics

Required material:
- scissors
- pieces of old (unnecessary) fabrics, maybe old clothes
- bath mat (with holes)

1. Cut the fabric into small strips
2. Using tweezers or a hook, begin pushing the strips through the holes.
3. Tie all fabric strips with a simple knot.

3. Making a rug from old towels

Required material:
- old towels
- scissors
- sewing machine (needle and thread)
1. Cut your towels into several strips. IN in this example each strip is about 3 - 4 cm wide.

For convenience, you can fold each towel in half and cut it into 2 halves. Fold each half in half again and cut along the fold line, etc. It is advisable that all towels are approximately the same size.

2. Place 3 strips of different colors together and secure them with thread (stitch the ends). Start braiding these strips. After finishing the weaving, stitch the ends again.

3. Make several of these “braids” and then connect them into one long strip using a needle and thread (or a sewing machine).

4. Start rolling your long strip into a spiral, securing it with a thick thread.

5. Secure the entire structure and turn it over so that the seams are on the bottom.

Your rug is ready!
4. Rug made from wine corks
Wine bottle corks are an excellent material for a variety of crafts for the home and garden. One of useful options- make a rug out of corks with your own hands. Cork bark practically does not absorb moisture and bacteria do not multiply in it, which is why cork is excellent for rooms with high humidity, that is, for the bathroom. And walking on a mat of traffic jams is not only very pleasant, but also useful!

To make a small rug, you will need:
- 150-180 wine corks;
- glue;
- a piece of water-repellent material for the base (rubber shower or yoga mat, rubberized fabric, soft thin plastic);
- sharp knife;
- coarse sandpaper;
- cutting board.
1. Assemble and prepare the plugs. If you don't have required quantity, then plugs can be bought in online stores. Wash them thoroughly in warm soapy water. To remove red wine stains, soak the corks in a bleach solution and leave them overnight. Then rinse well and leave to dry.
2. Cut each cork lengthwise into two pieces. Use cutting board and a sharp knife. If the cuts are very uneven, smooth the edges with sandpaper. For convenience and safety, it is better to cut the cork not on its side, but by placing it in a vertical position.

3. Place the corks with the cuts down on the table as they will be located on the rug, decide on the size of the future rug. Then cut from rubber material base of the required size. You can come up with a pattern yourself, it can be a checkerboard pattern, even rows, zigzags.

4. Start gluing the corks to the base with an adhesive suitable for gluing such surfaces. Glue the corks around the perimeter first, then moving towards the center. Remove excess glue immediately with a cloth.

The cork mat must dry completely. To make it completely waterproof, you can treat the surface with a sealant. If you use a cork mat in the bathroom, it is advisable to dry it in the sun at least once a month for prevention.


5. Rug woven from shreds

Materials needed for making it yourself:
- thick fabric (carpet base)
- pieces of fabric
- black thread
- needle
- scissors
- fabric glue
- adhesive tape
- aerosol for protective coating(if desired)

1. Select the size of the carpet and prepare a cloth of the appropriate size.
2. Prepare long strips of fabric. Each strip should be approximately 6-7 cm longer than the main part of the carpet.

3. Prepare several bundles of 3 strips and start braiding. You need several blanks so that you can combine them into one carpet. For convenience, secure the ends of each piece with adhesive tape. Don't weave all the way through - leave some of the fabric unwoven.
4. Apply glue to a thick canvas. No need to skimp on glue.
5. Carefully place the blanks on the canvas so that they stick.
6. Connect all the pieces together using a needle and thread.
7. Remove the duct tape from the ends. Trim the ends so they are even.

The rug is ready!
6. DIY pompom rug: Option No. 1

Required material:
- wool thread
- scissors
- bath mat (with holes)
1. Wrap the wool thread around your fingers (the more you wrap, the fluffier the pompom will be).
2. Carefully remove the wound thread from your fingers. Prepare another short thread - about 20 cm long - and tie it around the wound thread (in the middle).

3. Cut off the ends with sharp scissors. Also cut off the excess parts with scissors to get a neat round pompom. But don't cut the thread you used to tie the pompom, you'll need it later.

4. Make enough pom poms to cover the bath mat. After this, begin to thread the thread through the holes and tie it to the rug, thereby attaching the pom poms to the rug. The pompoms should be close to each other.

5. When you have tied all the pompoms to the carpet, you can cut off the ends of the threads.

Your DIY pompom rug is ready!
7. Simple pompom rug: Option No. 2

To make such a blue and white pompom rug, you will need:
- thick woolen threads for knitting;
- mesh base for the rug;
- scissors.

1. Make pom-poms in different colors to create a smooth gradient color transition. You can make a plain rug or lay out a specific pattern. You can also play with the size of the pompoms, using large, smaller and very small ones. To do this, look here at how better way make pompoms of different sizes.

2. Now tie each pompom to the net, observing color scheme. Try not to see the outline between the pom-poms.


If desired, the back side of the rug with knots can be covered with fabric or knitting so that the pompom rug is beautiful from all sides, even from the inside out. If you couldn’t find a suitable base - a mesh - it doesn’t matter, pompoms can simply be sewn to any fabric.
8. Round foot mat made with a hoop
Old knitted T-shirts are actively used by craftswomen for a variety of crafts; in particular, the idea of making rugs out of them is very popular.

Necessary materials:
- 3-4 T-shirts (other things, ribbons or ropes)
- children's gymnastic hoop or hula hoop for adults
scissors
The size of the mat depends on the size of the chosen hoop; you can take either your daughter’s gymnastics hoop or a large weight loss hoop. The weaving technology is very simple; even a child can do it by making a round rug on a hoop for their room.
Cut T-shirts or other old outerwear into strips of equal width, from one side seam to the other, to form rings. Place each strip on the hoop: first a vertical line, then a horizontal one, and then divide each sector into equal parts with a strip of a T-shirt.
Important! The strips of fabric should not be very stretched, otherwise the finished rug will wrinkle and will not hold its shape. Ideally, the T-shirt strip should fit almost loosely over the hoop, with minimal stretching of the fabric.
It's likely that if the diameter of your hoop is larger than the t-shirt strip, it's too tight or you're using ropes at all. In this case, simply wrap the hoop in fabric or rope and tie a knot.
Try to have all the warp lines intersect at the center point. We start weaving the rug from the center. Take a strip of T-shirt, fasten it with a loop to one of the warp lines and pass it under and over the longitudinal lines.

When the strip ends, tie another T-shirt ring to it, hiding the knot under the previous row. Continue weaving in the same way, alternating between pulling the strip under and over the longitudinal lines. Try to keep each circle pressed tightly against the previous one, avoiding large spaces or holes between them. Once you have finished weaving, cut off the ends of the loops with scissors and tie them with a knot.
9. Backlit mat
Sometimes at night you want to go to the toilet, go to the kitchen to eat, drink a glass of water or prepare a bottle of formula for the baby, so you have to get up and leave the bedroom. In the dark, and even in a half-asleep state, there is a risk of bumping into something, and turning on the overhead light is not always possible so as not to wake up other family members. For such cases, LED floor lighting in a rug will be an interesting and useful solution.

Craftswoman Johanna Hyrkas came up with the great idea to use LED strip as an illuminating way sign from the bedroom. The ribbon is twisted in a spiral, located inside a round rug woven from ordinary rope, and a long tail leads further from the room. Soft, cozy light spreads across the floor without disturbing sleep.

Such a rug with LED lighting can serve as a night light in a child’s room. In addition, a strip of rug can be laid along the walls and lead to the toilet or kitchen. For such purposes, it is better to use a sealed closed LED strip. You can make a rug with your own hands, using a large crochet hook or using your fingers to braid a ribbon with thick yarn or rope. Of course there are expensive models LED backlight floor with light power control. But often homemade version is excellent budget solution, as in this case.
10. Rug made from jeans labels

The concept of using clothing items for other purposes after they have been worn out is not new. For decades, women have been making patchwork rugs and quilts from old items. In the same way, you can make a carpet with your own hands from labels from jeans. The only problem is finding a sufficient number of labels, because even for a small rug you will need at least 50 pieces.

To make such carpets with your own hands, it is better to sew labels onto some kind of fabric, maybe even thin. Labels sewn on each other will give the carpet the necessary density. For work use sewing machine, since manually sewing each label is a very labor-intensive task. Make stitches around the perimeter of the label, where it was sewn to the jeans. You can choose the pattern yourself - the correct even mesh, herringbone, spiral for a round carpet, but labels in a slightly irregular order, sewn on top of each other, look most impressive.
11. How to make a rug “French bracelet”

Required material:
- old fabric of 2 colors (you can use old T-shirts). The width of each piece of fabric is 20-25 cm and the length is 3 meters. If you are using old T-shirts, you can join several pieces together with a thread and a needle.
- scissors
- needle and thread
- adhesive tape

1. Lay out 5 strips different color in the order in which you want them to look on the future carpet.
2. Next to the 5 laid out strips, place another 5 strips in a mirror image.

3. Take the first strip, in this case the pink one, and tie it as shown in the image. First, fold the fabric to form a number 4.
4. Continue tying the pink strip around the remaining strips until you reach the middle.

5. Start doing the same on the opposite side, tying another pink stripe around the other 4 stripes. Start also with the number 4, but in a mirror image.
6. When the two pink stripes meet in the middle, tie them together.
7. Repeat the same with the subsequent remaining strips. Choose the length of the rug yourself.

8. Start another rug, choosing the same colors. After this, connect both rugs with thread and needle.
Advice: If you wish, you can make one or more similar rugs, which can then be sewn into one large rug.

9. Excess parts can be cut off and the ends secured with thread to prevent them from unraveling.

12. Bath mat made of sea stones

This bath mat is made by yourself
The most important thing in making a sea rug is to get sea pebbles. They can be collected on the beach during your trip to the sea, or perhaps you live near a beach strewn with pebbles, such stones can also be found near rivers, or in a hardware store.
To make a rug with your own hands we will need:
- Rubber mat. It is possible with holes, this will serve for water drainage.
- Smooth sea or river stones. Make sure they are porous and not too polished or slippery, otherwise they may not stick well.
- Waterproof silicone sealant.
- Oilcloth or old shower curtain.


If the face of the rubber mat has a textured pattern, it is best to turn it over and start working on the smooth side. To avoid staining anything with silicone, lay down the prepared film.

Now compactly and harmoniously lay out the sea stones on the surface of the rug to make sure you have enough pebbles and outline how they will lie. This may seem like a bit of a puzzle to you, so be patient!


Once you have arranged the stones the way you like, you can start gluing them. This procedure needs to be started from one corner, taking one pebble at a time, squeezing out a drop silicone sealant on the back of the stone and place it back on the mat. Press it for a few seconds and repeat with the remaining stones.


The instructions for the silicone say that it will dry for 3 hours, however, before using the mat it is better to wait 24 hours, this will make it stronger.

When you make this amazing bath mat with your own hands, you will bring a piece of nature into your bathroom and remember your favorite beach trips!
The interior of any bathroom should provide not only convenience, but also practicality. Therefore, some little things can perform different functions. Bath mats provide comfort, safety and are also important element decor. To emphasize the individuality of the room design and use unnecessary things, you can make a bath mat with your own hands from various materials(cork, twine, pebbles). It is necessary to take into account that the product must have the appropriate qualities.
Special operating conditions ( high humidity and temperature, the use of a variety of cleaning and detergents) determine the requests made to decorative coatings rugs in the bathroom:
- the product must have some rigidity that prevents it from folding;
- the presence of a silicone/rubber layer on the back side, providing an anti-slip effect on smooth/wet floors;
- high wear resistance;
- hygienic, simple and easy care, quick drying;
- environmental friendliness;
- the ability to allow moisture to pass through and dry quickly (especially if the rug is in the “bath-shower” area).
The bathroom can be divided into the following zones according to humidity: “dry” - near the washbasin, toilet, hangers and “wet” - near the shower cabin, bathtub. For each area, it is better to make a mat from a material suitable for its characteristics.
Suitable for placement in a “dry” area, since the cork can absorb moisture and regular drying of the product will be required to prevent mold or mildew from appearing on the rug. The effect of a slight “spring” will create a pleasant tactile sensation, combined with a relaxed foot massage.
Materials: silicone glue, rubber or silicone mat - backing, wine corks (the number of corks depends on the size of the backing), construction knife.
- Cut all the plugs lengthwise with a knife.
- The mat is prepared (wiped with acetone or alcohol).
- Strips of glue are applied to the cut of the cork and left for 20-25 seconds.
- The cut side of the cork is pressed tightly against the base (the parts are glued to the side with flat surface). You can apply a little glue to the sides of the parts for additional fixation.
- The remaining halves of the corks are also glued. You can lay out any pattern - 2X2 checkerboard, Christmas tree.
- For the glue to dry firmly, you should let the mat sit for about a day (it is advisable to put some kind of weight on top).

It can be located in a “wet” area, where the “stone” surface of the mat can withstand regular moisture. The non-uniform face also has a pleasant massaging effect on the feet.
Materials: silicone glue, rubber or silicone base, pebbles (preferably small in size and flattened in shape).
The rubber base is selected for a small area, since a mat with significant dimensions will be inconvenient to care for and move due to its serious weight
- The surface of the base is treated (degreased with acetone/alcohol).
- Drops/strips of glue are applied to the pebble and left for 20-30 seconds.
- The pebble is pressed tightly against the flat side of the base coating.
- The same actions are performed with the remaining stones, while carefully filling the entire base.
- Allow 24 hours for the glue to dry completely.

Rubberized/silicone bases should not have a continuous surface. Having holes that allow water and air to pass through will prevent mold from forming.
The surface of the rug has a soft and pleasant structure, which is knitted from yarn (cut strips). It is advisable to lay in a “dry” area.
Materials: synthetic curtain, ruler, scissors, knitting needles (hook number 10), silicone strips, glue.
- On a level place (preferably on the floor) the curtain is laid out.
- Using a ruler, mark strips 2-4 cm wide on the fabric and cut them evenly.
- The resulting ribbons are carefully tied into knots and rolled into a ball.
It is necessary that the knots are the same size - this will give the knitted fabric a uniform surface
- Using knitting needles or a hook, the fabric is knitted in a stocking pattern. It is necessary to try to ensure that the canvas is elastic and not loose. If desired, choose any simple pattern you like. For creativity and massage effect, “braids” are added to general scheme pattern.
- To prevent the mat from slipping, silicone strips are glued to one side of the knitted fabric and left to dry for a day (under some kind of pressure).

The size of the canvas should be comfortable enough for use by residents, but not difficult to maintain
DIY bathroom accessories look original and can be associated with some personal or family memories. Despite the exclusivity, all these things should fit organically into the bathroom interior - emphasize designer style or serve as bright contrasting accents.
- To create a pleasant, relaxing atmosphere, you can make a set of rugs by combining products using the same shades.
- When making rugs, it is acceptable to play with shapes and textures (make all the elements rectangular, but from different materials- put the cork one near the washbasin, and the pebble one near the shower).
A homemade rug will not only create comfortable conditions, but also bring joyful emotions. Decorating a bathroom with homemade products is limited only by the imagination of the residents, and sometimes it may not be limited.
Tiled bathroom floors are practical and durable, but touching them with bare feet when getting out of the shower is not very pleasant. To eliminate discomfort, use small moisture-resistant mats, which can be bought in almost every supermarket. Don't want to use standard things? Then you need to make a rug for the bathroom with your own hands - such a designer accessory will decorate it much more effectively than a factory product. Any available materials will do to make useful crafts!
What could be more pleasant than a walk along the sea coast, if it is not somewhere far away, but in your own shower? A pebble mat is not only beautiful, but also good for health - a daily foot massage will only be beneficial and will help you cheer up early in the morning. Not only sea pebbles, but river pebbles are suitable for crafts, mosaic tiles made of pebbles, which are attached to a mesh base.
The easiest way to make such a miracle is to take a shallow tray and pour a layer of small stones into it so that the bottom is completely covered. To prevent the walls of the tray from looking boring, they can be painted Blue colour or cover it with a green base that imitates seaweed.

Original decoration in a marine style
The second option is a little more complicated, but no special skills are required for the job. The basis is an unnecessary and tired old rubber carpet. If you are planning a pattern, then it is better to immediately lay out the pebbles, and then, lifting each one and lubricating the base with waterproof glue, carefully attach the pebbles to the base
If you manage to buy tiles based on pebbles, the work will be greatly simplified - simply glue the finished squares to the base.
Handicrafts after the holiday: a rug made of wine corks
Such a warm carpet can be made after a wedding, anniversary or other event during which a lot of wine corks were collected. For a medium-sized product, you will need about 200 wooden plugs, which need to be cut lengthwise into two halves and the rough surface treated with sandpaper.
The resulting blanks are glued onto a suitable base. The easiest way is to make a square product by simply gluing the corks in even rows, but creative individuals can get creative and place the blanks at different angles relative to each other, achieving original patterns.

Eco-friendly cork will fit into any interior

Another version of the cork accessory is assembled on a fishing line or nylon cord. In this case, the work resembles assembling beads, which are then fastened together in rows. The advantage of a rope product is that it is absolutely not afraid of water and dries quickly. To save traffic jams, it is recommended to connect them in a checkerboard pattern, although for such a craft it is better to leave the “beads” intact.
Family gatherings: fluffy pompom carpet
For those who don’t want to craft alone, but plan to involve the whole family in this exciting activity, a fluffy accessory made from pompoms is ideal. The most difficult thing here is to make a lot of pom-poms from multi-colored threads.
To make it, cut out two circles of the same size and make a round hole inside. Next, the paper blanks are folded together and wrapped with thread to the desired thickness. After this, all that remains is to cut the threads along the outer circumference, pull the yarn in the center, and form a round pom-pom.


The finished fluffy balls will remain sewn onto a thick base, onto an old PVC mat, linen or jeans. A little imagination and you will get a funny puppy, a turtle lounging in the sun, or a slice of watermelon.
Recycling: a comfortable carpet made from old T-shirts
If there are children at home, then the supply of T-shirts takes up half of the closet. It's time to recycle your unwanted T-shirts. First of all, old things should be mercilessly cut into thin ribbons one and a half to two centimeters wide.

Cut in a spiral, starting from the bottom up, while stretching the strip so that it tends to curl. To make the process go faster, you can attract a second assistant and ask him to wind the ball. Braids are woven from the resulting yarn, and then a circle is formed by sewing the spirals together. If you have knitting skills, then crochet a circle, alternating multi-colored ribbons.
The second version of the T-shirt product will appeal to those who love fluffy, soft things. T-shirts are cut into pieces 9-10 cm long and attached in frequent rows to a base of thick fabric. To fix the blanks, the ribbons are pre-glued with double-sided tape.


For the most economical: bedding under your feet made of plastic bags
If you don’t have unnecessary T-shirts in your wardrobe, but don’t want to buy raw materials for making crafts, choose a budget option- from colored plastic bags. For a practical, cute accessory, soft, thin but durable bags that are easily crushed and twisted are suitable. The advantage of a polyethylene product is that it can be washed many times without fear of premature wear.
The birth of a masterpiece begins with the preparation of packages - each of them needs to be cut into strips of the same width (about 1 cm). Long blanks are formed from them, connecting them together using a hot iron, thread or ordinary knots. For convenience, it is better to immediately wrap the plastic ribbons into balls. Crochet thickly using the simplest technique, such as single crochet. If you manage to collect multi-colored bags, try to knit patterns, having thought through the design and pattern of the product in advance.


Toilet kit
There are many more various techniques home production rugs: from plastic stoppers, thick cord, polyurethane scraps. If you don’t have time to do handicrafts, but you want to have an exclusive accessory in your home, you can order a designer product from those who do this professionally. Talented people will be happy to bring all your fantasies to life and help make your bathroom cozy and unusual!