The role of the kitchen table in everyday life is difficult to overestimate. It is considered the main attribute in the kitchen, and not without reason - after all, it is at the table that the whole family most often gathers, celebrating various events happening in life.
When talking about kitchen tables, the one that most often comes to mind is the dining table. However, kitchen tables are used not only for dining and differ in their functions. Thus, the bar table perfectly divides the space into zones. It can be used as a dining room for a small number of people, usually 2-3 people. It is especially relevant when you need to save space. The table under the sink serves as the basis for embedding the sink.


When thinking about purchasing a kitchen table, you can consider making it yourself. This option, firstly, will save some money. Secondly, surprise your guests original form products, unusual design or decoration method. Third, master carpentry skills. And, of course, enjoy the work done and the final result.


Having convinced yourself of the need to make a kitchen table yourself, you need to determine a number of important parameters for yourself. Namely, decide what shape it will be, choose a design option, calculate the dimensions of the product and the size of individual parts, and decide on the material for their manufacture.
You will learn how to make a table with your own hands in the video:
Kinds
Tables differ in design options: classic, folding, transformable, corner, folding or hanging, retractable. If desired and necessary, the table can be equipped with a cabinet or with drawers. The choice of design option depends primarily on the size of the kitchen and the semantic load.


For small kitchens, most likely ideal solution There will be a folding version or a folding, bar, corner one. Corner tables can also be folding or folding.


Transforming tables solve the problem when you need a 2 in 1 solution, which significantly expands the possibilities of its use. So, with a slight movement of the hand, graceful coffee table can easily turn into a full-fledged dining table.

A retractable table saves space and is usually built into kitchen units.
With the help of a bar table, you can divide the room into zones of both small and large areas.


Materials
The materials from which a table can be made are amazing in their diversity and require a clear idea of themselves.
For this purpose, arrays of various tree species, such as oak and conifers, are suitable. If a beginner is going to engage in production, then pine is perfect, since it is much easier to process. Solid wood furniture is considered “capricious” and requires special treatment. It may fade when exposed to direct sun rays, absorb odors, it is poorly affected by changes in humidity and temperature. The positive aspects of this material are environmental friendliness and durability. Solid wood furniture looks very elegant and expensive.

- Chipboard- a material that is quite common and very often used for making furniture. It is made from dry wood chips and resin using the pressing method. Among the disadvantages are environmental unsafety. Plus - relatively inexpensive cost.
- MDF It is considered a more environmentally friendly material compared to chipboard, but it is also more expensive. Obtained by mixing wood shavings with carbide resins modified with melamine and their pressing. The downside is that it is easily flammable, and even quickly heated objects, not to mention an open fire, pose a potential risk of ignition.
- An alternative to chipboard and MDF can be furniture board . It is relatively inexpensive. It is a strong and environmentally friendly material. It consists of glued bars, tightened with a press.


- Metal can also be used to make a table. Most often used for these purposes stainless steel. The cost of such material is quite high, and a cold surface will require the use of tablecloths or napkins. However, the sparkling appearance of such an attribute will definitely attract everyone's attention.

Dimensions and shape
The most common form is rectangular. A rectangular table is convenient because it can accommodate a fairly large number of people, while requiring less usable space than a round one. It can easily be pushed against the wall. But because sharp corners both rectangular and square options are considered the most dangerous.


Round- claims to usable area 1.5-2 times larger than the area needed for rectangular table designed for the same number of people. It is believed that round table stronger than other forms create a feeling of comfort in the room.

photos
Oval tables, as well as rectangular ones with rounded corners, combine the advantages of rectangular and oval shapes. Oval tables are considered the most elegant and aristocratic.

Dimensions can vary from large to compact. If necessary, the compact table can be designed in such a way that it can be expanded. For example, a folding table when folded takes up a small space, but when unfolded it can accommodate a fairly large number of people.


An important point is the calculation of dimensions. If it concerns standard kitchen, ranging from 6 to 8 square meters, drawings and diagrams will demonstrate a standard solution with a height of 750 mm, length and width from 800 * 500 mm to 1200 * 600 mm, respectively.
For correct calculation, the number of persons must be multiplied by 60 (perimeter per person). But as for the width, the optimal width here is from 800 to 1200 mm. Because narrow tables are difficult to set, and wide ones are not very comfortable to sit at. For a round table, you need to measure the circumference using the formula - diameter * 3.14 (pi).

photos
Step-by-step instruction
- If you intend to make this kitchen attribute yourself, you must make a drawing.
- To make a table from solid wood you will need the following tools: a plane, a grinder or Sander, electric jigsaw, a circular saw, drill (with a 6-8 mm drill), screwdriver, sandpaper, self-tapping screws (30-35 mm), wood glue, dowels, clamps, pencil, tape measure, gloves and safety glasses.
- It is necessary to buy supports (legs) for the table, which can be different - from ordinary rectangular to curly.
- For a tabletop 80 cm wide you will need four boards 120 cm long. They must be dry.
- To ensure a smooth finish, the countertop must be sanded well. The joints must be processed in such a way as to achieve complete contact with each other.
- To avoid deformation of the tabletop from excess moisture, the boards should be laid in a pattern facing each other. To connect the boards you will need dowels.
- At the ends of the boards that will be connected, make holes with an 8 cm drill. The distance of the holes from each other should be 10-15 cm. Then these places must be sanded and the end, holes and dowels greased with glue. Drive the dowels into the holes and thus connect the tabletop. Excess glue must be removed.
- Using screws and glue, it is necessary to connect the transverse and longitudinal boards with the legs. We make two holes in the top of the longitudinal boards; they will be useful for attaching the tabletop. Wait 12 hours. Install the countertop.
Cover the finished product with varnish, paint or stain. When using stain, you need to take into account some nuances - choose the right thinner (if you do not have enough experience, you need to use a slow thinner), the surface to be treated must be sanded evenly, it is important to adjust the gun correctly (the torch must be oval in shape and the applied layer must overlap the already applied one by half).

Traditionally, dowels are used to make wooden furniture. This connection is invisible and low cost.
For tables made of wood, it is appropriate to use wooden dowels, since they dry out at the same time in this case. For chipboard, it is better to use plastic ones, since chipboard practically does not shrink.
But it can be difficult for inexperienced craftsmen to achieve the most accurate calculation when planning holes for dowels. Therefore, an alternative to them are Euroscrews or Confirmats. Of course, this makes the product somewhat more expensive, but makes it easier to manufacture.


A kitchen table made of laminated chipboard with metal legs can be a fairly budget-friendly solution.
- Nowadays you can easily buy a chipboard sheet of the required size, or cut it yourself. The most common top covering made of plastic makes the tabletop quite resistant to abrasion.
- For work you will need: an edge for processing the end, couplers, connecting and end strips, designed to protect the joints and ends of the tabletop from moisture, dirt, and grease. In addition, they make the look more aesthetically pleasing. To make such a table, you also need to purchase legs.
- Mark the desired radius of curvature on the chipboard sheet. Next, cut the tabletop to the specified shape using a jigsaw. To prevent chipping of the plastic surface, it is better to work with a saw with reversible teeth. Using a router, make a groove and fill the edging.
- Be sure to apply sealant to both the edge and the top edge of the tabletop. Remove excess sealant. There is a special solvent designed to clean surfaces from such materials. Using self-tapping screws, install the holders and put the legs on them.
It should be noted that such a table can be made quite easily and quickly.

The following method allows you not only to assemble a modern model of a wooden table without enormous costs, but also to remake an old tabletop.
- To do this, you will need unnecessary boards of the same size, wood glue and three clamps.
- The boards must be laid out on work surface so that the middle of the laid board is at the junction of the two previous ones.
- Using wood glue and clamps, you need to fasten the boards together. Then smooth the edges and sand the surface. Sand the edges and cuts.
- If the table is made entirely, then to make the legs you will need two boards and a corner that will connect them together, as well as wood glue.
- First we glue them together with glue, then strengthen them with a corner.
- We attach a rim along the perimeter, on the inside, where the legs are connected to the tabletop.
- You need to fasten the tabletop, legs and rim using a corner.
- Cover the surface with varnish.
- To make or restore a table, you can also use wooden pallets.
- To do this, we make the base of the tabletop and attach the supports. For strength, you can add wooden spacers to the legs.
- It is better to install wheels, as the tabletop will be quite mobile.
- Fit a piece of plywood to right size and attach a rim around the perimeter.
- We lay a piece of plywood on the base.

To decorate the tabletop you can use chopped ceramic tiles or a mirror. We glue them to the tabletop and fill the voids with grout for the seams. At the final stage, you can paint or varnish everything. This method can also be used to restore damaged or old countertops.

photos
There are many more interesting ways to decorate countertops. One of which is dyeing through tulle. The result of this decoration is a beautiful lace pattern.
One of simple types furniture that you can make yourself is a table. For a dacha, the simplest option is suitable. For the kitchen, it is worth exploring existing options in order to make a table suitable for general interior. Below are table options with drawings and manufacturing instructions.
Table dimensions are optimal for the kitchen
Before you start making a kitchen table, you need to decide on its dimensions. There are several factors to consider. The size of the table is directly influenced by the area of the kitchen and the place where it will be located. It should fit harmoniously into the kitchen, be spacious, not interfere with cooking, and fulfill its full function during the meal.
For a person to feel comfortable at the table, his personal space must be at least 70 cm, that is, there should be no one within a radius of 30 cm. For a family of four, a table measuring 90x90 cm or 100x100 cm would be optimal if it can be moved away from the wall or placed in the middle so that everyone has their own side.
If it is impossible to move the table, and the size of the kitchen does not allow installing the table in the middle, you can install a rectangular table with a side length of 120 cm, a short side of 70 or 85 cm. Two will sit on the long side, and two, one at a time, on the short sides.
If the size of the kitchen allows, then it is better to install a large dining table with dimensions of side length 160, 180 cm, short side - 90 cm. Such a table will be easy to sit on on ordinary days, and during events with guests it can accommodate 10-12 people.
For small kitchens for entertaining guests, a transforming or sliding table will come to the rescue. Such furniture has inserts with a width of 40 to 50 cm, which are inserted into the middle of the table. There can be up to three inserts; they are usually hidden under the tabletop. The length of the sliding structure can reach 280 cm, when folded – 180 cm.
The height of the table depends on the size of the people sitting at it: height and build. They are usually made with a height of 700 mm, but options from 60 to 80 cm are possible. When choosing a table, you need to take into account its location. When the housewife moves around the kitchen, she should not be disturbed by those sitting at the table.
What role do the legs and their number play?
When deciding on the size of the table, you should pay attention to the type and number of legs. There may be different numbers of them:
- One massive leg is suitable for products not large sizes. More often these are tables for gazebos, children's, and small-sized kitchens. For stability, they make a reliable cross-shaped harness that can cope with heavy loads.
- Two massive legs are used for oval and rectangular tables. They are installed at the optimal distance from each other. Usually such legs are narrow at the top and widen towards the bottom. They are convenient because people sitting at the table do not collide with their legs.
- The most popular is a rectangular dining table with four legs. This is convenient for a folding version. No need to invent any complex structures and make specific calculations. The table is quite stable and reliable if the length and dimensions of the legs are correctly calculated. They should be the same so that the table does not wobble or warp during use.
The legs for the table can be tightly fastened to the drawers, or they can be detachable. The second option is convenient for storing and transporting the product. In this case, the tabletop must be reliable. True, the design of a table with detachable legs is more complicated.
Choosing a tree - characteristics of the species
Currently there are many building materials, from which you can build kitchen table. But the most affordable and reliable option is wood. A person with minimal carpentry experience can make a wooden kitchen table with their own hands. It is important to choose the right tree that is suitable for this.
The choice of material for the countertop determines its durability, resistance to mechanical damage and rotting.
Wood varies in density and can be soft, hard or very hard. Softwood countertops may leave scratches and marks, although this depends on how the table is used. Hard rocks are more difficult to process.
Softwoods are often used: spruce, poplar, alder, pine, fir, cedar, juniper, horse chestnut. Hardwoods are: birch, oak, fruit trees (plum, apple, quince), walnut, elm, ash, maple. The hardest varieties include: yew, dogwood, acacia, boxwood, iron (stone) birch.

The best option for the kitchen is oak. It is durable, strong, easy to process, varnished, resistant to rotting and deformation, ideal for wet rooms. Larch has healing properties, but since it has to be treated with protective substances, it releases healing phytoncides to a lesser extent. Juniper is not used because there is little of it left in nature. Horse chestnut is used for landscaping.
It is best to use walnut, pine, oak, wenge for the tabletop, birch for the legs, boxwood and acacia for the dowels. Tabletops can be made from laminated chipboard, plywood, MDF. The ends of these materials are covered with melamine film or special PVC. These materials are less strong and durable, are not as environmentally friendly as solid wood, but are easy to process and have a low cost.
Table models - types and configurations
By design, there are four types of kitchen tables that you can make yourself: regular, folding, sliding and prefabricated.
A regular table can be oval, rectangular or round. This is the simplest option in terms of design, but the technology for its manufacture is not so simple. There are many nuances associated with the ability to use carpentry tools. It is necessary not only to assemble the product correctly, but also to decorate it beautifully. The crucial step is varnishing.
Round tables are suitable for large kitchens and living rooms, they are located in the center of the room. The main problem is that they take up more space. You can’t put them against the wall, since in order to sit at a round table you need free space. The round shape of the tabletop makes it possible to vary the number of legs: there can be one, two, three or four. The option with two legs is not suitable, since this design is not stable. Can be installed round table and in a small kitchen, then the countertop should be no more than 90 cm.
For compact kitchens, a small one is suitable oval table, which can be conveniently placed in a soft kitchen corner. A more common option is a medium or large table that fits well in the average apartment. At the same time, quite a lot of people can sit behind him. If the dimensions of the room do not allow you to install a large oval table, you can resort to sliding version. When folded, it can even have a round shape.
A transforming table is most often a compact bedside table that can be placed against the wall. They take up no more than 60 cm. The unfolded table can accommodate from 10 to 15 people. To make a transforming table you will need special tools and the ability to use them. Therefore, it is difficult to make it yourself.

The most simple option homemade table is a book-table. It is easier to make it from laminated chipboard, the sawing of which can be ordered at a special factory. You can assemble a table yourself from ready-made parts. The tabletop parts are attached using hinges. You can use wood as the manufacturing material, but this will complicate the process.
The sliding version is also easy to manufacture. A special feature of this table is that its dimensions are increased by inserting an additional panel into the middle of the tabletop. To do this, you need to move the two halves of the tabletop apart and insert a panel between them. The parts are connected using wooden tongues. Sliding mechanisms can have different designs. Older models did not have roller guides or full rollback, so you had to make an effort to push the tabletop apart, as the wooden parts rubbed against each other.
IN modern models a special mechanism is used to ensure the rollout of parts without damaging wooden surfaces. The simplest version of the mechanism is two metal guides, which can be used as furniture slides for drawers. Additional sections are folded and stored under the tabletop. To fix them, you can make special fasteners.
In factory sliding tables additional sections connected by hinges fold and hide under the tabletop thanks to a special mechanism. For this purpose, the table is provided with an additional false tabletop, which has a hole in the middle.
A folding table is a tabletop with a pair of folding legs, which is attached with hinges to a wall or furniture. The greatest difficulty is in making the folding legs. Although there is ready-made options such legs that can be purchased in stores that sell furniture fittings.
Organization of the workplace - selection of materials and tools
For carpentry work, you need to choose a special room, since a lot of dust and debris is generated during work. Wood requires treatment with special protective substances that emit harmful fumes, so the room should be well ventilated, it is better to organize a forced operation. You can work in a garage, but the presence of sawdust and dust is not in the best possible way will affect the car. The best option- barn. If it doesn’t exist, then you can build it - it will be useful in economic activities in the future.
Having found a room, you need to prepare the necessary carpentry tools and related materials:
- plane;
- hacksaw;
- drill;
- jigsaw;
- fastening tool;
- carpenter's hammer;
- mallet;
- chisel;
- bit;
- milling machine;
- grinding machine;
- sandpaper;
- paint brush;
- wooden boards;
- corners;
In addition to carpentry tools, it is necessary to prepare measuring instruments: a ruler, a square, a pencil or marker, and a construction tape.
To produce a tabletop, you need to prepare a furniture slab with a thickness of 4 to 5 cm, a width of 60 to 80 cm. The length is selected based on personal preference, usually it ranges from 120 to 140 cm. If a solid slab for the tabletop could not be found, it can be replaced with a set boards The boards need to be glued together or connected in another way.
For the legs you need to prepare a square beam. Most suitable timber size 60x60 cm or 70x70 cm. You can purchase ready-made figured legs in specialized stores. To add rigidity to the structure, you need to purchase a beam with a cross-section of 40x40 cm and a length equal to the size of the tabletop around the perimeter.

You can protect wood from rotting for its entire service life by treating it with a water-polymer emulsion (WPE). The parts need to be processed twice with a break of 3-5 days. After VPE treatment, even birch plywood does not delaminate and becomes suitable for front panels.
Acrylic varnishes are replacing nitrocellulose varnishes for furniture. water based, which are safer to use and have best characteristics. This also applies to glue. PVA is gradually replacing wood glue and BF-2. True, it must be applied to both touching sides and left connected under pressure for 1-3 days before sawing, but for use at home this is acceptable.
Furniture pieces can be protected in advance and tinted with stain or painted with special paints with a varnish base or non-painting oil and water-based varnish dyes. A starter of varnish and paint is prepared in advance, stored in a tightly closed container, and then added to the varnish until the desired tone is obtained. Mix colored varnishes on oil paints and NC according to the rules for mixing paints for painting. Acrylic paints can be mixed without restrictions.
Start of work - drawings, preparation of parts
Before you start making your own dining table, you need to carefully consider what it will be like: shape, size, design, technological solutions. At the design stage, the appearance of the table and the degree of its convenience are determined. It should fit harmoniously into the kitchen space, not interfere with the movement of people, and fully fulfill its main function - accommodating people for meals.
Before making a table, you need to draw a sketch and create a diagram according to which the components will be assembled. You can use ready-made options, choose the most suitable one and be guided by it. But if you want to show your imagination, you can create your own individual sketch, make the appropriate calculations and diagrams. It is important to avoid errors in calculations in order to obtain a reliable, durable and stable structure.
Below are ready-made drawings with dimensions.

During the manufacturing process, any wooden structure you need to prepare the details. To do this you need to do the following:
- Preparing the canvas. It needs to be sanded, cleaned, processed antiseptics and antipyrines to protect against moisture, fire and rot.
- If wood cuts are used for the table, they must have optimal humidity. They should be reviewed carefully before use. If there are cracks, they must be carefully repaired.
- The main details of the table: tabletop, legs and stopper are transferred from the sketch to the canvas and then cut out.
- The parts that are intended for the support legs and slats are made 3 cm shorter. On the legs you need to make horizontal cuts on each side. Processing depends on the type of attachment of the legs to the tabletop.
When all the elements are ready, you can start assembling the table. If a more complex design is provided, then additional parts and mechanisms need to be prepared.
We fasten the legs in pairs using short jumpers. To do this, drill two inclined holes on the inside of the crossbars. When drilling, you need to be careful not to damage the legs. We fasten the structure with self-tapping screws, screwing them through the legs and bars. Then we fasten the legs with long jumpers. We also twist the elements using self-tapping screws. It is better to fasten the legs to the tabletop with bolts, having drilled the corresponding holes in advance.
Making the main element of the table - the tabletop
Particular attention should be paid to the main element of the table - the tabletop. It must be reliable and durable. The reinforcing bar should be installed exactly according to the markings, taking into account the location of the legs.
The best option is to buy a ready-made postforming countertop. Manufacturers offer slabs with a wide selection of textures, sizes and colors. Postforming is a profiled laminated particle board with rounded ribs. The advantages of using such a stove for the kitchen are as follows:
- High wear resistance, resistance to mechanical damage and high temperatures.
- The postforming countertop has a drip tray where dirt collects and is easy to remove. This ensures high hygiene.
- There is no need to edge the slab, which is a labor-intensive process.
- Ease of processing. If it is necessary to saw post-forming, it is processed in the same way as wood or chipboard.
- Thanks to the rounded ribs, mechanical stresses are distributed evenly across the entire tabletop, which is important if the table is made with a load-bearing tabletop.
The use of postforming simplifies and speeds up the manufacture of a table, but solid wood or furniture panel looks more solid.

If you were unable to purchase a ready-made tabletop, you can make a typesetting one yourself. To do this you will need a long jointer and hand cutter. It is better, of course, to carry out processing on milling and jointing machines. If the necessary tools are not available, parts can be ordered from a carpentry workshop, providing exact dimensions.
Making a countertop consists of the following steps:
- 1. Prepared boards must be adjusted to the required size so that they are the same width and length.
- 2. Next, we lay out the boards on the work surface like brickwork: the middle of each board was at the junction of the previous ones.
- 3. When the material has been laid out, you can begin making the tabletop. The mating surfaces should be well processed and polished. Then we glue the rows of boards together using wood glue or PVA and three clamps. You can glue up to 6 rows at a time. Leave the workpieces until completely dry.
- 4. Then we remove the unevenness using a plane and sand the surfaces with medium and fine-grained sandpaper. We chamfer and round the corners.
An interesting option for a countertop decorated with furniture tiles or a solid block. To do this, using manual milling or a chisel, a cavity is made with a depth equal to the thickness of the tile. Along the perimeter of the tabletop you need to leave a side with a height of about 50-10 mm. The tiles are glued to the prepared surface with glue. To make the structure stronger, a block is attached to the perimeter with self-tapping screws.
Assembling a table from a tabletop, legs and lintels
Below is the assembly of a simple kitchen table with a countertop, the manufacture of which is described above. In addition to the tabletop, you need to make 4 parts for the legs.

In each manufactured element we drill holes into which fastening bolts will be inserted. The holes on the vertical and horizontal parts of the supports must coincide exactly with each other so that they can be bolted together. To make supports, you can use plywood or OSB about 16 cm thick.
To make the structure durable, we install a jumper between the legs; it will prevent them from moving apart. The lintel can be made from the same material from which the countertop was made. There is no need to fix it at first. This can be done when the table is completely assembled by tightening one screw at each end vertical support. Next, we install the brackets for the legs and additionally fasten the tabletop with bars. For better aesthetics, brackets can also be made from OSB or plywood.
To give the table a massive appearance, we install a frame to cover the tabletop with a frame. To do this, we attach the rail around the perimeter, screwing it with self-tapping screws. In the slats, we first drill holes for furniture dowels (chops) at a distance of 30 cm from each other. When the slats are screwed, insert dowels into the holes around the perimeter of the tabletop. We decorate the tabletop around the perimeter with a solid wood strip, the thickness of which should be about 3 cm. It is placed on dowels, having previously applied glue to the contacting sides. Next, we turn the finished tabletop over and attach the legs to it, which we fix with bolts.
After complete assembly, all fasteners should be checked. There should be no play anywhere.
The advantage of such a prefabricated structure is that it is easy to disassemble and reassemble. This is convenient when updating the table. Having disassembled the table, you can remove the old coating from each part, sand it and re-varnish or paint it.
Bringing the external beauty of the table - finishing
All wooden parts that will be used to assemble the table must be carefully sanded and polished to ensure a perfectly smooth surface. This makes it possible to emphasize the natural beauty and texture. To make a dining table, you need to take high-quality wood that can withstand the load. If the wood has defects, they can be leveled, puttied and decorated with acrylic paint.

When the table is fully assembled, you need to give it a beautiful appearance. This is achieved by covering it with stain and varnish, and the more layers of varnish applied, the more beautiful it will look. wooden product. Varnishes serve additional protection For wooden parts from mechanical damage and premature aging, allowing you to extend the service life of the product.
Paintwork work is carried out in stages. Before applying varnish or paint, the work surface must be cleaned of dust and dirt. Then stain or varnish is applied. By adding dyes, the varnish can be given a certain shade. Dry the wood after varnishing at room temperature.
The table can be painted by first treating it with a primer. The choice of color depends on personal preference. It is important that the kitchen table is in harmony with the overall decor. It is better to choose water-based paint; it dries well and is almost odorless.
To wooden furniture It served for a long time and had a beautiful appearance, it needs to be looked after. Furniture with a polished or varnished surface requires more careful care, as scratches can easily appear on it. Such furniture does not tolerate contact with hot temperatures. For maintenance, universal polishing compounds are used. Countertops made of chipboard and MDF with plastic coating can only be washed with detergents.
A dining table made with your own hands can become the pride of the owner, since he puts his soul into making it. In a company sitting at such a table, a sincere and warm atmosphere is created.
The table is an integral attribute of the kitchen interior. At the same time, it must not only combine style, beauty and comfort, but also be quite reliable. And what could be more reliable and durable than natural wood? The problem is that high-quality wooden furniture is not cheap, so not everyone can buy it for their kitchen. However, do not despair, because making a wooden table with your own hands is a completely doable task for a person who is able to distinguish a screw from a nail and knows how to use a drill, jigsaw and sanding machine.
The choice of kitchen table design depends on several factors, such as the size of the kitchen, the number of occupants and interior design. If you look at the options offered by furniture manufacturers, among the variety of designs we can distinguish three categories:
- medium sized tables for 4-6 people;
- oversized tables for a large family or entertaining guests;
- practical folding tables for small kitchens.
A table in the kitchen should combine three qualities: aesthetics, convenience and practicality.
To make a kitchen table with your own hands, you need to have on hand a drawing of the product, the necessary set of tools and at least some skills in working with wood. Below are design options for standard, large and small kitchens with photo instructions and a detailed description of each stage of making a wooden table.
Rectangular dining table on balusters
A rectangular design with a standard size of 1200x600mm is considered the most popular due to its practicality. This table can comfortably accommodate a family of 4 people. In addition, it can be installed either in the center of the kitchen (if space allows) or placed close to the wall in order to save free space.
Schematic drawing
In order to make the wooden table more attractive, we will use balusters instead of straight legs. If you don’t have a lathe at hand, then such legs can be ordered separately at the nearest furniture workshop.
For your information! Balusters are shaped pillars that are primarily found on the railings of stairs, balconies and roofs. However, the use of these elements in the manufacture of kitchen tables is also far from uncommon.

Drawing of a rectangular table on balusters
To assemble the product you will need the following materials and tools:
- 4 ready-made baluster legs 720 mm high;
- furniture board 30 mm thick for table top;
- board 20x100mm for the frame;
- wood screws about 30 mm long;
- drill (screwdriver);
- a circular saw;
- sander;
- sandpaper of different grain sizes;
- building level;
- square;
- roulette;
- wood glue
Step-by-step assembly instructions
A kitchen table made of wood on balusters is made with your own hands in the following sequence:
- We prepare the cross members of the frame. To do this, we cut a 100 mm board into 4 parts (2 x 400 mm, 2 x 1000 mm), after which we remove the burrs and bring the surface to a smooth state using sandpaper or a sanding machine.

- We take the balusters and connect them in pairs with short crossbars (400 mm), making a small indent from the edge of the leg (about 15 mm). Fastening is carried out using glue and screws, which are twisted at an angle from the inside of the board.
Advice! To prevent cracks from appearing, it is better to pre-make holes for the screws.

Attaching short crossbars to legs
- We connect the finished pairs of legs with long crossbars (1000 mm). The fastening algorithm is the same as in the previous stage.

The final stage of installing the table frame
- After we have made the frame of the wooden table with our own hands, we move on to the tabletop. If it comes to the kitchen, then it is better to purchase a ready-made furniture panel. Although for a gazebo or cottage, where the requirements for the appearance of the tabletop are not so stringent, it can be assembled from tongue-and-groove boards.

Furniture panel for table top
- The finished tabletop must be connected to the frame. To do this, lay it face down on a flat and clean surface, and evenly place the base with legs on top. The crossbars are fastened to the tabletop using screws according to the same principle as described in paragraph 2. However, in this case you need to be extremely careful not to drill through the countertop.

- At this point, making a kitchen table with your own hands can be considered almost complete. The last stage is characterized by the process of polishing the surface, as well as applying stain or varnish, the color of which is selected to match the interior of the kitchen.
Note! The number of layers of varnish depends on the type of wood. Hardwoods, such as oak or hornbeam, absorb varnish poorly, so in this case 1-2 layers are enough. But for pine or spruce you will need at least 3 layers of coating.

Wooden dining table with balusters
Wooden table for a large family
A large table, at which you can dine with a large family or arrange a feast by inviting friends, must have a reliable design. The usual four legs are usually not enough to support a heavy tabletop. Therefore we have to accept additional measures to strengthen the frame.
Product design
IN in this example Let's look at how to make a large wooden table for the kitchen with your own hands, measuring 2337x978 mm (of course, minor deviations in one direction or another are allowed).

Drawing large table made of wood
Before starting work, you should prepare lumber for:
- load-bearing frame(38x90 mm);
- countertops (38x140 mm);
- support strips (19x64 mm).
You will also need the following tools:
- a circular saw;
- jigsaw;
- drill;
- screws (4x65 mm);
- drills (3 mm);
- furniture glue;
- pencil, tape measure, sandpaper.
Manufacturing stages
To make the table reliable and have an attractive appearance, you need to approach each stage responsibly. So let's get started:
- Using purchased lumber, we make parts for the future wooden table with our own hands:
- 2 upper cross beams (38x90x978 mm);
- 4 legs (38x90x695 mm);
- 2 bowstrings (38x90x921 mm);
- 1 longitudinal lower beam (38x90x1575 mm);
- 1 longitudinal upper beam (38x90x1473 mm);
- 2 braces (38x90x772 mm);
- 7 blanks for the tabletop (38x90x2337);
- 6 support strips (19x64x432 mm).
We carefully grind all parts, achieving an absolutely smooth surface without burrs.
Important! Sanding quality wooden surface depends on the correct grit size of the sandpaper. For primary grinding, the grain size should not be larger than 200 microns. Final processing is carried out with finer-grained sandpaper - 80-100 microns for soft wood and 50-63 microns for hard wood.
- We fasten the legs together in pairs using transverse beams (above) and bowstrings (below). We use two screws for each connection.

- Using a longitudinal lower beam, we connect two strings together.

Attaching the lower cross beam
- We strengthen the structure using the upper transverse beam.
Advice! In order for the beam to reliably connect the two halves, in addition to screws, additional wooden dowels with a diameter of 10 mm should be used.
- We cut the ends of the blanks for the braces at an angle of 45 degrees. After this, we attach both braces to the upper and lower transverse beams.

Attaching the upper cross beam

- We connect the wooden boards intended for the tabletop to the transverse beams on the inside of the structure.

- Additionally, we strengthen the tabletop with support strips. Make sure that they do not extend beyond the dimensions of the table.

Strengthening the structure with support strips
- If desired, you can make semicircular corners in your wooden kitchen table, which will give the product a more elegant look.

This option is suitable for both large kitchen or a dining room, or for a summer residence
Folding wooden table for a small kitchen
If there is not enough space in the kitchen to place a large or medium-sized table, then you should look for a more original approach. One such solution is a folding table, which is attached to the wall and can be easily removed, freeing up occupied space.
Materials and tools
To make a folding wooden table for the kitchen with your own hands, you will need the following:
- furniture board 30 mm thick;
- wooden beam 20x60 mm;
- loops (6 pcs.);
- corner lamella (2 pcs.);
- wooden dowels;
- dowels;
- screws;
- drill;
- jigsaw;
- sanding machine or sandpaper;
- glue;
Assembly: step by step
Advice! Before you begin, decide on the location where the table will be installed. Since the structure is attached to the wall, it is very important to take into account all the features of the future kitchen interior, so that you do not have to rearrange it later, leaving unsightly dowel holes in a visible place.
Steps to assemble a kitchen table with your own hands:
- We prepare the parts for the folding legs. To do this, we cut the wooden beam into 8 parts: 4 720 mm long, 4 320 mm long. We sand each element, removing burrs.

- We assemble two rectangular frames. The slats are connected to each other using furniture dowels, for which it is first necessary to drill blind holes with a diameter of 8 mm.

- We connect the finished frames with hinges. In addition, it is also necessary to attach a narrow strip to one frame using hinges, which will be attached to the wall.

- We fix the frame to the wall using dowels, after which we install corner slats on the sides. It is important to arrange the slats in such a way that they do not interfere with the folding of the legs.
Advice! Instead of corner slats, you can use any furniture corners of the appropriate size, matched to the color of the table.

Fastening the structure to the wall
- From wooden shield cut out a tabletop measuring 900x600 mm. For a more impressive look, the corners can be rounded. After this, all ends should be sanded using a machine.
- We “separate” a piece 250 mm long from the tabletop, which will be attached to the wall structure. The two parts are connected to each other by means of hinges.


- We install the 250 mm part on the corner slats and connect the elements with screws.

The final stage of installing a folding table in the kitchen with your own hands
- You can refine the table at your discretion by applying stain, varnish or paint. But even in its original form, such a product looks very good.

Wooden folding table – original solution for a small kitchen
On the Internet you can find a lot of options on how to make a wooden table with your own hands. We looked at the three simplest solutions for standard, large and small-sized kitchens, the production of which is quite economical and does not require specialized machines or extensive experience in working with wood. To manufacture more complex structures, we recommend seeking help from specialists.
Finally, watch a video that shows how to make old wooden planks You can make a pretty decent kitchen table.
Video: DIY wooden table
Even if furniture making is far from your area of expertise, making a country table with your own hands to gather with family and friends on warm summer evenings is quite a feasible task.
Its main advantage, as opposed to a purchased one, is its undoubted savings. It is not necessary to make a table from scratch: simply by assembling purchased parts, you will save 30-50% of the cost. If you manage to use materials left over from construction or renovation, the costs will be limited to the purchase of fittings.
To choose a design, you need to decide where the product will be used.
By using cheap, substandard boards for your country or kitchen table, you will get benefits that are not available for mass production. Sounds dubious? But this is true: the knots that cause boards to be rejected have interesting decorative properties. If you can successfully highlight them, you will become the author of a completely unique design product that would be a shame to leave in the garden in the rain.

Making a country table with your own hands to gather with family and friends on warm summer evenings is quite a feasible task.
To choose a design, you need to decide where the product will be used: on a grassy lawn under a tree, to complement a gazebo, to stand in a workshop or in a house.
The simplest country table can be assembled in a few hours with a minimum of materials, but it will not last long. To get a product that will be truly pleasant to use, you need to carefully prepare the boards and perform all technical operations at each stage with high quality.

Its main advantage, as opposed to a purchased one, is its undoubted savings.
If you find a large stump in the forest, it can be easy to make garden table. All you need to do is remove the bark from the stump, make an even cut along the top, sand it, treat it with an antiseptic and varnish it. It is enough to nail or screw the finished furniture panel to the “leg” of the stump - and you’re done.
Tabletops made from boards fastened at the bottom with transverse slats look good. If you prefer a glued tabletop, you can make it yourself, but it will require a lot of effort.

If you can successfully highlight them, you will become the author of a completely unique design product that would be a shame to leave in the garden in the rain.
It is difficult for a novice master to fasten the legs securely, so try to choose a design, correctly assessing your skills and taking into account the cost of labor and time. The easiest way to make cross-shaped and L-shaped legs. To attach straight legs, you need to carefully connect the parts.
One of the most cozy options for the garden - a collapsible table with benches, which can be installed in a gazebo or on the veranda. It’s not difficult to do, the main thing is to choose quality materials and properly prepare them for work.

The simplest country table can be assembled in a few hours with a minimum of materials, but it will not last long.
How to choose a tree?
Wood of many species is suitable for a garden or kitchen table, both soft (pine, spruce, cedar, fir) and hard (oak, birch, ash, walnut, maple, apple, pear, acacia, etc.) The exception is too soft species wood (poplar, alder, aspen, willow).
One of the main parameters of the suitability of wood for making furniture is resistance to rotting: the species listed above meet this requirement.
If you do not plan to do furniture work on a regular basis or are just starting to practice, give preference to the most common types of wood - pine and birch.

Tabletops made from boards fastened at the bottom with transverse slats look good.
Wood can be used for the tabletop, frame and legs different breeds. At the assembly stage you will need dowels: they are usually made of acacia or boxwood. Birch wood has an inexpressive pattern and can be significantly warped due to spilled liquid - it is better not to use it as a tabletop material, but due to the hardness of this species, it can be used to make legs.
It is better to make the tabletop from oak or pine. If you know how to brush wood, the surface of your kitchen table can become a real work of art. Soft types of wood can be brushed: the wood is fired gas burner, and soft fibers are removed with a wire brush. It is better to carry out work in the yard due to the large amount of dust. If you managed to burn the wood evenly, you will be pleased with the result. Brush can be tinted with stains, stains, artistic paint diluted with water acrylic paint. Of course, brushing the wood is not necessary: it is only a finishing option.

If you prefer a glued tabletop, you can make it yourself, but it will require a lot of effort.
Selection of paints and adhesives
Before installation begins, the boards must be protected from rotting. The tree must be impregnated with water-polymer emulsion (WPE): treatment is carried out twice with an interval of 3-5 days. This is enough for the product to last a long time.
Some models will require glue. Along with special carpentry adhesives (BF-2, etc.), you can use construction PVA: it is applied to both surfaces to be glued, dried until tack-free, then the parts are connected and kept under pressure for up to three days.

It is difficult for a novice master to fasten the legs securely, so try to choose a design, correctly assessing your skills and taking into account the cost of labor and time.
The choice of paint and varnish materials is determined by where the product is planned to be used: in the yard or indoors. For garden table which is inevitably exposed to precipitation, alkyd, alkyd-urethane, nitrocellulose varnishes and oil paints are suitable. For the kitchen table, as for any furniture that is constantly located indoors, it is better to use acrylic paints and varnishes: they are more environmentally friendly and do not have a strong odor. Varnishes marked with the “blue angel” sign are recommended for children's furniture and toys.
If you decide to cover the wood with stain, paint or simply tinted varnish, this must be done before assembly. Material compatibility must be taken into account. The varnish is tinted with a paint of a suitable composition: if the varnish is alkyd, the paint should be oil-based; if you use acrylic varnish, it can only be tinted with acrylic paint. First, a small amount of varnish is thoroughly mixed in a separate container with paint, and then the resulting mixture is added to a larger volume of varnish.

One of the most comfortable options for the garden is a collapsible table with benches, which can be installed in a gazebo or on the veranda.
What tools are needed
To work you will need:
- hacksaw,
- circular saw or jigsaw;
- drill;
- screwdriver;
- hammer (if you decide to use nails).

Many species of wood are suitable for a garden or kitchen table.
This list includes only the most necessary tools, but to make the work more comfortable and the finished product to look aesthetically pleasing, it is advisable to buy or rent a rotary miter box, an eccentric sander and a milling machine.
The rotating miter box makes it possible to make cuts at exactly the right angle. An eccentric sander will allow you to prepare parts simply, quickly and efficiently: you will sand the boards in an hour, instead of doing it all day by hand with sandpaper. For high-quality processing of the ends, a belt sander is useful, and a milling machine allows you to select wood for the required grooves and process the edges.

If you do not plan to do furniture work permanently or are just starting to practice.
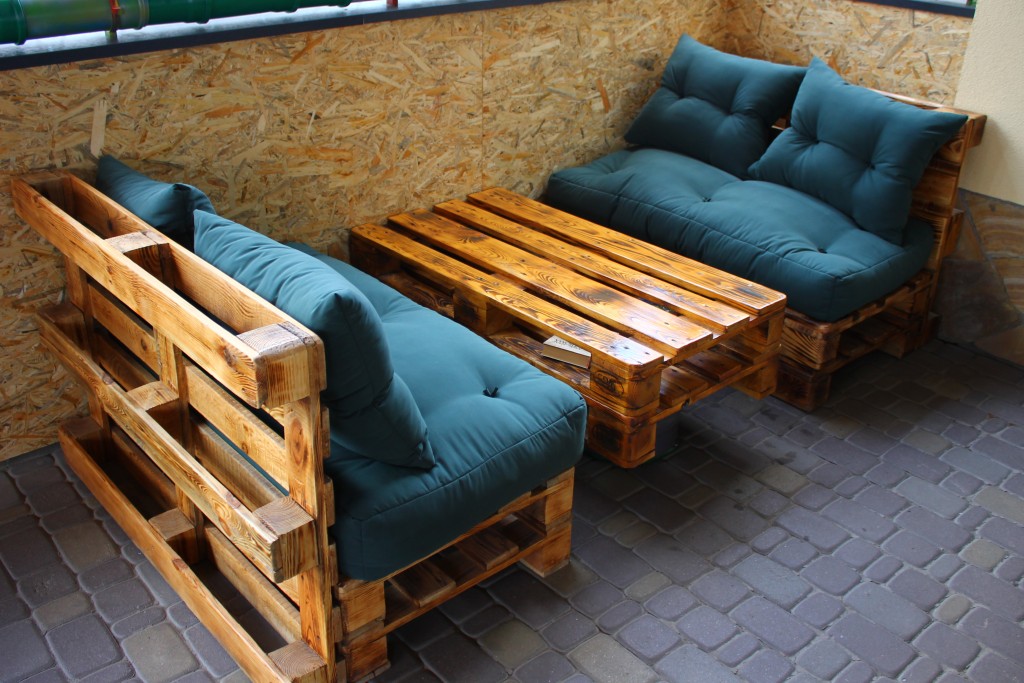
Homemade table from pallets
A spectacular table in a rustic style can be constructed from pallets ( wooden pallets). If you are the happy owner of such a container, especially a double-deck pallet, just disassemble it: there is no problem purchasing boards!
Do you think that buying new boards is always better? You probably haven’t worked with wood before: you can’t use raw wood (the product will become deformed after a few months), and dry boards are much more expensive. To dry raw wood boards, they are stacked in a well-ventilated area: this necessary process will delay your project by 4-6 months! Not a bad option The already mentioned rejected boards, also dry, can be used for the kitchen table.

It is possible to use different types of wood for the table top, frame and legs.
Let's return to the pallets: they are disassembled. Now you have at your disposal strong boards with different patterns and colors, it is possible that they are from trees of different species. These features should not be considered as disadvantages: they will add zest to the product: you just need to create an interesting composition from them, alternating boards of a similar shade.
From the side parts of the pallet you will get excellent frame, and the remaining strips will be used to assemble the tabletop.

It is better to carry out work in the yard due to the large amount of dust.
To make the legs, you will need a beam at least 5 cm thick. All parts must be prepared: sand strictly along the grain with sandpaper, first coarse (No120-150), then finer grain (No400-600), carefully removing dust.
Some boards can be painted with acrylic or oil paint. Fans of the loft style can use stencils in the form of numbers or simple graphic symbols. We stain boards with a beautiful natural pattern or simply varnish them. After staining or first layer acrylic varnish soft fibers rise; They need to be sanded with medium-grit sandpaper and a new coat of varnish applied.

A spectacular table in a rustic style can be constructed from pallets (wooden pallets).
If a non-aqueous varnish is used, it is enough to apply 2-3 layers, and if acrylic, the number of layers can reach up to ten.
Rejected boards, also dry, can be a good option for a kitchen table.
We fasten the tabletop boards with strips, which we place at the joints of the boards. Using a drill, screwdriver and self-tapping screws, we fasten the boards to the planks (we use two self-tapping screws at the joints, and one on solid boards). The use of a drill is necessary so that when screwing in the screws the wood does not crack. We assemble the frame from the prepared pallet sides. Using a drill of a diameter suitable for self-tapping screws, we drill holes at the joints. We coat the joints with glue and fix them with self-tapping screws. We install the legs: simply screw the boards to the frame, screwing in the screws diagonally. To strengthen the structure, we make jumpers at the bottom in a similar way.

To make the legs, you will need a beam at least 5 cm thick.
Wooden table with glued top
For a glued tabletop, you need to select boards of the same width. If the table is intended for a workshop and its appearance does not have of great importance, you can use old floorboards: there are already grooves there. To make the grooves yourself, you will need a milling machine.
A flat surface is required to assemble the tabletop. We simply coat the sides with glue, join the boards together without gaps and tighten the resulting structure with clamps. Depending on the glue used, the tabletop should dry from 1 to 3 days. If everything is done correctly, you will get a tabletop with a completely smooth surface without cracks. All that remains is to work on the ends - first trim them with a jigsaw and then sand them. If you do not have a belt sander, this must be done manually - with sandpaper, first coarse, then medium-grit.

After varnishing the parts, you can proceed to installation, which consists of several stages.
If you don’t want to bother with glue and clamps, you can use a ready-made furniture panel made from hardware store. Then the tabletop remains to be covered with transparent or tinted varnish.
For good result you need to apply 5-7 (for acrylic varnish up to 10) layers. After every third layer, the working surface of the tabletop should be sanded with fine-grained sandpaper, carefully removing dust with a damp cloth. At the varnishing stage, it is important not to rush: each layer of varnish must dry thoroughly.
All that remains is to make the legs of the garden or kitchen table: let’s focus on the option with L-shaped legs. You will need boards with a thickness of at least 22-25 mm.

For a glued tabletop, you need to select boards of the same width.
L-shaped legs consist of two parts connected at an angle of 90. It is necessary to make a sample on the boards to be joined, coat the joint with wood glue, and then install self-tapping screws.
When the glue has dried, we coat the legs with varnish and, after drying, simply attach them to the tabletop with self-tapping screws.

There are several options for connecting the legs to the tabletop.
Table with straight legs
To make straight legs, just saw thick timber into pieces of equal length. There are several options for connecting such legs to the tabletop.
To ensure that straight legs are installed securely, you can use a dowel connection at home. You can make them yourself from acacia wood or buy ready-made ones. To assemble dowel joints you need quick-drying wood glue (BF-2).

To make straight legs, just cut a thick beam into pieces of equal length.
Table with X-shaped legs
Sequence of work.
- On the inside of the tabletop we attach two strips on each side with self-tapping screws.
- To make the table look good, the edges of the planks must first be cut at an angle of 52.
- We fasten the paired planks so that the legs fit, making overlaps of 2-3 mm on each side.
- We put the boards on flat surface, crossing them at the desired angle. We measure the distance between the ends of the boards: it should correspond to the width of the table.
- We outline the intersection with chalk: here you need to select half the thickness of the boards so that after assembly they lie in the same plane.
- We coat the recesses with glue and place the parts under the press for 1-3 days. For greater reliability, the connection can be strengthened with self-tapping screws.
- We varnish the legs.
- All that remains is to attach them to the tabletop, placing them in the grooves formed by the slats - and the table for your garden with your own hands is ready.

X-shaped legs are made from beams or boards with a thickness of at least 50 mm.
Table with benches
The optimal solution for a gazebo is a dining table with benches attached to it. It is better to make this design collapsible so that it can be stored indoors for the winter.
The table will require thick boards (from 32 mm), which need to be cut into pieces according to the drawing. In this version, two benches are attached to the table. When all the parts are cut, they need to be sanded, paying particular attention to Special attention ends. We varnish each board separately.

The optimal solution for a gazebo is a dining table with benches attached to it.
To connect the parts of the structure, we will prepare studs (length 160 mm), nuts and washers - 24 pcs. For other connections we use screws or nails of suitable length. Using a drill, you need to prepare all the holes for fastenings.
According to the drawing, we assemble the tabletop and the upper parts of the benches. We cut off the transverse slats along the edges, the angle should be 45. This is convenient to do with the help of a rotary miter box.
We make and fasten all the legs with self-tapping screws. We fasten the parts cut at an angle.

We varnish each board separately.
We tighten the product with studs and bolts. The holes for the studs must be pre-drilled with a drill. When installing the stud, you need to put washers on both sides and tighten the nuts using a wrench.

We tighten the product with studs and bolts.
We fasten the seat boards with gaps of 5 mm. When the seats are connected to the sawed-off supports, we attach them to the assembled base with 160 cm boards: you will need 4 boards.
Install the remaining studs and enjoy the result.

Using a drill, you need to prepare all the holes for fastenings.
VIDEO: Do-it-yourself wooden table for a gazebo
50 photo ideas: how to make this table with your own hands


Of course, today everyone has the opportunity to buy any furniture in the store, including a table. But why not make it yourself, with your own hands?
It's not as difficult as it might seem at first glance. In addition, you have the opportunity to make a table that will be ideal in size and appearance for the interior of your kitchen or other room.
In addition, home-made furniture is not only a money saver, but also a reason for pride, since not every man knows how to make something these days.
What types of tables are there?
If you decide to make boards yourself, then you need to figure out what types of tables there are and decide what exactly you need.
The simplest is a regular table with four legs, a table top and a frame. Making it will not be difficult even for those who are not experienced in woodworking.
If you are experienced enough in this matter, you can make the dining table round or oval, decorate it with carvings, paintings, or burn designs and patterns onto the surface.
A more complex option is made from boards. In essence, this is the same ordinary table, but quite thick and long crossbars are attached to its legs, on which seat boards are laid on top. This is how we get a table with benches on both sides. Similar furniture well suited both for the kitchen and for installation in the courtyard of a private house or cottage.
If the room only has free space in the corner, make a corner table that will fit perfectly into this unoccupied space. It may not be as comfortable to dine at as at a classic table, but you can put a TV, microwave or kettle on it - there will be enough space there.
 Another interesting option could be a window sill table.
In essence, this is the same window sill, but significantly expanded and adapted, for example, to serve as a comfortable workplace for a schoolchild.
The advantage of this solution is that the table will be well lit most of the day.
There is also a downside: sitting at such a table in winter, your feet will have to rest against a very warm, even hot radiator, which is not very convenient.
Materials and tools
 Buying everything you need to make a table with your own hands is quite simple and will not be difficult or costly. The main material for the dining table is wood, or more precisely:
- Boards from 25 to 50 millimeters thick, 100–150 millimeters wide, quite long.
The thicker the material for the table top, frame and legs, the heavier, but at the same time the more durable they will be.
Choose boards from good wood, without any defects. - Beam. It is necessary for making table legs, so choose fairly thick and strong samples. The timber can be replaced with the same boards, if you arrange them in the letter “L”, or use purchased aluminum table legs. You can also use balusters (curly carved wooden posts that support the railings on some stairs) as legs.
- Sheets of chipboard or plywood, which can be used as countertop materials. Choose samples that are thick and strong enough to withstand daily abuse.
 As with materials, And Do-it-yourself tools and fasteners are easy to obtain; most homes have them. If something is missing, you can buy it at the nearest hardware store.
- pencil, corner, roulette and ruler;
- jigsaw or hacksaw on wood;
- screwdriver with a set of attachments and drill;
- plane, if it is necessary to pre-treat the boards from unevenness and defects;
- kit self-tapping screws, furniture bolts and nuts;
- sandpaper or Sander;
- varnish or stain, roller or tassel for processing the finished table.
Attention! When working with a jigsaw, always remember the safety rules and keep small children or pets away!
Simple kitchen table made of planks
 First we need to make a tabletop.
There are several options here:
- Cut out the required size piece from a sheet of chipboard or plywood using a jigsaw;
- Lay several fairly wide boards and subsequently secure them to the frame;
- Take a large number of relatively narrow boards, place them side up and glue them together using wood glue.
The result is a fairly thick, heavy and durable tabletop.
Stages of work
Step 1. Assembling from boards table top.


Step 2. We make a frame from boards or their wooden bars. It can be made equal in size to the tabletop or with a slight indentation, approximately 2–2.5 centimeters on each side of the table. Having fastened the parts of the frame with screws, use them to connect the frame to the tabletop.
Step 3. After we With We put the frame and tabletop together, half of the table is already ready. All that remains is to make his legs. If you use timber for this, drill two holes in it for furniture bolts. Moreover, they can be made either on one side, one above the other, or on two different ones for more secure fastening to the frame.
Important! Carefully check the length of the table legs; they should not differ from each other. Otherwise, the table will not stand level and wobble. If you do not want it to spoil the floor material, attach rubber “boots” to the bottom of the legs.
Then make similar holes in the table frame and fasten the legs and frame with bolts and nuts. The legs can also be secured from above using screws, but over time this fastening may become loose.
 If you want to make table legs from boards, fold two boards in an “L” shape on the outer or inner corner of the frame and secure them with the same furniture bolts or screws.
To prevent the legs from becoming loose, connect the folded boards together in the lower and middle parts using screws or nails.
That's all, simple and reliable, made by yourself, ready!
Advice: Before you start, do simple drawing, preferably from several sides. Constantly check the dimensions of the parts. Some parts of the same size can be cut out at the same time if you secure the boards or beams with clamps.
Pallet table
 Wooden pallets are widely used in shops and warehouses as pallets for goods.
If you wish, you can get a few pieces for free and use them as a basis for making an original and unusual kitchen table.
If at least on one side the surface of the pallet is solid, then you no longer need to make a tabletop, it is ready.
You just need to process it and, if desired, round the corners.
Note! Since the pallets were originally intended for warehouses, no one sands and cleans them. Therefore, before making a table out of them, carefully sand them and remove all burrs. Irregularities and defects in the boards can be hidden using putty.
Stages of work
Step 1. Most pallets are open and there is quite a lot of space between the boards. distance, due to which the surface of the pallet can be used as table top not very convenient. There are two ways to solve this problem: either make boards appropriate size and secure with their screws between the pallet boards, or install a sheet on top plywood or chipboard.


Step 2. As for ordinary table, table legs from pallets can be made from timber or boards. The best thing fasten them with quite thick and strong pallet timber using nails, screws or furniture bolts.


To prevent the legs from becoming loose, connect them together with crossbars.


