A homemade rocking chair will cost many craftsmen less than a store-bought product. Self-made furniture will be of higher quality and more environmentally friendly; you can think through your own design and construction concept. A rocking chair will be a successful addition to the interior design of a room, a device that will calm you down, give you a good mood for work, and relax you. This product will also become indispensable when rocking a child. For the baby himself, such a chair is a real swing.
If a person has nothing to do with carpentry, then a natural question arises: how to make a rocking chair with your own hands? Initially, you should decide on the type of rocking chair; there are several of them. There are different types regarding design features:
- A rocking chair that has radius runners. This model is classic and most popular. It has a low landing, since on rounded “radii” it is very difficult to maintain balance when swinging.
- Chair with runners of variable curvature. In this case, the “radii” do not represent part of the roundness, which means the swing can have a large amplitude. IN in this case use will be safer and more comfortable.
- Armchair nirvana. There are two subtypes: elliptical and spring. The first is considered unsafe, as capsizing often occurs, but the swing is soft and smooth. Spring models are more suitable for widespread use, but making a rocking chair with your own hands such an upgrade requires skill and experience.
- Rocking chairs 3 in 1. All three modes are presented here: chair, rocking chair, lounger. Depending on the degree of reclining of the structure, the position of the body is determined. Multifunctional furniture, but large in size.
The presented design options can be made from almost any material: wood, metal, wicker, rattan. The seat can be hard, soft or a combination. Materials can be combined, and in some models it is even necessary. Thanks to photos on the Internet, you can choose the model of the product you like.
Wicker model
Making furniture from wicker or rattan with your own hands is quite difficult. Rattan is an expensive material, but a product made from it has a long service life, and the body is more resistant to mechanical stress. The same cannot be said about the vine, but it is more accessible and pliable to work with.
To create original wicker furniture, you can watch the master class. Such instructions will be quite sufficient to implement the project. First, the material is prepared:
1. Rattan cannot be collected by yourself - it is a tough vine that grows in certain areas of America. The vine is harvested independently: branches are collected throughout the year. Length and thickness may vary. When the vine is collected, it is placed vertically outside to dry.
2. Processing of rods involves stripping. The branches are placed in a bath of warm water, where the material should spend about 12 hours. The branches will become elastic. When each twig bends well, you can remove the bark from them.
3. To continue working, you need to give each element the appropriate form. Thick branches are fixed in clamps in the appropriate position, and thin branches are divided into several parts, called shreds, using a splitter.
4. Each shank must be passed through a press so that they become flat and suitable for weaving.
5. The prepared vine is placed in a dryer for three days, where the shape of each element of the future product is permanently fixed. Only from such a vine can a rocking chair be made.
The next stage will be the manufacturing itself:
1. First, a frame is made from thick branches or wooden planks. The sizes are determined independently. All parts are fixed with nails or wire. The item is placed in the dryer for several days.
 The frame is being made
 2. Braiding consists of covering the back and seat with tires. Furniture glue is applied to the body, which will serve additional connection. The shanks themselves braid the sheathing rods in a checkerboard pattern.
 We braid the back and seat
 3. When the body is ready, the runners are attached and the product is tested. The chair needs to be slightly rocked; if this process proceeds easily, and the chair itself does not tip over when rocked, then the center of gravity is determined correctly.
4. The last step is to open the vine with furniture varnish.
The made rocking chair can be used in the country house, veranda, balcony, garden, hallway. In addition to the positive feelings while using this piece of furniture, this element will become a wonderful authentic design decoration.
On video: making a fully wicker rocking chair
Wooden rocking chair
Making a rocking chair from wood with your own hands is quite simple, the main thing is to make the appropriate preparation. If this is the first time such work is being done, a master class will help with this. . First we prepare the tools:
- wood hacksaws, jigsaw;
- sanding machine or sandpaper;
- screwdriver;
- set of drills;
- measuring tape;
- hammer;
- spatula;
- level;
- construction corner;
- brushes, pencil.
Preparation of the material is also important. A wooden rocking chair is made partly from plywood. It is better to choose the remaining wooden parts from an elastic material. It would be great if it were flannel.
After collecting tools and material, you can begin to work. Initially, a drawing of a rocking chair is made in accordance with the parameters of the future product. The diagram is an exact copy, but on a reduced scale:
1. You need to cut out the side elements from plywood with your own hands, which are semicircular bases with grooves for flannel. A jigsaw, wood saws and a sander will come in handy here.
 Making the sides
 2. Flannels are prepared; you can make them from plywood with your own hands, but provided that the plywood is at least 30 millimeters thick and flexible in its base.
 We make flannels
 3. The side parts made of plywood are connected to each other using 30x50x600 mm bars. Crossbars (flannels) are attached to the frame from above using a screwdriver at a distance of 2-3 cm from each other.
 Assembling the structure
 4. We attach the flannel to the frame; for this we use a screwdriver.
 Screw the flannel to the frame
 5. The plywood rocking chair is awaiting finishing. Places where flannel is attached to the sidewalls are covered with putty. When the putty has dried, you can coat the product with wood varnish.
 Finishing
 A rocking chair made of plywood can be additionally equipped with other elements. For example, you can make the seat soft. To do this, a foam rubber base is laid on a wooden base, on top of which the fabric is laid.
On video: how to make a rocking chair out of wood.
Metal chair
There is another class of product - metal rocking chairs. Not every master will be able to make such a design, since this requires more serious equipment and skill. Although, it’s worth trying to make a rocking chair out of metal with your own hands. This can be done by looking at the photos, or by watching the master class.
To work we need the following components:
- steel rods;
- galvanizing;
- steel corners;
- welding machine;
- drill with special drills;
- Bulgarian.
Often, arcs for runners are made from profile pipe, and corners are cut out from the profile itself, which will serve as fasteners. From a profiled metal sheet you can make all the necessary elements to create such a structure:
1. First, drawings are made according to the product design. To do this, you can take a ready-made chair and transfer this sketch, but also think about a way to attach the rounded runners.
2. Steel rods are cut into 1 meter lengths. After this, the frame is welded, to which the rods will be welded. The distance between them is about 1 centimeter. The metal curls into an oval.
3. After this, the master must attach the seat to the oval base. The seat itself is made of galvanized steel. Fastening is carried out using bolts, and holes for them are made using a drill.
4. The final stage will be painting and sanding the sharp parts.
If we compare the operating conditions of wicker, metal and wooden furniture, then the most universal option is wicker. It does not damage the floor surface, is easy to move, and can be used in any room or outdoors.
You can decorate such a piece of furniture with textiles, in particular decorative pillows, quilted bedspreads, warm blankets. Thus, a note of comfort and coziness is introduced into the overall idea.
Secondly, a simple and at the same time effective health simulator. Thirdly, it is surprisingly comfortable to relax in, read a book or indulge in sweet, addictive and enveloping laziness.
Since the statement that all diseases stem from nerves is largely true, a rocking chair can become a unique pill, a miracle cure for many diseases.
Rhythmic, uniform and calm swaying puts the human nervous system into some semblance of a trance - the body calms down and relaxes, but the parasympathetic nervous system is just the opposite - it is activated.
A person relaxes, distracted from the daily routine and obsessive thoughts. A relaxed mind is “lazy” to control the body, the muscles relax, beginning to fully rest and recover, accumulating a reserve of strength.
A rocking chair will help overcome sleep problems, because measured rocking is the same manipulations that a mother performs when rocking her child to sleep. cradle. Just half an hour in a rocking chair - and deep healthy sleep will embrace you.
A rocking chair will help patients with tachycardia - rocking seems to set a certain uniform pace to which the heart adjusts. It trains the vestibular apparatus - after it it is easier to endure long trips in a car, train or plane.
Today, rocking chairs are made from different materials, but our most popular products are from rattan and vines.
What to make a rocking chair from: selecting materials
To make a reliable, strong and durable rocking chair, you need to use high-quality wood - coniferous varieties, oak or larch. Often, to simplify the work, plywood is used - its sheets are not only easy to saw to obtain a part of the required shape, but it is also quite plastic and lends itself well to further processing (sanding, painting).
The choice of material is almost entirely determined by the location where the rocking chair will be placed. An outdoor rocking chair should have additional protection and be treated antiseptics, which minimize the impact of adverse aggressive natural factors(frost, rain, snow) and will allow you to maintain aesthetic appeal for as long as possible.
For the dacha the best option It looks like a combination of metal and wood - the base (frame) is made of forged metal, and the seats are made of wood. And stores are increasingly offering plastic rocking chairs, which have two undoubted advantages: low price and high immunity to all natural influences.
How to make a rocking chair with your own hands: the most affordable options
The main part of the rocking chair design is two runners (skis) that have an arched shape, due to which, in fact, the chair can rock. These runners can be short or long. In chairs with long runners, the depth and amplitude of the swing is quite large; a person goes from a sitting position to a reclining position. Rocking chairs with short runners provide a calm and sedate rocking motion, which is why they are especially popular with older people.
To make a simple rocking chair, you don't even need a detailed drawing of a rocking chair. It is enough to take a ready-made, for example an old, chair (1) with wooden legs. Let's make two supports (2), for this we make two elements from bars that will have the same curved base. We also cut out the cheeks (3), which we later use as the bottom for the chair legs.
For each leg of the original chair, we cut out two limiting bars (4) - a total of eight. We nail the appropriate stops at the required distance for each support for all legs. Both supports have outside screw in three (6) furniture bolts - this will give the chair stability and ensure safe swinging. Prepare an end plate (7) for each limiting timber. Having inserted the legs of the chair into the prepared grooves with limiters, we cover the limiters with closing plates and fix them using a hammer drill. For convenience, you can add a footrest (8) to the front.
Similarly, you can upgrade a chair with metal legs by making special metal mounting loops
Plywood rocking chair

For plastic modeling, plywood is the most favorable material. By using a jigsaw, you can get a design that will greatly simplify the process, because structurally it combines the two most important (and most difficult to manufacture) elements of a rocking chair - the runners and the sides. In addition, the absence of joints significantly increases the strength of the structure.
For production we will need:
- jigsaw
- screwdriver
- plywood – sheet at least 15 mm thick
- oak (pine) slats with a cross-section of 10x50 mm - about 20-35 pieces, the length depends on the manufacturing option - a single or double chair. For a single seat, the length of the rail is 1200 mm.
- timber (pine, better oak) – 30x50 mm, 3 pieces, equal in length to the slats
- self-tapping screws
We draw a pattern on graph paper, transfer the design to plywood and cut out the side panel with a jigsaw.

After this, we sand all the parts and remove small chamfers. If the rocking chair is intended for a summer residence, special attention the ends will be required - they require maximum protection from moisture. Therefore, the ends of all parts are impregnated with hot drying oil, after which the wood fibers are slightly flattened with a hammer - this way the moisture will be absorbed much less. Before the general assembly begins, the finishing and varnishing procedure for the ends must be carried out twice.
We mark holes for connecting bars (tsars) at the foot, middle part and headboard. To achieve maximum accuracy, after preliminary marking, the sidewalls are aligned and a hole is drilled. The drawers are secured with Euroscrews and additionally secured with wood glue. After this, we evenly fasten the slats onto the already assembled frame with self-tapping screws. After completing the assembly, you need to fill the holes above the screws, sand all the parts again with fine sandpaper, treat them with an antiseptic, cover them with stain (if you like dark tones of wood) and cover the resulting chair with waterproof varnish.

If it is possible to use an angle grinder and welding machine, can be collected metal frame. To do this you will need a steel corner (20x20x3 mm) and a steel strip (thickness 4 mm, width 40 mm). After assembly, the frame is painted, after which holes for self-tapping screws are drilled along the entire length of the seat and backrest, which will be used to fasten the wooden facing strips.
Advice! Before assembly, be sure to treat the metal parts with an anti-corrosion compound.
A rocking chair is a symbol of comfort, harmony and peace of mind. Unfortunately, purchasing this product is not a cheap idea. Prices start from 5,000 rubles and above. However, it is quite possible to make it yourself. In this case, you can think through your construction project and design.

How to design correctly?
There is a large selection finished drawings. However, when using them, keep in mind that they may be designed for certain individuals and are not intended for the general public. To make the chair comfortable and meet individual needs, study the kinematics. Briefly described, the stability and convenience of the rocking chair depends on the location of the person’s center of gravity relative to the center of the generating circle. Remember, e If these two points coincide, then the so-called dead equilibrium is observed, in which the chair does not rock. Such a coincidence is rare, but it does happen. If the center of gravity is higher than the center of the circle, the structure will be unstable. To avoid such a scenario, the rocking chair is designed for the tallest and heavy man in the family.

Remember that too sharp rocking can always be softened with a pillow under the back and on the seat.
Making skis
The comfort and smoothness of swinging depends on the runners. Let's look at two ways to make them:
- The first option is simple and does not require much time.. We make skis from plywood no less than 1.5 cm thick. Using a pattern and a drawing, we cut out two blanks. We polish them . We cut grooves in the legs of the chair for runners with a depth of 7-10 cm. We install the skis. When installing, complete symmetry must be achieved. Having achieved harmony, we make through holes at the point of their contact with the legs of the chair. We treat them with glue and insert a wooden spike. The runners are ready.
- Second option. We make the runners from a square meter block with a side of 4.5 cm. We cut grooves for the legs of the chair. We prepare the legs of the chair to fit them into the grooves on the skis. Soak the bars in hot water. When the wood becomes pliable, bend the runners into the desired shape and leave to dry. We treat the joints with glue and install dry runners on the legs. The skis are ready.

If you don’t have a ready-made drawing at hand, you can make it yourself. We construct the profile of runners of variable curvature in several steps:
- Select the center point of the circle.
- We choose a fixed angle, usually it is 10 degrees.
- Draw a line that exceeds the radius of the center of the circle by 2-3% and mark a point.
- Next, we increase the radius at each turn according to the law of geometric progression. The indicator is taken equal to 1.02 or 1.03. We also raise the center of the circle after each turn according to the same law.
- We connect the resulting points using a pattern with a smooth line.
- The runner profile is ready. It is better to take a scale of 1 to 5 or more.

The rocking chair is unlikely to turn out perfect the first time, so the resulting product must be balanced. A poorly swaying chair requires weighting the rear overhang. This problem can be solved by using a U-shaped beam connecting the ends of the runners. Weights need to be placed in the beam. It also happens that the rocking chair falls backwards. In this case, you need to weigh it down at the front. A footrest or weight attached to the underside will help achieve balance. In some cases it may be necessary to change the shape of the runners.

Most popular options
Before you take on the chair project and make it yourself, you need to study existing species. There are several product concepts depending on consumer needs:
- With radius runners. The first version of the rocking chair that appeared in everyday life. It gained popularity due to its simplicity of design and technology. In most cases, it has a low landing due to unstable balance when swinging. At large amplitudes, capsizing is possible. To avoid this, the runners are made with a closing horizontal arc.
- With runners of variable curvature. Their main advantage is the inability to tip over. Suitable for creating rocking cradles, as they guarantee safety and comfort.
- Armchair Nirvana. There are two types: spring and elliptical. Rolling is smooth in both cases. However, there is a big difference in production and use. Spring models require special materials: high-quality wood or spring steel. In addition, they are unsafe and inconvenient to use. The gap between the skid and the spring becomes clogged with dirt and your fingers can get pinched in it. Options on ellipses do not guarantee capsizing, but have a very light and pleasant rocking motion. The problem can be solved by installing bumpers. Elliptical rockers with an awning never tip over.
- Rocking chair 3 in 1. The name speaks for itself. The chair includes a rocking chair, an armchair, and a lounger. The main advantage is versatility. The disadvantage is the large dimensions, which are not always possible in an apartment. In addition, the transition from one mode to another may be accompanied by unpleasant shocks.
- Pendulum on bearings. An improved version of the classic chair. The difference lies in the fixed base and completely silent operation. Just like rocking chairs with runners of variable curvature, they are suitable for rocking small children.


The materials for making rocking chairs are varied and sometimes surprising:
- Metal. Great solution for the street due to its high wear resistance, strength and resistance to adverse external conditions. However, forged rockers require special equipment and skills, and the finished products are heavy. You can consider the option of making it from a profile pipe; it is better if there is an ellipse in its cross-section. To reduce the weight of the structure, and therefore reduce the moment of inertia, the seat is made of a different material.
- Made from plywood. Suitable for carpenters with little experience. The main advantages of plywood are that it allows you to make precise connections, is lightweight and, due to its flexibility, is suitable for the implementation of non-standard ideas and solutions. The plywood product must be impregnated with any protective composition, be it acrylic varnish or polymer emulsion. In this case, the product will last longer.
- Made of wood. Traditional material for making any furniture. Affordable, natural, eco-friendly and simple. Wood has high strength characteristics, a significant service life, and also has a pleasant appearance. However, in conditions high humidity the tree begins to rot. Solve this problem using various paint and varnish materials. Fortunately, there are many of them on sale.
- From a professional pipe. Insensitivity to moisture, pleasant color and ease of assembly contributed to its spread. Plastic pipes They do not require glue and can be easily painted in any color, but there are also disadvantages. The main disadvantage is low strength. During use, parts of the furniture become deformed, lose their aesthetic appearance, and sometimes break.
- Made from polypropylene pipes. Affordable, lightweight and durable. A flight of design thought will easily support a wide range of pipes presented in stores. The set of tools required for making furniture is minimal and includes a hacksaw, a marker and a tape measure. Suitable for lovers of unusual interiors.
- From plastic bottles. The environmental movement is gaining momentum. In this vein, it is increasingly proposed to reuse waste. Plastic bottles– is no exception. The main thing is that there are a lot of them and that they look aesthetically pleasing.

Sketches of simple options
The easiest, fastest and cheapest way to make a rocking chair is to make it from an old regular chair and attach skis to it. We will need:
- a chair with legs (if you don’t have them, you’ll have to make one);
- runners;
- screwdriver;
- screws;
- drill;
- sandpaper;
- paint and brush.

Manufacturing takes place in several steps:
- Ski preparation. You can cut them yourself or order them from a carpenter. The distance between the legs of the chair should be 20-30 cm less than the length of the runners. We drill holes in the place where the legs are attached. Try it on - the skis should “sit” on your legs. If everything goes well, then you can start painting. We sand the surface of the runners with sandpaper and cover it with paint. To achieve a deeper color, it is better to paint in several layers.
- Installation of runners. We put the runners on the legs. To secure them, we drill holes in the chair legs for screws, insert them and tighten them. Turn it over. The rocking chair is ready!

How to weave?
The highlight of the interior can be wicker furniture. It will add comfort and harmony to the atmosphere. Advantages of wicker furniture compared to regular furniture:
- environmental friendliness;
- ease;
- ease of operation;
- ability to withstand heavy weight;
- beauty.

Among the disadvantages are the following: cost and labor intensity of production.
Rattan and willow are most often used for weaving. Rattan is a plant from the palm family. Furniture made from it tolerates moisture well, so they prefer to install it outdoors. It is environmentally friendly and has an excellent appearance. However, repairing such furniture will cost a pretty penny due to the cost of the material. A cheap option is willow. It is less flexible and unstable to moisture, like rattan, but is more accessible and therefore widespread. Perfect for home furniture.

A wicker chair made of willow, wicker or rattan is not so easy to make. Before you start work, you need to prepare the material. The vines are harvested in cold seasons. The raw materials collected at this time are easier to process. The harvested vine is kept outdoors in a vertical position for 70-120 hours. Raw materials are sorted depending on their purpose. Thick branches with a diameter of 5 cm are selected for the frame. For braiding, rods 1 cm thick are suitable.

Before weaving, raw materials must be processed as follows:
- Soak the sorted rods in hot water for 10-12 hours.
- Remove the bark.
- We make shanks - we align the thin rods along the length and cut them into 3-4 parts.
- We pull each shank through the press. The result should be ribbons of the same length.
- We bend thick branches along the cylinders of the templates, secure them and let them dry. We make templates according to the drawing as follows. We apply the frame design to the tree and attach wooden cylinders to it.
- We are waiting for it to dry completely. Most often it is 3 days.

Let's start assembling the frame:
- We attach supports to the frame. For reliability, we fasten them with cross bars.
- We install armrests and other parts.
- We secure everything with self-tapping screws and remove the temporary fastening.

Braiding of the structure occurs only on assembled frame in the following order:
- Before weaving, we knead the shanks by pulling them through any cylindrical object.
- Lubricate the braiding areas with glue.
- We weave. For structural strength, the frame should be wrapped in three rods.
- Inside, the weaving can be of different options - openwork, single.
Having finished with weaving, we install runners, supports and overlays:
- Turn the product upside down.
- Heat the installed pad with a hairdryer.
- We install it on the ski and wrap it with tape.
- Remove the tape from the cooled overlays and glue them to the runner, securing them with nails.
- After the glue has completely dried, replace the nails with self-tapping screws.

Before use, the chair must be treated with liquids that protect against fungus and wood pests, and the product must be varnished. If it is necessary to give the chair some shade, then before covering it with varnish it is worth soaking it with drying oil or paint.
Made of wood
A rocking chair made of wood is perhaps the lightest and simplest option after using an old chair. Garden tumbler benches have become especially popular. Their peculiarity is that they tilt 90 degrees when you lean back. The person sitting will be in a supine position with their feet pointing towards the sky. If you pull them forward, the bench will return to its usual position. However, making runners for such a bench is somewhat more complicated. They will not tolerate amateurism.
For smooth and comfortable rocking, it is better to use a proven drawing and accurately transfer it to the material.

Let's consider making a tumbler bench. We will need a jigsaw or a hacksaw for wood, sandpaper or a sander, a tape measure, a construction angle, a level, a screwdriver with a set of drills, a hammer, putty, a pencil and brushes with paints. The choice of materials is important to the performance of the finished product. We will make the side parts from plywood, and the slats from any elastic wood.
Let's get started:
- We cut out the side elements from plywood with a jigsaw or hacksaw. We get a semicircular base with grooves for flannel.
- We are preparing the slats. They can also be made from plywood if it is thicker than 30mm and has sufficient flexibility.
- Using three bars 30x50x600 mm we connect the side parts to each other.
- We attach the slats to the frame.
- All that remains is to give the product an external gloss. Apply putty to the places where the slats are attached to the sidewalls to hide the recesses for the screws. We are waiting for the putty to dry completely.
- We coat the bench with wood varnish and let it dry.
- The tumbler bench for the garden is ready.

If desired, you can make the seat soft; for this you can use foam rubber. Another solution would be a removable soft case. It will last longer since it can be removed in bad weather.
Made of metal
Metal rocking chairs are more difficult to make. This will require special equipment and knowledge. However, they are perfect for the garden due to their high strength and wear-resistant characteristics. What can we say, your grandchildren will also be blissful in a metal rocking chair. There are different options manufacturing, but let's consider the simplest one. For this we need the following set of items:
- steel bars and angles;
- galvanizing;
- Bulgarian;
- welding machine;
- drill and metal drill bits.

Let's get started:
- We study the drawing.
- Cut from metal profile steel strips 1 meter.
- You need to weld the frame and weld rods to it, the distance between which is 1 cm.
- We make the seat from galvanized steel and attach it with bolts. The holes are made with a drill.
- We sand potentially dangerous areas.
- Let's paint.

The main disadvantage of metal furniture is its weight. Therefore, it is worth thinking about how it can be reduced. If the metal rocking chair will be used at home, it is worth gluing a strip of rubber to the runners to protect the floor from scratches.
For a child
Memories of a homemade rocking chair will for a long time warm the souls of grown children. Making a rocking chair for a child is not radically different from making a regular chair. The only thing worth considering is the size and proportions, as well as the presence of handles. A rocking chair for children is often made in the shape of a horse, but this is no longer furniture, but a toy. Let's consider the simplest option. Necessary equipment: circular and miter saws, grinder, router, jigsaw and a set of hexagons. Required materials: 18 mm plywood, cardboard, 2 threaded studs 50-60 cm long, 4 nuts for the studs and paint. We start manufacturing from the sides. We cut them out of plywood according to the drawing. We cut out the grooves. The thickness of the plywood determines the thickness of the groove. Drill the holes.

Cut out the seat. The width is determined individually. To ensure that the edges of the seat fit into the grooves, we narrow them tightly towards the edges. When cutting out the backrest, keep in mind that its width should be equal to the width of the back side of the seat. We collect all the parts and measure the resulting spacer size. When cutting, consider the size of the grooves. We sand the edges and install the studs under the seat. We saw off the protruding studs with a grinder. We tighten the sidewalls by tightening the nuts on the studs. Let's start painting. It’s great if your child takes part in creating the design of a new piece of furniture.

Restoration
Sometimes it’s easier to update your favorite things than to tear them away from your heart and just throw them away. Often they remind of long-standing family ties or pleasant events. It also happens that old furniture has not lost its wonderful properties, but its appearance leaves much to be desired. In this and other cases, restoration will help. Let's say you have a well-worn soft rocking chair with a wooden frame. Worn wood and worn upholstery are striking. We will restore it at home. We will need: grinding machine or sandpaper (the first is faster, the second is more interesting):
- screwdriver;
- acrylic paints;
- new fabric for upholstery;
- furniture foam rubber.

The operating procedure is as follows:
- First you need to disassemble the chair using a screwdriver. We are tidying up the screws, we will need them later.
- We remove the old layer of paint with sandpaper or a machine. The sandpaper should be fine grain. In case of heavy contamination, remove a larger layer.
- Coating wooden parts acrylic paints, drying oil or varnish. Here you can use various ways painting. The worn effect is very popular now.

Replacing a seat
Let's start reupholstering the soft part of the chair:
- We remove the old upholstery and soft layer.
- We are preparing a new soft layer from a sheet of furniture foam rubber. We cut new upholstery with allowances of 5-6 cm. From fabrics you can choose chenille, tapestry, corduroy.
A rocking chair is a very necessary and comfortable thing that helps you relax while relaxing, or, conversely, concentrate while working. In the furniture market, you can choose a given piece of furniture for different tastes and at different price categories.
But there is a more reliable and less expensive option - making your own rocking chair at home. It is important to carefully calculate and measure all the details, since if the exact balance is not maintained, the chair will either not move or tip over on its side.

Main types of rocking chairs
Below are photos of different types of rocking chairs.
A massage rocking chair would be an excellent option for a private home - it will not only give your interior a modern style, but also has great functionality!
Look at the photo how beautifully the massage rocking chair fits into the interior:

Chair on skids
The chair is most popular among users, that is, it has radius runners. This rocking chair is distinguished by its simplicity of design and fairly simple assembly technique.

The disadvantage of such a chair is that it will not be possible to swing much, as it will simply tip forward or backward.

Chair with variable curvature
A chair with variable curvature prevents tipping over. It is the most comfortable to use and allows for almost any seating height.

Chair on elliptical runners
The chair on elliptical skids is equipped with bump stops to prevent it from tipping over.

Multifunctional chair
The multifunctional chair has another name: “3 in one”. If necessary, such a piece of furniture can be turned into a lounger, but its dimensions are quite large, so it can only be used in relatively large rooms.
Materials for production
Typically, rocking chairs are made of wood, as metal is too heavy for such a design. Most often, beginners assemble a rocking chair from plywood without violating the following recommendations:
- the plywood for the middle layer should be much thicker than for the edges;
- it is necessary to use predominantly waterproof glue, or when using PVA, it is better to secure the parts with small nails;
- all connections are treated with glue, securing them with several self-tapping screws on both sides;
- It is reasonable to protect the surfaces on which the entire mass rests with rubber or durable wooden slats to avoid plywood chipping under load.
- For greater strength, the finished structure must be treated with a special emulsion or water-based varnish.

Tools that will be useful are an electric jigsaw, a screwdriver, a drill and a hammer.
A forged rocking chair, of course, can only be made by a specialist, since it will require special equipment and premises.

Of course, it is possible to make such a chair by welding metal profile pipes that resemble wicker rocking chairs. But this option is more suitable for a garden street area.

You can also place a sun lounger with an awning (like a swing) in the garden, which is a little more difficult to make, but will bring a lot of pleasure to use!

For home comfort and comfort, it will be more aesthetically pleasing to use wood, decorating it with wicker rattan rods.

A children's rocking chair is also not complicated, but its proportions will differ from the adult version. Making it yourself is not at all difficult, even for a beginner.
Important steps and operating rules
Before you make a rocking chair with your own hands, you need a competent drawing! Most often, self-taught craftsmen find ready-made drawings of a rocking chair on the Internet, but it is worth taking into account the weight of the largest person who will use it in order to avoid misunderstandings in the future.
Pay attention!


And then, if necessary, you can put a pillow on the seat for greater comfort and to avoid sudden swaying.

Beginning craftsmen may not immediately get the ideal option, even if all the dimensions of the rocking chair are observed. This can be easily corrected by balancing the product.

The rear overhang can be made heavier by simply connecting the rear ends of the runners with a stick in a "U" shape. This will make it easier for the rocker to walk and not “push” when rocking.

When tilting the chair backwards, it is necessary to attach weights to the front overhang.
Necessary pads for chair runners
It is imperative to install linings on the rocking chair runners, which prolong its durability and make the furniture wear-resistant.
- you need to turn the chair over with the runners up;
- bar required sizes heat quite strongly with a special hairdryer;
- then carefully press the hot workpiece to the runner and wrap it with thick braid;
- We repeat a similar action with the adjacent runner;
- After waiting for the blanks to cool completely, glue them with waterproof glue;
- we secure the linings with small nails along the entire length;
- after a maximum of three days, when the glue has completely dried, you can remove the temporary fasteners. Then finally secure the ends with self-tapping screws;
- the heads of the screws must be thoroughly rubbed with putty made from sawdust of the same material (wood), mixing them with glue.

Pay attention!

DIY rocking chair photo


Much has been written about the beneficial effects of relaxing in a rocking chair. It also helps to concentrate during intellectual work. Finally, it’s just convenient, after pumping, to take books from the rack behind your back or a cup of coffee from coffee table. The prices of ready-made rocking chairs, as it should be in a consumer society, react to such advantages in their own adequate way: a rocking chair for 5,000 rubles. it's still cheap. And people are artisans and also respond adequately in their own way: there are more and more people wanting to make a rocking chair with their own hands. However, the rocking chair differs from other pieces of furniture, firstly, in that the whole thing moves and swings. Secondly, so that it does not turn from a rocking chair into a kicker or tipper, the entire product with the person seated in it must have a precise balance, which must be maintained within acceptable limits for riders of different weights and builds. This publication is devoted to consideration of issues of how to achieve the required qualities of a rocking chair.
Types of rocking chairs
You need to comply with your own needs already at the stage of choosing a prototype. There are several types of rocking chairs, aimed at users with different habits and needs. The main types of rocking chairs are shown in the photo. Rocking chairs on simple radius runners (arches, rocker arms, skis) were the first to appear in everyday use. They are in use to this day, both in modern and classic appearance, pos. 1 and 2. Their main advantage is constructive and technological simplicity.

Radius runners provide smoothness and softness of rocking only with relatively small swings, and with strong swings they do not guarantee against tipping over. Therefore, rockers “on radii” are made with a low landing, ensuring a large excess of the center of the generating circle (CO) over the general center of gravity (CG); For more details on the kinematics of rocking chairs, see below. If a seat of normal height is required, then the runners are equipped with bumpers, pos. 3. The shocks of the bump stops on the floor are noticeably felt at the “fifth point”, and in any case, you have to get out of the rocking chair on the radius runners, straining somewhat.
Note: Stability when swinging with a slightly larger amplitude at a normal landing height is provided by rockers on radius runners with a closing horizontal arc, see fig. right. But, suddenly the limit is reached, the supporting surface instantly reduces to a point and a sharp push follows in the back.

Tipping is excluded in rocking chairs on runners of variable curvature, pos. 4. All of them are comfortable enough for riders of different body types. They themselves gently unseat the rider of a rocking chair of the Nirvana type who has stood up and leaned forward on runners of variable curvature, pos. 5 and 6. It is also possible, by changing the progression indicator in the law of change of the generating radius (also see about kinematics), to design them for any landing height, within acceptable limits.
Note: mother and baby are given complete rest with complete unity of souls in the rocking cradle. Reliable rockers with a cradle are made only on runners of variable curvature, see fig. right. Otherwise, suddenly the little one will get worried and the mother will perk up, and we can tumble together. Which is simply dangerous for a baby.

Nirvana rocking chairs on elliptical runners, pos. 7, provide a gentle, truly blissful rocking, but do not prevent tipping over during strong swings, so they are equipped with bump stops; the front one is often combined with a footrest. Garden rocking chairs with ellipse awnings never tip over, pos. 8.

Nirvana rockers on springs, see fig. on the left, they swing as softly as on ellipses, because The mechanical characteristics of the springs are progressive. But making a spring chair with your own hands is difficult: you need either high-quality boards of special types of wood (teak, boxwood, dogwood) or a rubberized strip of spring steel so that it does not scratch the floor. In addition, dirt gets packed into the gap between the spring and the runner and it can be very painful to pinch your finger. For the latter reasons, spring chairs are now very rare on sale.

Rocking chair 3 in 1
Finally, there are also multifunctional “3 in 1” rockers on runners with smooth bends, see fig. right. When seated upright, this is a regular chair; by leaning back, it can be switched to rocking mode on radii, and by leaning back even further, it can be turned into a sun lounger. But the dimensions of the 3 in 1 rocking chair are too large for apartments below business class, and transitions from mode to mode are accompanied by rather sensitive shocks. In unsuccessful models, for this you either have to stand up, or twitch, squirm and fidget like a puppet on strings. Therefore, 3 in 1 rocking chairs are a piece of furniture for everyone.
To begin with
Without any special pretensions, just to relax after work, a rocking chair on radius runners will help. Drawings of a simple sample, made, with the exception of the runners, only from straight parts, are given in Fig. This chair can be made for the dacha, veranda or garden in half a day, using only a jigsaw, a drill and a couple wrenches(assembly - bolted). And having rocked to your heart’s content, you may already think about a home rocking chair for the more sophisticated; then you will need a more thorough tool and knowledge.

How does it swing?
Most home craftsmen make rocking chairs according to ready-made drawings, but prototypes often turn out to be designed and tailored to a specific person, and an exact replica is not so convenient. Therefore, before making a rocking chair, it is necessary to obtain at least initial information about its kinematics.
CG straight standing man of normal build is located on the border of the lumbar and sacrum on the inside of the spinal column. In a sitting individual, it will blend somewhat forward and even less downward. In the chair-seat system, the overall CG shifts back almost to its original position and a little further down. The downward shift of the general CG for the design of a rocking chair is not particularly significant and we can assume that the projection of the general CG onto the supporting surface (floor) is approximately the same as that of a standing person. In the future, the resulting error can be easily compensated by final balancing of the chair, see below.
The vertical location of the central center relative to the central center has a much stronger effect on the stability and comfort of the rocking chair; the latter is also a determining factor when designing rocking chairs on runners with variable curvature. If the CG and CO coincide, this is an indifferent equilibrium: for any physically possible tilt of the chair, the projection of the CG on the floor falls on the point of contact of the runners O, pos. 1 and 1a in Fig. The chair does not rock, and if you lean back too much, you will instantly tumble with the risk of breaking your neck. Fortunately, an exact match between the CG and the CO is only theoretically possible.

If the CG is higher than the CO, then its projection, at any inclination, “runs” outward, backward or forward, from the point of contact. At the slightest tilt, a tilting moment Mo occurs (positions 2 and 2a), and the rocking chair turns out to be unstable. To avoid such a situation for a family rocking chair, it is designed and balanced for the tallest, heaviest and pot-bellied rider possible so that its CO is 450 mm or more higher than the CO. Then, when the chair is tilted, the point O will “run away” from the CG projection, the restoring moment Mv will constantly act (positions 3 and 3a) and the chair will not tip over when rocking within acceptable limits. For those who are smaller, the excess of the CO over the CG will be too large, and the swaying will be harsh, but this can be easily compensated for by pillows under the back and seat. In general, the lower the elevation of the CO above the CG, the softer and smoother the swaying, but the likelihood of capsizing, suddenly straightening up and standing up in a chair, is higher. Therefore, it is better for novice carpenters to set the CO exceeding within 600-700 mm.
Note: if it is impossible to determine the position of the CG of the largest of the riders (say, in his absence), the radius of the generating circle R is taken equal to the average height of the users minus 5 cm. Suddenly the rocking turns out to be harsh, this can be corrected by placing a permanent pillow on the seat.
There is no need to drag your own pillows with you into a chair on runners of variable curvature: it will itself rise to the position of greatest comfort. At the same time, the big guy will lean back more, and the slender one will sit straighter. When swinging backwards, the point O will run away from the CG projection the further, the greater the angle of inclination, and it will simply not be possible to swing until it capsizes. And if you “pump” forward, which is actually difficult, the chair will smoothly drop the hyperactive person onto the floor: where should you rest? Go do something.
To construct a profile of runners of variable curvature, the radius of the generatrix of the circle (it is determined as in the previous case) will have to, firstly, be rotated several times by a fixed angle α; usually take α = 10 degrees. Secondly, to build the rear branch of the runner, R is increased at each turn according to the law of geometric progression with the index k = 1.02-1.03. That is, it will be (see position 4 in Fig.) R1 = kR; R2 = kR1; R3 = kR2; R4 = kR3, etc., if required. Actually, R changes according to some trigonometric function, but for furniture accuracy and the size of the rocking chair, it is more convenient to replace it with a progression, so it’s easier to count.
The construction of the anterior branch is carried out at a constant R, but with each rotation of the generatrix of the circle, the CO is raised vertically (ibid., in position 4 of the figure). The initial elevation Δh1 is taken equal to 2-3% R, i.e. (0.02-0.03)R, and the subsequent ones also follow a geometric progression with the same indicator as for the posterior branch. Δh1 in this case is a fairly critical value; its smaller value should be taken for thin people, and its larger value for fat ones.
Finally, the resulting points are connected using a pattern with a smooth curve. Do not be embarrassed if the tangents to it turn out to be not perpendicular to the radii: in order for the chair to be stable, at each moment of rocking it should be on the opposite slope. When constructing, it is advisable to take the scale no smaller than 1:5.
Note: if a nirvana chair is designed, but the front ascending branch of its runners will be an elliptical arc (green dotted line in position 4), tangent to the constructed profile of the runner in volume I there.
Final balancing
It is unlikely that a novice craftsman will immediately find a rocking chair comfortable enough. Most likely, the product will need to be balanced. If the chair doesn't rock well, and when you get out of it it pushes, you need to make the rear overhang heavier. The easiest way to do this is to connect the ends of the rear branches of the runners with a low U-shaped beam of boards, with the notch facing down. Weights are placed in the recess. The lever arm in this case is long, so there is no need to hang weights. Another option, depending on the design, is a transverse pipe beam with a weight inside. But during the balancing process it will have to be removed and put back several times. If the rocker tends to fall back, you need to make the front overhang heavier. The easiest way to do this is by placing a step and attaching weights to its underside.
About materials
Rocking chairs are made primarily of wood. Metal, for all its manufacturability, low waste and greater durability in the open air, is too heavy. The influence of the chair on the overall CG turns out to be significant, the moment of inertia of the system is large and, as a result, the rocking is too sharp. Or you have to set an extremely small initial elevation of the CO above the CO, risking that the rocking chair will tip over under someone. However, we will return to metal rockers when considering individual samples.

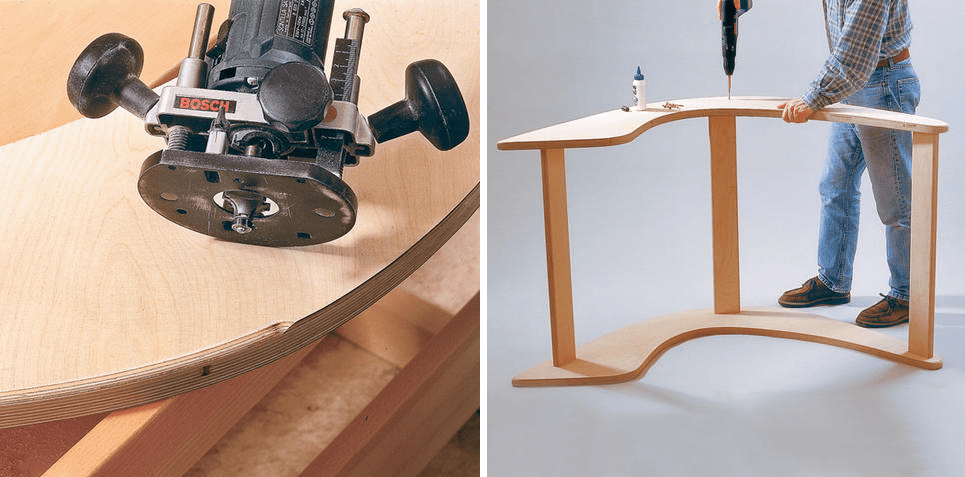
Plywood is a completely different matter, especially for novice woodworkers. Firstly, when making the parts of the rocking chair with 3-layer glued ones, you can only use a jigsaw to make accurate and strong tenon-groove joints, on the left in the figure, if you follow the following. rules:
- Plywood for the middle layer is taken twice as thick as for the outer layers. For example, if you need a total thickness of 20 mm, then glue 5-10-5 mm.
- The parts are assembled from blanks using 2-component waterproof glue. If it is on PVA, be sure to reinforce it with small nails.
- The connections are assembled with gluing (wedging in this case is unacceptable) and reinforced with diagonal pairs of self-tapping screws on both sides.
- The supporting surfaces are protected with linings made of thin (6-10 mm) strips of hard, durable wood or dense sheet rubber 4-5 mm thick. Plywood under a concentrated load cracks very well at the end.
Secondly, plywood makes it possible to use non-standard technical solutions, for example. as on the right in Fig. Such a rocking bowl can be made from plywood, again using only a jigsaw. Comfort is high, stability is absolute, and can serve as a hanging hammock chair or swing chair. The thickness of the lamella boards is from 12 mm; connecting half-washers on poles – from 24 mm.
Note: in any case, the finished plywood rocking chair must be soaked twice with a water-polymer emulsion or liquid acrylic varnish water based. This will not only increase the strength of the product and its resistance to external influences, but will also relieve excess residual stresses in joints and bent parts.
How to install overlays
Wear-resistant wooden pads are installed on the rocking chair runners. way:
- Turn the chair over with the runners up;
- We warm the blank plank thoroughly with a hairdryer;
- We place the workpiece on the runner and wrap it tightly along the entire length with cotton braid. Don't get burned, the wood is very hot!
- We also grab the second workpiece onto another runner;
- Once the strips have completely cooled, remove the braid bands and glue the pads with PVA on wood or with 2-component glue;
- We attach the ends of the planks with small nails until the linings fit snugly along the entire length. Place washers or pieces of plywood under the nail heads;
- Once the glue has completely dried (2-3 days), remove the temporary fasteners. We drill blind holes for screws and secure the ends completely;
- We fill the holes with the fastener heads with putty made from sawdust of the same tree, thickly mixed with PVA.
Note: The linings need to be secured with metal hardware only at the ends. Otherwise, when the lining wears out during use, the fastener heads will stick out and begin to scratch the floor.
Examples of rocking chairs
Metal
Let's start our review of rocking chairs with metal ones, because... making rocking chairs out of it is justified in few cases. Forged rockers, imitating classic wicker ones from wicker or rattan, as requiring special equipment, a forge, etc. We don’t touch qualifications. But a metal rocker “like a braid” can be made by welding from a profile pipe; preferably elliptical section. In this case, you need to choose the kinematic scheme of the nirvana rocking chair as the least sensitive to the excessive elevation of the CO above the CO; it also corresponds well in design to wicker rocking chairs, see Fig. In order not to increase the moment of inertia, the seat is made of braided cables, belts, etc.

It also makes sense to make garden tumbler rockers from metal, see below, due to its strength and resistance to wear. But a welded frame like the one in pos. 1 pic. on the right - the solution is not optimal, it is too complex, labor- and material-intensive. It is much easier to make a steel frame for a garden rocking chair of the Concept type, pos. 2. Pipe – round from 40x2. The bed itself can be sewn like a hammock; balancing - by changing its tension and, accordingly, sagging. As a result, the work and costs are much less than repeating the established forms of rocking chairs that come “from the tree,” and the comfort is no worse.

Here we can see another interesting option: the frame of a rocking chair Concept made from... gymnastic hoops. Just not aluminum or propylene, but carbon fiber (carbon). Strength is monstrous, durability is absolute, weight is negligible. The same cannot be said about the cost, however.
Vanka-Vstanka
Recently, garden rocking chairs - tumblers - have gained popularity. If you lean back completely in this one and tuck your legs, it falls back almost 90 degrees without losing stability; the rider will find himself lying on his back with his knees at the zenith. And if you stretch your legs forward, the rocking chair - the vanka-stand-up chair becomes its normal position and then you can rock as always.

The Vanka-Vstanka toy with a spherical bottom sways quite sharply. Comfortable rocking of the tumbler rocker is achieved by profiling its runners according to a complex law. It will not be possible to build their sidewalls “school style”, as described above. You need to be guided by proven samples and draw markings on the grid, see fig. The inset option, with cladding made of planks 30-40 mm thick, is more expensive, but less labor-intensive. It also allows you to increase the length of the rocking chair by installing intermediate supports-runners.
Note: wooden balls are placed on the protruding ends of longer rods (1050 mm) and form handles for rocking and carrying.
Rocking bench
Rolling your heels into the sky, throwing your hands behind your head and admiring the clouds floating in the blue heights through the fluttering foliage is a heavenly pleasure, but it doesn’t suit everyone. Some people want to look more impressive while relaxing. This is more suitable garden bench– rocking chair, see fig. It is a little difficult to swing on it, its own moment of inertia is high, but it also swings for a long time. The maximum span between supports with runners is 750 mm with cladding made of 40 mm thick slats. The back covering is decorative.

Sun lounger with awning
Both those and other requests will be satisfied by a garden rocking chair on elliptical runners and with an awning. The dimensions of its sidewalls are given in Fig. their material is 24 mm plywood. The width of the bed is up to 900 mm, its covering is made of 50x50 slats. The sidewall areas, indicated by gray circles, are connected by round wooden crossbars with a diameter of 60 mm.

Rocking chair
We are not talking about rocking horses here; they are toys, not furniture. But it’s also not harmful for children to rest while rocking, so it makes sense to give your child a rocking chair. Its proportions will be slightly different than for adults, due to the influence of the square-cube law.

The structure of a children's rocking chair, its assembly diagram and specification of parts are given in Fig. material – wood. More or less experienced home handyman building a rocking chair for a child, guided by these data, will not be difficult, and beginners can first watch a master class on making an almost identical children's rocking chair.


