You can make the premises especially cozy using various lamps and lamps. But it’s not always possible to buy a lamp that we like and matches the interior of our home. Therefore, we suggest that you make a lampshade with your own hands at home for a chandelier or floor lamp yourself, step by step.
For lamps with fabric lampshades, it is preferable to use energy-saving lamps, because a regular lamp can cause the fabric to catch fire. The frame for the lamp can be bought in stores for repairs, or you can make it yourself.

DIY lampshade step by step
Materials:
So, let's sew a fabric lampshade - for this we need:
- iron;
- pencil;
- ruler;
- material;
- English needles;
- threads in color with the fabric;
- thick paper and whatman paper;
- fabric glue.
Manufacturing process:
First of all, we make a template; it can be made in two ways:
- When the frame is in the shape of a cylinder, measure its circumference and height and transfer it to the fabric. Next, we draw two more sides and cut out the finished pattern.
- And when the frame is in the shape of a cone, then we lay out the paper, and slowly rolling the frame along the paper, we mark the lines of the sides. After the frame has been completely rolled, it is necessary to connect all the lines into one line and cut out the pattern.
Before transferring the pattern onto the fabric, be sure to attach it to the frame and check that it fits well. After checking, we pin the template to the fabric from the wrong side and trace it with chalk, after that we make allowances of 1.5-2 cm according to the template and cut it out. In the case when the fabric is not plain, the pattern must be laid out correctly so that the pattern is in the right direction.
Now turn on, steam well and iron the fabric, there should be no wrinkled parts.
Next, cover the surface of the table with newspapers, and lay out the fabric on them, apply glue to it and let it sit. required quantity time according to the instructions for using the glue. After time has passed, glue the lampshade to the frame. We hide all unprocessed sections. Leave the finished lampshade until the glue dries completely. After about a day, the lampshade can be used for its intended purpose.

Lampshade made of threads
DIY lampshade made from threads for table lamp looks amazing and always in fashion. A lampshade in this design will give any room a cozy and unusual atmosphere. In our article we will analyze step by step how you can make a lampshade from threads with your own hands.
We will need:
- Balloon
- Knitting threads (3-4 skeins)
- PVA glue 2 bottles
- Wire and other accessories for the lamp can be purchased at hardware stores.
- Bulb
- Scissors
- Oilcloth
- Gloves
- Foam sponge
- The cover is plastic.
Progress:
Inflate the balloon and tie it. The shape of the ball must be round, since the shape of the ball will form the lampshade.
We take the thread and fix it at the base of the ball, this will be the top of the lampshade. Next, we begin to wrap the ball with threads in a cross-shaped manner. We distribute the thread evenly throughout the ball so that the thickness of the lamp is uniform over the entire surface.
If this is your first time making such a lampshade, then you need to focus on the correct application of the threads and pulling them tight. But at the same time, make sure that the ball does not become deformed. This option is perfect for a chandelier or floor lamp.
So, we continue to wind the thread, you should get 5-6 layers so that balloon was hidden by threads. If there are small gaps, it’s okay, they will give the lampshade a finished look and rays of light will break through them.
Now we cut the thread and tie it to a knot on the ball. We cover the table with oilcloth and begin to apply PVA glue to our lampshade blank.
We put on gloves and, using a sponge, apply a generous amount of glue over the entire area of the lampshade. It is necessary to soak each thread well so that not a single thread remains dry. Otherwise the lampshade will not work correct form, otherwise it will completely break.
Leave the soaked ball to dry for 12 hours, preferably hanging. After everything has dried, pop the balloon with a pin. At the top of the ball, around our knots, we cut out a small hole through which the light bulb should pass.
We insert the lighting accessories into the lampshade and screw in the light bulb. We adjust the length of the wire, attach the lamp to the desired place, and you’re ready to enjoy the beautiful lampshade and pleasant lighting.

Paper lampshade
Things made by your own hands bring special energy to your home, and also reveal your creative possibilities. Nowadays, there is a lot of information on the Internet about how to make a lampshade with your own hands. In our article we want to tell you how you can make a lampshade out of paper.
For many, paper evokes feelings of airiness and carefreeness, and a paper lamp will certainly convey these feelings.
China is the birthplace of paper, so we will make Chinese lanterns.
We will need the following:
- rice paper, or, of course, regular paper,
- cartridge,
- light
- diagram - plan of a Chinese lantern,
- Ruler and pencil,
- awl,
- threads
Progress:
- We mark the paper from the inside out using the diagram for Chinese lanterns.
- Next, in the designated places we bend the paper, getting an accordion. There is no need to rush in this matter, since the precise folding of the paper will determine how even the flashlight will be in the end.
- Connect the socket to the light bulb. We make holes at the bottom of the workpiece and pull the thread through it.
- Next, we wrap the lampshade around the socket.
- We glue the edges.
Well, basically all the Chinese lanterns are ready!

Agree, a lot depends on the light in the room; compare at least the “cold” hospital light and the “warm” home light. But not everything depends on the lamp: DIY lampshades will help you “domesticate” the light. Only in this article, you will get full information how to make a fashionable lampshade quickly, inexpensively, beautifully! Read and enjoy!
How to make a lampshade with your own hands
Before choosing a design and starting to create a lampshade with your own hands, let’s look at a few important points. So, pay attention to the following points:
1. The greatest freedom will be provided by the use of energy-saving or LED lamps, since incandescent lamps get very hot and can burn a paper or fabric lampshade.
2. When remaking a finished lamp, try to handle the wires as carefully as possible, and upon completion of work, check their integrity.
3. When choosing a lamp, remember that depending on the color temperature they are often divided into “cold”, neutral and “warm”. For home lamp best choice will become “warm”.  The differences in color temperature are clear. The higher the value on the package (the higher the temperature), the cooler the light the lamp will produce and vice versa.
A little about the frame
For your own lampshade you will need a base. Often it consists of two rings on which a cardboard or plastic backing is attached to hold the shape.
 Such frames can be woven from wire using only pliers.
The frame can be bought at a craft store, but since our stores cannot always boast of such a variety, it is worth looking for frames in construction stores.
 The simplest solution: the cartridge is held by the neck of a 5-liter bottle.
You can also buy an old lamp at a flea market or make a frame yourself from wire.
 Finished cylindrical frame made of hardware store(metal grid).
Green lamp... literally
You can use a special lamp for plants, but a simple “housekeeper” or LED lamp will also work.

Repeating the design with your own hands will not be difficult, especially since it is very easy to change it, based on what materials you have at hand.

The main thing is that hanging version the pot was not too heavy (in a tabletop pot this can be neglected). You also need to insulate the wiring well; you can run it along one of the supporting wires.

10 steps to a fabric lampshade

DIY fabric lampshade: master class
The process of creating a fabric lampshade begins with preparing everything you need so that you don’t have to be distracted by searching for missing parts.
You will need:
- textile;
– masking tape;
– measuring tape and plastic ruler;
– chalk (or other material for marking fabric);
- pencil;
- scissors;
– thick self-adhesive film (from a craft store);
– lower and upper wire rings;
– clothespins-binders for paper;
- PVA glue;
– brush;
– threads;
- paper strip.
1 Step
2 Step
Cut a rectangle from self-adhesive film the right size, and then - a piece of fabric 5-6 cm larger at the edges. Glue the fabric right side to the table.

3 Step
Select the part of the pattern you want to keep on the lampshade and, using a ruler and something rectangular (like a book), draw cutting lines and corners.
4 Step
Flatten the fabric and begin gluing the film onto it. Do not tear off the entire backing from the very beginning: first separate 4-5 cm and glue them. After this, simultaneously tear off the backing and level the glued part of the film.

5 Step
Attach the lampshade to the frame, starting from the middle, using binders. When you reach the end, turn the lampshade over and start at the other end.

6 Step
Using a pencil, mark the line of contact and label the side that will be at the top. Next, glue the halves of the lampshade together and let them dry.
7 Step
Turn the lampshade over, apply a thin bead of glue to the edge, and insert the wire ring. Immediately secure it with paper clips, let it dry, and then repeat at the other end.

8 Step

9 Step
Also close the seam on the side of the lampshade.

10 Step
Put everything together and enjoy the finished lampshade.

Advice: Using the lampshade given in these instructions as a basis, you can make no less interesting designs eg: the ever-popular thread lamp.

Lampshade – both photo album and map
Marie Darby shared online her success in creating a lampshade - a photo frame. To do this, she writes on her blog, you need a base, for example, like the one in the previous section, or a ready-made lamp with a white lampshade.

You will also need tracing paper (several sheets, you can buy it at craft and stationery stores), scissors, glue, pencil, ruler and printer. The result in the photo was obtained from using inkjet, but you can also use laser, the main thing is that it does not “chew” thin tracing paper.
You can make a collage from the photos on your computer using Photoshop or another collage program such as Picassa. You can collage photos by cutting them out with scissors.
Please note: if you are printing with an inkjet printer, allow the ink to dry. You also need to be careful with tracing paper and not bend it, otherwise the mark from the bend will always be noticeable.

In exactly the same way, you can transfer anything to a lampshade: a child’s drawing or a favorite quote, or even a map of your favorite place.
rope sun
Making a popular openwork lampshade is actually easier than ever. You only need threads (acrylic or natural), glue (PVA or wallpaper), and balloon or a deflatable ball and Vaseline.

The inflated ball is smeared with Vaseline (so that the threads do not stick to it) and they begin to wrap it with threads previously soaked in glue. When the structure dries, the ball is deflated and removed. That's it, the lampshade is ready!

Advice: before making a “finish” test, make 2-3 small lamps for testing. Also, immediately mark with a marker a place on the ball where there should be no threads - through it you will need to remove the ball and insert the cartridge.
Do-it-yourself indoor “night sky”

The pattern on the lampshade can be formed in different ways, each having its own advantages. But in terms of originality, few can compete with a perforated lamp.
To make one, you just need to prepare a base on which you will make the first row of holes (outline) with a thin awl. After this, you need to add many smaller holes and secure the perforated blank to the lamp.
How to make a lampshade video:
Knowledge of English is not necessary, everything is clear without words.
As you can see, you don’t need a lot of resources or experience to make a lampshade with your own hands (), but the result can be excellent. And if you involve a male colleague in the business who will help make a good frame, you can consider that the matter is in the bag.
When you want to change the decor in your apartment and add a little originality to it, start with the little things. Try changing the lampshade, and you will be surprised at the transformation of your family nest.
And if you manage to find an original model that differs from analogues, then the changes will impress not only you, but also your guests.

True, unique lampshades cost a lot of money, because you can’t buy one-piece works by famous artists for pennies.

But no one is stopping you from creating your own unique masterpiece from cheap and sometimes even waste materials, which will look much better than the samples presented in the store.

All you need are simple materials, a little patience and a flight of imagination, and we will tell you how to make a lampshade with your own hands.
Materials
You can create a masterpiece from everything you have at hand: fabric, paper, thread, twine, wire, plastic bottle, beads or beads.

In general, absolutely everything is suitable, even what you usually throw in the trash bag.

Don't believe me? Just look at the photo of the lampshade.

Frame
If you have a frame from an old lampshade, then that's just great.

However, don’t be upset if you don’t find one, because you can create a frame yourself from ordinary wire.

Copper, aluminum, steel - anything that you can independently combine into a single structure will do.

The metal frame of a classic lampshade consists of three rings and six jumpers between them. The small ring is a holder, which is connected by three jumpers to a ring of a larger diameter.

The same, in turn, is connected by jumpers to the last ring. The following photos will help you understand the design.
From fabric
When you have a frame for a lampshade, the easiest way to create your masterpiece is to wrap the base in fabric. For this you will need:
- paper (newspaper);
- scissors;
- textile;
- chalk or pencil;
- threads

Wrap the frame with newspaper in such a way as to form a pattern out of it. Then transfer the resulting shape onto the fabric using chalk, adding 1 cm to the seam on each side.

Make a pattern, cut off the edges and sew the sides, forming a cover for the base of the future lampshade. We bend the upper and lower edges of the “cover” in such a way as to close the frame rings and secure them with a seam.

Note!

Voila, your lampshade for the floor lamp is almost ready. All that remains is to add a few highlights to your taste, making it unique.
From threads
How to make a lampshade when there is no frame? As easy as pie.

Take a balloon without drawings, glue, thread, marker and start creating.

First you need to inflate the balloon and mark on it the upper and lower boundaries of your future masterpiece. Then take the threads and wrap them around the ball, trying not to protrude beyond the marked contours.

Apply glue diluted with water 1:1 to each layer of thread. When the thickness of the wound thread satisfies you, fix the cut edge and hang the ball to dry. After 3-4 hours the threads will dry. Then pierce the ball and carefully detach it from the walls of the finished lampshade.

Leaves and flower petals woven between layers of threads can add additional charm to a thread lampshade.
Note!


A ball decorated with sparkling drops of beads also looks original. In general, watch and be inspired.
From paper
Ordinary sheets of office paper, glossy magazines, a cheap newspaper, an unnecessary book or an ordinary notebook, a paper towel or napkin - these are all future lampshades.

It doesn’t matter whether there is a frame or not, the main thing is that you have scissors, glue and paper. A thousand and one versions of such lampshades can be described with the words “cut and stick”.

The main thing is not to forget a few simple rules:
- It is safest to use a paper lampshade together with economy light bulbs, which heat up significantly less than incandescent bulbs;
- the diameter of the lampshade should be large so that the paper does not heat up excessively;
- for a light room you can make a lampshade from thick paper, but for a dark room you need a thin one that transmits light well;
- be careful with color. For example, red or yellow paper will add warmth to the room, green and blue will add coldness.

Well, that's all. Charge yourself with new ideas, arm yourself with the means at hand and move forward to easy changes that will bring warmth and comfort to your home.

Note!

DIY lampshade photo


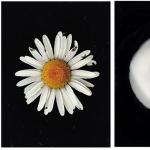
An organza lampshade looks simply amazing, and there is no need to water such a flower.
Materials and tools:
. Organza golden swamp and turquoise color
. Golden green beads
. golden wire
. Aerosol acrylic paint golden color
. Lamp
. Glue
. Pliers
. Wire cutters
1. Cut out 40 petals along an oblique line from organza in two colors.
2. We fold the petals of two colors in pairs and, stepping back from the edge 0.5 cm, sew a zigzag seam with stitches 2 cm wide. Cut off the excess fabric. Lightly pull each petal along the seam so that the edges are wavy.
3. We cut the wire into 20 pieces 10 cm long and attach a bead to their ends. We collect the blanks into a bundle. We twist the ends of the wire so that we get a flat leg. These will be fixes.
4. Cut a wire 35 cm long and string 50 beads onto it. We bend it so that there are 30 beads on one end and 20 beads on the other.
5. Using glue, attach the petals to the lampshade so that you get a flower.
6. Attach the stamens and long wire, imitating brushes.
7. Paint the leg of the lampshade with gold paint.
"Handmade"
making a lampshade like this

An ordinary lampshade under an elegant cover looks completely new. The most suitable fabrics- light, hard and transparent. Choose such tones so that a warm, caressing light emanates from the lamp, good mood create white, cream and pink shades. You can successfully use an old lampshade. For an ugly frame, take an opaque fabric - taffeta, light silk or thin cotton. If you like the color of the lampshade, let the design be visible through the transparent cover.
Curly lampshades
Using this method, the lower cover and the gathered upper cover are sewn separately, which are held on by an elastic band. The lining is placed over the lamp and the top edge of the lampshade, and the outer cover is attached just below, with the junction hidden under a wide ribbon. Finish the case with a silk ribbon, light braid, highlight its narrowed part with a bow, rosette or silk flower - this is a convenient reason to practice with decorations. You will need: A concave frame or lampshade. Centimeter, ruler, pencil and scissors. Paper. Textile. Threads. Elastic band 6 mm wide. 2 safety pins. Tape 50 mm wide.
Measurements. Measure the bottom circumference (A) with a centimeter, add 4 cm to the seam. Measure the length of side (B), add 8 cm for the elastic drawstring. Determine the height of the outer cover (C) and add 1.5 cm for the hem. Write down your measurements. 
Calculation of fabric consumption. Using the measurements taken and taking into account seam allowances, draw a rectangle AxB on paper. Draw a second rectangle taking into account the gathering allowance Cx2A. Determine the fabric consumption from the pattern - you need to cut one rectangle of each size.


Open it up. Pin the pattern onto the fabric lengthwise and cut out the outer cover and lining.
Stitching the lining and cover. Sew short sections of the lining using a French seam. On open sections, sew drawstrings, turning them first by 3 mm, then by 12 mm. Leave some unstitched areas on each drawstring so you can thread the elastic through. Sew the short sections of the outer cover with a French seam. Fold one long edge 3mm and stitch. Turn it over again by 3mm and stitch again.

Lining adjustment. Thread the elastic bands into the drawstrings and secure the ends with pins. Place the cover on the lampshade, tighten the elastic bands so that the cover fits the lampshade. Trim the ends of the elastic bands and sew them together. Sew the drawstrings with a hidden seam.

How to measure elastic for an outer cover. Wrap the elastic band around the lampshade at the level of the top edge of the cover. Pull the elastic slightly so that the cover fits snugly. Cut the elastic and sew the ends together.
Attaching the elastic band. Fold the elastic band into quarters and mark the folds with pins. Fold the cover in the same way and mark the folds. Pin the elastic to the top edge of the cover from the wrong side, aligning the marks. While stretching the elastic and gathering the cover into folds, sew the elastic in a zigzag pattern.

Finishing. Place the outer cover over the lining that is already on the lampshade. Tie a ribbon around the narrowing point to close the line of connection of the covers, attach it with a few stitches. Decorate the lampshade with a bow, rosette or flower.


Lampshade - “coolie”
You can also sew a cover for a conical lampshade. Here are instructions for sewing a lampshade cover from transparent fabric in the flower mentioned above. This cover is simply glued to a small white conical lampshade. If you don't have an old lamp that can be refurbished, pick up an inexpensive, color-matching lampshade at the store. You will need: Conical lampshade. Centimeter, ruler, pencil, scissors. Newspaper. Threads. Ribbon 35 mm wide for tying the top and for the bow. Universal glue.
Measurements. Measure the bottom edge of the lampshade (A), add 4 cm for the seam. Measure side (B), add 6 mm. Draw a 2AxB rectangle on paper, taking into account seam allowances, and calculate the fabric consumption. 
Open it up. Using the pattern, cut out a rectangle of fabric lengthwise. Sew short edges with a French seam. 
Hem. Turn one edge under 3mm and stitch. Fold the edge in again by 3mm and stitch again.
Gathering the top edge. Fold the cover in four and mark the folds with pins. Sew along the top edge twice, starting and ending at the pins. Mark four equal sections on the top edge of the lampshade with a pencil. Place the cover on the lampshade and, aligning the marks, gather it to fit the size. Distribute the gathers evenly, fasten the threads and remove the cover. 
Tying the top. Cut the ribbon so that there is enough for the top edge, adding 1.5 cm to overlap the ends. Fold the ribbon over the gathered edge, fold one edge, and attach the ribbon. Stitch the tape to the edge, catching both sides and gathers in the seam. 
Finishing. Place the cover on the lampshade and glue universal glue in several places. Tie the remaining ribbon over the glued area into a bow to disguise it.
Advice. Tulle lampshade. To ensure that a cover made of thin and soft fabric adheres better to the lampshade, it can be reinforced with a lining of hard tulle. Measure the distance from the edge of the lampshade on one side to the edge on the opposite side across the top. Cut a circle of this diameter from tulle. Drape it symmetrically over the lampshade and cut out a circle to cover the top. Sew the cover as above, but baste the lining before you tape the top edge.

The color of the lampshade under the clear cover with a small frill at the top matches perfectly with the decor of the room. Sew a cover as for a conical lampshade. Cover the gathered seam with a ribbon with a bow or a garland of roses.
Types of lampshades
Making a lampshade with your own hands is not at all difficult - this good way save.
Table lamps and pendant lamps play a prominent role in the interior. These are not just light sources in the house, but also important elements decor. You can reduce expenses on furnishings and choose the ideal lamp if you make a lampshade with my own hands.


What is needed to make a lampshade
Kits for most of our models are available for sale. But if you don't have a lampshade unusual shape, you can find an original old model in a thrift store, which you can decorate to your liking.
Frames. The frame consists of upper and lower rings connected by posts, and a base for the lampshade. The rings and shape of the posts determine the type of lampshade. For example, for a cylinder-shaped lampshade, the diameters of the upper and lower rings are the same. The rings are connected by straight lines vertical posts. The elegant “concave empire” lampshade has an upper ring that is smaller than the lower one and the posts are smoothly curved inward.
Materials. To make and cover the frame, you will need: Durable cotton paper tape dense weave, which is wrapped around the frame so that the lampshade can be sewn on. Self-adhesive paper tape if the lampshade is not sewn on. Enamel for painting a metal frame.
Textile. When choosing fabric for a lampshade, follow these rules: Look through the fabric at the lamp and check how it transmits light. For a lampshade without lining, you need a thick fabric that will hide the contours of the lamp and stands. If the outline is visible through the lampshade, add a lining. The fabric shades the light of the lamp. For example, blue and green lampshades give a cold glow, red and yellow - a warm glow.
Fittings. Each frame comes with mounts for the lamp fittings. Typically, the lampshade of a table lamp is attached to its stand using a suspension ring with spacers or to a special frame that rests directly on the fittings; small “candle” lamps have clamps that hold the lampshade. Lampshades pendant lamps suspended on fittings.
Parchment paper for a smooth lampshade. Self-adhesive PVC sheet is a rigid PVC sheet to which fabric or other material can be glued. Decorative finishing, which is glued or sewn to disguise the joints and finish the lampshade.
A lampshade made of dark, heavy fabric allows light to pass through from above and below and creates a directional flow of light.
Thick fabric is not suitable for a pleated lampshade. On a flared lampshade, the design is more distinct at the bottom. Check how a folded piece of fabric looks.
For a shaped lampshade, you need soft, easily draped fabrics. The fabric pattern should lie nicely diagonally.
Frame making
Before covering the lampshade frame with fabric, it must be prepared depending on the type of frame and the covering material. For example, if you are making a cardboard cap on a plastic-coated frame, no prep work is required. The metal frame should first be painted with white enamel to prevent it from rusting. The old frame needs to be cleaned with sandpaper. If you are sewing a lampshade to a frame, you must first paint the frame and wrap it with tape, after which you can sew on the cover.
Painting the frame. If metal carcass is not covered with PVC, it should be painted. Remove traces of rust with sandpaper. Sand the frame so that bumps and protrusions do not damage the fabric. Paint the posts and rings with white enamel, but leave the center ring alone. 
Wrapping the frame. If the frame is covered only with fabric, then you need to wrap it with cotton braid. Do not wrap the suspension and fittings ceiling lamp. To calculate the tape usage, measure the length of each post and the circumference of each ring and multiply by 3. This will be the total length of the tape. If the white ribbon shows through the dark fabric, paint the ribbon to match the color of the lampshade.
Wrapping the stand. Cut strips of tape 3 times longer than the post. Start work from the top end of the rack. Wrap the end of the ribbon around the ring, then around the post to secure the end. Using slight tension on the tape, wrap the post from top to bottom in a spiral so that each turn covers and holds the previous one. The finished winding should not move. 
Fastening the winding. When you reach the bottom of the post, wrap the braid around the ring, threading the end through the last turn to make a knot. Pull the ribbon tightly and leave a loose end. Wrap all the posts in this way except one. 
Wrapping the top ring. Measure the circumference of the top and bottom rings and the height of the last, unwrapped post. Cut the braid to this length. Roll up the tape and secure with a rubber ring, leaving a free end of 20 cm. Hold the end of the tape in front of the top ring at the unwrapped post. Throw the ribbon through the ring over the free end and secure the end. 
Shutdown. Wrap the top ring, wrap the braid in a figure eight around each post. Having reached the unwrapped post, secure it with a figure eight and wrap it from top to bottom. Make a figure eight at the bottom and wrap the bottom ring. On each stand, trim the ends of the braid to 1 cm and hide them under the braid wound in a figure eight. After finishing the winding, trim all ends of the braid to 6 mm, tuck and sew by hand. 
How to choose a base stand
The lampshade and the lamp stand must form a single unit. There are a few principles to keep in mind when choosing a base stand and lampshade. The lampshade should completely cover the fittings, but not the base of the lamp. The lower diameter of the lampshade should be twice as wide as the widest point of the base stand. The height of the lampshade should be 1-2 times the height of the round or vase-shaped base stand. The height of the lampshade for the base stand and candle should be 1/3 of the height of the stand. 
In the interior of each apartment, even the smallest and most insignificant element plays an important role. Just one wrong detail and the interior is ruined. That is why the choice must be approached carefully and very responsibly. In this article we will talk about such interior decoration as lamps. It’s not enough to just hang a light bulb, you also need to decorate it somehow. This can be done using a lampshade. Store-bought variations of lampshades may not always please you, and it is rare that among them you can choose the model that will harmoniously fit into our interior. We do not always choose a new lamp with beautiful design, sometimes the old one no longer attracts us, has gone out of fashion or absolutely does not fit into new interior. All these factors push us to create DIY lampshade (photo).
It would seem that decorating a lampshade yourself is a rather complicated procedure, but in fact everything is very simple. Set aside some free time, and we will tell you several options for creating beautiful lampshade. Do DIY lampshade can be made from any materials that you find at hand. It can be any fabric you like, ribbons, beads and many other materials that, in your opinion, are suitable for decorating an original lampshade.
DIY lampshade for floor lamp everyone can do it. The main thing is not to set yourself too serious tasks. If you have never encountered homemade products and have a hard time imagining how to cope with the task, then it is better not to take risks, but to choose a simpler option for designing a lampshade.

A beautifully selected material, color and shape for the future lampshade will create a truly spectacular interior element. A neat and original floor lamp or other lamp can perfectly complement the design of a hall or other space.

It is not always convenient to make a lampshade from scratch; it is much easier to transform an existing one. In particular, this solution is much simpler for those who for the first time decided to decorate their apartment with their own hands and add a fresh touch. To create a new design for central lighting or a floor lamp, you need to take an existing lampshade or purchase the simplest one in the store inexpensive option. Each of the proposed options is good in its own way. In the first case, the former lampshade does not always have ideal condition, which accordingly can add problems during its registration. In the second case, you will receive a whole new material to express your imagination, but at the same time you will incur small losses.

But in any case, making a new one from a ready-made lampshade will not be as difficult as decorating a new one. What can be made from an old floor lamp? Having cut out, for example, parts from cardboard or plywood, they can be attached to an existing lampshade, painted in one color or covered with fabric. We will get a lampshade with new shapes. This solution is often used when parents want to create a fabulous design. Just imagine how great a boy’s room will look, decorated in a cosmic style with elements of unearthly planets, and a lamp made in the form of a cosmic creature or a small satellite. But making such a lampshade for a lamp using the above method is not difficult. Imagine a little, involve your child in the process, who is always full brilliant ideas that you wouldn't even think about. A little time and effort and you will succeed original solution for central lighting of a children's room. All guests who come to visit you will be delighted with the solution they see.

If you have a plain lampshade, you won’t have any problems with its design. Plain colors are an ideal material for homemade decoration, because here you can realize any wishes and ideas. For example, you can get an original lampshade using appliqués, embroideries and even ordinary stickers, which can be found in many stores.
DIY lampshade - master class
We offer you an interesting DIY lampshade (master class), in which we will tell you how to create a work of art from an ordinary light lampshade. During the day our floor lamp will represent normal element interior, and at night it will turn into a wonderful decoration.

Our master class will be devoted to creating a lampshade in the form of a night city. To do this, we need the lampshade itself in light colors, yellow, orange or light pink shades are desirable. They will most closely resemble night lighting when the lamp is on. We take black fabric and cut out our model of a night city from it. These can be trees, buildings and even cars. Using PVA glue or any other glue, we glue our applications onto inner side of our lampshade so that no wrinkles form. You can sew a black ribbon on the bottom. Please note that it is better to stitch with white thread or thin ribbon. This will create the effect of a city road.
In daylight, our application will not be visible. And when the light is on, landscapes of a night city with houses and trees bathed in moonlight will open before us.

When choosing a colored floor lamp with bright ornaments and patterns for decoration, it is enough to slightly decorate it by adding pendants with beads bright colors. It is possible to decorate with thin satin ribbons to create a brighter effect. This lamp will fit perfectly into. Thanks to such a small additional interior, she will be able to feel like a real princess living in a fairy-tale room with a cute interior.
How to make a lampshade with your own hands from scratch?
If you are interested in a question, how to make a lampshade with your own hands from scratch? Then you can just buy a few plastic folders and wire. From the folders, cut out the necessary parts for the frame, and use wire to connect them together. This solution will allow you to create a completely new, original and unique lampshade.
Before you begin any design of the lampshade, you need to take into account all the colors that are found in the room for which it will be intended. As you understand, the lamp must fit harmoniously into the interior of the room, match the texture and color scheme space. In addition, follow safety precautions. That is, if you have a baby who is still too small and strives to grab onto everything that comes his way, then try to design a more discreet version of a floor lamp or lamp that the baby will not reach out to. The fact is that we have more than once encountered situations where children pulled the pendants on the floor lamps and tipped it over on themselves, receiving various injuries. Let's not talk about the bad. Just try to take into account all factors other than beauty.

What materials are most often used to create a lampshade? The most common option is textiles. It is good not only for its flexibility and ease of use. Its popularity is also deserved thanks to the chic variation of colors, which allows you to decorate absolutely any floor lamp that is perfect for any interior, be it minimalism or ethno style. Among all the variety of fabrics, it is best to choose thick cotton or felt, which very quickly gain popularity among needlewomen. Felt is an excellent material for creating a lampshade. It allows you to create a variety of multi-layer compositions, for example, DIY lampshade with butterflies.
If you don’t want to tidy up your old lampshade for central lighting, we suggest you very interesting option doing it from scratch. This option will not take much effort and time; it is good for any interior, especially for.

To create a new lampshade for a ceiling lamp, we will need a ball, glue and thick threads. Performed DIY thread lampshade very simple. Inflate the ball. Dip the threads in glue and wrap the ball in a random order. Just don't overdo it. There should not be too many threads; there should be enough space between them to allow light to pass through. In addition, it is worth leaving a small space without threads on one side, this will be the bottom of our lamp, through which the light will flow. The creation process is almost ready, just wait a little until the glue dries, after which you can blow off the ball.
Our threads will remain in the form and form in which they were at the time of drying. If desired, our lampshade can be painted with paints in order to give it brightness and originality, while simultaneously combining several colors. Now all we have to do is hang our lamp on the lamp. As you have seen, there is nothing complicated about this. But the interior will receive a new note of originality.

To decorate an old lampshade, you can use satin ribbons and even scraps of fabric. They can be sewn along the diameter of the fabric, thereby creating horizontal stripes. For example, you can make a combination of several colors. For example, let our lamp be bright Pink colour, and we will insert stripes in burgundy tones with bright small flowers. A combination of turquoise and brown. This lampshade is suitable for decorating the interior of a hallway or one of the rooms. A cute floor lamp can be placed in the nursery, and a brighter solution can be left for guests to see in the living room.

Recently, people have been striving to create new and original elements for interior decoration with their own hands. Therefore, in their works they use absolutely unpredictable elements, among which are kitchen utensils, artificial leaves, bamboo and other equally interesting materials. Lampshades look unusual, the frame for which is made of transparent plastic, and the inside is covered with old slides, photographs or decorative stones.

As you noticed, making a new floor lamp or chandelier is not as difficult as it might seem at first glance. Everything is quite simple if your imagination works and you have a lot of brilliant ideas. You can make an original interior element from any available means by adding a little new perspective to their design. Imagine, experiment and you will be able to create bright interior, full of unusual and unique details general composition.