Wood milling can be a profession or a hobby. Beginning craftsmen will be interested in learning about how to choose a hand router, what techniques and rules exist when preparing and working with the tool, and what equipment may be needed when making wood products. Let's talk about this.
Wood milling - mechanical restoration material, removing part of it to create grooves, grooves, edges, holes, figured patterns on the surface, obtaining parts complex shape. A milling cutter is a hand-held power tool for woodworking with a working tool – a milling cutter. A milling cutter is a single- or multi-bladed tool that cuts wood while rotating. The capabilities of the work performed depend on the modification of the router, the number and type of cutters, as well as the density of the wood and the experience of the craftsman.

Types of hand routers
Wood milling is used in the manufacture of furniture, the production and installation of doors, and the laying of wooden floor coverings, for various kinds of crafts. The choice of tool depends on the prospects for its use: special and universal purposes.
Special milling cutters:
- submersible (for holes, grooves, grooves of any depth - the motor with the cutter moves along the vertical axis);
- edging (only for edges, chamfers - with a guide bearing);
- lamellar (for rounded linear grooves);
- dowel (for grooves, for dowels, tongue-and-groove assembly);
 1 - submersible; 2 - edging; 3 - lamellar; 4 - dowel
The universal router is equipped with two bases. In this case, the tool works as a submersible tool and processes edges.
When choosing a tool, you need to pay attention to the following parameters:
- power (0.8-1.3 kW is enough for a home handyman);
- cutter speed;
- correspondence between power and speed;
- type of clamp (the best is a conical collet);
- speed adjustment (smooth, clock);
- maximum immersion depth;
- accuracy of work;
- smooth start;
- security locks;
- presence of a dust extractor.
By determining the level of importance of each parameter, you can find a milling cutter that matches the upcoming tasks and intensity of use.

Types of cutting tools
Structurally, cutters can be monolithic, with replaceable blades, prefabricated, brazed. Materials: carbide or high-speed alloys, cermets, etc. The configuration of the tool corresponds to the recess or edge shape that needs to be obtained on the product.
Types of groove cutters:
- straight;
- fillets;
- structural;
- shaped;
- « dovetail»;
- “mouse tooth”, etc.
Types of edge cutters:
- straight;
- moulding;
- disk;
- curly;
- horizontal, etc.
Each cutter is produced in various standard sizes. The easiest way is to purchase a kit containing a set cutting tool for a specific activity. The diameter of the part to be fixed must correspond to the collet of the router.

How to use a hand router
The easiest way to start learning is with a plunge router. Visually, such a tool is the most bulky and complex, but it is easier to work with, since the direction of the cutter is fixed by the design of the machine perpendicular to the surface being processed.
Step 1. Secure the cutter shank in the collet.
You need to insert the shank into the chuck and tighten it with the key provided for this purpose. At this stage, it is important to correctly calculate the tightening force. Overtightening is undesirable and insufficient fixation is also undesirable.
Attention! If you are planning a deep recess, it is better to take a cutter with an extended shank.
Step 2. Setting the excavation depth
If the work is carried out according to the drawings and the groove is shallow, you just need to set the appropriate depth on the limiter and set the fine adjustment (if the model has fine tuning). If milling is done “by eye”, you need to estimate the depth of the tool by placing the milling cutter against the end of the product. The depth can also be selected in stages - when producing more than 3-8 mm (depending on the diameter), precision work or at the training stage.
Step 3. Testing the operation of the milling cutter
For those who have no milling experience, have purchased a new tool, or are working with an unfamiliar type of wood, it is advisable to use a “draft” - the same piece of wood as the future product. You need to test the operation of the cutter, changing the speed, direction (towards you, away from you, turning clockwise and counterclockwise) and the depth of the notch, and monitor the accuracy. Adjust settings.
Step 4. Determine rotation speed
When operating a cutter, an important indicator is the peripheral speed - the rotation speed not of the shank, but of the surface of the cutting tool in its widest part. If the cutter rotates too quickly, it will tear out wood fibers and leave gaps; if it rotates too quickly, the material will get burnt. If the rotation is too slow, the surface of the product will be rough, as if covered with “ripples”.
When adjusting, the rule applies: the larger the diameter of the cutter, the lower the speed on the shank (shaft revolutions) should be. Some manufacturers provide tools with instructions: wood/diameter/speed. If there is no such data, you need to experiment.
 1 — too low speed; 2 — too high speed; 3 - uneven movement of the cutter at high speeds; 4 - good result
Step 5. Fixing the product
The wood being processed should not wobble. The result of your work will be spoiled and you may injure yourself. The workpiece must be laid on a reliable base and secured, for example, with clamps. When using a template, it is also fixed.

Step 6. General rules preparation for work
Markings must be applied to the workpiece (when working without a template). The milling operator's movements should not be sudden. A smooth start and smooth, uniform movement along the calculated trajectory, a correctly selected number of revolutions is a recipe for an ideal and beautiful result.
When working, you should not lean your whole body on the router or let it float freely. The pressure should be tight, confident, and uniform throughout the entire stage.

Attention! The instructions for the machine will indicate how to hold the router correctly. Each model has handles that ensure safety during operation.
Step 7 Milling the finished product
The start of work can be from the edge of the product (open groove) or in its mass (blind groove). In the first case, you must first install the router and then turn it on. In the second - turn on, and then feed the cutter into desired point. Upon completion of milling, you need to turn off the tool after removing it from the wood.
When making deep grooves and step cuts, you should always turn off the tool for adjustment. The maximum single depth must correspond to the diameter and material of the cutter, and the density of the wood. To obtain a smooth surface, the last removal should be no thicker than 1.5 mm.

It is important to correctly determine the speed of movement of the router along the line being processed. Too slow will cause overheating and burns. If you move too quickly, sawdust will not be removed in time, the work will be difficult, and it may look sloppy.
The basic rule when choosing the direction of movement of the router is: in the direction of the approach of the cutter blades (cutting edges). This applies to both free milling and tooling.
To process edges and obtain a certain edge configuration, sometimes the router is fixed under the table, with the router rising above the tabletop, and woodworking is performed by moving the workpiece relative to the router. Thus, from the category of a hand tool, it moves into the category of a mini-machine.

Equipment for working with a hand router
To make work easier and faster, it is advisable to use simple devices, such as:
- guide bars;
- rip fence;
- rod compass;
- copy sleeves;
- templates
All devices can be purchased, and some can even be made independently and improved to match the author's idea.
The rip fence provides rectilinear movement cutters relative to the workpiece, the edge of the workbench, the guide bar. This device is usually included with the tool.

The guide rail (bar) allows you to guide the tool not parallel to the edge, but at any given angle. It must be secured to the table with clamps. Homemade option— fixed wooden limiter bar.

A rod compass is needed to make circles, arcs, and geometric curves. When working with a compass, the movement should be performed in a counterclockwise direction.

The copying sleeve makes it easier to guide the tool along a complex path and ensures accuracy. In combination with templates, the best results are achieved.

There are two types of templates: internal and external. It all depends on whether the tool moves along the inner or outer edge. When driving along inner contour template, the router must be driven clockwise, outward - counterclockwise. The template must be thick enough so that the copy sleeve does not touch the workpiece.

You must also work with a milling cutter using equipment carefully, smoothly and equally progressively, as with free milling. Perhaps the first time you will get a not very outstanding milling result. This is the type of work where experience and attention to detail are very important.
If you are interested in carpentry, you definitely need to understand how to work manual router. The cutter allows you to create a variety of crafts without putting in almost any effort. However, before you begin, you need to become familiar, firstly, with the features of the structure and use of the tool, and secondly, directly with the operating technology. Having learned how to work with a wood router, you will be able to decorate furniture, doors and any other objects made of wood. If you wish, you can even start your own small business.
Design of a hand router: 1. Base - plywood (acrylic, MDF); 2. Milling cutter 6 mm; 3. Matching hole in the base of the router; 4. What should happen; 5. Hairpin (a nail without a head is fine).
What kind of work can be done with a hand router?
Using a wood router you can perform work of a varied nature and varying complexity. At its core, a router is a device that makes many rotations at high speed, creating holes of the required shape and size. All the work that a manual router allows you to do can be divided into several main categories. So, using this tool you can mill quarters, grooves and grooves. The holes created with the help of a tool are usually part of a prefabricated structure or a decorative element.
Before you start working with a manual router, you need to consider the main features of each existing type works First of all, this is profiling. A hand router can be used to profile platbands, cornices, skirting boards, glazing beads and other products. This is done with an edge. This type of work is usually used in the manufacture of furniture. Great option decorations wooden products.
Using a hand router you can decorate the edges of a variety of complex products, creating a truly exclusive product. Each craftsman has his own idea of what the finished product should look like, so the end result often turns out to be real masterpieces. It is better for beginners to take on such work after they have gained experience. Experts advise doing this work only using a template.

A hand router allows you to solve many common everyday tasks, for example, making recesses for locks. In production conditions, as a rule, special milling machines, but at home you can get by with simple hand tools.
When working with a router, you will need various additional tools and devices. Their list will vary depending on what specific work you are going to do, but the following are used most often:
- Electric jigsaw.
- Electric drill with drills.
- Iron plate, screws.
- Milling cutter.
- File.
- Templates.
- Overalls, respirator.
Return to contents
When processing wooden products, special cutters are used. Choose them according to the type of work to be done. Also consider the type of material being processed. Each of them has its own characteristics and requires the use of appropriate cutters.
The cutter itself is part of the design of the tool in question. It consists of a working part with a cutting edge and a shank. Milling cutters may differ from each other in design features, size, material of manufacture, and shape of the cutting part.
Cutters made of lightweight materials are suitable for processing soft wood. If you have to process harder wood, select an appropriate hard cutter.
Exists generally accepted classification of this structural element. Milling cutters are usually divided into:
- Profile. Used for decorating various wood products.
- Cone-shaped. With their help, you can process wood of various species at an angle.
- Rectangular. Used when processing grooves.
- V-shaped. Allows you to create holes with an inclination angle of 45°. Typically used to apply various kinds inscriptions on the surface of wood products.
- Moulded. Used to round edges.
- Disk. With their help, you can create horizontal grooves in a wood product different widths and depth.
- Folded. Used when milling quarters.
- "Bird home". Designed specifically for making hidden and open tenon joints.
- Fillet. Allows you to create fillets on the edges of wood products.
In addition, there is a classification of cutters into bearing and bearingless. Hand tool without bearings in all cutters allows you to process the workpiece in any required place.
Return to contents
Step-by-step instructions for installing the cutter
First of all, the cutter must be set to the required depth. This is done in the following order:
- Select a router bit to create the hole you want in the wood.
- Insert the shank of the selected product into the chuck so that the immersion is no more than 20 mm.
- Turn the chuck until it clicks and tighten the nut with a wrench.
- To set the router to the required depth, use a special device called a movable depth stop.
- Set the fine tuning knob to a position between minus and plus.
Before you start processing the finished product, be sure to check how deep the cutter will go into the finished sample. If the entry is not as desired, you can independently set the required depth using the handle provided for this.
Return to contents
Basic rules for working with the tool
It is very important to install the speed controller correctly. If this is not done, the workpiece may deteriorate. The risk of damage to the workpiece becomes especially high when working with a large-diameter cutter.
Select the speed of rotation in accordance with the characteristics of the work to be done and the characteristics of the materials. The more correct the ratio of the cutter speed in relation to the characteristics of the wood being processed, the better and cleaner the work will be.
When choosing a router, you need to pay attention to the working field, optimal size which is 12000x1200 mm, and the power of the tool.
As the diameter of the cutter increases, the rotation speed must be reduced. For example, cutters with a diameter of 1 cm can be used at a speed of about 20,000 rpm, and a product with a diameter of 4 cm is better to work at a speed of up to 10,000 rpm. Instructions are included with each cutter. Make sure it is available when purchasing the tool. The instructions indicate all the requirements that must be met to obtain a good result.
While working, you can hold the router with your hands or secure it to the table. It is more convenient and preferable to process small items on the table. In this case, the work will be of the highest quality. The router is installed on this type of table with the spindle facing up. If you wish, you can also buy or assemble a machine yourself.
Milling wood on a table requires compliance with the following rules:
- A ruler should be placed on the surface of the table to match the shape that you plan to cut. If a semicircle is to be cut, arcuate guides are used. When creating lines, the guides must also be straight.
- When working with variable profile parts, use narrow rulers with an oval end. Attach them perpendicular to the workpiece.
When working with a router, do not forget that the router must be moved along the workpiece exclusively in the opposite direction relative to the movement of the cutter. Otherwise, you risk not being able to hold the tool and getting injured.


In order to ensure the normal operation of the milling machine, it is necessary not only to handle the device used correctly, but also to correctly use, in other words, devices for So that this tool has the ability to form a workpiece in accordance with the requirements of the master (that is, cutting off the edges and other places of the material where it is needed, and not where “it happened so”). So, it is precisely to give the processed material a clear planned shape that the farm uses “devices” for a manual milling machine.
The difficulty of making homemade devices
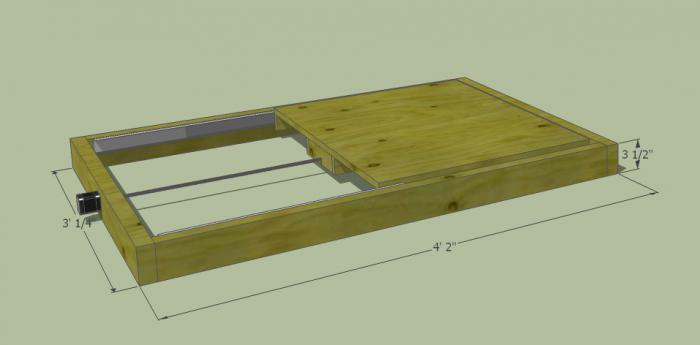
Often, manufacturers themselves complete their products at the production stage, but with a full set of all necessary tools, alas, not every company will be able to please consumers. And why do this if at any time you can make a suitable tool with your own hands in a garage. This can be done even without a preliminary drawing: their design is so primitive that even a novice master can cope with such work. To make a parallel stop or any other part, it is enough to have with you a drawing of this device and minimum set tools. But if you want to make homemade table for a manual router, you definitely can’t do without a drawing. You need to calculate everything correctly, indicate the dimensions of the table, and then get to work.
How to work with a hand router?
Before carrying out milling work on wood, you need to make sure of the following:
- Is the cutter secured in the collet?
- Does the additional device installed on the workbench correspond to its power and speed?
- Is the required milling depth set (when working with submersible devices, this indicator is measured using a special immersion limiter).
- When working with it, make sure that a guide ring or bearing is installed that provides the desired trajectory of the device (the thickness of the cutter should be no more than three millimeters).
We pay attention to supports for parts when performing work.
When considering the question “how to work with a hand router,” it is also necessary to note that the part you are processing must always have some kind of support. For example, before the engine is turned on, the edge of the sole or bearing is pressed against the guide part or template. Only then does the master turn on the machine and begin milling.
Below we will look at what types of tools there are for a router and what makes them special.
Rip fence
The rip fence is one of the few devices that is already included with every router. Therefore, there is simply no need for their independent development and production. As for the functions, with the help of the mentioned element it is possible to make a reliable stop for the material being processed, thereby ensuring the linear movement of the cutter relative to the base surface. The latter can act as a straight edge of a part, a guide rail or a table.

With this attachment for a hand router, you can quickly process edges and mill various grooves, holding the material almost in the “dead center” position.
Guide rail
This tool has similar functions to the previous one. Like the rip fence, the guide rail ensures extremely smooth, straight-line movement of the device. Working with a manual wood router using a guide rail can significantly reduce the time spent on processing a particular part. In addition, using the specified equipment, you can install the mechanism at almost any angle relative to the edge of the table.

In some cases, the design of the tools in question provides for the presence of special elements that facilitate the performance of certain operations (for example, this may be the function of cutting holes at the same distance opposite each other).
Copy rings and templates

Devices for a hand router, such as copying rings, are a round plate with a protruding shoulder that can slide along the surface along the template, thereby ensuring the exact trajectory of the cutter. Often this element is attached to the base of the workbench. There are several ways to install it:
- Screwing the ring into a threaded hole.
- Installation of special antennae of the device into the holes on the sole.
If you have such a device for a manual router as a template, you can also achieve more accurate and efficient work. The designated

the element directly on the workpiece itself, after which both parts of the device are pressed against the machine using clamps. Upon completion of the work, experts recommend checking the condition of the ring - see whether it is securely pressed against the edge of the template or not.
Another feature of the tool in question is the ability to process not the entire edge, but only its corners. At the same time, some devices for a hand router allow you to make curves of four different radii at once. Thus, the process of cutting material using a template is an excellent way to cut grooves for a part.
Compasses
Data homemade devices for a manual milling machine, they are intended to move the entire machine along a certain circle. The design of this tool includes a main part (a compass consisting of one rod), attached at the end to the base of the router, and a secondary part - a screw with a pin inserted into the hole of the machine. The value is set directly by the offset of the machine relative to the device design. Before starting work, you must carefully secure the tool to the base and make sure that the router is in good condition and is functioning normally. It is worth noting that the most effective and easiest to use is the compass that has not one, but two rods.

Most often, this instrument is made of transparent plexiglass. A small metric scale is additionally applied to its surface. It is worth noting that some models of compasses can have a circumference of up to 150 centimeters. Using this device, you can easily make a round tabletop for several people.
However, let's return to the principle of operation. Using an angular lever with a precise scale, copying is carried out on the workpiece. In this case, here you have the opportunity to center the ring directly under the cutter. The angle arm, which is complemented by a special support plate, also ensures precise edge milling.
The entire structure of this device consists of a base plate, a set of probes and a chip protection device.
Devices for copying identical devices and parts
This characteristic refers to a set of tools consisting of an angle lever and special copying probes, which are needed for the manufacture of a batch of identical parts. Most often, such equipment is used in cases where there is a need for replication. wooden devices small sizes. But before you start working with such a router, you need to prepare the angle lever scale in advance (division value is 1/10 mm).

Once the scale is set, you will be 100 percent sure of the correct centering of the thrust ring under the cutter, the location of which depends on the values set on the angle lever. Also, this adjusting element can be equipped with a support board and a special mechanism that protects the surface of the device from chips. The use of such parts will significantly speed up and secure the processing of product edges.
Those who love carpentry, i.e. woodworking, should definitely know how to use a hand router. With the help of such a device you can create real masterpieces without any effort at all. However, this will require work skills and knowledge of what this tool consists of, how to assemble and disassemble it. Using a hand-held wood router you can create beautiful door, decorative furniture or other original items. You can even open your own business making a variety of wood products.
Types of milling work
The router is a unique device that makes a large number of rotations per second, while creating holes required diameter and shapes. Work performed divided into several categories. The holes that are created by a router are almost always part of a detachable or one-piece structure that decorates the product.
It is necessary to consider in more detail the work carried out using a router.
- Profiling of products such as cornices, platbands, skirting boards, glazing beads, etc. is carried out using an edge. Such work is suitable for furniture manufacturers. This is a great solution for decorating wood products.
- Decorating the edges of complex products using a router helps create an exclusive product. A professional can even create a masterpiece. For beginners, a video will help in this case. This process is necessarily carried out using templates. They help create identical patterns over large areas.
- Using a wood router, simple everyday problems can be solved. For example, it is necessary to make recesses for locks or for awnings. A special milling cutter is used for this, but for home work you can also use hand tools.
All woodwork is carried out with special cutters. They are selected based on the type of work that will need to be carried out and the type of wood that is milled. On the Internet you can find a large number of videos that explain in detail and clearly show what a cutter looks like and how to choose it correctly.
The cutter is a component of the router and represents shank and working element with cutting edge. They are distinguished by:
- cutting edge shape;
- the type of material from which they are made;
- size;
- designs.
Thus, for working on soft wood, lightweight materials for the cutter are needed. And for making an object from hard wood, preference is given to “hard” cutters.
There are cutters:
- cone-shaped;
- V-shaped;
- disk;
- Swallow's nest cutters;
- profile;
- rectangular grooved;
- moulding;
- folded;
- fillets.
In addition, cutters are divided into those that direct movement and have bearings and those that do not. Using a hand-held milling cutter without bearings, work is carried out anywhere on the workpiece.
Installation of cutter
Once the required template is found, further work wood should be cut using a hand router. For this purpose, they select install the correct cutter. This is done in the following sequence:

How to do the job correctly with a hand router
A large number of electrical devices for construction and repair carry out their work by rotating the shaft. A hand router makes a large number of revolutions per second. It is generally accepted that woodworking will be done cleaner by a router if there are as many revolutions as possible. In fact, this is a misconception. The item may char and break if incorrect installation speed controller and when performing work with a milling cutter large diameter.
That is why for each type of work and material it is necessary to select and set a certain number of revolutions per second. The work will be carried out much cleaner if the ratio of the speed of movement of the cutter relative to the wood that is being cut is correctly selected.
Work with a manual router is carried out by placing it on a special table or simply holding it in your hands. Small workpieces are usually milling on a stationary table. This helps to complete the work without any defects. The router is installed on such a table with the spindle up.
In order for milling on the table to be performed without errors, it is necessary:
- Place rulers on the surface of the table to match the shape that will need to be cut;
- narrow rulers with an oval end are necessary for working with parts of variable profile and they are attached to the table surface perpendicular to the workpiece.
It should be remembered that when working with a hand router, it must be moved in the opposite direction relative to the movement of the cutter. Otherwise, the tool often breaks out of your hands and causes injury.
Compliance with safety regulations
A hand router for wood is a must requires compliance with safety regulations so as not to cause harm to health:

Conclusion
It is quite difficult to learn how to make wood products using a hand router. Best to study video lessons with necessary instructions . Do not forget that this is a rather dangerous tool that can cause serious injury. That is why it is important to follow safety precautions, be attentive and careful.


