DIY laminate installation guide. Step-by-step instructions with video detailed description the main stages of creating a coating.
Laminate is one of the most popular types of flooring. Panels made from polymer-based fiberboards, according to operational characteristics are not inferior to traditional materials.

After studying the simple instructions, you can lay the laminate flooring yourself
Laminate occupies an intermediate niche between linoleum and natural parquet, successfully combining the low cost of the first and the undeniable advantages of the second. Displacing these players from the market, laminate also has its eyes on, although they seem to have different niches!
Laying laminate flooring with your own hands is not an easy task, but knowing certain secrets and tricks, anyone can cope with it.
Lock connection options
All options modern panels attached using one of three methods:
- Adhesive - based on the tongue-and-groove system. The installation technology is similar to that used when laying parquet boards.

Laying laminate flooring with glue
- “Click” - with this system, the spikes are flat hooks. They are inserted into grooves equipped with a platform for engagement with a hook, which can be made at an angle of 30°.

Click laying system
- “Lok” - this type of lock looks like a tenon with a locking comb, which is inserted into a milled groove in the adjacent panel.

Lok laying system
The adhesive method allows for increased strength of the seams. But due to the use of glue, the structure becomes non-removable, which greatly complicates its dismantling.
Lok panels are installed by driving a tenon into a groove until it fits tightly.
Compact the lamellas with a mallet or metal hammer. To avoid damaging the panels, a short piece of timber or a small wooden block is first placed at their end. The disadvantage of the system is that under load, the joint combs wear out, which is often accompanied by the appearance of cracks.
Assembling the “Click” panels is not difficult, thanks to which you can lay the laminate with your own hands, if necessary, assembling and disassembling the flooring up to six times. Having connected the grooves with the tenons, the joints are pressed to the floor until the hook engages with the groove area, which is confirmed by a characteristic click.

Diagram: comparison of laminate laying systems
Securely fixed panels do not move apart even under heavy loads during operation, maintaining the integrity of the canvas.
Tip: Regardless of the type of lock, the connection system is essentially the weakest point in the design. To extend the service life of joints, it is recommended to treat them with hermetic impregnations.
Options for panel laying schemes
When laying lamellas, craftsmen recommend adhering to the principle that they should be placed parallel to the direction of light. Then the light falling from the window onto the floor will not create shadows on the seams, thereby achieving the effect of an ideal surface.
But based on the layout and design of the room, the installation of lamellas can be done using one of three options:
- In the direction of the world.
- Perpendicular to the light flux.
- Diagonally.

Laminate installation options
By choosing one or another installation scheme, you can advantageously emphasize the originality of the coating design and even visually modify the geometry of the room, expanding or, conversely, narrowing the space.
The slats are always placed “staggered”, laying out the elements of each subsequent row with a slight shift to the side by 15-20 cm relative to the previous one.
Step-by-step instructions for laying laminate flooring
Regardless of the chosen type of material and method of laying the panels, when planning to lay the flooring with your own hands, you can follow the universal step-by-step instructions, the main points of which will be discussed below.
Preparing the necessary tools
When planning to lay laminate flooring yourself, you should prepare the following tools in advance:
- Construction tape;
- Metal square;
- Hacksaw with fine teeth;
- Jigsaw;
- Hammer;
- Wooden or rubber mallet;
- Marker for marking;
- Tamping block;
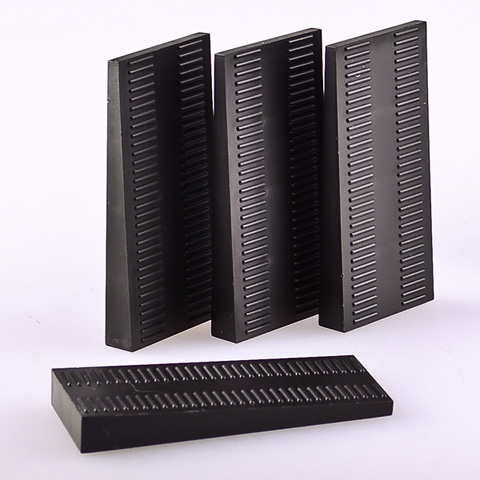
- Dies 12-15 mm thick.

Tools needed to install laminate flooring yourself
If you don't have a wooden mallet, you can use with a regular hammer. Wooden dies can be purchased at hardware store, or make it yourself from pieces of timber.
Performing a calculation
The determining factor in the calculation required quantity panels is the way they are laid.
Choosing classic version, which is considered the most economical of those listed, the calculation is made as follows: determine the area of the room by multiplying its width by its length, and add a margin of 10% to the resulting value.
This ten percent reserve will compensate for the consumption of panels if they need to be trimmed to fit in accordance with the room plan. When planning to place panels diagonally, the supply of lamellas should be increased by 20%.

Please check before purchasing accurate calculations required amount of laminate
Preparing the base
One of the prerequisites for the reliability and durability of the coating is its installation on a perfectly level surface. And laminate is the most demanding in this regard.

Clean the floor surface before laying laminate flooring
- Tile and linoleum - they must fit snugly to the floor and be firmly fixed.
The concrete screed must sit for at least one and a half months before applying the coating. Otherwise, the perspiration released by it will provoke rotting of the coating.
When working with a wooden base floor, you can level the surface by laying the boards on top in chipboard sheets and placing them in a checkerboard pattern.
Although laminate is known as a universal coating, there are a number of limitations when working with it, the main ones being:
- It is not recommended to install it in rooms where the humidity reaches 70% or more.

If laying is carried out on a concrete screed, it must be leveled
- Use as a finishing coating when installing electric heated floors.
- Attach to carpets.
Attention! Before laying the laminate with your own hands, the panels should be brought into the room for acclimatization and, without unpacking, laid out in a stack on a flat floor, leaving for 1.5-2 days.
If you plan to use or, then it is advisable to use laminate of classes 31-33. When choosing this laminate, pay attention to the presence of special symbols, as well as the safety level, it should be E1 or E0 ( Minimum quantity harmful substances emitted by the board when heated).
Arrangement of the substrate
The substrate is designed to perform three functions: absorb noise, prevent the penetration of moisture and act as a shock absorber.
Before laying the coating, the concrete base is first lined with a vapor barrier layer of foamed polyethylene foam or polystyrene. The canvases are laid with an overlap of 20 cm, not forgetting to make overlaps on the walls of 12-15 cm.
The thickness of the substrate on the concrete screed should be 3 mm. If the surface of the concrete base is made of a “dry” screed, the insulation does not need to be lined, since this layer is already provided for.

Laying laminate on a substrate
On wooden boards The vapor barrier layer may not be laid out. But it is imperative to make a soundproofing substrate made of balsa wood or foamed polypropylene, the thickness of which is 2 mm.
When arranging it, the strips are laid out in the direction from the window to the door, fixing the joint to the joint with construction tape. Linoleum and tiles they do not need a vapor barrier. The lamellas can be laid directly on the substrate.
Video: subtleties of arranging the substrate
Laying panels
When laying panels with your own hands, you most often choose the traditional method (direct placement), which is the simplest and waste-free.
The first row of the future covering is laid entirely, starting from the far corner of the room. The strip is moved towards the wall and wedged with small spacers on three sides.
The wedges are designed to provide gaps of 15 mm, which allow them to compensate for linear expansion of the floor covering. An expansion joint must be provided around the entire perimeter of the room; after installing the plinth, it will be invisible.

Laminate laying diagram
When installing lamellas in doorway The gap is made a little smaller. Subsequently, it will be covered with the door frame. If this condition is not met, you should be prepared for expansion due to heating or high humidity the slats may bend in an arc.
The second and subsequent strips are installed in the end lock of the previous one and laid on the floor, not forgetting to place wedges at the ends. To ensure that the panels are placed staggered, the beginning of each next row is laid out with the remaining section of the previous one.
Tip: It is better to install from the corner where the pipes are located heating system and a radiator was installed, thereby making the installation process easier.
If it is necessary to frame the risers, the panels falling on them are trimmed. Ideally, if a joint of panels is formed opposite the riser, then it is much easier to cut a hole along the edge.

Panel joining diagram
If it is necessary to cut a whole panel, then several holes are pre-drilled at the intended point. Cut the panel, focusing on the hole, drawing a cut line clearly in the middle. When attaching these panels, glue is used.
The last strip, if necessary, is trimmed taking into account custom sizes. To do this, turn it face down and apply the end side to the wall. The cut line is drawn with a marker, focusing on the last plate. The cuts are made along the intended contour.
To install the last panel you will need a special lever with a hook. In the absence of one, you can use a crowbar. After installation is complete, the wedges are carefully removed.
Fastening of decorative thresholds and skirting boards
You can do without thresholds only if the covering is laid in several rooms, creating a single canvas. Docking wood panels with tiles is done by installing aluminum thresholds.
Their rounded surface conceals slight differences in height. To install them, holes are drilled along the edges of both coverings every 100 mm into which dowels are driven. Having applied the threshold, distribute the nails over the holes and fix them by lightly tapping them with a hammer.
Attention! When installing thresholds, a gap should be left between the coating and the hidden part of this element.
Video guide for installing the threshold:
A decent frame for the floor covering can be skirting boards made of plastic, MDF or natural wood. To ensure uniform pressing of the panels to the floor, it is better to fasten the skirting boards to special clamps.
Skirting boards begin to be laid out from the corner of the room, moving clockwise. After installing the planks, install the connecting elements and plugs.
Floor laid using lock method, can be used on the same day. If you use glue to fasten panels, you must wait the time specified by the manufacturer in the instructions.
Do-it-yourself laminate installation: video
Laying laminate: photo


Laminate is a very popular floor covering with good performance qualities, such as wear resistance, practicality, and strength. The material is quite simple to install, which, with care and precision, can be handled even by those untrained in professionally Human. With a huge choice color solutions, patterns and surface textures, laminate is affordable.
However, in order to beautifully lay laminate flooring in a room, you need to know some nuances, which include the direction of laying the material.
Choosing a laminate
The choice of texture, pattern and color of laminate is a matter of taste, and there is no arguing about tastes. Moreover, designers have long ceased to consider the statement that the floor covering should be darker than the walls as an unshakable truth.

When renovating a room, you should pay attention to the option in which a laminate of one type is used in finishing the walls and floor. color range, But different shades. This solution visually enlarges the room.

Important! One of the main criteria when choosing a laminate is whether the material belongs to a certain class. The class determines, first of all, the wear resistance of the coating. Our stores offer laminate of 31, 32 and 33 classes, and material of 34 class has also appeared on sale. All of these classes correspond to the “commercial laminate” category. At the same time, sellers state that laminate of a lower class (classes 22 and 23, this is “household” laminate) is not in demand and therefore is not on sale. It is often added that even class 23 laminate has a short service life.


In fact, it is simply more profitable for both manufacturers and sellers to promote commercial laminate as more expensive. Six years of guaranteed operation of class 23 laminate in any room of the apartment is not enough?! Class 23 coating has two types of connections: adhesive and locking, so you can choose. It's just hard to find it on sale.
Requirements for the base for laying laminate flooring
Before starting work, you need to check the condition of the surface of the base on which the laminate will be laid. The requirements for the foundation come down to three points:
- Be even.
- Be durable.
- Be dry.
When checking with a rack, the permissible height difference is 2 mm. Usually used for measurement building level, the length of which is 2 m.
Laminate flooring is laid on concrete or wooden floors or plywood. OSB boards can be used as the base.

Before installation, an inspection of the wooden floor is carried out. Creaks must be eliminated by fixing the floorboards to the joists in these places. Replacement of boards and joists is carried out if necessary. The wooden floor can be sanded, which will ensure flat surface.

The cracks are sealed with wood putty. Plywood is often used to level a wooden floor. To create a reliable base, sheets of plywood are laid so that four seams do not meet at one point. To do this, the sheets are cut with different configurations. When laying, there should be a distance of about 10 mm between the plywood sheets.

Checking the level of the screed is carried out using a construction or laser level, and inspect the screed for cracks and concrete sagging. Sagging is smoothed out by grinding or knocked down. Deep cracks embroidered and sealed with mortar. If there are significant fluctuations in height (within 20 mm), use is used to level the screed. The mixture is poured over the surface of the concrete screed, leveled, then rolled with a needle roller to remove air bubbles from the mixture.


After the self-leveling floor has dried, the surface is primed. It's better to use a primer deep penetration. For waterproofing, when laying laminate flooring on a screed, it is necessary to use polyethylene film.
On old linoleum You can lay laminate if the surviving coating is firmly laid on a flat base, has no serious (through) damage, and there are no swellings on the surface of the linoleum. In other cases, the old linoleum needs to be removed.

Preparatory work. Styling tools
The material in packages is brought into the room in which installation will take place. Within 2 days it must adapt to temperature and humidity. Packages are opened immediately before starting work.
Important! Covering must be purchased for the entire premises. Remember that the shade will vary in different batches of the same laminate model. Or this model may end up on sale.
For diagonal laying, it will be enough to provide a margin of 10% of the total area of the room, for straight laying - 7%. The area of the room is determined and divided by the footage of laminate in one package. The resulting number of packages is rounded up to the nearest whole number.
Before starting installation, draw a plan of the room (to scale, indicating the dimensions of the panels you purchased). The plan will help you rationally cut the material and avoid unnecessary costs and mistakes.


For installation we will prepare:

A mallet and a block for tamping the panels are needed to install the covering with a Lock-lock.
Choosing the direction of installation
There are several options. Laying diagonally and herringbone will require much more time, and the material consumption will be greater. Diagonal laying visually enlarges the room. It is believed that this method of installation reveals all the beauty of the floor covering.


Important! Traditionally, laminate flooring is installed so that the light shines along the long side of the panel (perpendicular to the window). In this case interpanel seams will be almost invisible.


Laminate flooring is laid parallel to the window in narrow spaces. This method helps to visually expand a narrow room.

If the base is an old wooden floor, the direction of laying the floorboards must be taken into account. In order to reduce possible deflection of the structure, the coating on the wooden floor is laid perpendicular to the floorboards.
If the old wooden floor is leveled with plywood sheets, it is better to install traditional way- perpendicular to the wall with the window.
Procedure for laying laminate flooring
First, the substrate is laid. There are different types substrates. Their properties depend on the material from which they are made. They also differ in price:

Despite the fact that some manufacturers claim the ability of the substrate to level out unevenness in the laminate base, this is a serious exaggeration. The purpose of the substrate is to create an additional sound-, hydro- and heat-insulating layer under the material. The underlay can compensate for minimal differences in height, but cannot level the floor with serious differences in height.
Important! The rolled substrate is rolled out so that the strips lie end to end. These joints are glued together with tape. This is done so that the substrate does not move during the installation of the coating.

Laying laminate
The work begins with installing restrictive wedges around the perimeter of the room. They are needed in order to maintain a gap for the expansion joint. Installation begins from the far left corner of the room and proceeds towards the window. The panels of the first row are laid so that the ridge faces the wall. The end sides of the panels are connected. The last panel in the row is cut to size and laid.
Advice! Lay the covering in a checkerboard pattern or offset the next row by one third of the panel (the seams in adjacent rows should not match). In the first case, the row begins alternately with a whole or half of the panel. When laying a panel offset by a third, the first row starts with a whole panel, the next - with a panel 2/3 of the length, the third - with a panel of 1/3 of the length, then everything is repeated. This way the floor will have a neater appearance and the strength of the structure will be greater.

The second row of panels is assembled and joined to the first. Panels with a Lock connection require hammering with a mallet. The blow is applied to the block pressed against the panel to ensure that the ridge fits tightly into the groove.

Panels with a Click connection are applied to those already laid at an angle of 45°, lowered and click into place with a characteristic sound. The cover with a Click-lock can be disassembled and reassembled 3-4 times.

Usually you can't fit a whole number of panels in a room. Therefore, often the last row has to be dissolved. It may turn out that the dimensions of the room will dictate the width of the last row of 50-70 mm. Panels of the first and last rows of different widths will look very ugly. That's why you need a room plan. In this case, it is worth trimming the panels in both rows. More work, but appearance the floor will be much better. Don't worry if the cut is not perfectly straight - it will still be hidden by the baseboard.
After completing the installation of the covering, the wedges must be pulled out. Then you can begin installation.

As a conclusion
If the room does not have any special features (the room is very narrow, the window is off-center), the long sides of the panels are usually laid along the flow of light perpendicular to the window. In this case, the seams between the panels will not be so noticeable. In addition, this method of installation visually increases the length of the room.
Diagonal laying is used to visually increase the width of the room. For the same purpose, you can use laying the laminate parallel to the window.
Laminate has high quality docking connections. Thanks to this, ease of installation and almost seamless connection of panels is achieved. Such panels do not require fastening to the subfloor. They are laid in a single monolithic layer, reminiscent of a carpet.
Laminate flooring is probably known to everyone - a perfectly flat and smooth surface. But not many people are familiar with the installation rules.
When deciding to use this building material, you need to understand that the final price of the floor will consist of several factors:
- Material cost,
- Works,
- Deliveries,
- The size of the room area.
Therefore, before deciding to lay laminate flooring, you need to carefully calculate the area of the room and the weight of the laminate packaging.
Procedure for laying laminate flooring
If the laminate is laid correctly, the result will be a single, flat surface.
For correct installation laminate we need:
- Hammer;
- Tension device 30 cm long;
- Belt;
- Foam rubber;
- Saw or jigsaw;
- Adhesive tape 80 mm wide or double sided tape;
- Waterproof putty;
- Polyethylene film
The ease of installation also comes from the fact that you don’t have to dismantle the old floor covering.
Laminate can be laid on almost any surface: linoleum, plank flooring, fiberboard, chipboard, plywood, concrete floor and tile.

If you follow the basic rules for laying laminate flooring, absolutely anyone can handle this job.
Here are the basic rules:
- The purchased material must be unpacked.
- Check completeness, quality and color.
- Leave in the room where installation will be done for two days for acclimatization.
- The room temperature should not be lower than 18 degrees, and the humidity should not be more than 75%
Surface for laying laminate.
In order to avoid problems with the laminated surface in the future, you need to take into account that the base for installation must be clean, dry, hard and as smooth as possible.
Linoleum and plank coverings do not require dismantling. Even short-pile carpet can serve as an excellent underlay.
If you plan to lay laminate flooring on a hard surface - a wooden floor or tiles - it is advisable to lay an underlay with a thickness of at least 2 mm. Such a substrate can be soft linoleum or foam rubber. It is advisable to attach the substrate with glue or mounting double-sided tape. You should also waterproof the joints of the walls to a height of 20-30 mm and the floor.
If the coating is laid on a cement floor, then it is recommended to cover the floor as insulation plastic film with launch on the wall.

Advice! Uneven floors must be leveled with floor putty.
As long as the coating is laid correctly, it does not matter what it will be laid on.
In which direction is the laminate laid?
When laminate flooring is planned to be installed in a large room, it is necessary to provide expansion joints. When entering a room with a laminate floor, there should be a place that will not allow moisture to penetrate into it. We must not forget about opening doors. It is necessary to measure their unhindered opening.
Advice! Laminate should be laid in the direction of the light beam, and in long rooms - regardless of the direction of the light beam.
An important fact: during work on laying laminate flooring, it is prohibited to ventilate the room!
Laminate flooring is installed in a floating manner. The panels should not be attached to the subfloor. But you can glue the panels together.
Gaps of 1-1.5 cm must be left near the walls. After installing the laminate, they are covered with a plinth without fastening to the floor.

Below is general instructions for styling laminated coating. But we must not forget that for each reason there are nuances. Therefore, you need to carefully read the instructions included with the laminate manufacturer.
- The entire surface of the base must be covered vapor barrier material. It is laid with an overlap and is given a 20 cm run on the walls.
- Place a backing on it. The substrate is laid end-to-end.
- Start laying the laminate from the left corner of the room. To connect the short sides, a ridge is inserted into the groove and driven through the block with a hammer. You cannot hit the panel itself with a hammer!
- Subsequent panels are attached to the long edge of the first panel by inserting the tongue into the groove of the previous row at an angle of 25%.

Laying laminate flooring with your own hands is probably within the power of every person, even those who are doing it for the first time. Thanks to the step-by-step instructions and simplest design“tenon and groove”, you can confidently lay the boards on the base and the quality of work will be the same if all the work was done by a specialist.
If we draw an analogy with other popular floor coverings, it should be noted that laminate is the most popular and modern material. Variety of textures and beauty are not its only positive qualities.
Laminate structure
In its structure, laminate is a four-layer material, where each layer plays an important function. Most top layer aimed at protecting against all kinds of mechanical influences and damage. Improves light resistance and heat resistance, resists electrification of the laminate.
The decorative layer consists of special impregnated paper, onto which a pattern is applied that imitates the structure of wood or other materials.
The middle layer is the main one, since it will be the supporting base of the laminate. This layer is made from wood dust, which is impregnated with resins when high pressures. This procedure makes this layer extremely durable. The layer can be either HDF - high-density board or MDF - medium-density board. Also, the main supporting layer can be made of plastic - this makes the laminate moisture resistant.
The stabilizing layer prevents the slab from deforming, increases sound insulation, and slightly protects against moisture.
Conditions for laying laminate flooring

Before you decide to install laminate flooring, please make sure that it is suitable for the conditions under which it will be used. . This will directly increase its service life.
Of course, laminate is a very beautiful floor covering and it looks great throughout the apartment. But you should not install it in the bathroom; installation on the balcony is not advisable. If you plan to put heated floors under the laminate, then they are best suited, since they will not deform it. In general, it is prohibited to lay laminate flooring in areas where there is high humidity.
Laminate flooring must be installed in rooms that are heated or do not have sharp temperature fluctuations. The floor will last a long time at a room temperature of 15 to 30 degrees and a humidity of 50 to 70 percent.
Laminate is an excellent flooring option. It is relatively cheap and easy to install yourself. Below I will tell you step by step how to do it correctly.
Methods for joining laminate boards
Currently, several methods have been developed for installing laminate flooring. Each of them is unique and has a certain right to its existence.

“Click” - this installation method is the most popular, as it is easy and convenient. Having laid the entire first row completely, insert the tenon of the next row into its groove at a slight angle. After inserting, we align the row horizontally and snap the parts into the lock. You can use a mallet or hammer. We splice adjacent parts until there is a characteristic click, and until the seam becomes almost invisible.

“Lok” - differs from the “Click” method in that we place the next board strictly horizontally and drive it into the lock to the previous one using a hammer or mallet. Do not use the hammer too hard, as you may damage the joining edges. Do everything strictly carefully.


The glue method is less common. All work is identical to the first “Click” method, but all joining edges are additionally coated with glue. This will make the seams more durable and moisture resistant. But this method will not allow you to disassemble the floor covering if necessary, and the glue may also dry out over time.
Preparing the room
First of all, it should be noted that competent and proper preparation bases for laying laminate - this is 50 percent of it high-quality installation. Carry out this stage of work most carefully and responsibly, since the durability of your flooring will depend on it.
Considering all the little things for installation, you will need the following materials:
- primer;
- glue;
- laminate;
- baseboard;
- fastenings intended for baseboards;
- foamed polyethylene or film;
- wedges for technological gaps.
Glue is used only to adhere the boards in the place where the edges and hooks are provided.
Laminate flooring is purchased with a small supply. After all, with a simple installation technique, few will be immune from mistakes that could result in a couple of boards being damaged when cutting or sawing out a bend in a wall or a pipe outlet.


The styling tool is quite simple:
- roulette;
- corner;
- pencil;
- wooden block;
- hammer;
- electric jigsaw or hacksaw.
Step 1 Allow the laminate to acclimate

Place undamaged packages of laminate flooring in the rooms where it will be installed. This must be done at least 48 hours before installation, this time will be enough to adapt to the temperature in which it will be used. This will minimize the deformation that occurs from heating or cooling the wood.
Step 2 Clean the floor


You will need to remove dust from the screed or other surface on which you will be laying the laminate. You can sweep the floor or vacuum. We prime the surface so that the primer fills all the depressions and uneven areas that are invisible to the eye.
Any base is suitable for installation; it can be a regular wooden flat floor or concrete screed, which do not have differences in height up to two millimeters per square meter. If the floor, nevertheless, has unevenness, then it must be leveled. Fill all cracks and depressions with putty or special mixtures. If the base is a concrete screed that has many cracks, then it is necessary. If you don't do this, the flooring will quickly deteriorate.
If the room where you are going to lay the laminate has a plank floor, then first of all check for fungus and dampness under the boards. If there are unevenness on the boards, this can be eliminated by scraping. If your boards squeak, then you need to go through it additionally. Wooden floors included.
Step 3 Install waterproofing


Lay waterproofing material on the floor, you can use plastic film.
Before laying on a concrete floor, cover the base with plastic film, the thickness of which should be at least 200 microns. Lay the film strips on top of each other with an overlap of approximately 15 cm and seal the joints with tape. It is recommended to run the film onto the wall a little, about 4 cm, it will be covered by the baseboard.
Step 4 Substrate under the laminate


A substrate is laid on top of the waterproofing, which will significantly increase heat and sound insulation. The most commonly used underlay is 3 mm thick polyethylene foam; it removes minor unevenness in the floor, such as small pebbles or dimples, and makes the floor perfectly flat. This type the underlay can help soften impacts on the laminate, which significantly extends the service life decorative covering. The backing is laid end to end and secured with tape.
IMPORTANT! There is a laminate whose base already has a soundproof backing. In this case, the polyethylene lining does not lie down under any circumstances. If installation is done on concrete base, then we just form the waterproofing.
Step 5 Lay down the first board


Laying the laminate begins from the left corner, in this case the locks are correctly positioned for further fastening of the boards.
Step 6 Place Spacers


A wedge is inserted between the laminate boards and the wall. You can buy wedges, but it's easier to make your own. The width should be approximately 1 cm. You can saw it off the laminate or cut a piece of plywood. 5 - 6 pieces should be enough for you.
For wedges, you can use pieces of drywall, pieces of laminate - anything, as long as the size is the same in thickness. But you can also buy them - they cost pennies.
Wedges are a must! Laminate flooring uses wood; it is affected by changes in temperature and humidity, and if you place it close to the wall, the floor may warp and stand on end.
Step 7 Lay down the next board

Insert the next board into the lock of the previous one at a 45 degree angle and lower it. We begin to mount all the boards in a row against the wall. At the same time, make sure that the laminate is connected correctly. If the whole board does not fit at the end, then we cut it off, taking into account the gap to the wall of 15 millimeters and the remaining piece will go to the beginning of the new row.
Step 8 Laying the second row

Trim a laminate board and use that piece in the second row so that the boards are staggered relative to the first row. It is necessary to lay a new row from the remaining pieces from the previous row. This will significantly strengthen the adhesion of the boards to each other.
We place all the elements in the second row near the first row, touching only the edge of its end, without snapping it into the groove. Only after you have completely assembled the second row, carefully lift it and insert it into the groove, snapping the lock.

If the row fits into the groove, but there are still some inaccuracies, then we apply a block to the edge and carefully drive the entire row into the lock with a hammer. And we continue like this until we have covered all the necessary space. The most careful attention is required in places where there are protrusions or multiple bends in the walls, where there are outlets for heating pipes and communications.
Step 9 Continue laying boards

One by one until the entire floor is finished. Be sure to make sure there are no gaps or gaps between the rows.
Step 10 Trimming the boards at the end of the room


When you have filled the entire area in the room, and there is only one row left to lay along the wall, then you will need to saw off every detail. When sawing, be sure to take into account that the walls may be uneven, and make all calculations, including one and a half centimeters for the defragmentation seam.
Step 11 Don't forget to remove your spacers

We remove the pegs around the entire perimeter when the entire floor is ready. Let the laminate sit overnight. Do not wet clean immediately after installation. If you decide to continue further work When decorating a room, be sure to place the remaining backing under the legs of a chair or table so as not to scratch the laminate.
Step 12 Installing skirting boards

To complete your floor you will need to nail down baseboards, install thresholds and other small details. Small holes or rough spots can be covered with special construction chalks, which are available in any color at hardware stores.
Skirting boards can be mounted either with glue or with screws. All fastenings are made directly to the wall. If you start screwing the baseboard to the floor through the laminate, this can lead to swelling due to thermal expansion.

Therefore, regardless of installation methods, the plinth is fixed to the walls - this is very important. Also this method fasteners will allow you to easily remove the entire structure of the skirting boards and, if necessary, easily disassemble the required section of the floor to carry out partial repairs.
Method adhesive fastening used if you do not intend to change the floor covering in the future and do not carry out any repair work.
Considering that the plinth follows the contour of the wall around the perimeter and that walls are often uneven, it is better to use plastic skirting boards. When laying wires, do not allow the wire to lie between the laminate and the wall.
Several laying schemes
When laying laminate boards, be sure to follow the method of orienting the pieces towards the light. This is required by designers and aesthetic considerations. There are several installation schemes according to light orientation: diagonally to the light, perpendicular to the light and parallel to the light flux:
- Classic styling scheme;
- Diagonal pattern;
- Chess or brick scheme styling;


More popular. In this scheme you can use all the material economically. The parts must be placed parallel to the light streams and laying the laminate must begin from the wall that is closer to the windows. The next row begins with a cut board from the previous row. This will reduce the amount of trimming and increase material savings.
The most sophisticated and fancy. Designers use it to create spaciousness, airiness and lightness in a room. Consumption increases by 15 percent with this installation scheme. The consumption may increase even more if the laminate is installed in long and narrow rooms.
Many flooring professionals install laminate flooring only diagonally. It gives effect visual increase rooms, which are later used for non-standard implementation design solution. Main disadvantage– this increases the consumption of boards and labor intensity.
All preparatory process has no differences. Select a corner from the window, stretch the fishing line from the corner to the opposite wall at an angle of 45 degrees. The fishing line will be your guide during installation.
On the first strip, we cut off the edge at 45 degrees and place it in a corner, making sure to install wedges for the gap. Next, we take several laminate boards and measure them so that the joints are in the middle of the first row, and the cut edges lie against the wall with a small gap for the wedges. We fill the entire space in this way, focusing on the fishing line and the joints of the already laid out rows. And only after that we cut and fill the areas near the walls. This will save you from the situation when in the apartment uneven walls. If you start laying from the walls, you will constantly have a gap between the joints in adjacent rows.
Checkerboard layout

Named due to the fact that all the laid parts according to the drawing will resemble chessboard. The whole principle is quite simple: each new row is placed offset by half of the previous board. Here, the material consumption will also be increased to 15 percent, but at the same time the structural strength will be the highest.
Proper care of laminate flooring
Of course, every owner wants the floor in the house to look like new and therefore it requires some care. Laminate is no exception.
- Before entering, be sure to place a dirt-catching mat, which will reduce the ingress of sand onto the floor by 80 percent, which inexorably scratches it.
- All legs of standing furniture must be covered with felt pads to prevent scratching.
- Do not allow water to accumulate on the surface. Carry out wet cleaning using a well-wrung out cloth.
- You can use special cleaning products for laminate flooring, but do not exceed the concentration. Do everything according to the instructions detergent. After use special means, it is necessary to wipe the floor dry so that no traces remain of them.
Cutting out the pipes
It happens that problems arise with installation in hard to reach places: projections and recesses of walls, heating pipes, radiators. Make all pipe cuts correctly and slowly, otherwise you will ruin the entire appearance of your floor. The pictures show in detail how you can bypass the pipes when laying laminate and how to do it all correctly.
We lay the board turned diagonally, resting it against the pipes. Using a corner, we mark the location of the pipe(s) along their width. Next, we rest the board against a construction peg and mark the distance on the side of the pipe. And we see the locations of the pipes, which we carefully drill out first.
This is done using drills called ballerinas. You can make two options here: in the first one, we simply cut it, place the part and the piece near the walls and coat the cut with glue and glue the part together, or we buy plastic covers, which are also common in all stores; The second option is to make the holes strictly according to the size of the inserts.
Decorative contours for heating pipes also look nice and will hide all your mistakes and irregularities when drilling or sawing out holes. I think everything was clear to you here, because in fact it’s not difficult to get around the pipes.
We go around the ledges on the walls
When laying laminate boards, it may happen that the edge will rest against unevenness on the wall or in its rotation. In such a situation, we cut directly into the parts the required form electric jigsaw.
There are situations when elements covered with plastic or plasterboard become an obstacle. Here is a solution to this problem - we carefully trim the bottom of the sheathing and push the part along it to the wall, taking into account a gap of about two centimeters. To do all this correctly, adjust the lock on the adjacent part and you won’t have to lift half of the flooring to snap the lock, but the strength of the connection will suffer. In this case, before connecting, coat all joints with glue and press firmly.
Installing laminate flooring in several rooms
If you are going to lay laminate flooring over a large area, be sure to form expansion joints between rooms. Thresholds are used here, which are fixed to the floor between two sections laid laminate, which are not related to each other.
This is all done in order to allow the floor to “breathe”, since temperature changes in the room lead to the expansion or contraction of the laminate flooring. Although the coefficient is small, increasing the scale of the floor can lead to divergence of the laminate or swelling.
In conclusion, I want to say that the entire process of laying laminate flooring is not complicated. Anyone can do this with their own hands. The main thing is not to make mistakes in technological process installation and your floor will delight you with its beauty for many years.
Laminate manufacturers in their advertising campaigns emphasize that the installation of this most popular floor covering has become so simple that anyone can handle it. Who has no experience working with laminate at all. You need to read the instructions, watch the company’s advertising video, and as a result of your efforts, the room with the new floor will quickly be transformed, and the admiring family will extol your construction achievements. Despite the fact that before installing the flooring, your success in this field was not much different from the ability of one of the characters of the English writer Jerome K. Jerome Uncle Podger to hang pictures.
Indeed, the improvement of panel interlocking systems has greatly simplified the installation process. If laying laminate flooring with a Lock lock requires certain experience and skills, then the next generation of locks - Click - does not impose such requirements. And the market already sells laminate flooring with 5g and Megalock locks, and even with aluminum locks. Soon everything will be like in Russian fairy tales, when all you need to do is bring the packages into the room where the installation will take place and hold the flooring without opening the boxes for a couple of days. To adapt to the temperature and humidity in the room. And then you open the packages, and the panels themselves are laid “at the behest of the pike.” However, the devil, as we know, is in the details.
Laying laminate
The work of installing the flooring has become much easier. The same cannot be said about preparing the base before laying. The base must be level, stable and dry. The difference in height is permissible within 2 mm per 2 m. In some cases, a waterproofing device is required before laying the substrate and the laminate itself.
Laying the substrate
Substrates differ in the material from which they are made, characteristics and cost:
Manufacturers claim that the substrate is able to level the base under the laminate. This is an exaggeration. The substrate must provide heat and sound insulation. The underlay can compensate for minimal unevenness in a leveled old wooden floor or plywood base, but no more.
Important! The substrate is laid end-to-end, the joints are fixed with tape. This way it will not move when laying the laminate.

Choosing a installation method
We determine the method of laying the covering: diagonally, perpendicular or parallel to the light (along or across the room). Diagonal installation is more often used in narrow rooms - this is one of the ways to visually expand them.


It is usually customary to lay the laminate perpendicular to the light source (the long side along the flow of light) - this is a window in the room. In daylight, the joints between the panels are less noticeable.

However, when laying the covering on a wooden floor, you must be sure to focus on the direction of the floorboards. On such a floor, the laminate is laid perpendicular to the floor boards to reduce possible deflection. If the old wooden floor is covered with plywood on top, the flooring should be laid in the traditional way - perpendicular to the window.

In small narrow rooms without natural light (corridors, hallways), laminate flooring is laid across in order to visually expand the room.

Laying laminate flooring with different types of locks
For installation work you will need:

First, plastic wedges are installed to maintain a 10 mm gap between the laminate and the wall. The first row is laid horizontally from the corner of the room in the direction from left to right. The ridge of the panels of the first row is directed towards the wall. The panels are connected at their ends. The last panel in the row is cut with a jigsaw or hacksaw and laid in a row. You can start the next row with the remaining piece of the panel (provided that its length is more than 300 mm). It is important that the seams in adjacent rows do not match.
Advice. To give panel offsets a more accurate appearance, a technique such as “offset by a third of the board” is used. One third is cut off from the new panel, after which it is laid.

The first and second rows are joined. When using panels with a Lock-lock, you will need to hammer them with a mallet (through a die) to fix the ridge in the groove of the adjacent panel.

Click system panels are laid at an angle of 45° until they click into place. This coating can be disassembled if necessary.

The panels of the last row will most likely need to be cut to size. Remember that the cutting line will be covered by the baseboard, so small unevenness in the cut area is not a problem. After laying the laminate on the wooden floor is completed, the wedges are removed and the baseboard is installed. First, see how much you need to trim the panels of the last row. Flooring It will not look very good if the width of the panels of the first and last rows is very different. In this case, it is better to trim the panels of both the first and last rows.