Garden figures decorate the garden, making it unusual and beautiful.
Garden figures can be made from any material, but now polyurethane foam is very often used to make figures.
Polyurethane foam is used to seal structures.
To make garden figures from polyurethane foam you will need: polyurethane foam, wire, plastic bottles, knife, fabric, scissors, wooden planks, and other materials.
The very first thing, before you make figures for the garden from polyurethane foam, you need to prepare a frame. For the frame, wire, wooden sticks, plastic bottle, lids, iron can, glass jar. Much depends on what kind of figure you want to make.
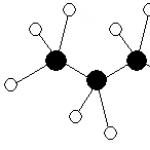
If you do deer, goat, a ram, then you should take a plastic bottle, a tin, wooden planks, and wire.
In a plastic bottle we make a small cut on all sides for future legs; if the legs are made of wooden slats, then the cut should be wide, and if the legs are made of wire, then the cut should be small. We make a neck from wire that can be wrapped in cloth. The fabric must be applied in several layers so that the neck is not too thin, the wire must be slightly bent, and a tin can must be placed on it, which will serve as a muzzle for the animals.
The ears can also be made of wire, which needs to be slightly bent.
Then you need to apply mounting foam to the prepared frame.
To protect the mounting foam from destruction, you need to use putty. To ensure a smooth surface, you need to use sandpaper.
For the figure to serve for a long time, polyurethane foam must be applied in two or more layers. The top of the figure must be coated with paint or varnish.

You can make it from polyurethane foam snail.

To do this, you should put an unnecessary cellophane oilcloth on the table and apply polyurethane foam. This will be the frame of the snail, let the mounting foam dry a little. As soon as the mounting foam has dried, you need to apply a second layer of foam, then you need to insert a bottle that will serve as a neck for the snail. We apply polyurethane foam for the snail, let it cool a little, slightly extend the snout, and make horns. For the shell, you need to apply a huge amount of foam; you need to insert an unnecessary bucket into this foam. We also apply foam on top. Carefully, using a pencil, draw curls on the shell.
Once the foam has cooled, the snail needs to be sanded.
That's it, the garden figure is ready. It can be used to decorate a garden or a plot near the house.

It turns out very beautifully from polyurethane foam.

To make a frog, you should take an unnecessary pan, an iron can, wire, foam, beads or buttons, paint, and varnish.
You need to apply polyurethane foam to the pan and jar, let it dry a little, then apply a layer of foam again. As soon as the foam dries, you need to connect the body (pan) to the head using a wire. We make arms out of wire, apply mounting foam again, and beautifully shape the toad’s body and head so that everything looks like a toad. We cover the figure with paints, insert buttons or beads into the eyes.
A dacha is a place where we relax and enjoy life. But decorations for the garden and yard cost a lot of money. Therefore, some owners make crafts from polyurethane foam, which are in no way inferior to expensive figurines made of plastic, metal and wood.
In order to decorate your garden plot, you do not need to complete art courses and have “golden hands”. A small set of tools, a little diligence and abstract thinking will allow you to acquire gnomes, frogs, sheep and Christmas trees from quite affordable material.
Manufacturing technology
First things first, you need to stock up necessary materials and tools. This will determine how high quality and quickly the manufacturing process goes:
- For the frame of the product, plastic bottles filled with sand, boards, metal objects and thick wire. Even an ordinary brick can become the basis for a future mushroom on your site!
- Polyurethane foam.
- Gun for polyurethane foam.
- Gun cleaner.
- If you plan to grow flowers in a sculpture, then you need to mount some kind of container in the center of it, such as a bucket, tin can or the same plastic bottle.
- Varnish, paint and brushes for them.
- Stationery or other knife.
The process of creating garden figures itself consists of two alternating processes. First, apply foam to the base and let it harden a little. Then we apply it again and so on until we get closer to the shape we need.
After this, the excess protrusions are removed with an ordinary stationery knife, the sculpture acquires its finished shape and can be coated with paint. The entire work can take from an hour to several days, depending on the size of the figure and the thickness of the applied layer. It is advisable to do all this in a separate dry room, where there is no excess dust and children do not run around.. Otherwise, you will have to wash off the extremely sticky substance, which is polyurethane foam, with gasoline or acetone.
Manufacturing examples with instructions
Below are a few examples of different figures that even a beginner can create on their site. The main thing is to strictly follow the sequence of all operations. And after a few hours you will definitely feel like a real creator, from whose hands comes an excellent decoration for summer cottage!
Details about crafts from tin cans read .
Christmas tree
Making a Christmas tree from polyurethane foam is as easy as shelling pears. To do this, you need to collect twigs and attach them to iron pipe. This can be done with tape or wire.
After this, you need to wet the workpiece with a spray bottle so that the foam “sticks” to the base more firmly.
Green acrylic paint is perfect for creating New Year's mood using such simple things as scraps of sticks, twigs, foam and fishing line. 
You will find all the information about paths made from plastic bottle caps.
Ball
The ball is the easiest figure to make. It is recommended to start your creative experiments with it, and only then move on to more complex decorations and sculptures.
- Take a paint can and fill it with sand;
- Layer by layer we apply polyurethane foam;
- Upon reaching the required size and more or less spherical shape, remove excess parts with a knife;
- We coat the product with varnish;
- We choose paint for our decoration depending on our preferences;
- If it is a bun or the head of some animal, we make eyes, a nose and a mustache from buttons, fishing line and wire.
It is possible that you will find the material about .
Ram and ewe
- First we make the frame. We take several plastic bottles and fasten them with tape. The result will be something like a “skeleton” of an animal. The lower “limbs” can be filled with sand to make the figure more stable.
- Next, you can apply foam. But to save it, it is better to wrap the frame with isolon or other polymer material. The first layer of polyurethane foam - you already have a rough idea of what the end result will be!
- We make ears from pieces of leather. You can also make them from plastic bottles by preheating and bending them.
- We process the muzzle with a knife, carefully giving it the necessary features.
- We coat the product with varnish.
- We paint the eyes, mouth and other “features” of our sheep or lamb!

Scheme for making a sheep.
Goat
- We make a frame from thick wire, which we wrap around several plastic bottles.
- It is better to use metal pipes as a frame for the legs (bones). They can be welded to a pedestal, dug into the ground, or secured with bolts. Your figurine must withstand wind and rain, so take the time to securely secure the base.
- Apply one or two layers of polyurethane foam.
- We make horns and a tail from wooden sticks or plastic cuts and secure them.
- After applying the last layer, we cut off all excess and wrap the product with sickle or fishing line.
- Cover the surface with primer and paint. You can choose any color, because it is completely your creation!
- Making eyes from buttons.
- We place our goat next to a pond, in a clearing, in the company of other decorations, etc.
In total, this sculpture will take one to two weeks to complete, as each layer of foam must harden. As a result, from unnecessary pipes, plastic bottles, wire scraps, other “garbage” and several cans of polyurethane foam, you get an excellent decoration for your summer cottage!
What a plastic curb for paths is will tell you.
New Year's crafts
Even with nothing on hand other than wire and a can of polyurethane foam, you can create excellent New Year’s decorations. Various ornaments, Christmas decorations, simple and complex figures - all this is accessible and simple!
For example, you can make a snowflake. We take a wire of such thickness that it can be bent without effort. We make the frame of a future snowflake out of it. Carefully apply one or two layers of foam. Before it hardens, we achieve even and smooth surfaces. If something goes wrong, you can always add a little foam and cut off the protrusions with a regular stationery knife. 
The Christmas ball is made even easier. The tennis ball is covered with a layer of foam. After hardening, apply a layer of paint and decorate our New Year's toy in bright and positive colors!
A simplified version of the Christmas tree is made using cardboard or isolon, wound on a rigid base in the form of a cone. Even a child can apply several layers! We level the surface, paint it and place it in a visible place.
How to make a swan from a tire is described.
Basic rules for working with polyurethane foam
- Shake the container periodically.
- The ideal temperature for work is room temperature.
- Polyurethane foam does not like direct sunlight. Therefore, it is necessary to work in the shade and coat the finished product with paint.
- The hardening time of the foam varies depending on the manufacturer, temperature and operating speed.
Important points
- The paint used to coat the finished product should not contain nitrocellulose. Otherwise, the polyurethane foam will soften and the decoration will lose its shape.
- Gloves are a mandatory element of the work. Without them, washing your hands will take much more time than the process of making the craft itself.
- Polyurethane foam is a very lightweight material. Therefore, heavy objects must be placed inside any product made from it. This could be a jar of sand, a plastic bottle filled with water, an iron base, metal pipes held together with wire, and other massive things.
Video
This video explains how crafts are made from polyurethane foam:
Conclusion
You can add beauty and originality to your summer cottage without spending any money on it. big money. Crafts made from polyurethane foam are easy to make, non-toxic and can have the most different shapes. Starting from a simple ball and ending with figures of animals, birds, gnomes and even people!
Do you want to improve your summer cottage or the area near a private house, but are tired of the consumer goods offered in the store? Or do you want to decorate the playground? Then think about whether you can do everything yourself using... polyurethane foam.
In fact, the choice of polyurethane foam as a material for sculpture is only at first glance unusual, because if you take into account its pliability and softness, then it becomes quite understandable that crafts made from this material are gradually gaining popularity.
Required materials
What will you need to create sculptures from polyurethane foam and where to start?

In fact, the list of materials is short:
- plastic bottles;
- cans of polyurethane foam;
- dye;
Plastic bottles will be needed as a frame for future figure and their volume directly depends on the size of the sculpture. The amount of foam is also calculated based on the size of the planned craft. It is worth noting that the volume of foam at the exit of the cylinder ranges from 50 to 70 liters. Usually there is a marking on the cylinders indicating the amount of foam coming out. The choice of paint is entirely up to you; it can be oil-based, in spray cans, or any other. It should be noted, however, that if you intend to use the craft outdoors in the open air, you should choose paint that is resistant to natural influences.
To make a sheep you will need the following amount of materials:
- plastic bottles 4 pcs, 2 l each;
- Isolon (this is a special backing for linoleum, can be purchased at any hardware store);
- 5 cylinders of polyurethane foam, 70 l each;
- adhesive tape or in other words adhesive tape;
- paint, varnish;
First, we make a frame from plastic bottles. It doesn't have to be perfect, just well made so it doesn't fall apart.

Then you should cut the isolon into narrow strips 2-3 cm wide

The next step is to wrap the frame with strips of isolon to give it more volume. We secure the isolon strips with tape so that they do not unwind.

After the frame is wrapped with isolon, you can attach a sheep's tail made of ordinary wire.

After this, you can apply polyurethane foam to the frame. The foam is applied in layers. Apply each new layer only after the previous one has dried; to speed up drying, you can spray it with water. The fact is that water coming into contact with the foam triggers a reaction, which accelerates the hardening of the foam.

The foam should be applied as evenly as possible so that imperfections do not have to be corrected.

After our sheep has been shaped using foam and the foam has completely hardened, we can proceed to the details. To start, you can glue on the ears.

Then you can correct the sheep's face using a stationery knife, and then decorate it.

All that remains is to paint the hooves, draw the eyes, and the sculpture is ready.

It should be noted that foam is a fairly toxic material and should only be worked with in well-ventilated areas. It is also quite sticky, and therefore you should stock up on acetone or a special solvent for polyurethane foam and patience.
In general, foam is a fertile material, and almost any figure can be made from it, as long as you have enough imagination, patience and time. Starting from the simplest and smallest to the size of a human being.
 How to make an ironing board

Without attaching special effort and material costs, foam crafts will become excellent decor and decoration of any summer cottage. It is no secret that for many, a dacha is a place where people come to relax from the city noise, rhythm and bustle. Therefore, it is very important that the dacha be exactly the place where a person can truly enjoy life and rest his soul. Often, caring for a summer cottage and decorating it requires a lot of money, patience and time, but with foam everything is different.
In order to make any crafts from polyurethane foam with your own hands, you do not need to have any special education– Absolutely everyone can cope with this task, it is enough to have good imagination and imagination.
In construction, polyurethane foam is used very often and in large quantities. It is used to seal small cracks and has the ability to expand, filling all the voids.
Important! The hardening of the foam depends on what brand of foam it is, but on average it takes from 15 to 25 minutes.

You can cut off excess parts of finished products only after the foam has completely hardened.
You can cut off excess parts of finished products only after the foam has completely hardened.
From construction foam you can make any crafts, since foam is an unpretentious material, and when frozen it can withstand any temperature; in addition, crafts made from foam do not undergo any serious changes when they are exposed to precipitation.
The material is light and has no sharp corners, so foam crafts for installation are often made for kindergarten or sites. Such crafts can have both large and small size, but the weight of the craft will be small.

When working with polyurethane foam, you must use a foam gun, which is placed on the can, and after finishing work, use a gun cleaner
How to work with polyurethane foam?
To work with polyurethane foam, you may need minimum set tools and accessories - several pairs of gloves, preferably rubber - the fact is that the foam has such unpleasant properties, it quickly sticks to the hands, so it is simply impossible to do without gloves. In addition, you will need 2 or 3 knives of different sizes - they are needed after the foam has dried in order to give the products the required shape and for cutting out small details such as eyes, nose, mouth. When working with polyurethane foam, you must use a foam gun, which is placed on the can, and after finishing the work, use a gun cleaner. To paint finished products you will need paints and brushes. In order for foam crafts to last as long as possible, it is recommended to coat them with varnish.
Important! Polyurethane foam is a very light material, so every time before performing any new craft, it is important to take care of its weight, otherwise the structure will not hold.
Therefore, it is necessary to place something heavy inside each structure - it could be a container with sand, a piece of iron, a plastic bottle with water. You can use anything, the main thing is that the thing at least slightly fits the shape of the future craft (if the finished product is small in size or volume) and is weighty.
It is important to remember that all work performed with polyurethane foam should be carried out only in a well-ventilated area. The temperature should be room temperature. If work is carried out in the fresh air, then this should be done in good weather, but work under direct sun rays You can’t, you need to step into the shadows.
While working, it is important not to forget to shake the can of foam before each use.
Finished products made from polyurethane foam must be coated with paint, but it is important to remember that the content of nitrocellulose is unacceptable, since this substance adversely affects the foam; as a result, the craft softens and the entire structure may lose its shape.

Hedgehog figurine made of polyurethane foam
Crafts made from polyurethane foam
Animal figures are especially popular among crafts made from polyurethane foam. You can place them in any part of the garden, placing a lonely figurine by the pond or on the lawn, or create an entire composition. When making crafts from polyurethane foam for kindergarten, figurines of fairy-tale characters are mainly created:
- Hedgehog. This figurine is very easy to make and is ideal for beginners. Any material can be used as a frame, it all depends on the preferences of the master. When the foam has hardened, you need to carefully cut off all excess with a knife and give the product the required form. Hedgehog needles are made from toothpicks, which must first be prepared for work - they need to be painted black, leaving a small distance untouched. The part that needs to be stuck into the figure remains unpainted. If desired, the other end of the toothpick can be painted golden color. Before sticking toothpicks into the hedgehog, the figurine must first be painted and allowed to dry. In these photos you can see step by step production crafts made from polyurethane foam like a hedgehog.

Foam goat
- Sheep and lamb. A master class on making crafts from polyurethane foam, such as a ram and a sheep, should begin with making a frame. The frame can be made from several plastic bottles connected with tape. In order for the structure to be stable, the bottles that will be used as lower limbs must be filled with sand or water. After the frame is completely ready, you can begin the main work - treating it with polyurethane foam. Foam treatment should be done gradually, in layers. Each applied layer must dry thoroughly (15-20 minutes), and only then can the next one be applied. What the craft will look like after final processing becomes visible after the first layer. After the final layer has been applied and dried, you need to use a knife to give the figure its final shape, and then paint it.
- Goat. These photos show step by step instructions on making such a craft with your own hands from polyurethane foam, like a goat. For the body frame, you need to use plastic bottles, pre-wrapped with tape or wire. Leftovers are used for the leg frame metal pipes, which must be the same length and thickness. The resulting structure must be securely fastened to the ground, and care should be taken to ensure that the base of the body is securely fastened to the legs. The product is covered with one or two layers of polyurethane foam. In order to make the horns and tail, you can use cuttings of thick branches, securely fasten them and apply another layer of foam to the goat. Before painting the goat you need to apply one thin layer primers. Large buttons can be used to make eyes.

Polyurethane foam bun
- Kolobok. This photo shows a craft in the form of a kolobok, made with your own hands using polyurethane foam. A medium-sized plastic ball can be used as a frame. The ball needs to be covered with foam in several layers, not forgetting to dry each layer. The hands of the kolobok are made of a plastic tube with a wire stretched inside. Hands need to be secured to the kolobok and treated with foam. Small ones are used for the legs wooden blocks, which must also be secured and foam applied to them. The scarf is also made of foam. And you can use cardboard as a frame for the ears on the headscarf. The finished bun needs to be painted, varnished and planted on some stump.
- Figure for growing flowers. In order to make an original flower pot, you can make any craft from foam. But it is important to remember that in the middle part of the figure you need to secure a container for growing flowers - this can be: a deep basin, a tin bucket, a large plastic bottle with a cut off neck.
- New Year's crafts. Such foam crafts can be made both at a summer cottage and on the territory of a kindergarten. A Christmas ball can be made from a tennis ball; to do this, cover it with a layer of foam and paint it with bright colors.
In order to make a Christmas tree, you must first make a frame. The frame is made from a cone made of cardboard. The foam is applied in several layers to the cone-shaped frame. As it dries, the figurine is shaped into a Christmas tree using a knife and painted in the appropriate color.
Polyurethane foam – unique building material, which is widely used for installation, sealing of structures and increasing their thermal insulation. Lovers of garden decorations have expanded the scope of application of this building material. Every owner can easily make garden figures from polyurethane foam with his own hands. country house or a summer cottage. In this article you can see photos of finished crafts, as well as popular sculptures made from polyurethane foam.
1. Light weight.
2. Ease of use (applied to any surface, easy to cut).
3. The ability to make crafts of any size.
4. The finished product is not affected precipitation and temperature changes.

Conditions for using polyurethane foam for garden sculptures
Conditions for using polyurethane foam for garden sculptures
If you have never worked with polyurethane foam, we recommend that you read the instructions from the manufacturer. Do not forget that the foam inside the container is a liquid mass, and when it comes into contact with air, it begins to harden. Complete hardening occurs after 10-12 hours. When working with foam, use products personal protection. It is not recommended to carry out work when sub-zero temperature air.
Before each use of the foam, shake the container well. While working, keep the canister with the cap down so that the gas does not escape from it and all the foam can be used. You should not apply many layers at once, as the uncured ones will fall off. Do everything gradually, apply the next layer at least 10-15 minutes after the previous one. For ease of application, use a special gun.
The appearance of a polyurethane foam figure directly depends on the type of frame. You should first find a picture of the figure or make a sketch so that all the nuances are taken into account and the finished product looks like a wooden or plaster sculpture.

To make the frame, you can take different materials, for example, plastic bottles or iron cans are suitable. Wooden planks, fittings and wire will also be useful to you. To make the sculpture stable, you need to fill it with sand.

Now you can start decorating the craft with foam. Distribute the foam evenly over the frame, taking into account the future reliefs of the craft. When it has completely hardened, you can remove it with a stationery knife. unnecessary details and correct defects. If necessary, add foam to places where you forgot or want to correct something in the craft.

A layer of putty will help protect the mounting foam from destruction. To garden craft turned out smooth, grout with sandpaper. Now take acrylic paints and cover the figure. Preferably two layers or more. To extend the service life of the future masterpiece, it is coated with varnish on top.

Garden figures can be additionally decorated with the most different materials, for example, beads, flowers or make LED backlight so that the sculpture glows at night.

In order to make a snail for the garden, you will need half a bottle of foam. Cover the table with oilcloth and begin applying foam for the base of the snail. When the first layer has dried a little, apply the second and insert a kefir bottle to make the snail's neck. Cover your neck with foam too and form a head with your hands.

Give the snail horns and a slightly elongated muzzle. After this you can start making the shell. To do this, a round mound of foam is applied to the snail's body. Now insert a bucket, which will be intended for flowers and will turn the garden craft into an original flowerbed.

Use a marker to mark where your snail shell begins and ends, and make curls. When the foam is completely dry, sand the product. All that remains is to decorate the snail and the garden craft is ready.

Materials:
- old saucepan;
- iron can:
- oil or acrylic paint;
- foam container;
- wire;
- beads.
1. Separately fill the pan and jar with foam and let dry.
2. The jar is the head, and the pan is the body of the frog. Fasten these parts with wire and secure with foam.

3. In the place where the frog’s arms should be, secure the wire and also cover it with foam.
4. Now shape the head and body so that they look like a frog. Make the lower legs as well.
5. Paint the craft with paints and then insert the eyes. The frog is ready, now it can be placed near a pond in the garden or near the pool.

To make a garden fox figurine, you will need a plastic bottle. Fill it with sand or pebbles, then the wind will not be able to turn your product over. Foam the bottle, but not immediately in a thick layer, but gradually, pausing for about 15 minutes for the foam to set.

You can use a rubber tube to make the paws. To make the legs flexible, insert a wire into the tube. The tail can also be made from a tube, which will need to be well foamed. For the neck, use a cardboard cylinder from under toilet paper. Install some kind of round blank for the head.

Foam everything well and give it to the sculpture appearance foxes. After that, paint the figure oil paints and varnish. Keep in mind that if the paint is white, the varnish will make it yellow.

You can use a plastic ball as the frame of the kolobok. Place it on some kind of support, such as a jar or bowl. Now apply the foam, waiting for each layer to dry. To make handles, insert wire.

Also form the scarf from foam, and you can make the ears from cardboard. When the foam is completely dry, use a utility knife to cut out the eyes, mouth and nose. Make legs from wooden planks. All that’s left is to color the craft and the bun – it’s ready!

Interestingly, from polyurethane foam you can make not only garden figures, but also an original lantern that will give your personal plot notes of exclusivity and will help decorate the garden in Japanese style. To make a lantern stand, take a pipe that needs to be foamed on the bottom side and installed on a level surface. wooden base. For the lantern bowl, you can use a plastic bowl that needs to be secured on top.

Now pour the foam in layers, waiting for each layer to partially dry. Come up with a design to decorate the lantern, draw a diagram and implement the idea using polyurethane foam. You need to make a hole in the center of the bowl so that you can secure the lid with self-tapping screws. Insert the bars into the bowl and foam them.


Attach the lid to the bowl with self-tapping screws. Now cut out a smaller square from the chipboard. Foam it on one side and secure the racks on the other. In the center of the squares you need to make a hole in order to insert a lamp into it later. solar battery. Hide the wires.

After this, a roof is made from a large piece of plywood, which is installed on racks. To make the relief design beautiful, first draw it with a marker on the surface of the lantern, and then carefully cover it with foam.

Garden figures made of polyurethane foam master class
The finished product is completely painted. To install it, you need to dig the pipe a little into the ground or make a small flower bed around the lantern.

DIY polyurethane foam figures will help transform any garden plot. Even without the skills of a sculptor and artist, you can make a beautiful sculpture that will enliven your exterior.
polyurethane foam can also be used to decorate rooms or building facades.