Are you going to save money and promise yourself every time that you will buy a piggy bank that will contain emergency cash reserves? Get started new life today and make a cute piggy bank from scrap materials. Here you will find options for both adults and children - take advantage of the presented master classes!
How to make a piggy bank with your own hands at home
This cute little thing will not only keep your money safe and sound, it will also decorate the interior. Surely you had a piggy bank as a child, didn’t you? She will cheer up her interesting design and everyone in the household will like it.
Master class No. 1: from plastic bottle.
You will need a plastic bottle of any color, pink spray paint, toy eyes, scissors and glue.
- You need to make a cut in the bottle as shown in the photo. Cut out the middle part of the bottle, you only need the bottom and top parts at the moment.
- Place the lower part on the upper one, you can glue it if you are afraid that it will fall off.
- Spray paint the bottle several times, it can be any color you like. Let dry, then start gluing on the eyes. Eyes from any old toy would be ideal.
- Cut out ears from cardboard or plastic, paint them light pink and glue it. You also need to paint the lid and draw these stripes on it with a marker, you will get a nice little patch.
- Use a knife to make a small hole on top so that you can put both small change and paper bills. Also don’t forget about the pig’s legs; they can also be made from lids or plastic.
- That's it, your piggy bank is ready!
Master class No. 2: how to make a piggy bank in the style of Superman and Batman
This thing will appeal to boys and men, as well as those who are interested in comics. It’s easy to make, the main thing is to find a beautiful jar with a neat metal lid.
Paint the jar in several layers with aerosol paint and let dry thoroughly. Then cut out a Superman or Batman emblem from construction paper, or print it out on a color printer. Glue the drawing with glue.
Do sharp knife hole in the lid. Since many people cannot restrain themselves and take money from the piggy bank, we recommend gluing the lid with strong glue to avoid such a problem.

Master class No. 3: from a tin can.
Are there any empty coffee cans left? They can be used to make a piggy bank. You just need to find it on the Internet beautiful ornament and drawings of flowers, then print them on a color printer.
Cut the paper according to the parameters of the jar, stick it on the jar and on the top of the lid, then decorate the top with flowers or rhinestones.

Master class No. 4: made of cardboard and bright threads
Very budget option, requires minimal costs. You need to sketch the box as shown in the photo, use a ruler and pencil for this. If you can't do it yourself, download the sketch from the Internet, print it and use it as a stencil.
As you can see, you should end up with a box like this. Make holes in it with a thick nail, as in the picture, they are needed to insert threads. Make a hole on the lid of the box for money.
Sew the box with bright thick threads as follows, this must be done without a needle. That's it, a beautiful and inexpensive piggy bank is ready!
How to make a piggy bank: video
This master class will help you make a beautiful and original thing, use the tips.
Women's online magazine website - crafts and ideas for the home
At home, you can make a piggy bank with your own hands. It can be perceived not only as a children's toy, but also as a temporary means of storage.
If you make a decoration, it will turn out interesting decorative element, which will complement the interior.
Needlewomen can use various materials at hand, use their imagination, invite a child and spend time together.
To put your house or apartment in order, to collect scattered small things, you can make a piggy bank from cardboard or paper.
It is easy to make, you don't need to spend a lot of time.
- Cardboard.
- Laces for decoration.
- Scissors (large and small).
- Pencil.
- Ruler.
- Nails.
- Stationery knife.
- Rubber.
The piggy bank is created in several stages. The main condition is to follow simple instructions:
| Stages | How to do |
| Stage 1 | First you need to make a blank from paper or cardboard. You need to draw the material into 4 squares horizontally and 3 squares vertically. Optimal size for a small piggy bank – 7x7 cm |
| Stage 2 | The workpiece must be folded into a square. Take a large nail and make holes where the lace will be inserted. If the piggy bank is made of paper, at the stage of creating the blank, you need to leave 1 cm along the side edges. In the process of forming the piggy bank, they are folded and glued with office glue. |
| Stage 3 | Using a stationery knife, make a rectangular hole where you can put small coins. For large items you can cut a large hole |
| Stage 4 | The workpiece is fastened with laces |
Important! To prevent the lid from opening, it is necessary to secure an elastic band.
To do this, it is tied inside the piggy bank to a cord. Next, it is threaded through the hole in the lid and a strong knot is tied.
Piggy bank from a jar or box
To create a piggy bank, take an ordinary glass jar. She might be different sizes. Be sure to screw the lid on top.
There will be a slot for coins on it. The main condition is beautiful and original decoration. The square piggy bank looks beautiful.
Step by step instructions:
- Two strips are made from cardboard. One piece should match the width of the can. The second blank is equal to - 1 height, the diagonal of the can and one more height.
- The strips are attached to each other in the place where the bottom will be. For secure fastening, use a stapler. This creates a part for the frame.
- Next, another blank is formed. Place the first piece on the bottom of the cardboard and trace it.
Additionally, leave 1 cm for allowances on each side. The second blank is cut out with a stationery knife.
- In the central part there is a circle that corresponds to the diameter of the lid. The workpiece is cut out.
- Next, put the resulting blanks on the jar. The container is placed in the central part of the first blank, the edges are raised, and another blank is put on the second part. They are attached to each other with a stapler.
- To provide additional strength, the entire structure is wrapped with tape.
- Take paper towels and cut thin strips. PVA glue is diluted with water in a 1:1 ratio.
The strips are thoroughly impregnated with glue and laid on the base in waves. The jar is decorated on each side using this principle. It is recommended to make several layers.
Before applying the first layer, the glue must dry thoroughly. Each layer is carefully painted acrylic paint. You can choose the color or shade at your discretion.
Pay attention! The first layer can be made darker so that there are no gaps.
The rest can be done in light shades. Next, take strong glue, which dries quickly, coat the neck and the places where the surface of the workpiece ends.
Packing rope, burlap or wool thread. The same glue can be used to decorate the lid using rope.
On the sides you can decorate the piggy bank with buttons, rhinestones, bows and other materials.
You can make a piggy bank from a shoe box. To do this, you can make a hole of any size on top. You can come up with decor and design at your own discretion and decorate it as you wish.
Ideas on what else you can use to make a piggy bank for coins and banknotes
Piggy bank for coins and paper money can be made from a plastic bottle. You can take containers of different sizes.
Before starting work, you need to prepare the following materials and tools:
- Plastic bottle.
- Water.
- Knife or scissors.
- Glue and brush for application.
- Medium size black buttons.
- Marker, tape.
- Paper towels.
- Pink cardboard paper.
- Bottle caps or wine stoppers.


To make a piggy bank with your own hands, you need to cut off the top of the bottle. These materials make beautiful and useful craft in the form of a pig.
Children will definitely like it. The top of the bottle serves as the head. The lower part is the torso.
After forming the blanks, you need to mix paint and water, PVA glue. The edges of the head and body are carefully processed and leveled. They are connected to each other using tape.
Using a stationery knife, make a hole in the upper part, next to the head, for coins or paper bills.
The piggy bank is carefully covered with the resulting solution of glue and paint. Place napkins on top in several layers, be sure to coat the layers with glue.
Pay attention! Each layer must dry thoroughly before applying a new one.
When the surface of the pig is even and smooth, you can screw the lid onto the neck of the head. It serves as a patch.
Cut out a tail and ears from pink cardboard, and attach the parts with quick-drying glue. Buttons are used to make eyes.
The remaining covers are used to form legs. Thanks to these simple instructions, you get a beautiful home piggy bank.
Using this technology you can make a dog or other animal. There are other ideas on what you can use to make such a useful craft.
It can be plaster, wood, salt dough. Any available means will do.
Useful video
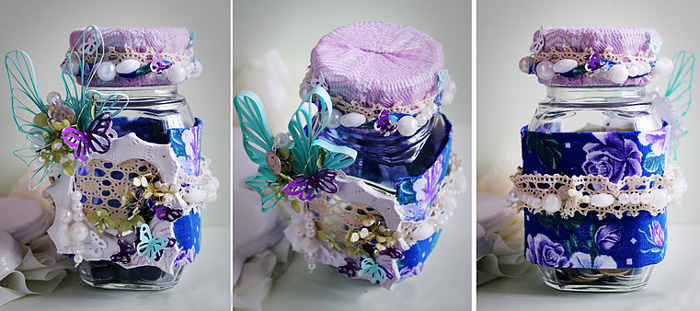
Very detailed master class on making a piggy bank from a jar using decoupage technique.
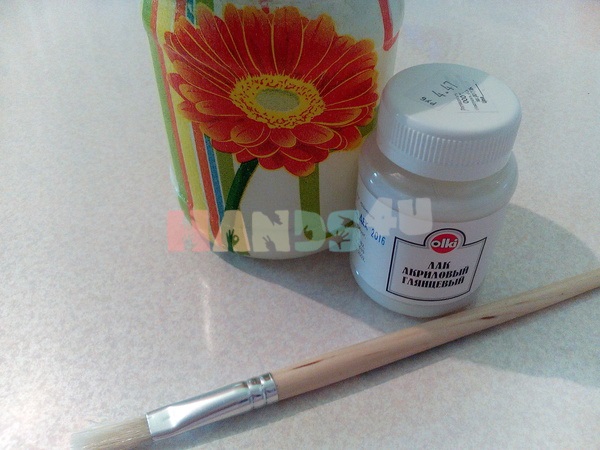
If iron money operates in the country's economy, a piggy bank is an irreplaceable thing! Of course, you can also put paper bills in it, but it’s not that interesting. You can buy a piggy bank in a store, but it is much more interesting to make it yourself using the decoupage technique. To work you will need a glass jar with a lid. If you don’t have a screw-on one, you can roll up a regular one. Also take white acrylic paint, a sponge, PVA glue, a file, a spray bottle with water and a napkin with any design.
How to make a piggy bank from a jar with your own hands:
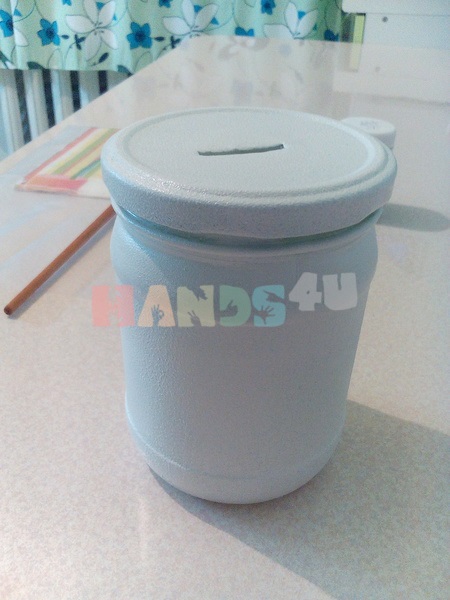
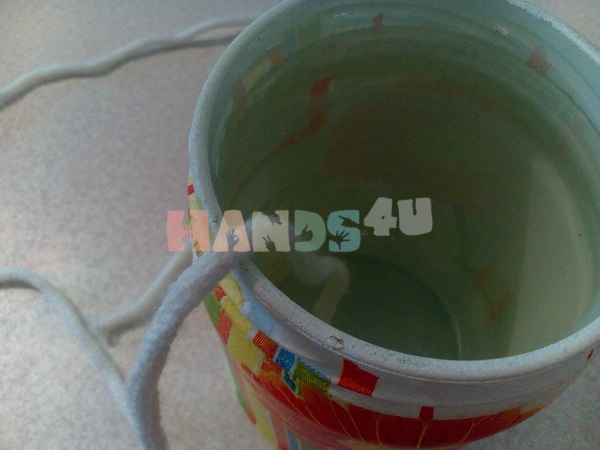
1. You need to wash off traces of glue from the jar, remove the label, and degrease the surface with alcohol. Make a slot in the lid for coins. It’s better to use a grinder, but an ordinary kitchen knife will do.


2. Dip a sponge into acrylic paint and apply it to the surface of the jar and lid using “smacking” movements. It is important to paint the entire surface evenly, just make sure that the layer of paint is as thin as possible, otherwise it will not dry well. If necessary, you can repeat the procedure 2 times. The main thing is to wait until the paint is completely dry each time! It is optimal to paint the jar and lid in the evening.


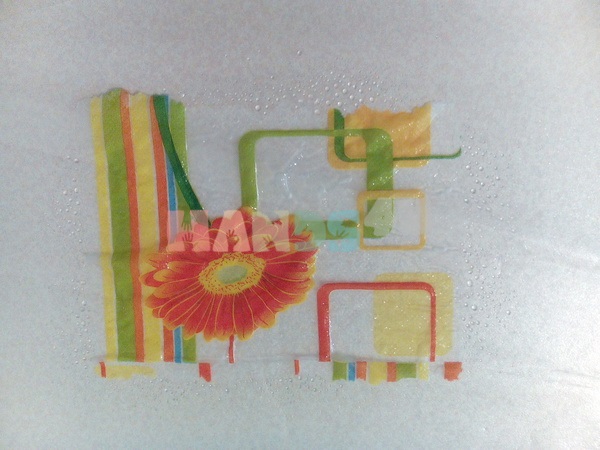
3. We tear out the motif we like from the napkin. It is better not to use scissors, but to carefully tear out the design, because... the torn edge is less noticeable on the finished product. From the torn out drawings we separate the top colored layer. Napkins come in two or three layers. We are only interested in the one on which the drawing is applied. Be careful not to tear it.


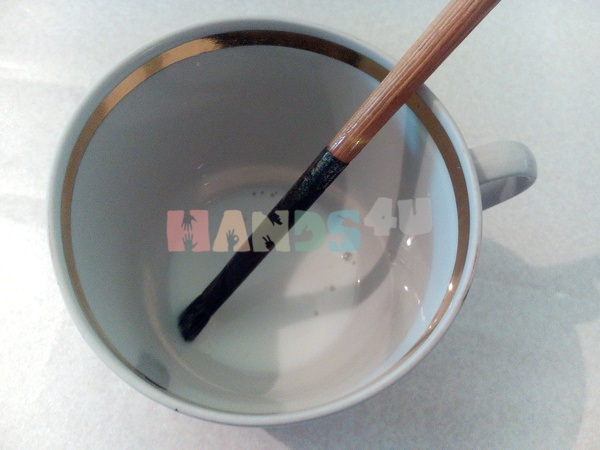
4. Place the drawing face down on the file. Spray generously with water from a spray bottle. We dilute the PVA glue by half with water and grease the drawing with the resulting mixture. At this stage, the napkin will increase significantly in size, take this into account when gluing the pattern.


5. Apply the file with the napkin to the surface of the jar and gently press it with your fingers along the perimeter. Separate the file. The design should remain on the surface of the jar.

6. Using a dry brush, smooth the design from the center to the edges. It is important to remove all folds and air bubbles, but do not tear the napkin. If there are still any creases or air bubbles left on the surface, you can get rid of them at the next stage.

7. Let the jar dry completely. You can dry it with a hairdryer, you can leave it near the radiator, you can turn on the oven for a while, then turn it off and leave the jar there until it cools completely. The main thing is that the napkin is completely dry. If any defects remain after drying, remove them using “zero” sandpaper.

8. Cover the jar and lid acrylic varnish. You can apply 2 layers, but apply the second only after the first has completely dried. This is important.
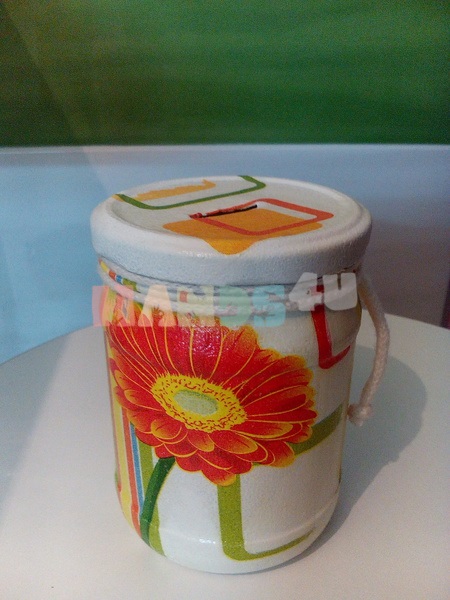
We decorate our jar with lace. To prevent the coins from clinking too much and damaging the jar, you can put a piece of soft cloth or cardboard at the bottom.


The piggy bank is ready! You can collect coins!


A piggy bank is a useful and stylish accessory. It will help preserve your savings and become a fashionable design addition. And the original thing created with my own hands, will also be a source of pride.
This article is intended for persons over 18 years of age
Have you already turned 18?
How to make a piggy bank yourself?
How to make a piggy bank yourself without investing a lot of money in the product? In this article you will find the most interesting and useful tips, which will help you make an accessory at home.
The storage container can even be electronic or with a secret - it all depends on your imagination.
Things self made are highly valued. Therefore beautiful and unusual homemade piggy bank You can safely give it as a gift for a wedding or birthday.
What can a money organizer be made of? Surely every home has the following materials:
- shoe box;
- tin or cardboard jars;
- jars, bottles made of glass or plastic;
- unnecessary toys.
The craft can be decorated beautiful paper, coins, clippings from glossy magazines, ribbons, beads, remnants of lace, etc. You can even use a wine cork and other elements that you can find at home.
If you have a child, they will surely love a kids piggy bank that is easy to make together.
An organizer made of paper or cardboard is a simple option that does not require much time and effort. Prepare necessary materials, and let's start creating a real handmade masterpiece.
To work you will need:
- cardboard box;
- white acrylic paint;
- PVA glue;
- decorative elements;
- scissors;
- stationery knife.
Step by step steps:
- Prime the entire surface of the box with acrylic paint white or PVA glue;
- carefully cut out a hole for coins or bills and trim the edges;
- decorate the craft to your taste.
This is how you can make a nice interior item quickly and inexpensively.
There are many other options for making a savings organizer from improvised materials:
- it can be made from papier-mâché;
- If you know origami technique, you can easily make interesting accessory from several sheets of paper;
- a craft from a book or a children's model from Lego will be original and unusual;
- you can build a large composition from wood or a small accessory from plywood. Wooden model- durable and practical;
- You can make any figurine from plaster, just purchase suitable form. Plaster craft will decorate your home or become good option for a present.
All of these materials require some skill and experience, so adults can handle them. What can you use to make a piggy bank for a child? Young children can try to create their own version from salt dough, clay or plasticine.
DIY piggy bank for paper money
A money box can be designed for coins or banknotes. This should be taken into account when choosing base material. A product for jingling money should be stronger than for rustling money. It is also worth considering that the glass base is not suitable for coins due to its fragility.
You can use Lego for banknotes. This construction set is a favorite among modeling fans. A huge variety of shapes of parts allows you to experiment and create real masterpieces.
Making an organizer is simple: assemble a cube from individual elements and leave a hole for money. Use your imagination, which will definitely tell you how to make it creative and unusual.
But piggy banks are not just for money. Among collectors, such organizers are used for wine corks or beer caps.
DIY piggy bank from a jar
From a glass jar or bottle you can build a beautiful and unusual thing. Knit clothes for the product, and it will become bright accent in your interior.
Some interesting ideas will help you make your own practical and inexpensive piggy bank.
Master class No. 1. From glass jar.
For work we will need:
- jar;
- metal or plastic cover;
- decorative rope;
- glue;
- elements for decoration.
Stages of work:
- wrap the middle of the can with rope, gluing its beginning and end;
- decorate the top with a rope small decor, placing it on glue;
- roll up the jar or put on a plastic lid;
- cut a hole in the lid for bills.

All! The product is ready.
Master class No. 2. From tin can.
If you have some pretty coffee jars left over, use them to create piggy banks. To make original item, prepare the necessary materials:
- tin can;
- scrap paper different colors(you can take gift wrapping paper or interesting wallpaper);
- stationery knife;
- glue.
Stages of work:
- close the jar and cut a hole on top for money. Do everything carefully so as not to get hurt;
- cut out a paper circle and glue it to the lid. Cut a hole in the paper so that it matches the one on the jar;
- Cover the walls with paper as well;
- prepare a second piece of paper. It should be narrower than the first one. Glue it in the center of the jar. You can pre-write an inscription on it;
- You can further decorate your product with beads, lace or other materials.

Admire your creative result!
Master class No. 3. From plastic bottle.
Together with your child, you can make an unusual rocket piggy bank.
What we will use:
- plastic bottle (volume to choose);
- blue or light blue cardboard;
- stationery knife;
- glue;
- permanent marker.
- Cut out a circle from blue cardstock. Cut it into two parts. We only need one;
- cut the round edge into segments. They will help glue it to the craft;
- bend the semicircle into a cone and glue the sides together;
- glue the cone to the bottle cap;
- on the side, at the top of the rocket, cut a hole for coins;
- Glue wings from quarters of a cardboard circle on the sides;
- glue the round portholes and trace their outlines with a marker;
- Draw the details of the space car with a marker.
Like this interesting model We did it!

The Year of the Dog has imperceptibly approached. In order for him to pamper us with his attention, it is worth having elements in the form of this animal in the house. Can be produced at New Year good gifts to your loved ones and friends with your own hands. And we will tell you how to make a dog piggy bank easily and simply.
For work we need:
- an old toy in the shape of a dog;
- glass jar or plastic bottle;
- scissors;
- needle and thread.
Stages of work:
- remove some of the filler from the toy;
- place a jar or bottle without a top in the middle;
- make a hole in the toy for money (preferably along the seam, securing the edges of the slot);
- sew up the place where you inserted the can.

Such a product can also serve as a hiding place for important little things.
An original handmade New Year's piggy bank will be a good present for a loved one. She will keep a piece of your warmth and love.
Modern technologies make it possible to create unusual and extraordinary options that surprise and delight. A striking example is the cat thief. IN cardboard box there is a hidden toy kitten that will grab the coin you put with its paw.
But a simple cardboard house or a bottle rocket is much nicer than an interactive accessory. Why? The answer is simple - it is made with your own hands and is a source of your pride.
Hello everyone, today I prepared a very interesting and simple homemade product for our website! This homemade product is a simple piggy bank for coins. Our piggy bank will be able to distribute coins by denomination, for example, you first threw 2 rubles into our piggy bank, then 5 rubles and 10 rubles, and each of these coins ends up in its designated place! I think I've already interested you in this! So get to work!
And so after watching the video you will probably want to read detailed description about how to make our piggy bank, but still, if someone has already gone to make a piggy bank, then our instructions will tell you in more detail how to make it!
To do this, we will need to cut glass of a suitable size for you, a couple of flat boards that I had left over after the renovation, barbecue skewers or small wooden blocks, door hinge, corner and we also need to cut out something like this and make 4 holes in it, small screws. From tools hot glue and epoxy resin.


Let's get started!
Next we need to make these markings on our materials! We measure all the dimensions as shown in the pictures to make a rectangle)

We cut off all the parts that interfere with us!

And we polish it thoroughly with a needle file!

We cut the back wall to the width of our glass!

Next we need to make the side walls, bottom and top cover!


We are putting together a test version of our piggy bank and if everything is done correctly, we will transfer it to the finished material!
Oh, I almost forgot! We now need to make a miracle mechanism that will distribute our coins according to their face value, for example, if you throw 10 rubles, they end up with 10 rubles, 5 rubles with 5 rubles... and so on.
For this mechanism, we need to take kebab skewers or small wooden blocks and glue, put our piggy bank frame on the table and glue our block strictly at an angle of 20-30 degrees, and check how our coin rolls! It rolls great, now we need to make a distributor for our coins, we all know each coin has its own height. To do this, we will install height limiters!


This is how we made our coin distributor, now we can move on to designing our piggy bank so that it has at least some aesthetic appearance) and it would not be a shame to put it somewhere or something else)!


