This master class will show you how easy it is to make an unusual notebook with your own hands. We age the sheets for the notebook by hand. For work we will need the following tools and materials:
- plywood 5 mm thick;
- sandpaper coarse and the finest;
- drill;
- opening rings for albums;
- A4 printer paper;
- natural coffee;
- burning device;
- transparent water-soluble odorless varnish;
- tassel;
- wide bowl;
- iron ;
- pencil or ballpoint pen;
- ruler ;
- carbon paper;
- single hole punch.
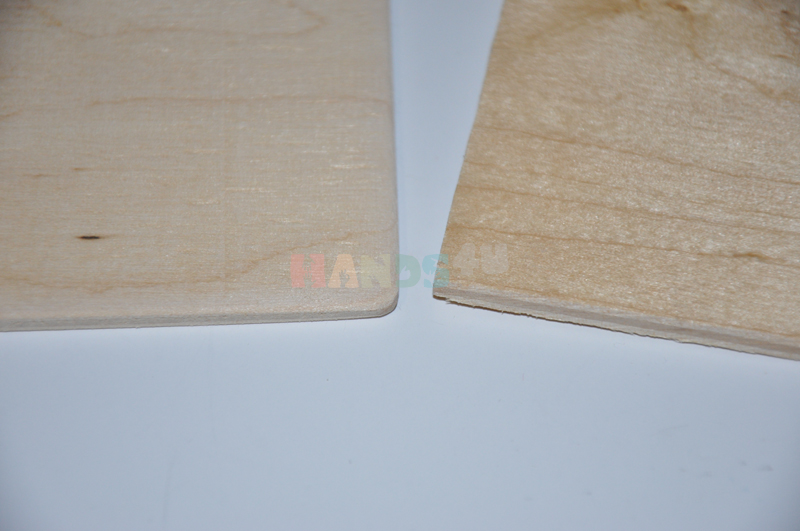
We cut out two pieces of A5 plywood for the cover. We clean the plywood with coarse sandpaper.

Then we sand the plywood with the finest sandpaper.

The corners and ends of the plywood are smoothed using sandpaper.
Use a drill to drill holes for the rings. The thickness of the drill should be slightly greater than the thickness of the ring metal.

On the Internet we find an interesting monochrome drawing. We format it to the size we need and print it.
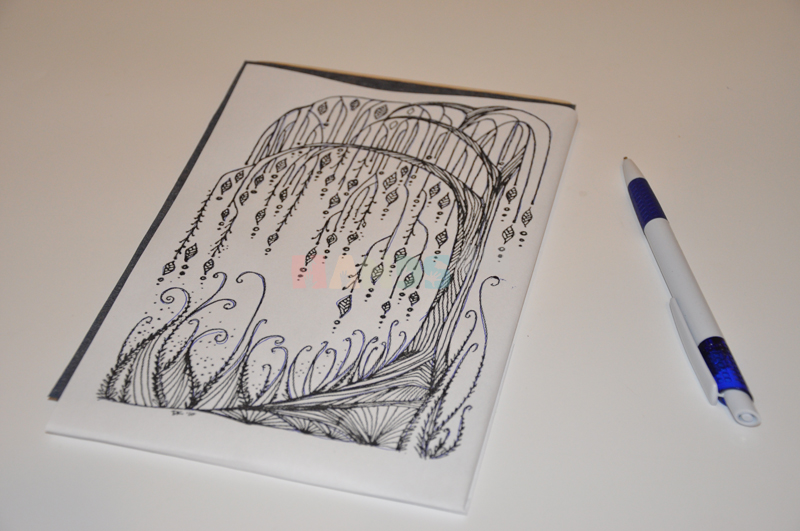
Using carbon paper, we transfer the drawing onto one sheet of plywood.

Using a burning device, we draw the contours of the design on the plywood.

We coat the sheets of plywood cover with a transparent, odorless, water-soluble varnish.
Brew strong coffee. To do this, put 4-5 teaspoons of natural ground coffee in a standard cup and pour boiling water over it.

While the coffee is cooling, prepare the sheets.
Under the ruler we will tear up office paper of the required size. To prevent the sheets from protruding beyond the edges of the cover, we make them 1 cm smaller at the top and bottom. And 1 cm less on the side.
Strain the coffee into a bowl.

We soak each leaf in coffee.

We lay out the wet and already fragrant sheets on clean old towels to dry.
Finally dry the sheets in the oven at a temperature of no more than 50 degrees Celsius.

The result was wrinkled, slightly brown and stained leaves with a slight coffee aroma.

You can leave it like that, but it’s better to iron them.


We place a stack of sheets between sheets of plywood cover and mark the locations of the holes on the paper.
We make holes in the paper with a single hole punch.

Assembling a notebook on rings.

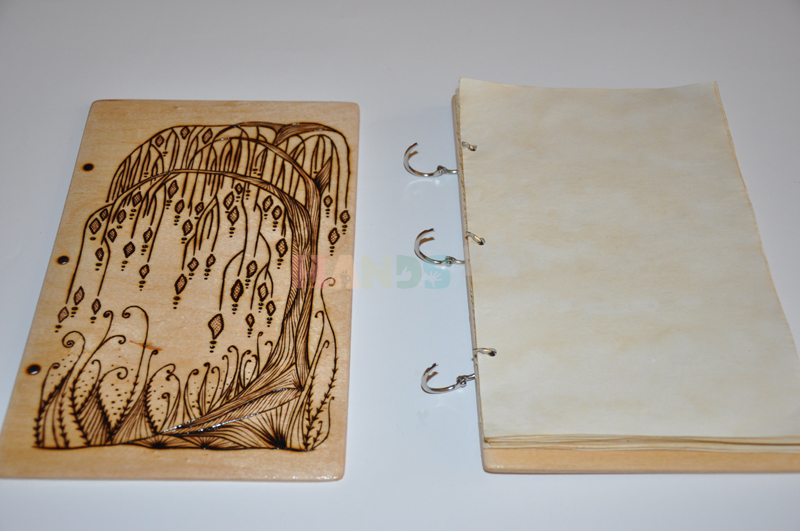
The result is a unique notebook or notepad.

Unusual design And handmade notebook will highlight your individuality.
And the right drawing and light aroma of coffee can make such a book an excellent personalized gift for any occasion.
In addition, opening rings will make it possible to replace sheets with new ones. And this notebook will serve for a long time.
A photo album is not just a beautiful and elegant souvenir, but a chronicle of the main events in life. It will preserve the memory of your family's history, a vacation spent together, or a fun corporate event. There are many options! The Nefertum company offers to produce beautiful and original photo albums to order for you at the most attractive prices.
Advantages of making a photo album to order:
- Exquisite wooden cover. Original design solution gives the photo album a noble look and securely stores your photos. This is an excellent solution for a custom wedding photo album or family chronicle. Unlike paper analogues, a wooden photo album does not wrinkle and does not lose its magnificent appearance over the years;
- A photo album with a plywood cover can be decorated with a variety of images, from curly carvings to a luxurious family monogram;
- We are ready to design for your photo album unique design and decorate the plywood cover with any image or inscription you wish;
- We offer our clients only the most comfortable prices without extra charges or overpayments;
- We deliver throughout Chelyabinsk. You can also pick up your order from our warehouse. We send orders for residents of other regions using transport companies.
How to order a photo album?
The Nefertum company offers everyone luxurious and stylish photo albums made of plywood. You can place an order on our website by filling out a simple and convenient form. Be sure to include your contact information: our specialists will quickly contact you to clarify the details of the order. Do you have your own sketch? Send it to us at email. We process all applications promptly. You can ask us a question by contact numbers. We are ready to take on a task of any complexity in order to please you with a truly unique and beautiful custom photo album. We are waiting for you!
This video tutorial explains how to make a notepad with the so-called Coptic binding- one of the most ancient methods of creating book covers, which was invented by the first Egyptian Coptic Christians in the 2nd century AD.
The wooden cover will be heavy, so it will not be suitable for diaries, but will become indispensable original solution for photo books or collections of recipes - thanks to the type of binding, the pages open completely and immediately.
You will need:
Paper for pages
- thin board for cover
- scotch
- twine
- a piece of wax
- sandpaper
- pencil
- paper knife
- bookbinding bone (a tool for smoothing and folding paper)
- awl
- needle with a wide eye
- roulette
- drill
If you don't have a suitable size piece of board for the cover, you will also need a machine or saw.
Instructions:
1. Attach the paper to the future cover and measure right size. Cut two pieces of board the same size for the front and back cover. Sand the edges using sandpaper.

2. Glue both covers together with a piece of tape and measure 2.5 cm from the bottom and top, stepping back about another centimeter from each mark and make one more mark.
3. In the marked places, make four holes with a drill.
4. Prepare the pages. You can use any paper (the video uses printer paper). Using a binding bone or any other similar tool, bend required quantity sheets in half, making several notebook tabs. For example, in the video there are five tabs of twenty pages each, which makes a total of one hundred notebook pages.
5. Now make notes with a pencil in the upper left corner of each tab notebook to make it easier to line up all the pages. Also mark where the holes will need to be made.
6. Bend the sheets with notes so that the notes are inside so that you can make holes on all sheets of the tab with inside, as shown in the video.
7. Treat the twine with wax - this will make it more tenacious and durable.

8. Using needles, thread the twine into the adjacent holes of the notebook insert on the inside, and then into the holes of the cover. Continue threading the rope as shown in the video until you reach the other part of the cover. Tie the ends of the twine together on the inside. The Coptic style notebook is ready!
If your new hobby is sawing out various decorative elements, burning or carving wood, then our advice would be to start with a material such as plywood.
There are several significant reasons for this:
Plywood is quite easy to work with.

If it's in your hands good tool, and you start with small figurines, then making them will only take you a couple of hours.

The material is universal in use, so you can make literally anything you want from it: furniture, toys, small decorative elements.

All this can be a wonderful addition to the interior of your home.

Features of working with the material
What is a plywood sheet? It consists of several sheets of veneer, which are connected to each other using glue.
Important: plywood can be different types: based on beech, birch, pine.

Not only the quality of the finished product, but even its structure and color depends on which sheet you choose.

If you are going to cut out various figures using a jigsaw, then you need to choose the highest quality types of plywood.

They are particularly durable, which guarantees that the plywood will not crack, ruining the entire appearance products at the most unpredictable moment.

If you are going to start working immediately, immediately on the day of purchase, then choose only dry sheets of wood.

They won't break the jigsaw blade every 10 minutes.

To work with plywood, you will need to acquire a number of tools.
In principle, they are always the same for all types of products, so you only need a one-time investment:
- Jigsaw
- Jigsaw files
- Hand or electric drill
- Ruler
- Grinding machine
- Burner.

Framework
If you want to beautifully decorate your home or give an original gift to someone close to you, make a plywood frame with your own hands.

The preparation process will not take you much time, because you just need to get the necessary materials.
Pay attention!


They are standard for all cases, and we have already mentioned them before.

We will offer you master classes on light plywood crafts. You can make either a regular straight frame or plan various patterns and figures on it.
First you need to make a template, and after that you can cut it out, trace the contours with a pencil on the plywood and begin the manufacturing process.

This stage is not only the most responsible, but also the most exciting. If you put a piece of your soul into your work, everything will definitely work out. The finished structure must be opened with varnish. Ready!

Doll furniture
This task will be a real test for parents.

Pay attention!

The so-called test of acquired design skills.

The peculiarity of creating doll furniture is that children do not tolerate falsehood at all.

If they see that the furniture is not worked out in detail, and instead of a kitchen stove for your favorite doll you brought an ordinary rectangular block, then you simply cannot avoid serious grievances and childhood disappointments.

The second feature of making such a craft from plywood using a jigsaw is that all this furniture must be carefully worked out with sandpaper or a grinding machine.

Your child will constantly come into contact with these self-made toys, and if the edges are poorly processed, they may get hurt.

Pay attention!

Well, the last feature of crafts made from plywood and the house is that the materials for such furniture must be absolutely non-toxic and normal for constant contact with the child, because he can drag it into his mouth or take it to bed with him.
This is not a simple applique or paper craft, so you need to take the matter seriously, following a whole list of actions that need to be completed.

Carrying out work from plywood
How simple furniture is made in detail, and then assembled into one piece of furniture, so do-it-yourself plywood crafts should be done separately.

To do this, first of all, prepare special drawings of plywood crafts, on which you will specify the dimensions of all parts and their fastenings.

Take a ready-made plywood sheet and attach a paper part template to it.

Trace the part with a pencil and plan out the outline with a jigsaw.

After this, each part must be cleaned with sandpaper or a grinding machine and only then the piece of furniture must be assembled.

When you are done with the entire set, open it with varnish.

Below are provided different options and photos of plywood crafts. Choose the one you like.

Photos of plywood crafts