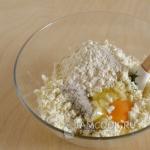
These beautiful paintings are made from paper butterflies by artist Rebecca Coles. To make such paintings requires a lot of patience and perseverance, but the technique is not very complicated - let's look at it in more detail.
Such bright, multi-level and voluminous paintings are made from thin sheets of paper in the shape of butterflies.

An interesting play of color through the use of colored paper. And visual tricks with volume can be achieved by using elements, which are the silhouettes of butterflies, of different sizes.

An unusual texture is emitted by the wings of butterflies cut from the pages of glossy magazines and other waste paper.

Even stamps are included, probably specifically for the fact that their size allows you to place most of the picture on the wings of butterflies, which in turn can be viewed with interest in the finished picture.

The play of light and shadow is achieved by the arrangement of white butterflies on a white background, where interspersed with dark elements give the composition accents that are interesting to the eye.

How to make paper butterflies
The author cuts out butterflies from various papers, magazines, newspapers, books and even stamps. In addition, cutting according to the silhouette is not at all difficult. Look how Rebekah does it - she takes a small piece of paper and draws half a butterfly on the fold, of a random, approximate shape.

Then you just have to cut them out and spread the wings.

If you are planning to make yourself a picture of butterflies cut out of paper using the Rebeca technology, do not twist a piece of paper too much when you bend it, so that later when you cut a butterfly out of it and spread its wings, the crease will not be visible.

Then all that remains is to get a lot of pins with a barely noticeable head with which to attach the butterflies cut out of paper by the author. The same method is used by collectors of real butterflies, which apparently gives Rebeca’s compositions a special sophistication.

For the background, you can use a sheet of foam or polystyrene covered with a sheet of paper chosen for the picture as a background. This way the pins will hold more securely and you can place them at different levels.

The work is done carefully, according to a pre-conceived composition and selection of colors. Applying element after element of butterflies, she slightly spreads their wings, slightly bends others, and the picture from ordinary paper comes to life.

If you don’t have money for new renovations right now, but you want to decorate your apartment, this can be done with homemade panels, stencils or other accessories. In this article we will tell you how you can decorate your walls with your own hands, decorating them with butterflies, as in the photo. It won't take much time, but the effect will be very beautiful, it will look especially good in a bedroom or nursery.
This type of decor involves applying drawings to the walls. Stencils can be either drawn by hand or printed using special blanks and then cut out. In fact, there are many ways to decorate an interior using a stencil. Let's talk about the main options.
Thanks to lighting and loose mounting, a volume effect is created
It turns out especially beautiful if the butterflies are of different sizes and are not placed chaotically, but in the form of a pattern, or are used to zone a room. In the video you can see examples of the use of butterflies in the interior:
Let's start production
First of all, you need to decide on the form of the future application. If you are bad at drawing, it doesn’t matter – you can download and print ready-made examples stencils with butterflies. Of course, they also buy ready-made stickers, but we do everything ourselves, so even if you don’t have a printer, you can order a stencil print from a photo workshop. Well, if you -
If you are a born designer, you can easily draw butterflies on paper yourself.
Butterfly stencils (click to enlarge): 


Advice! If you need large drawings, you need to look for them in vector format, then after printing, stretched pixels will not be visible.
Then we’ll decide on the color – make monochromatic silhouettes, or paint them. If you choose too many colors to paint your wings, the result may be motley and disappointing. Try to choose colors that match your interior, while the decorations should be contrasting so as not to blend into the background.
Manufacturing methods and materials
You can decorate walls from almost any available material. The most popular methods are:
- Paper. Most affordable way. You can print it out, decorate it yourself, and cut out any curls the easiest way. The main advantage is low price material. The paper is easily attached to the wall in any way, and the wings of the butterflies move well from the air currents. If you get tired of decorating the walls with butterflies, you can easily remove it without regretting the time and money spent.
- Cardboard. Decorations cut from it will be many times stronger than paper ones. It is more difficult to cut out the curves, but the cardboard will be able to take the desired shape of the wings. If you wet it and put it under a press, then after drying the cardboard will retain this shape. Some butterflies with raised wings can be made this way.
- Self-adhesive film. You can find thick film made of polyethylene or vinyl different colors with a glossy surface.
- Textile. Perfect if you want to decorate curtains or walls with a soft finish.
- Tough. Original butterflies are made from tin. If you want to surprise your guests, make butterflies from this material. When cutting, be careful not to cut your fingers. If you have small children, place the butterflies out of their reach.
- Wallpaper. If you are sure that such a pattern will not get boring, then you can purchase wallpaper with butterflies for the walls. This option is perfect for the corridor, hallway, kitchen, nursery, bedroom. If you decide to use this method, read our article about.
- Dye. Having made a stencil, you can easily paint the design on the wall. The disadvantage is that you will only get a monotonous silhouette.
- Chandelier with butterflies too good option, which looks very impressive due to the backlight. You can make it yourself from a lampshade from an old lamp. First paint it in suitable color, and then glue the butterflies, which can be painted with acrylic paints, add LEDs and rhinestones to them. Thin chains and wire decorated with beads are also used for fastening.
- Origami butterflies. In this case, you do not need to cut out paper, but you need to be able to assemble origami. It's not very difficult, the main thing is to do one thing, and the rest will go automatically. The main advantage of this option is that you can make a three-dimensional composition.
- Glue using regular PVA or wallpaper glue. It is important not to let it stain the front part. The easiest and most affordable way. To make the wings flutter from the air, glue the butterflies onto a small piece of foam.
- Pin fastening is suitable for fixing on plastic panels, wallpaper and fabric. Once removed, the pins will leave almost no trace.
- Hang on threads, chains, wire. This method is best used for mounting on a ceiling or chandelier.
- Attach with double-sided tape.
Advice! To achieve the desired effect, you can combine various ways. Use decor different color and size, from different materials, mix with other pictures. For example, butterflies will look great in combination with flowers, dragonflies, birds, and grass.


How to decorate walls with glowing butterflies
To decorate the walls with glowing butterflies you will need stencils, fluorescent paint(several colors), brushes and glue. After securing the stencils to the wall with glue, apply paint. We wait for it to dry completely, remove the stencils, turn off the light and admire the glowing butterflies! 
Butterfly decoration in the form of a painting
If you are hesitant to glue or paint butterflies on the walls, the ideal solution is to place butterflies in the form of a painting. Butterflies are cut out of any material convenient for you and hung on the wall in a frame. If the painting is under glass, dust will not settle on the butterflies and the fragile elements of the crafts will not be damaged. 
Forming a general composition

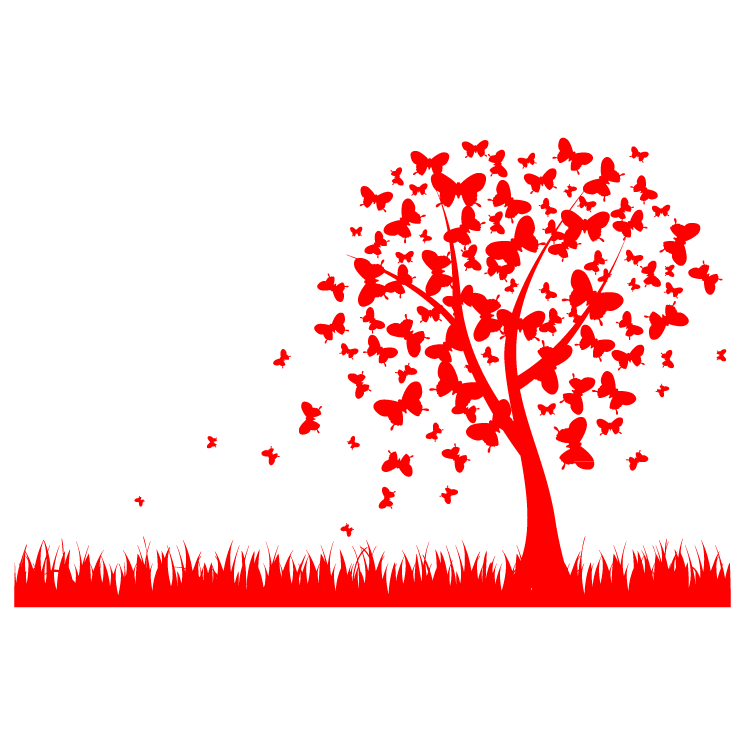
To get the maximum effect, you need to choose optimal location butterflies on the wall. This can be done in many ways: in the form of a swirl, a heart, a flower, a tree, at the head of the bed, or randomly in suitable places. To accurately repeat the desired contour, first make a barely noticeable marking on the wall with a pencil, which you can then erase.
Attaching the decoration

To securely secure the decoration elements, you can use one of the methods.
Summarize
As you can see, butterflies on the wall can become excellent decor, which will add romance and spring mood to the house. This way you can pleasantly surprise your other half while enjoying the process. Choose the most best option for yourself, and start making!
For creating unique interior used today different variants. Butterflies on the wall, photos of which you will see in this material - original way bring an empty wall to life.
The renovation is complete, the furniture is in place, new curtains are already hanging, but something is missing to complete the look of the room. Paper butterflies on the wall - creative idea, which cannot fail to attract attention.


Creating such decor will require a minimum of material and free time. Even if there is no suitable paper at home, it is sold in any office supply department and is inexpensive. If you don’t want to bother with cutting out silhouettes, you can purchase ready-made stickers with a sticky base.
But fluttering beauties can be made not only from paper - there are other materials suitable for realizing the idea. This is what the conversation will be about.

DIY butterflies on the wall
Butterflies as a design move are used not only to decorate walls. They are used to decorate photo and painting frames, chandeliers and floor lamps, mirrors, and ceilings. However, butterflies in the interior on the wall are the most popular option. And this is not just a beautiful element of decoration: according to the laws of Feng Shui, butterflies are considered a symbol of joy, rebirth and mutual love.

Their appearance in the bedroom will add new colors to marital relationships, bring back slightly faded feelings, and rekindle the fire of passion. Fluttering beauties should not be bored alone - they are glued to the walls in pairs or large groups.

Different materials are used to make bright moths:
- Colored paper.
- Rough cardboard.
- Vinyl records.
- Starched fabric.
- Thin metal (beer cans, Coca-Cola cans).

The sizes of soaring beauties can also be different, and are also allowed different shapes and colors. The embodiment of an idea depends on imagination and available material.

Advice! You can arrange butterflies on the wall randomly or depict a rapid whirlwind. Moths can be used as a frame for any composition, for example, from several photographs.

For what style are such decorations acceptable?
Decorating a wall with butterflies will be appropriate in any interior style:
- rural Provence;
- abounding in high-tech technology;
- ascetic modernity;
- stingy minimalism;
- noble classics.

The main thing is that the miniature applications harmonize in color with common interior. Otherwise, they will look ridiculous and tasteless. Just don’t make butterflies from paper of the same tone as the walls; they will simply blend into the background and be almost invisible.

The following combinations would be ideal:
- green or red moths on a beige wall;
- black or dark brown on a white or gray background;
- combination of bright blue and bright red on a pink wall.


Preparing for work
First you need to think over the composition and make a stencil of butterflies for the wall. You can look up photos of ideas on the Internet, just in case your own imagination doesn’t suggest anything. Then you should choose the material, and if there is nothing suitable in the house, you will have to go to a stationery or arts and crafts store.

Moths are drawn on paper or vinyl film using a stencil. the desired shape and size. Ideally, there should be several stencils, then the figures will be varied. When choosing a mounting method, you need to consider some points:
- if moths hang on the wall at least until next repair, then you can use glue to attach them;
- if the apartment owner is not sure that the butterflies will last long, it is better to secure them with pins or small buttons.

Advice! Having clearly imagined the future composition or drawn up a sketch on paper, you need to mark the lines of the butterflies’ location on the walls with a pencil. This will make it possible not to deviate from the plan, which may well happen while gluing the elements.

Moths made of colored paper
This is the most common decoration option, which requires colored paper. To create a sketch you can use computer program. Buying paper will not hit the family budget, which is an important factor.

There will be no problems attaching the paper to the wall, since it is light, and the thin wings of butterflies will flutter at the slightest movement of air. If the presence of moths on the wall begins to bother you, they can be removed at any time without receiving material damage or damaging the wallpaper.

By placing butterflies near a lighting fixture, you can create a beautiful three-dimensional effect
Bright, shiny butterflies are obtained from old, long-read magazines. Photos of butterflies can be taken from the Internet and printed on glossy paper. In order for the applications to shimmer with multi-colored lights, they are covered acrylic varnish with the addition of glitter. The effect is amazing! Compositions with fluorescent paint look no less tempting.

Advice! When fixing butterflies to the wall, you should fix only their middle, and the wings should remain completely free and bent, creating volume.

Wall composition of colored butterflies different sizes and forms
Composition of fabric and painted butterflies
If the room is finished liquid wallpaper, decor with butterflies on the wall – perfect solution, but it is better to choose fabric as a material. Any variegated or plain rags that are likely to be found in any home will do. It is better to use PVA for fastening.

To prevent the edges of the fabric from fraying or fraying, and to make the fabric more rigid, it is recommended to first soak it in water with the addition of PVA glue, dry it, and only then cut out the figures.

Painted moths look no less luxurious. To create a unique composition you will need:
- a stencil made from plastic or thick cardboard;
- acrylic and fluorescent paint;
- thin brush;
- sponge for washing dishes.

Using a stencil on the wall acrylic paint the main design is applied, then the contours of the butterflies are outlined with fluorescent paint. In the dark, the hovering moths will flicker mysteriously.

Advice! You need to prepare several identical stencils and fix them on the wall masking tape. The stencil should be removed only after the paint has dried, otherwise it may run down the wall and ruin the finish. For the same reason, paint cannot be applied in a thick layer.
Wall panel of bright butterflies on a beautiful turquoise background
The bright pages of the magazine will be used to make butterflies, the number of which is determined by the size of the frame - there should not be too few figures, but they should not be sculpted too thickly either.
First, a background is made, for which a sheet of colored paper is used or the base is simply painted with acrylic paint. You can attach the elements of the composition with PVA glue or double-sided tape. It is better if the butterflies do not fit tightly to the base, but rise slightly above it. To achieve this effect, you need to place small fragments of foam rubber under the tape. The finished panel is placed in a frame and hung on the wall.
Beautiful painting of butterflies in pastel colors
To create a luxurious room design, it is recommended to use several techniques at once that will combine with each other and make the room harmonious:
- One wall is decorated with a composition of butterflies.
- A panel is hung on the opposite wall.
- They attach the moths to a fishing line or colorless thread and hang this origami on a chandelier.
DIY multi-colored butterflies will replace a chandelier
Butterflies go well with flowers, small bird figures, bees and ladybugs. If pins are used, they should be decorative (beads, beads). To attach to wallpaper, the sharp end of the pin is bent 90° and driven under the paper covering. Butterflies seem to float in the air.
Any ideas are suitable for such creativity, but patience is also required. The reward for perseverance and diligence will be the unique decoration of the room.


To create a unique interior, different options are used today. Butterflies on the wall, photos of which you will see in this material, are an original way to enliven an empty wall. The renovation is completed furniture arranged, new ones are already hanging curtains, but something is missing to complete the image of the room. Paper butterflies on the wall are a creative idea that will definitely attract attention.
Creating such decor will require a minimum of material and free time. Even if there is no suitable paper at home, it is sold in any office supply department and is inexpensive. If you don’t want to bother with cutting out silhouettes, you can purchase ready-made stickers with a sticky base.
But fluttering beauties can be made not only from paper - there are other materials suitable for realizing the idea. This is what the conversation will be about.
DIY butterflies on the wall
Butterflies as a design move are used not only to decorate walls. They decorate, and, mirrors, ceilings. However, butterflies in the interior on the wall are the most popular option. And this is not just a beautiful element of decoration: according to the laws Feng Shui, butterflies are considered a symbol of joy, rebirth and mutual love.
Their appearance in the bedroom will add new colors to marital relationships, bring back slightly faded feelings, and rekindle the fire of passion. Fluttering beauties should not be bored alone - they are glued to the walls in pairs or large groups.
Different materials are used to make bright moths:
- Colored paper.
- Rough cardboard.
- Vinyl records.
- Starched fabric.
- Thin metal (beer cans, Coca-Cola cans).
The sizes of the floating beauties can also be different, and different shapes and colors are also allowed. The embodiment of an idea depends on imagination and available material.
Advice! You can arrange butterflies on the wall randomly or depict a rapid whirlwind. Moths can be used as a frame for any composition, for example, from several photographs.
For what style are such decorations acceptable?
Decorating a wall with butterflies will be appropriate in any interior style:
- rustic;
- replete with technology;
- ascetic;
- stingy;
- noble classics.
The main thing is that the miniature applications harmonize in color with the overall interior. Otherwise, they will look ridiculous and tasteless. Just don’t make butterflies from paper of the same tone as the walls; they will simply blend into the background and be almost invisible.
The following combinations would be ideal:
- green or red moths on;
- black or dark brown on white or;
- combination of bright blue and bright red on.
Advice! Designers recommend enhancing the effect, creating the illusion of real soaring. A bedroom or children's room decorated in this way will look great.
Preparing for work
First you need to think over the composition and make a stencil of butterflies for the wall. You can look up photos of ideas on the Internet, just in case your own imagination doesn’t suggest anything. Then you should choose the material, and if there is nothing suitable in the house, you will have to go to a stationery or arts and crafts store.
Moths of the desired shape and size are drawn on paper or vinyl film using a stencil. Ideally, there should be several stencils, then the figures will be varied. When choosing fastening method Some points need to be taken into account:
- if the moths will hang on the wall, at least until the next renovation, then you can use glue to attach them;
- if the apartment owner is not sure that the butterflies will last long, it is better to secure them with pins or small buttons.
Advice! Having clearly imagined the future composition or drawn up a sketch on paper, you need to mark the lines of the butterflies’ location on the walls with a pencil. This will make it possible not to deviate from the plan, which may well happen while gluing the elements.
Bright, shiny butterflies are obtained from old, long-read magazines. Photos of butterflies can be taken from the Internet and printed on glossy paper. In order for the applications to shimmer with multi-colored lights, they are coated with acrylic varnish with the addition of glitter. The effect is amazing! Compositions with fluorescent colors look no less tempting. paint.
Advice! When fixing butterflies to the wall, you should fix only their middle, and the wings should remain completely free and bent, creating volume.
Composition of fabric and painted butterflies
If the room is decorated with liquid wallpaper, decorating with butterflies on the wall is an ideal solution, but it is better to choose the material textile. Any will do variegated or plain patches, which are sure to be found in any home. It is better to use PVA for fastening.
To prevent the edges of the fabric from fraying or fraying, and to make the fabric more rigid, it is recommended to first soak it in water with the addition of PVA glue, dry it, and only then cut out the figures.
Painted moths look no less luxurious. To create a unique composition you will need:
- , which is made of plastic or thick cardboard;
- acrylic and fluorescent;
- thin brush;
- sponge for washing dishes.
Using a stencil, the main design is applied to the wall with acrylic paint, then the contours of the butterflies are outlined with fluorescent paint. In the dark, the hovering moths will flicker mysteriously.
premises or renovate your homefor the holiday, so that it will bemore comfortable and beautiful.Usually when it comes to decoration, this implies high costs. The same can be said about a home, which requires a lot of time and money to update.
But if you come to this question creatively, then you can decorate any room without breaking the bank.
You can decorate the walls with paintings or panels, handmade, or you can decorate one or more walls with simple paper butterflies.
On our website you will also find:
- 10 simple works that can decorate any wall
- Beautiful and inexpensive DIY wall crafts
Having created such a decoration, you will be amazed how beautiful it lookswall decoration, which gives the impression that someone is sitting on your wall to restmany bright, rare butterflies.
You can also create a vortex of butterflies that like they're floating in the air flapping his wings in a synchronized dance.
This craft will undoubtedly please the eye. Moreover, butterflies can be not only paper - you can paint them on the wall, which will also look very attractive, especially if you use glowing colors.
Paper butterflies on the wall. Option 1.
You will need:
Colored paper or self-adhesive film
Bright magazine pages
Safety pins
Scotch tape or PVA glue
Scissors
Pen or marker
1. Prepare one or more cardboard templates.


2. Using templates, start making butterflies - trace the stencil on colored paper or self-adhesive film (which will be easy to stick to the wall).
* You choose the number and size of butterflies yourself.
3. If you are using self-adhesive film, then you are almost done - you just need to peel off the paper layer so that the body of the butterfly becomes sticky. Now just stick the butterflies on the wall as you like.

If you used colored paper, That you can attachbutterflies to the wall using pins, glue or regular or double-sided tape.
Wall decor with butterflies. Option 2.


You will need:
Colored paper (preferably double-sided)
Scissors
Pencil
Double-sided tape
1. Draw an image of a butterfly on colored paper and cut it out. Use this blank as a template for other butterflies. You can also make several templates of different sizes.


2. Attach the templates to colored paper, trace them and cut out new butterflies. To cut out several butterflies at once, simply stack several sheets of paper, fold them in half, draw half a butterfly and cut it out - when you unfold it, you will have several butterflies at once.
3. When you have cooked required quantity butterflies, first lay them out on the floor to figure out how they will be located on the wall.
4. Start gluing Double-sided tape to each butterfly, and then start gluing the butterflies according to the pattern that you came up with in advance.
* Butterflies can be glued close to the wall, or the wings can be slightly bent to create the effect of butterflies fluttering.
DIY paper butterflies on the wall. Option 3.

You will need:
Colored paper or origami paper
Pencil
Scissors
Double-sided tape.
1. Place several sheets of construction paper into one pile and fold them in half, and in half again, to create a variety of butterflies when you cut them out.

2. Draw a butterfly on a piece of cardboard and cut it out.
3. Use cardboard butterfly to draw on top sheet from a stack of butterflies, tracing a cardboard template.
4. To stick paper butterflies to the wall, use double-sided tape.

Glowing butterflies on the wall using stencils
For such a butterfly you need a light wall and a bright light nearby - desk lamp, For example.

You will need:
Butterfly stencils
Phosphor paint (in in this example 3 colors are used - yellow, green and blue)
Pencil
Sponges and brushes or sponge brushes (one for each paint)
Palette
Spray adhesive
1. Make some butterfly stencils. It is advisable that each paint have its own stencil (or several stencils).
2. Using spray adhesive, adhere the stencils to the wall in the desired order.
3. Prepare a sponge, cut it into several parts and attach each part to the handles of the brushes. You can buy sponge brushes and then you will skip this point.
Read also: